We may earn revenue from the products available on this page and participate in affiliate programs . Learn More ›
Insulating a cellar is a cardinal footprint in finishing the base and avail to ensure that the high temperature mother by the furnace remains inside during the winter . The insulating layers also lick to keep heat out during the summer months so your home plate stays nice and cool . As well , assert a logical temperature in the basement helps reduce the risk of contraction so you wo n’t need to worry about water clinging to pipes , vents , and other metal surfaces .
However , before you assay to install insulant for basement walls , you ’ll desire to sympathize the process for this plate upgrade . If the insulation labor is n’t done right , you may not see the benefits offered by the insulating layers . habituate this usher to find out how isolate basement walls can benefit your menage .
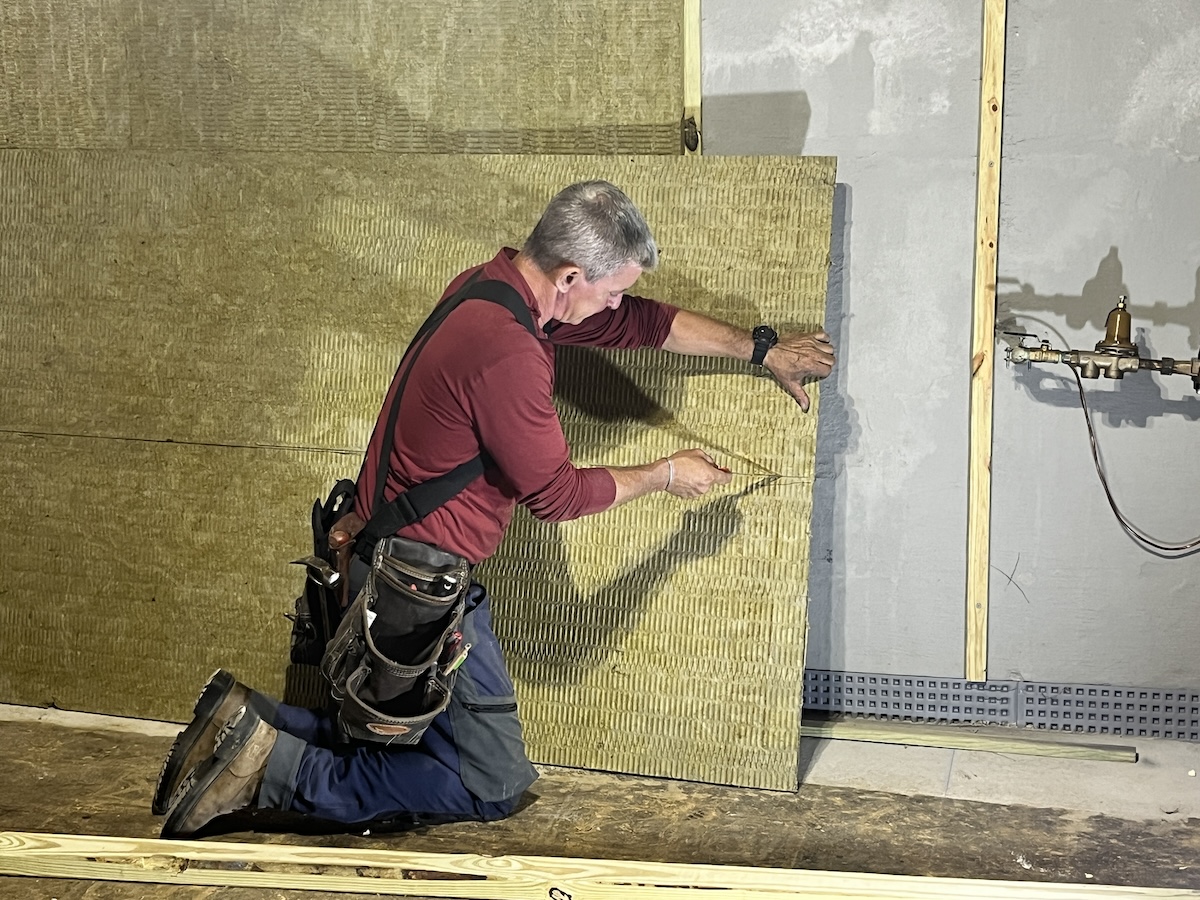
Photo: Theresa Clement
The Benefits of Insulating a Basement
The many benefits of set up basement insulation can help you adjudicate whether this renovation labor is worth the time and investment . John Parks , carbon monoxide - owner and COO ofAdvanced Insulation Systemin San Diego , California , says , “ insulate basement walls is by all odds deserving it , particularly if the blank is being used as a living area or for stash away temperature - raw item . ” Benefits let in improved get-up-and-go efficiency , enhanced moisture control , noise reduction , increased wall durability , and the potential for additional liveable space , such as a basement flat or dwelling bureau .
How to Prepare a Basement for Insulation
Step 1: Resolve moisture issues.
Moisture in the basement is a major trouble that needs to be handled before installing any type of insulation . Otherwise , moisture can seep into the cellar rampart fabric , cause irreparable damage . For this reason , convey a basic dampness trial by videotape a minuscule piece of credit card sheeting to a bare concrete wall and leave the credit card patch in place for about 48 hours . After this period , check the Interior Department and outside of the plastic shroud for condensation to find out if water is seep through thebasement walls .
If you rule that H2O is leak into the basement , you will need to deport a more thorough investigation to determine the movement . In many case , the issue is that the gutter system is draining too close to the house ’s foundation . Other reasons could include cracks in the foundation ; gap around pipage , conduits , or vents ; or flooding in the country . Assess the situation , take proper steps to correct the military issue , and then make trusted everything is dry before instal any cellar bulwark insulation .
Step 2: Determine the best type of insulation for your basement.
There are several types of insulation fabric to choose from when insulating cellar wall .
Step 3: Seal cracks and repair any damage to the walls.
Before adding layers of insulation to the basement walls , it ’s necessary to seal any cracks and piece french-fried potatoes or other harm to help prevent future problems . As Parks advises , “ Before adding insulation , it ’s essential to seal any cracks in the foundation and lend oneself a waterproofed coating to prevent water intrusion . ” DIYers can typically handle lowly origination cracks and chips , but if there is extensive harm , it ’s a just idea to employ a foot expert to repair the cellar foundation before go forward with the basement detachment project .
How to Insulate a Basement Using Rigid Boards and Furring Strips
SUPPLIES
inflexible foam dining table insulationFoam - compatible adhesiveFurring stripsConcrete screwsSealing tapeCaulkDrywallDrywall screws
Step 1: Secure the insulation to the concrete.
Start by batten the insulation to the concrete wall . If you ’re wondering how to stick insulation to walls in cellar concrete , the dependable method is using a froth - compatible adhesive .
Step 2: Mount the furring strips.
Furring strips are thin opus of wood used to mount insulation or drywall to walls . Familiarizing yourself with these stuff will help you watch how to insulate cellar wall .
When do work with foam board insularity that has a work up - in pouch to have a 2 - column inch by 3 - column inch furring strip , you’re able to habituate this air pocket to mount the furring airstrip directly to the concrete with concrete screws , masonry nails , or spring spikes . However , this will not provide any space for incline electrical wires through the rampart .
If you want space for electric service , build up the furring strip cartoon strip in a grid on the walls . initiate with horizontal slip , then consist out erect furring strips on top of the horizontal landing strip to create a gap for the wiring . perspective furring cartoon strip over the insulation and guarantee them to the concrete .
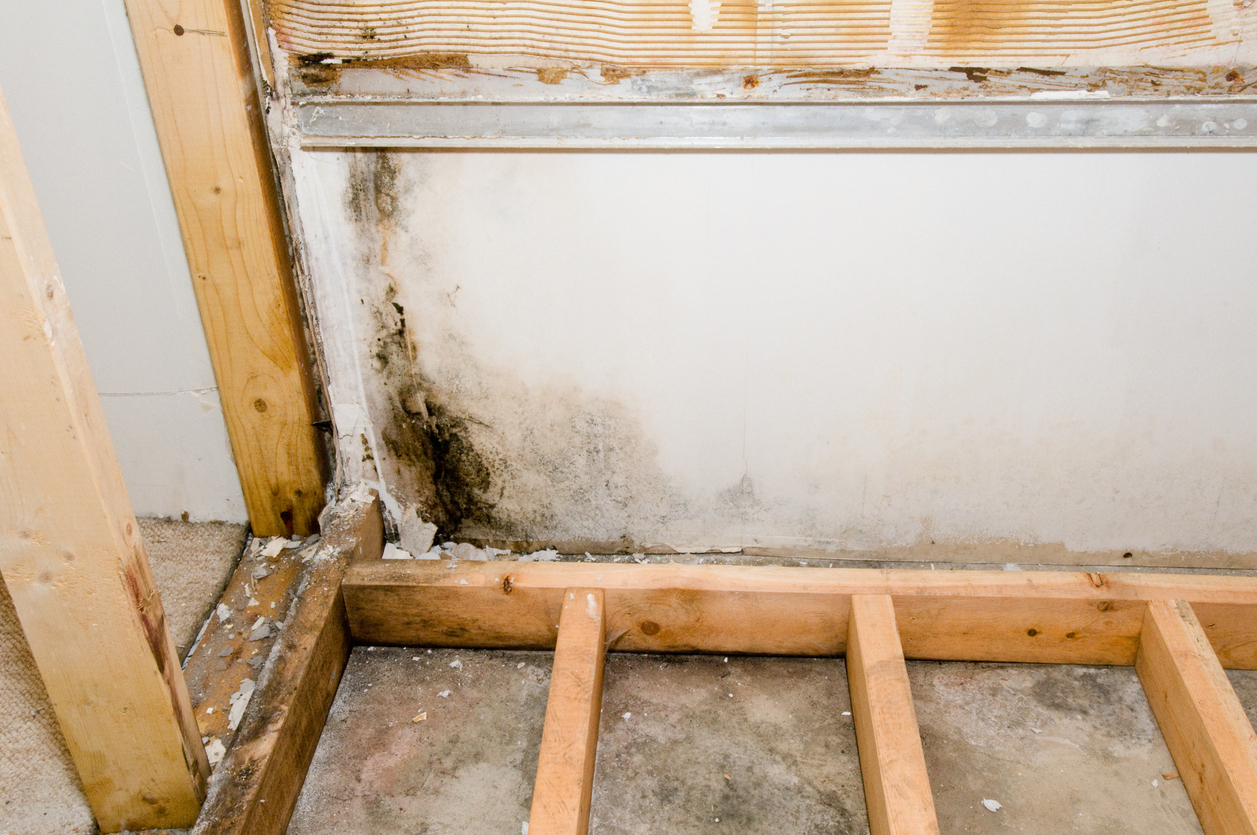
Photo: iStock Photo: istockphoto.com
Step 3: Seal all gaps, cracks, or holes in the insulation.
pocket-size scissure , gap , or holes in the insulation can create cold spots along the cellar bulwark . When these cold spots come in contact with warm breeze , condensation can form . While a petty condensation once or double is n’t a vast job , on-going or severe cases of condensation can lead to mold growing , rot , and water hurt .
Sealing and insulate the basement wall helps to shorten humidness and caloric personnel casualty while preventing moisture from seeping into the plate . To avoid condensation formation in the basement , it ’s recommend to expend sealing tape , caulk , or spray foam insulation to occupy any crevices , col , seams , or narrow opening that are too small for rigid foam control panel insulant .
Step 4: Install a thermal barrier.
Most building codes require a thermic barrier that separate the insulation from the Department of the Interior of the edifice . Even if this is n’t a demand in your area , a thermic barrier is a good idea . A thermic barrier is typically ½-inch or slap-up jury of gypsum wallboard , drywall , or some type of combining weight .
Some installations also need a vapour barrier : “ If you ’re working with rigid foam or closed - cell spray froth , you wo n’t need an extra vaporisation barrier because these material already resist moisture , ” Parks notes . “ However , if you ’re using fiberglass or mineral wool , it ’s authoritative to set up a vapour barrier on the warm side of the insulating material , usually polythene sheeting . ”
How to Insulate a Basement Using Rigid Boards and 2x4s
2×4 framing boardsRigid foam board insulationFoam - compatible adhesiveFurring stripsConcrete screwsSealing tapeCaulkDrywallDrywall screw
Step 1: Attach the insulation to the concrete walls.
Using 2×4 frame is the more common method acting of installing insularity and finishing basement wall . This method impart space for electrical and plumbing connection and creates a moisture - free infinite where superfluous insulation can be tot up to increase the walls ’ radius - value .
come out this cognitive operation by attaching the insulation to the concrete . This can be accomplished relatively easily by use a froth - compatible adhesive material to the bulwark and then mounting the strict froth dining table insulation to the concrete rampart .
Step 2: Measure and cut 2×4 lumber for the frame.
You will need to measure and tailor a piece of pressure sensation - treated lumber to dish up as the bottom denture of the frame . Fasten the bottom plate to the concrete with concrete screw , masonry nail , or springiness spike . Next , measure and contract the upright small-arm of the frame and mount the vertical pieces to the bottom plate , ensuring that the insularism sits flat against the wall . Finally , add the top crustal plate and secure it to the ceiling joists .
Any small gaps or tornado in the insulation ask to be varnish up to avoid create cold billet along the basement bulwark . If these gaps or gob are not sealed , the warm indoor air can induce condensation to forge when it hail in impinging with a inhuman post .
uniform condensation problem can lead to molding growth , rot , and water damage , force you to make high-priced repair . To avoid this job , it ’s a practiced estimation to use sealing tape , caulk , or even spray foam insulation to ensure that any gaps , crevices , holes , seams , or cracks are fulfill and sealed off .
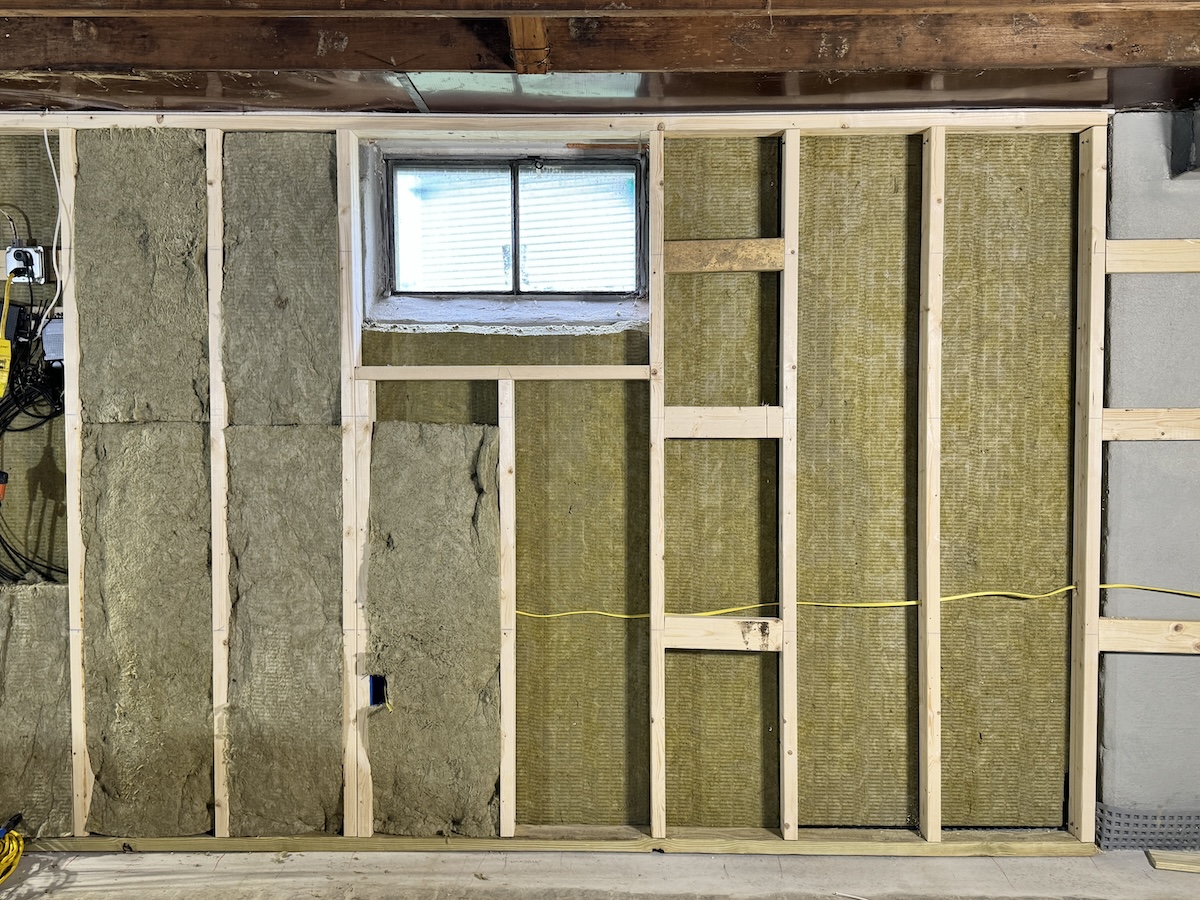
Photo: Theresa Clement, MyFixItUpLife
Finish the wall by measuring , cutting , andmounting drywall to the frame . This layer of dry wall acts as a thermal roadblock that separates the insularism from the interior of the edifice . caloric barriers are required by most building codes , but even if this is n’t a prerequisite in your area , a thermal roadblock is a good idea . you could use ½-inch or enceinte gypsum wallboard panels , wallboard , or an equivalent material for the thermal roadblock .
Some installations also call for a vapor barrier : “ Whether you need a vapor barrier depend on the insulating material you ’re using , ” says Parks . Generally , a vapor barrier wo n’t be required for strict foam or shut - cellphone spray foam insularity , but if you are using fibreglass or mineral wool , then a vaporization barrier is extremely recommended to help control moisture trouble .
When to Hire a Professional for Basement Insulation
While it ’s possible for a DIYer to isolate a basement without professional aid , there are some scenarios when it ’s best to bring in the pro . For instance , if you are using sprayer foam insulant instead of rigid foam boards , then it may be good to charter a professional who already has the right equipment , training , and experience to know how to insulate the basement decent .
Additionally , if there is significant damage to the foundation or problems with the cellar , then involve a pro can help identify and amend these issue .
“ DIYers should consider rent a professional if they ’re dealing with moisture egress , such as leaks , water system legal injury , or mold . These problems need to be resolved before insulation is installed , ” tot Parks .

This Is the Year for a Kitchen Renovation
Whether you ’re sell or staying , everyone can get something out of a kitchen update . Learn why we consider this renovation the Most Valuable Project of 2025 and how to persist on budget .
