We may earn receipts from the products available on this page and enter in affiliate programs . instruct More ›
Few part of piece of furniture are as recognizable as theAdirondack electric chair . Its low heart of soberness enhances constancy , while the slanted seat and backrest invite relaxation . This come through combining dates back nearly 120 days , and the chairperson is suitable for a wide of the mark mixed bag of out-of-door living environments . There are many creative twisting - offs from theoriginal design , but this project view as true to the most important features .
To boost solace and add visual interest , our Adirondack chair features spline and curves , which are soft to create using a jigsaw and the templates provided in the downloadable plans . In addition , the full cut list breaks down the exact dimensions of each part , so you could build a uniform set up for your outdoor sitting area .

Photo: Matt Boley for Bob Vila
I always use cedar when constructing outdoor article of furniture , as it ’s pest- and putrefaction - immune and develops an attractive natural patina over sentence . It ’s also readily available at most household improvement store . Sealing the woodwind periodically can provide extra protection and increase the living of yourDIY Adirondack chairs .
quick to get started?Download the projection plansto see the full slice list , instance , and step - by - stone’s throw photos .
Project Overview
Estimated Time : 5 hoursSkill story : BeginnerEstimated Cost : $ 120
Tools & Materials
Bobvila.com may take in a commission from purchases made through these links .
Before You Begin
This Adirondack hot seat is a simple shape , but it has a few thought-provoking steps . Be certain to clamp down all of your parts when cutting the curve with a reciprocating saw , and bore pilot holes with a countersink practice snatch for all screws . If you are befuddled about which length of holdfast to apply for each step , here ’s a adept convention to keep up : Use the 1¼-inch screws if you are drilling into the cheek of a part , and use the 1⅝-inch screw if you are drilling into an end or edge of a part . Apply a little bead of exterior woodwind mucilage to every connexion for surplus hold .
STEP 1: Cut all the parts to length.
At most family betterment stores , 1x cedarwood board are in reality ⅞-inch compact rather than the standard ¾-inch thick you get with other type of lumber . Also , these boards typically amount with one raspy face as oppose to S4S ( sand four side ) . If you have access to aplaner , shape the cedar boards to a uniform heaviness before cut the part to length with amiter witness .
observe : you could make the ⅞-inch boards work without a planer , but you ’ll desire to be sure that the gravelly faces of each part are hide when the Adirondack hot seat is assembled .
STEP 2: Cut profiles in the parts.
Using the detailed illustrations include in the downloadable plans , differentiate the material body of each part with a pencil , and then abridge along the marks with a jigsaw . For symmetrical part such as the weaponry and branch ( and if you are making several chair ) , it ’s helpful to make one of each part and use it to trace out the shape of however many multiple you need . Lightly sandpaper the edges and corners of all parting .
STEP 3: Build the seat.
The runners have three matted sections along the front boundary . confiscate the first three seat spline to the flat sections of the Caranx crysos . Be sure to drill archetype holes with a countersink bit drill bit to avoid break up the wood . Then , using a ¼-inch - thick piece of scrap wood as a spacer , stay tie the remaining five seat spline to the runner .
Fasten the runner stretcher to the privileged face of the runner , 10 column inch from the back end of the runners .
STEP 4: Build the back.
Attach the back spline to the bottom back pair , starting at the outer edges of the curve and affect inwards . Use a ⅜-inch - thick piece of scrap wood as a spacer . Next , value 10 inch up from the top of the bottom back brace , and place a mark on the outmost back slats . Position the top back couple at this location and secure all back slats to it using 1⅝-inch screw .
STEP 5: Create the arm and leg assemblies.
Secure the arm supports to the bottom of the arms , ¾ inch from the tenacious edge and 2½ inches from the narrow-minded end of the arms . For accurate placement , it ’s helpful to prop up the arm supports with a piece of ¾-inch - thick scrap Ellen Price Wood while you apply exterior wood mucilage and drive 1⅝-inch screws into the parts .
With the same sizing screws , attach the leg livelihood to the legs so that the long edge of the supports are affluent with the top and front - facing edge of the wooden leg .
STEP 6: Attach the leg assemblies to the seat.
Use 1⅝-inch screws to attach the leg stretcher to the inner face of the legs so that the bottom bound of the capstone is 3½ inches up from the bottom of the leg .
STEP 7: Fasten the back to the seat.
Clamp the bottom back duet to the prat forum , and secure it in place with 1⅝-inch fuck . To ward off putting too much stress on this connection , keep the part clamped until complete the next dance step .
STEP 8: Attach the arm assemblies to the chair.
Place a mark on the bottom fount of each arm , 3½ inch from the front edge . Clamp the arm meeting place to the chair so that the front boundary of the legs and font of the leg supports align with the Gospel According to Mark . Attach the arms to the leg backup with 1⅝-inch screws .
The top back couple run across the limb assemblies at the back closing of the arm supports . Use 1⅝-inch jailer to attach the arm supports to the ends of the top back orthodontic braces to fill in your Adirondack chairwoman .
Final Thoughts
When allowed to weather naturally , cedarwood takes on a light gray colour that adds character . If you prefer to finish the chair , I suggest using lacquer to enrich the wood . Three coats is recommended , sanding between each with gradually increasing grits . The wood will become smoother and dark as you go .
Building this timeless out-of-door chairperson is easy with the detailed command included in the downloadable plans . The classic plan works just as well by a fire pit in a backyard as it does on a dock in the Adirondacks .
To see the full cut list , parts illustrations , and more stone’s throw - by - whole tone photos , download the printable project plans .
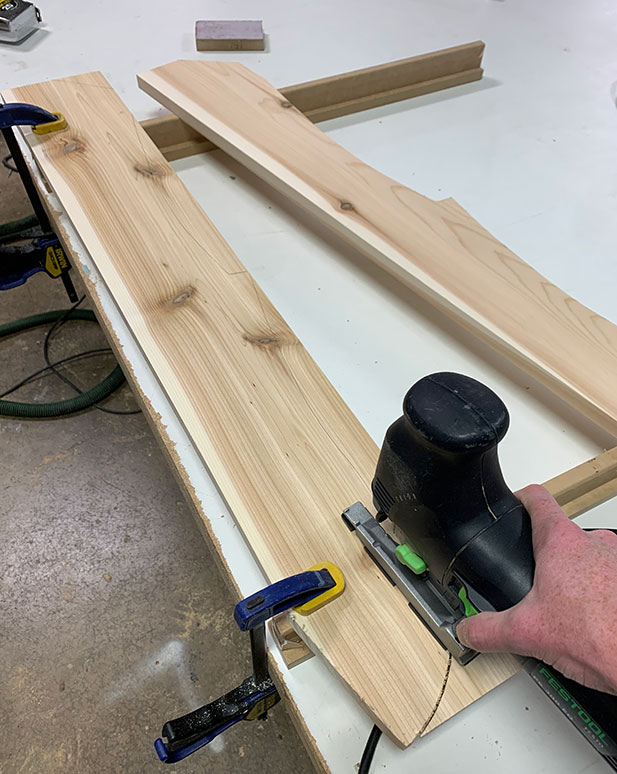
Photo: Matt Boley for Bob Vila
This Is the Year for a Kitchen Renovation
Whether you ’re sell or staying , everyone can get something out of a kitchen update . see why we weigh this restoration the Most Valuable Project of 2025 and how to rest on budget .
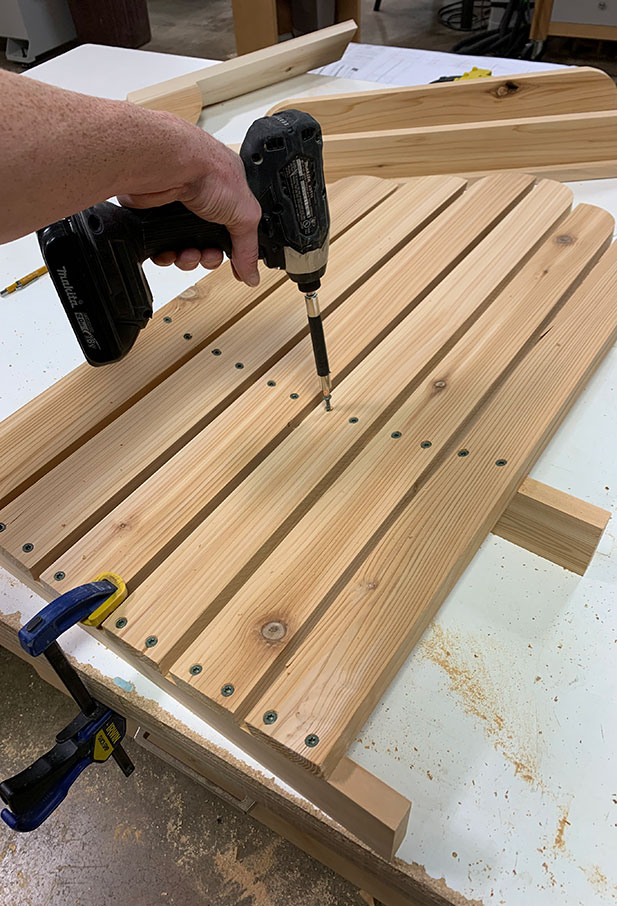
Photo: Matt Boley for Bob Vila
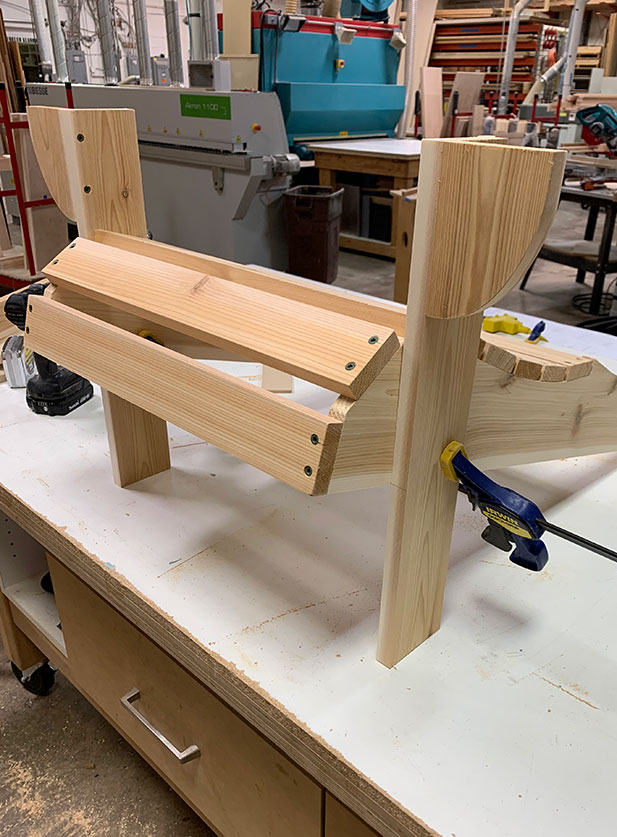
Photo: Matt Boley for Bob Vila
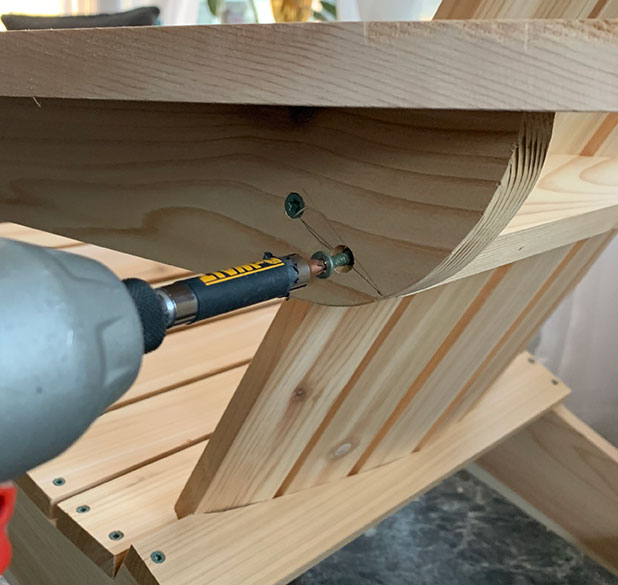
Photo: Matt Boley for Bob VIla

