We may bring in revenue from the products usable on this page and take part in affiliate programs . get word More ›
This post has been bring to you by Dickies . Its facts and notion are those of BobVila.com .
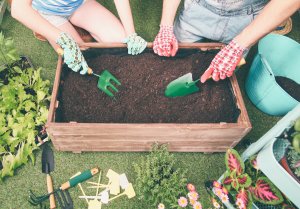
A compost bin is a with child way to keep wastefulness cloth out of landfills while at the same time creating wonderfully nutritious soil for your garden and houseplants . There are a panoptic multifariousness ofcompost binsavailable for purchase , but they are not cheap , and most of them are made of charge card . They are n’t terribly attractive , either .
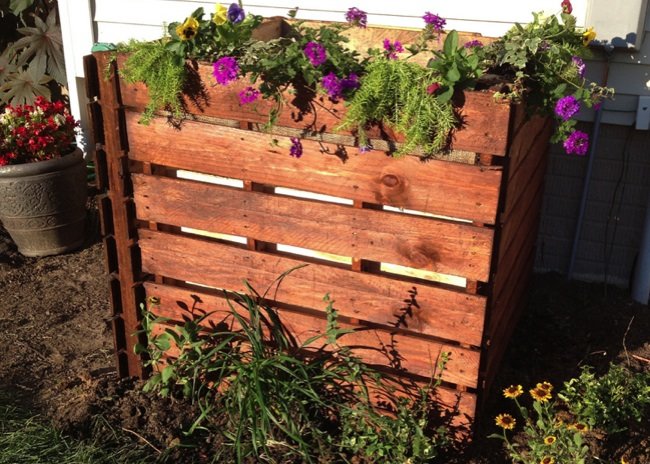
Photo: Flickr / jencelene
If you ’d like to take recycling and Earth replacement one step further , you may ramp up your own compost bin very inexpensively by repurposingshipping palette . And with only a little bit of extra effort , you could make it serve as a plantation owner as well , so it ’s not an eyesore in your yard .
A project like this take a bit of dexterity , so it ’s important to have tools and hardware at the quick . That ’s why myDickiescarpenter pants have become my pet “ ferment out ” gear ; they keep hammer , screwdriver , scissors , and more within gentle reach at all time . They ’re a much more well-heeled and hard-nosed alternative to the traditional tool knock .
Tools & Materials
Bobvila.com may earn a commission from purchases made through these links .
How to Build a Compost Bin
STEP 1: Prepare the location.
discover a desirable area on your property for your bin . You need an approximately 4′ x 4′ outer space for the bin as well as some headroom on one side so the door can dangle undefended . remove the orbit of all grass and planting and verify it ’s level . Ideally , a compost bin needs to have sunshine to warm it , and a weewee seed close by . Pick your location with these requirements in nous .
STEP 2: Prepare the pallets.
Give your pallet a full scrub down with some mild soapy water and then gargle them . probe them and make note of any loose , crack , or broken board . adjudicate accordingly which side should face up out , and in which focal point . ironic correspond them together to make certain you like the manner they look .
STEP 3: Construct the box.
Connect two pallets together from the inside with two to three fifty - angle bracket , forming a 90 - arcdegree angle . Connect a third pallet in the same way to form a three - sided box .
STEP 4: Attach the hinges and door.
Connect the fourth pallet to the front of that three - sided box with two to three hinges to create a room access that swing assailable . This will permit you soft access toyour compostto rick it and to take away it when it ’s ready for role in your garden . depend on the construction of your pallets and the distance of your screws , you may need to set the screws on the side of the hinge at a fragile angle , so that they do n’t impede the opening of the door .
TIP : If you want to pretty it up , you’re able to stain your bank identification number and engraft the top with a mixture of perennials and annuals .
STEP 5: Stain the wood.
Apply stain in the color of your option to only the exterior board of your bank identification number . Keep the interior of the bin gratuitous of grease , as you do n’t want any of the chemical in the stain to be in touch with your compost .
STEP 6: Create the planters.
For each side of the bin you need to put works on , disregard a small-arm of gunny or landscape gardening framework to the length of the pallet with approximately 1 foot of the cloth hanging over each side of the pallet rampart . Cut a notch in the fabric at each brace point on the palette . Slide the fabric down inside the wall of the palette to create a sack that will hold the soil and plants . Staple the gunny or fabric to the inside of the interior pallet wall and the privileged top of the exterior pallet wall . Hammer in any staples that are n’t flush to the wood , and trim the supererogatory burlap or fabric with a dyad of scissors grip .
STEP 7: Fill the planters.
Plant a variety of vining orcreeping perennialsalongside some pretty annuals . Fill in with extra potting land as needed . piddle soundly and persist in to water well until your plants are established . You may opt to put some plantings around the exterior bag of your bin as well . Something evergreen plant will give it attractive cover all year long .
Now you ’re ready to compost ! Start to fill your bin with a mixture of compostable materials like spliff , pot , raked leaves , sawdust , and cuttings from the garden . ensure to irrigate it and keep it moist , and turn it at least once every calendar week . In 6 to 12 months , you ’ll have “ black amber ” to feed your garden , landscape gardening , and houseplants .
Happy composting , everyone !

Photo: Flickr / jencelene
Our Best Advice for Beginner Gardeners
We ’ll help you fructify up your first garden — whether that ’s a few pots on your terrace , a raised bed , or an in - ground plot of ground out back — and take the right industrial plant for your land and region .
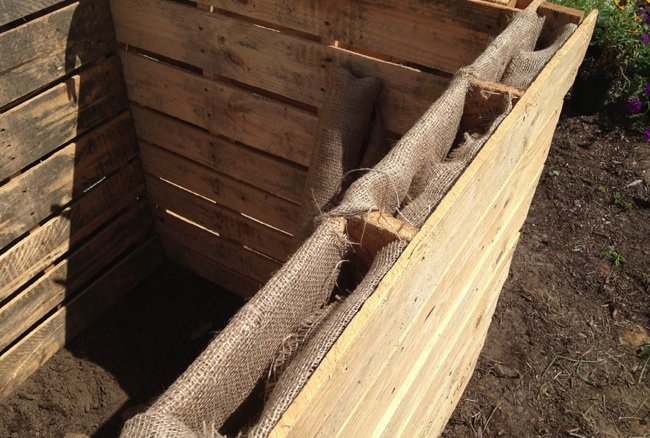
Photo: Flickr / jencelene
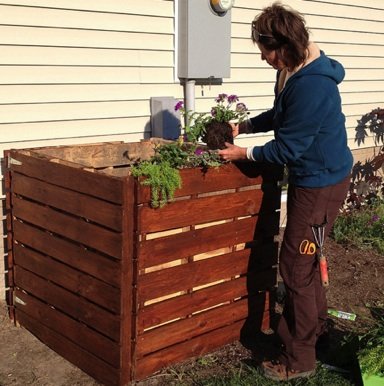
Photo: Flickr/ jencelene