We may earn tax income from the products available on this Thomas Nelson Page and participate in affiliate programs . Learn More ›
Stationary and sturdy by mean solar day , mobile and minimal by night , our workbench is designed to aid DIYers with a wide variety of jobs around the house . When unfolded to its full size , the bombastic workplace surface measures 4 feet by 4 feet , which is unadulterated for supporting benchtop tools and other tidy undertaking supplying . When crock up to its small-scale sizing , the unit can fit within 2 foot by 4 feet of floor space , idealistic for stashing in a corner of the garage or even a closet . It also features an undefendable store locker for keeping materials organized and easy approachable .
you’re able to build this wood workbench in one mean solar day and for less than $ 300 . It will quickly become an integral part of your DIY setup , plus there ’s room for customization .
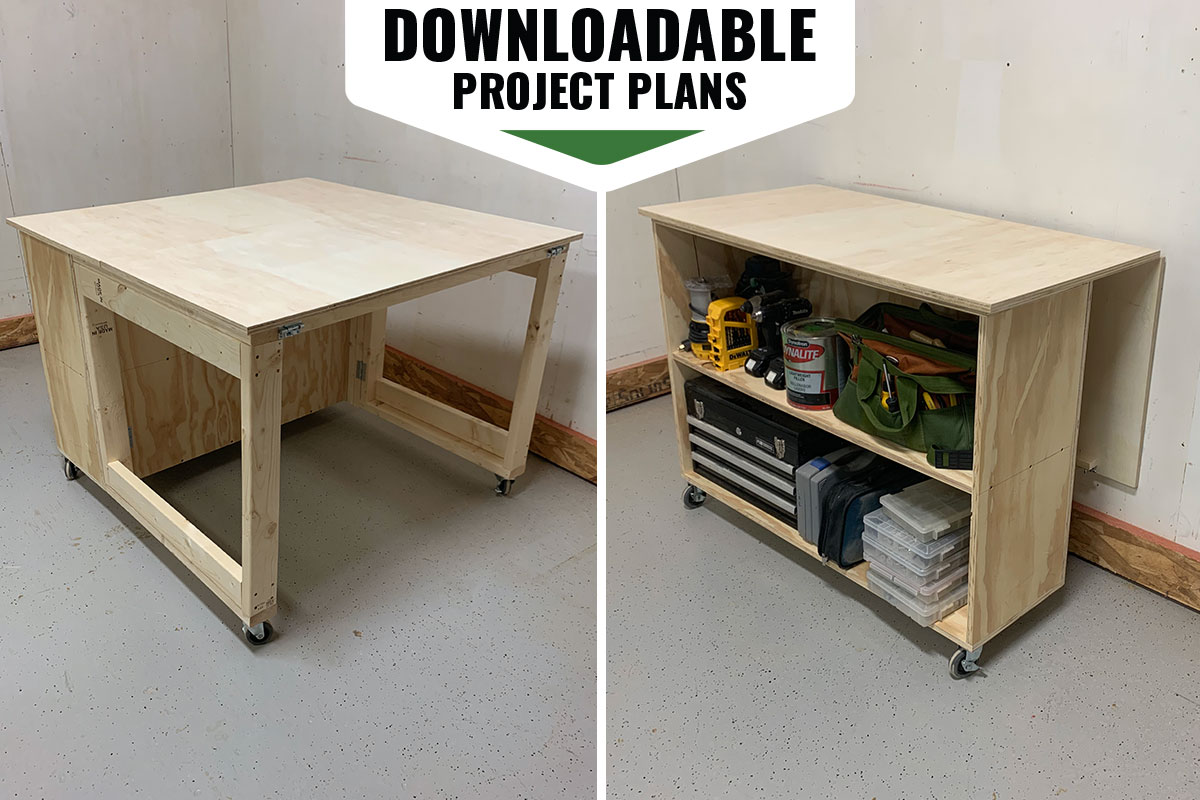
Photo: Matt Boley for Bob VIla
Project Overview
Estimated Time : 5 hoursSkill Level : BeginnerEstimated Cost : $ 300
Tools & Materials
Bobvila.com may earn a commission from purchase made through these links .
Before You Begin
As refer above , you may customize theworkbench plansto well fit your specific need and outer space ; just be sure to adjust the instructions accordingly before you buy material .
It ’s recommend to cut all the parts first , and then assemble the DIY workbench . As always , exercise caution when operating superpower tools . Wear appropriate gear such ashearing auspices , safety glasses , and a dust mask , and ensure workpieces are securely clamped as you go on through the steps .
STEP 1: Build the cabinet.
bond the storage locker sides to the cabinet top and bottom with wood screws . fix the storage locker back to the assembly . Then lay the cabinet on its back andscrewthe shelf in place . For precise shelf placement , it ’s helpful to clamp a scrap Mrs. Henry Wood spacer inside the locker .
STEP 2: Create the two end frames.
This workbench has two otherwise sized last systema skeletale in order for it to turn up up nicely . The folding spacer adds inch to the shorter material body , making it the same distance as the larger physique when full extended while allow the larger frame to tuck inside the shorter skeleton when fold up .
To build the ending frames , secure the form rail to the end of the figure stiles with wood screw . To bolster the end skeletal system , attach the fix support to the inner face of the stiles .
STEP 3: Build the folding spacer.
As remark in pace 2 , the fold spacer is necessary for this shop table to collapse down to a slick , stowable size . Its expression is wide-eyed : Screw the 2×4 spacers together with wood screw . Then secure the 1×4 tenuous spacer to the meeting place .
STEP 4: Attach the folding spacer to the cabinet.
Flip the cabinet on its remaining side and clamp the folding spacer to the correct side of the back of the cabinet . utilise wood gaoler to fasten the folding spacer to the assembly .
STEP 5: Assemble the bench top.
Lay the bench top parts on a flat Earth’s surface so that a foresightful side of each is abutted . Place the door hinges along the seam . Drill pilot film holes with a self - concentrate on drill bit and fasten the room access hinges to the judiciary top .
For the remaining steps , it ’s helpful to keep the judiciary top orient this room ( upside down with the hinges facing up ) as you attach more function to it .
STEP 6: Secure the cabinet to the bench top.
switch the cabinet upside down onto the undersurface of the terrace top and ordinate it so that the terrace top overhangs the side and front of the storage locker . assure the console to the work bench top .
STEP 7: Cut the notches in the end frames.
There are ½-inch - deep notches in the pinnacle of each movable end skeletal system . The snick allow the end frames to remove the hinges installed on the underside of the bench top .
check the notch locations along the tops of the final stage frame of reference . Set the circular sawing machine blade depthto ½ inch and cut numerous kerfs in the conclusion frames . Break the rest thriftlessness with a mallet , and clean up the notches with a woodwind instrument chisel .
STEP 8: Attach the end frames to the cabinet.
Flip the end frames upside down . Clamp the short oddment inning to the folding spacer and the long end frame to the opposite side of the cabinet .
Install two narrow utility program hinges along the interior turn up seam of each end build . Use a self - center morsel to practise pilot program hole , and procure the flexible joint in place with the include screws .
STEP 9: Affix the end frame spacer to the bench top.
The end physical body spacer plays a simple yet important role in the work bench innovation : It provide a surface for the end frames to register against ( and interlock to ) when they ’re unfolded .
Drill four pocket holes along the interior expression of the end frame spacer . Center the spacer along the workbench top between the unfolded end anatomy . fix the spacer to the bench top with pocket - hole screws . If you do not have a pouch - hole gigue , drive regular wood screws through the top of the bench top into the spacer , then meet and sand the gaoler holes .
STEP 10: Attach the casters and barrel bolts.
tighten the caster to the outmost corner of the cabinet and unfolded ending frames . Attach both phallus of two barrel bolts horizontally at the seams between the last frame spacer and end framing rails .
bind the large phallus only of another barrel thunderbolt to the top rail of the light end frame . Mark where the drum attain the bottom of the bench top . Temporarily shut the short end frame and a Mandrillus leucophaeus ⅜-inch - diameter by ½-inch - cryptical maw at the mark to catch the barrel .
Final Thoughts
With the precise slash list , representative , and step - by - gradation photos include in the downloadable plans , learn how to progress a bench is gentle . It ’s also a great way to piece up some basic cabinet - making skill , which are utilitarian for a wide variety of woodwork and home improvement projects . In addition , the designing of this collapsible , mobile workbenchpromotes space savings — a bonus in any home shop .
For more detailed instructions , a division undercut list , and helpful illustrations , download the printable labor programme .
This Is the Year for a Kitchen Renovation
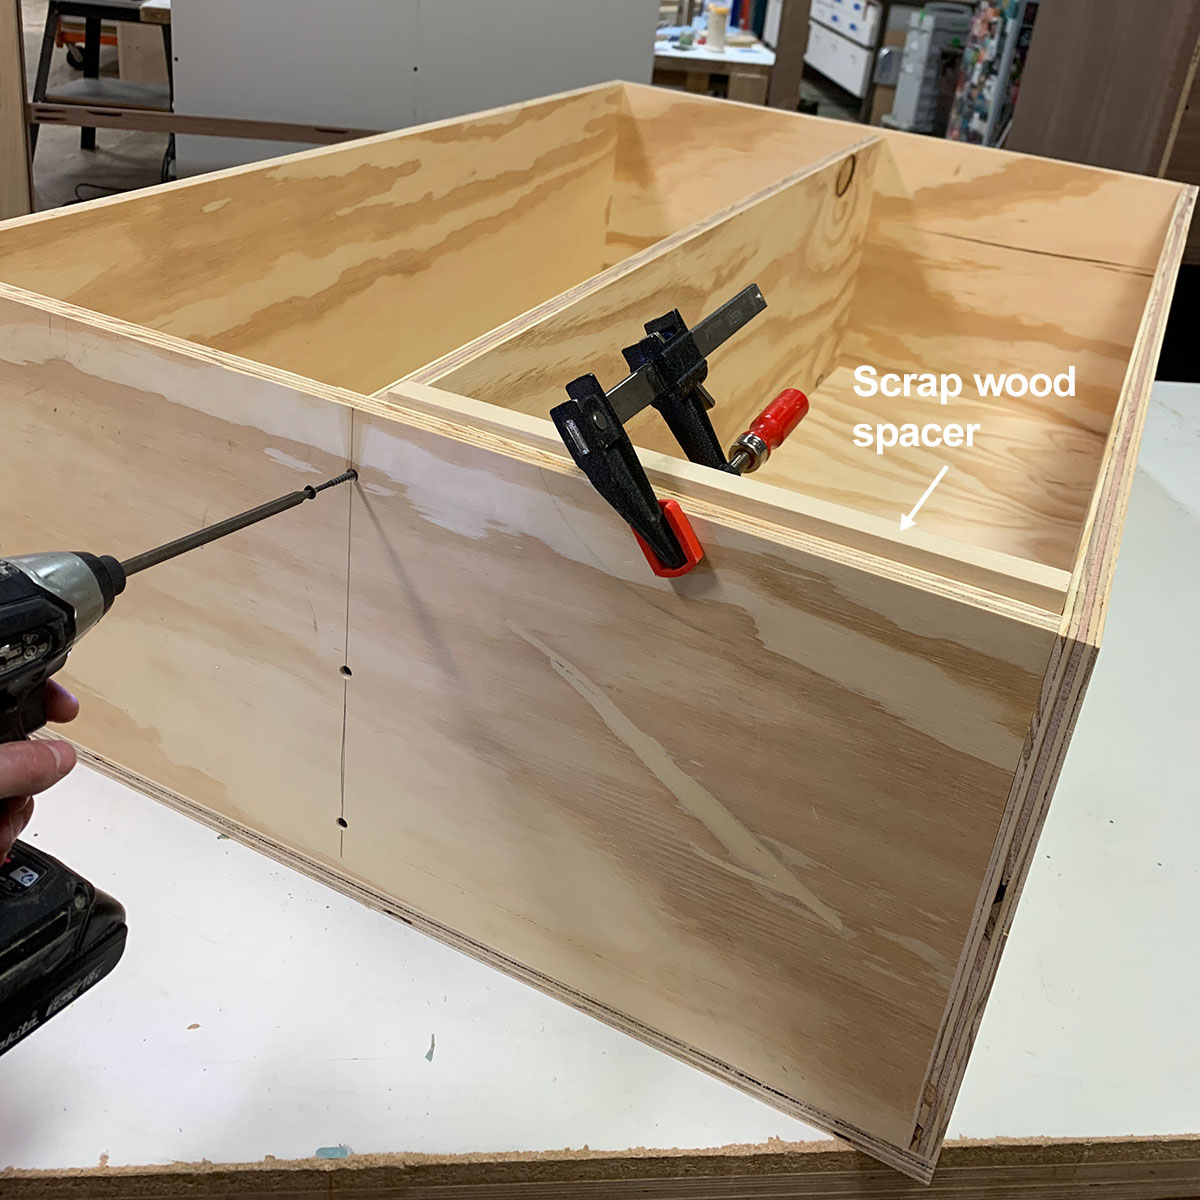
Photo: Matt Boley for Bob Vila
Whether you ’re selling or staying , everyone can get something out of a kitchen update . Learn why we consider this redevelopment the Most Valuable Project of 2025 and how to detain on budget .
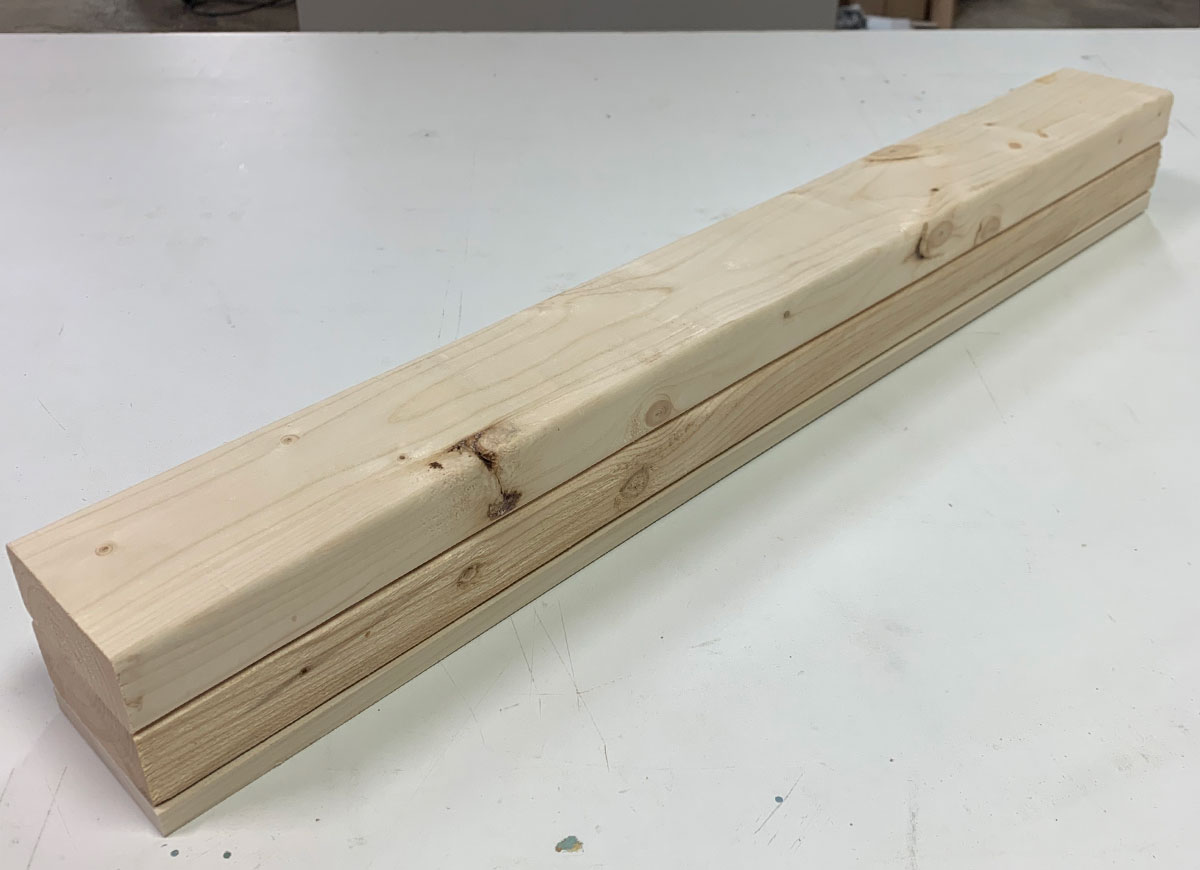
Photo: Matt Boley for Bob Vila
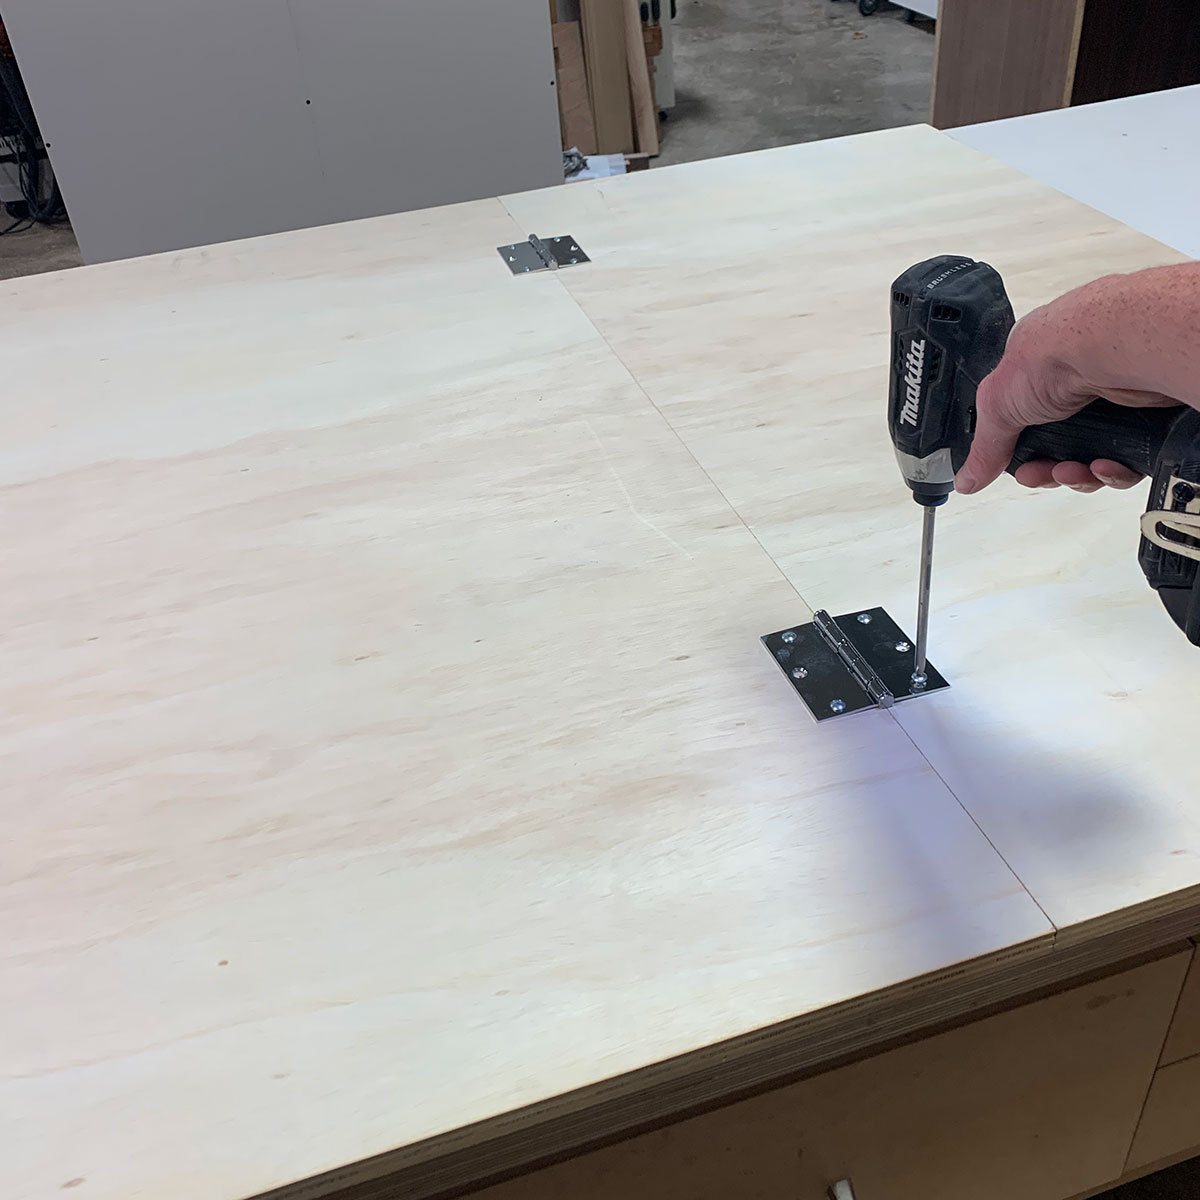
Photo: Matt Boley for Bob Vila
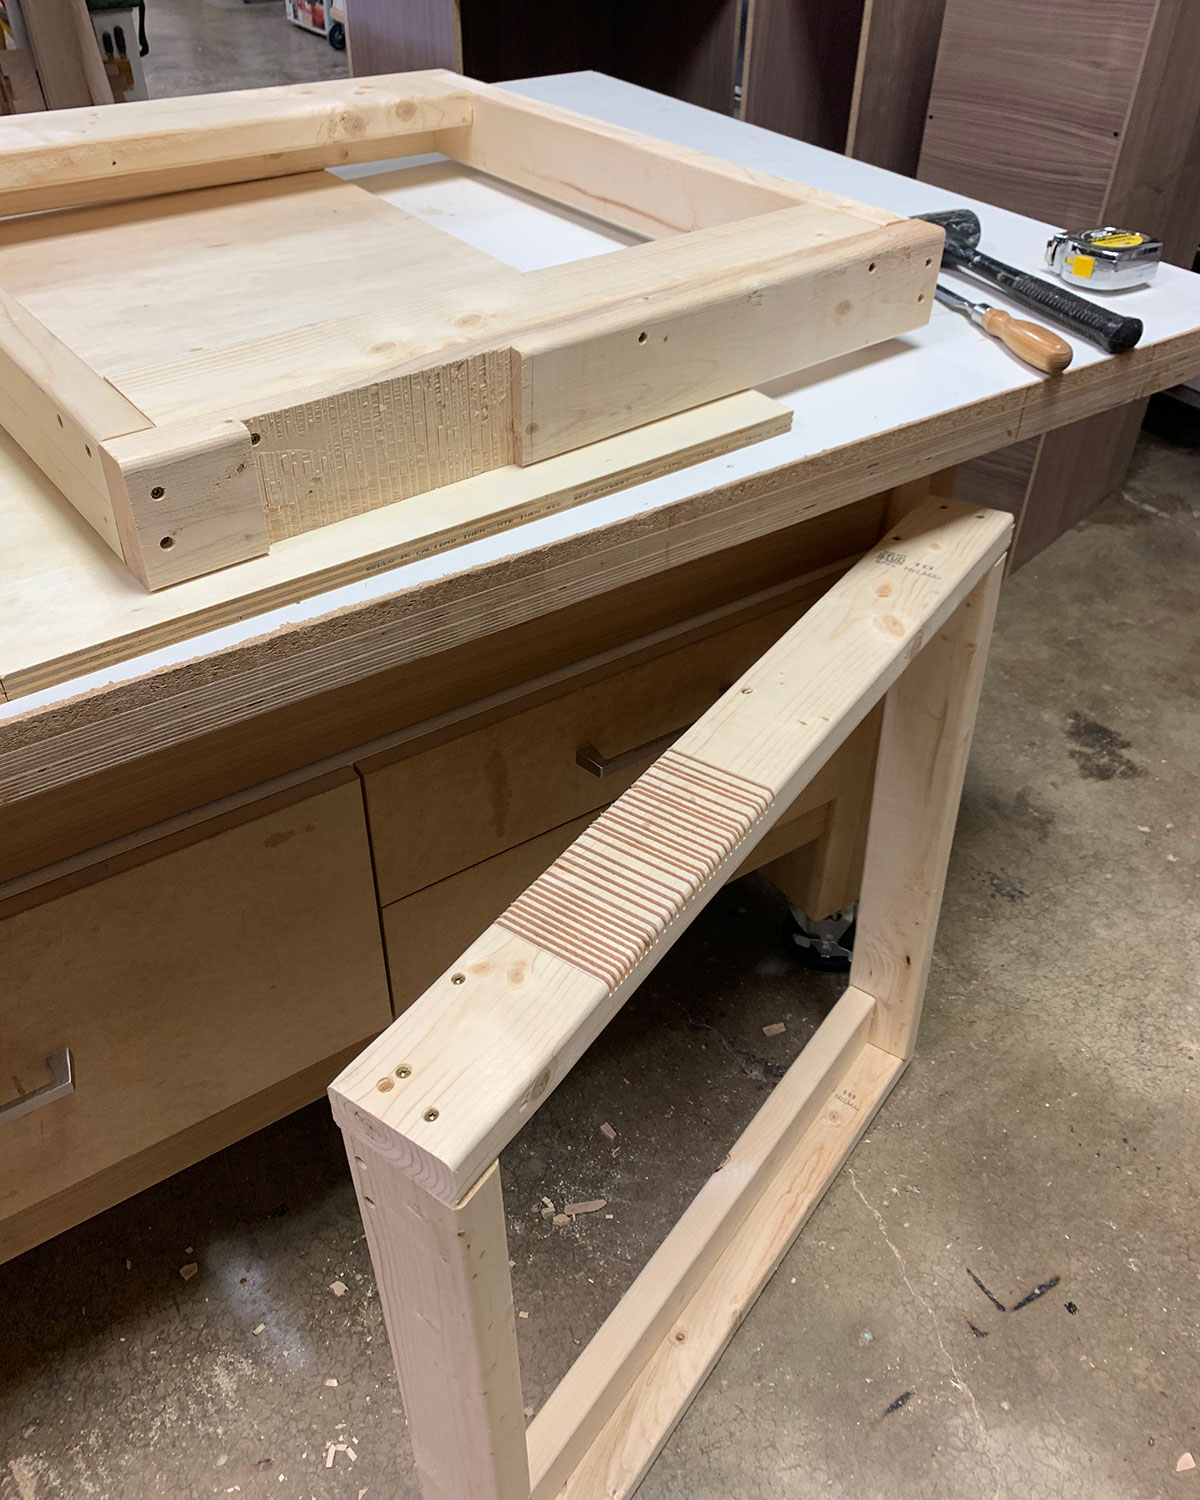
Photo: Matt Boley for Bob Vila
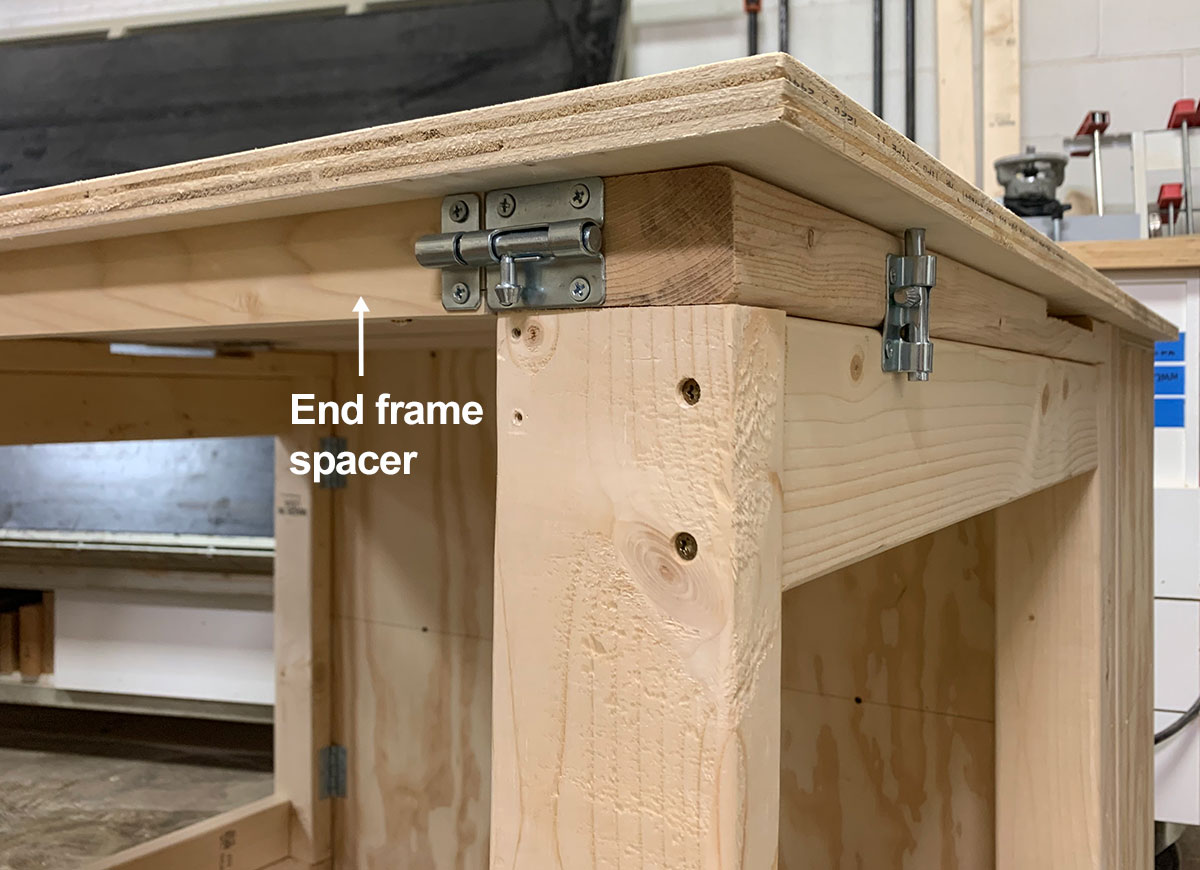
Photo: Matt Boley for Bob Vila

