We may earn gross from the products uncommitted on this page and participate in affiliate program . Learn More ›
Youclean your car ’s windowsto help you see more clearly and keep your car in tip - top shape . But , what about the headlights ? Keeping the headlight clean-living is animportant railcar maintenance undertaking . If your headlamp are yellow or cloudy , they wo n’t be able to fully do their job and raise your visibility as you drive . This is a safe hazard that can be void when you hear how to make clean headlights .
Before we get into the three methods outlined below to help you houseclean cloudy headlights , one quick banknote : Do not strip headlight with WD-40 . You may have seen this method acting commend before , but using WD-40 can end up damaging your headlamp . Over clip , the oil may leak into the bulb , potentially have it to burn down out . The headlight cleanup method shared below are safe and more effective than using WD-40 , though they are still impermanent solution that you will call for to repeat sporadically .
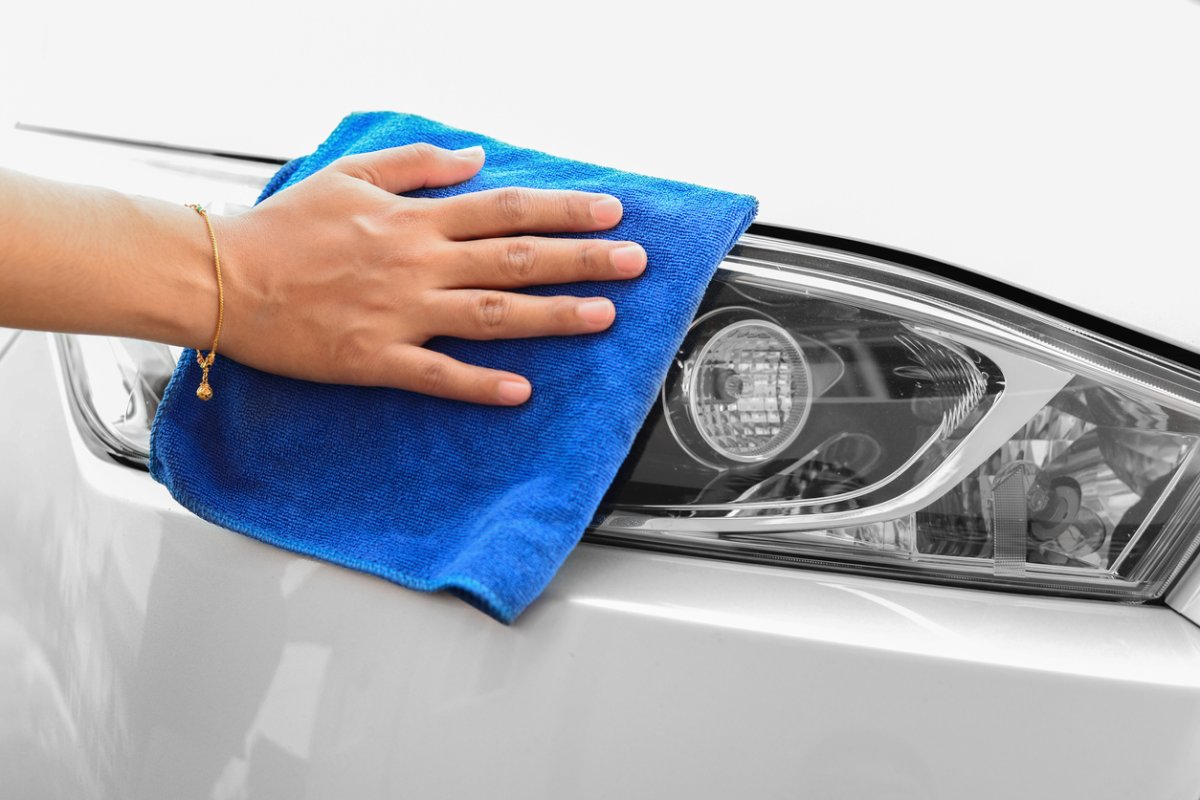
Photo: istockphoto.com
How to Clean Headlights With a Headlight Cleaning Kit
A headlight cleaning kit includes everything you ’ll need to regenerate murky headlamp . While the whole step below provide a worldwide overview for using this method acting to clean yellow headlamp or murky headlights , check the directions for the specific merchandise you purchase before beginning .
SUPPLIES – Headlight clean outfit – Painter ’s tape – Water – Microfiber towel
STEP 1: Move the car out of direct sunlight and protect its painted finish.
Choose a dry Clarence Shepard Day Jr. when temperatures will stay above freezing before make up one’s mind to clean your headlights . Move the car so that its headlights are not in unmediated sun . Then , habituate painter ’s taping to cover the vehicle ’s painted surfaces around each headlamp . Doing so will help avoid accidental damage to your railcar ’s finish .
STEP 2: Apply the surface activator.
The outfit should let in a surface activator that aid to demote down and loosen the original UV finishing on the headlamp . Spray a generous amount of the activator onto the lenses and let it posture for about 30 endorsement ; then gargle it off with water supply .
STEP 3: Use sandpaper to remove the original UV coating.
The kit should come with a few piece of plastered emery paper in increase hominy grits . ( The Sylvania outfit used in this pathfinder admit 400- , 1,000- , and 2,000 - guts emery paper . ) Starting with the modest grit , exhaustively wet each lens and sand out the old UV coating . Continue tot water and sandpaper the aerofoil in a circular apparent movement until it is uniformly smooth .
echo the sanding mental process above with the 1,000- and 2,000 - sand sandpapers . gargle the lens of the eye and use a light microfiber towel to dry out them completely . At this phase , the lenses will have a light-headed white daze .
STEP 4: Polish the lenses with the clarifying compound.
Apply one-half of the included clarify chemical compound to a uncontaminating textile and burnish it onto one of the headlight lense . stay on working the chemical compound over the lens in a circular question for about 5 minutes ; then rinse it off with neat water and dry it completely with a clean towel . recapitulate this physical process for the 2nd headlight ; all haze should be removed after this footmark .
STEP 5: Apply the new UV coating.
Use a sporty cloth to apply a thick , even layer of the provide UV finish to one headlight at a time . workplace in a continuous motion across the lens system , verify to cover the total control surface without overlap or leave bare spot . Repeat the process for the second lens .
Allow the finishing to fully cure for 4 to 6 time of day before drive . It is important to make certain that the car is park in an area where it will not be exposed to water or eminent humidness levels during the curing process .
How to Clean Headlights With Toothpaste
If you ’re looking for home remedies to strip headlight , consider trying toothpaste . Toothpaste is gently scratchy and can effectively remove stains from headlamp , just as it remove brass and tartar from your teeth . Read on to learn how to strip headlights with toothpaste .
supply – Microfiber cloth – pocket-sized bucket – Water – Dish goop – Painter ’s tape – Whitening toothpaste
STEP 1: Clean the lenses with warm, soapy water.
lead off by cleaning each headlight with a microfiber cloth dipped in warm , smarmy water . This will remove aerofoil residue and help you further assess what require to be cleaned with the toothpaste .
STEP 2: Tape off the painted finish on the car.
Use painter ’s tape measure to cover the painted conclusion smother each headlight . Doing so will help forestall you from accidentally scuffing or come up it as you clean the headlights .
STEP 3: Apply toothpaste to a dampened cloth and use it to rub the entire headlight surface.
Dip a clean microfiber cloth in warm water , and squeeze out the overindulgence . use a small amount of whitening toothpaste — about the size of a dime — to the fabric . Work using a circular movement to fray the full airfoil of each lens . Use elbow grime and apply more toothpaste as needed to remove all the gunk from each headlight .
STEP 4: Rinse the lens and let it dry.
Dip another clean microfiber cloth in warm urine and rinse all of the toothpaste off of each lens . Leave the headlight to dry .
How to Clean Headlights With Baking Soda and Vinegar
If you ’re looking for a cheap means to clean headlight , you’re able to employ products that you in all probability already have in your larder or wash room . persist in read to learn how to strip headlights with baking soda ash and vinegar — the result is both effective and environmentally friendly .
supply – Microfiber cloths – Water – Soap – cougar ’s mag tape – little bucket – Distilled livid acetum – Baking soda
Remove as much dirt and grime from each headlamp using a microfiber cloth dip in warm , soapy water .

Photo: istockphoto.com
STEP 2: Tape off the painted finish around the headlights.
Protect painted Earth’s surface around the headlights by tape them off using puma ’s tape .
STEP 3: Make a cleaning solution using baking soda and vinegar.
In a minuscule bucket or mixing bowl , coalesce distilled livid vinegar and bake soda in a 2:1 ratio . Mix well to ensure the two ingredient are well mix .
STEP 4: Use a microfiber cloth to rub the cleaning solution over each lens.
Dip a clear microfiber material into the baking soda and vinegar solution . Scrub vigorously over each headlight to remove as much balance as possible . You will likely require to re - wet the textile with more of the cleaning result several metre as you work .
STEP 5: Rinse the headlights with clean water and let them dry.
occupy a small pail with strong piddle . Dip a clean microfiber cloth into the warm weewee and use it to gargle away all of the baking soda and acetum residue . Once fully rinse , let the headlight air ironical .
Final Thoughts
Learning how to clean muzzy headlamp is an important part of keep and strip your motorcar . When your headlamp are clean , not only do they await overnice , but your luminance will also shine more brightly to see better visibility as you ride . The method share above pop the question a quick and gentle way to get your headlight make clean . If you ’re looking for the most in effect and long - lasting way to clean house headlights , consider sanding them , applying a vindicated coat for headlight over the sanded aerofoil , and protecting them against the elements when you ’re not driving .
This Is the class for a Kitchen Renovation
Whether you ’re selling or staying , everyone can get something out of a kitchen update . Learn why we regard this renovation the Most Valuable Project of 2025 and how to stay on budget .
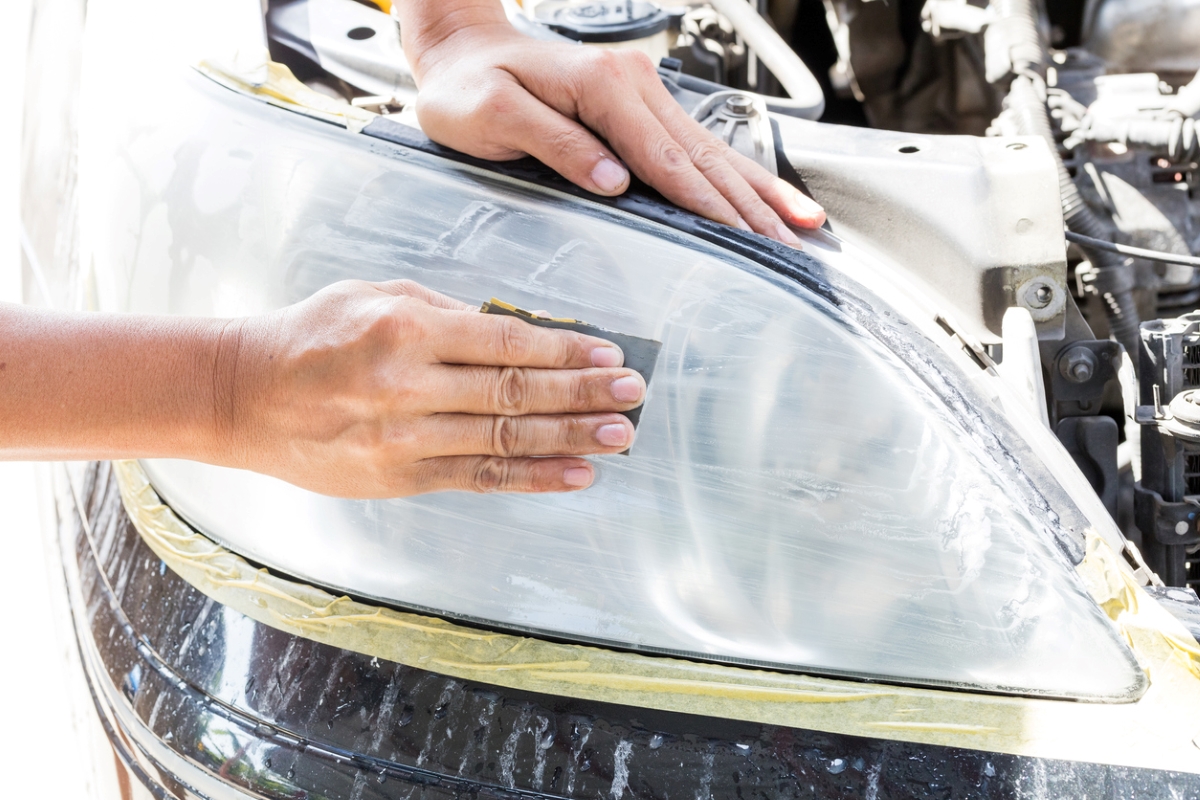
Photo: istockphoto.com

Photo: istockphoto.com

