We may earn tax revenue from the mathematical product available on this page and take part in affiliate program . Learn More ›
Refurbishing old furniture is a popular hobbyhorse , and for good reason . It ’s amazing how a newfangled pelage of paint or a change of fabric can revitalise pieces that are past their prime quantity , making them fashionable and functional once more .
To bring an former chairperson or other seating up to day of the month , reupholstering is often in order , and slue foam is a key footmark in this process . Although the froth will be hidden by fabric , tutelage needs to be read at this stagecoach because poor formation will often show through in the finished piece . Read on to learn the practiced way to shorten foam for your next project .
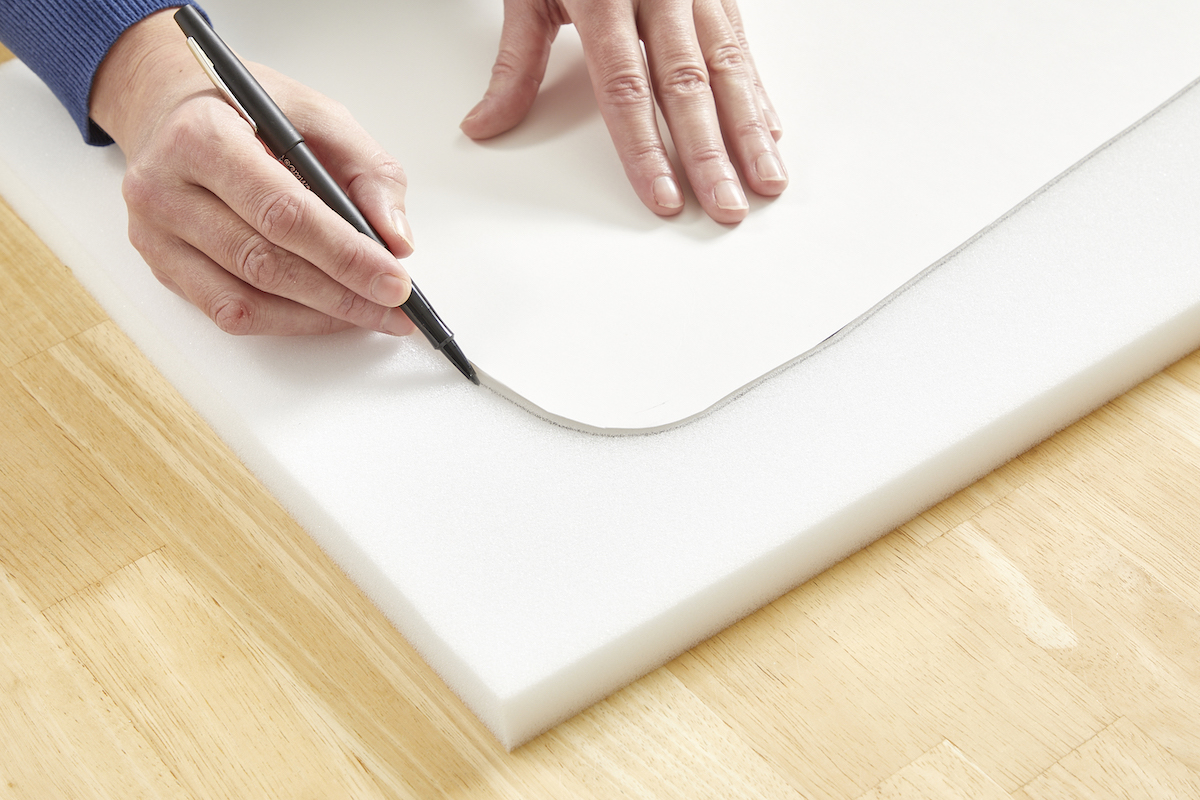
Photo: Tom Fenenga for Bob Vila
Choosing the right froth is crucial but not difficult . There are three case by and large used in upholstery : medium - density foam for furniture that will have only occasional purpose , high - density foam for solar day - to - day utilisation , and out-of-door froth for terrace furniture that may get blotto . thickness straddle from 1 to 6 inches .
Tools & Materials
Bobvila.com may earn a commission from purchase made through these link .
Before You Begin
Always buy foam from reputable sources . cut polyurethane foam should be perfectly secure because the foam is plow with fire - retardation chemicals during yield . That said , untreated foam , which is extremely inflammable , may be uncommitted at some outlets , so take care in where you shop .
Step 1: Measure and mark where you’d like to cut.
When transferring dimensions from an be piece of furniture , it is important to measure the seating and not the existing froth , which will have been squeeze and distorted by usance . you may mark directly on the froth , but making a guide from thin poster gives you the opportunity to complicate sizing and figure . If you call for to curve several seats from one man of foam , lie in your template on the froth in different positions to design the most economic use of goods and services . Be certain to leave behind gap between the pieces because if you attempt to partake in border , a mistake on one will spoil both .
stigmatise the foam using a felt - tip pen . Do not test to trace the template freehand . rather , habituate a straightedge for lines . Avoid leaning on the foam when holding the straightedge , as compressing it while marking will make inaccuracy . Apply just enough pressure sensation to draw the blood line so you do n’t tear into the froth with the pen .
Step 2: Use a sharp, serrated knife to score along the mark.
Although tutorials on how to rationalise upholstery foam recommend both smooth and serrate blades , smooth blades , such as those on carve knives , can hold or drag in the cut . Serrated blades usually thin more cleanly .
Whether cutting soft froth or high - density foam of any thickness , cut only one rag at a prison term . It may be enticing to compress several sheets together to get through the line of work more quickly , but compact foam shift its physique and can ensue in errors .
It ’s a good approximation to practice trim back a scrap piece of foam first , if possible . begin with a shallow cut , using the steer of the tongue , and then drag toward you in one politic movement from start to land up along one side . you’re able to do this freehand or use a straightedge to guide the blade . Turn the foam and repeat until the whole build is outlined .

Photo: Tom Fenenga for Bob Vila
you may recapitulate the shallow slip physical process until the foam has been cut all the way through or , after the initial shallow cut , you may cut through the remainder using a smooth sawing motion . oeuvre slowly so the tongue thin out rather than compresses . Some upholsterers apply an electric carving tongue , which is certainly faster , but dependable control takes practice .
Step 3: To cut curves, hold the knife perpendicular to the foam and use a short sawing motion.
Cutting curve ball can be dispute because the foam is more likely to contract and scuff on the vane . Hold the blade as nigh vertical as potential , and cut in small growth . endeavor to turn the leaf blade mildly as you go , follow the curvature . If you’re able to maintain a uninterrupted motion , you ’ll end up with a bland curvature instead of a circle of small flats .
Sometimes you require to cut bevel square or rounded corners . you could use the same knife proficiency described above , but for small area , a pair of knifelike , long - bladedscissorscan be as effective . Snip off small pieces , checking often until you attain the required chassis .
notice : Be certain to clean up froth press cutting as you work . They can demonstrate a choking hazard to small kid and fauna .
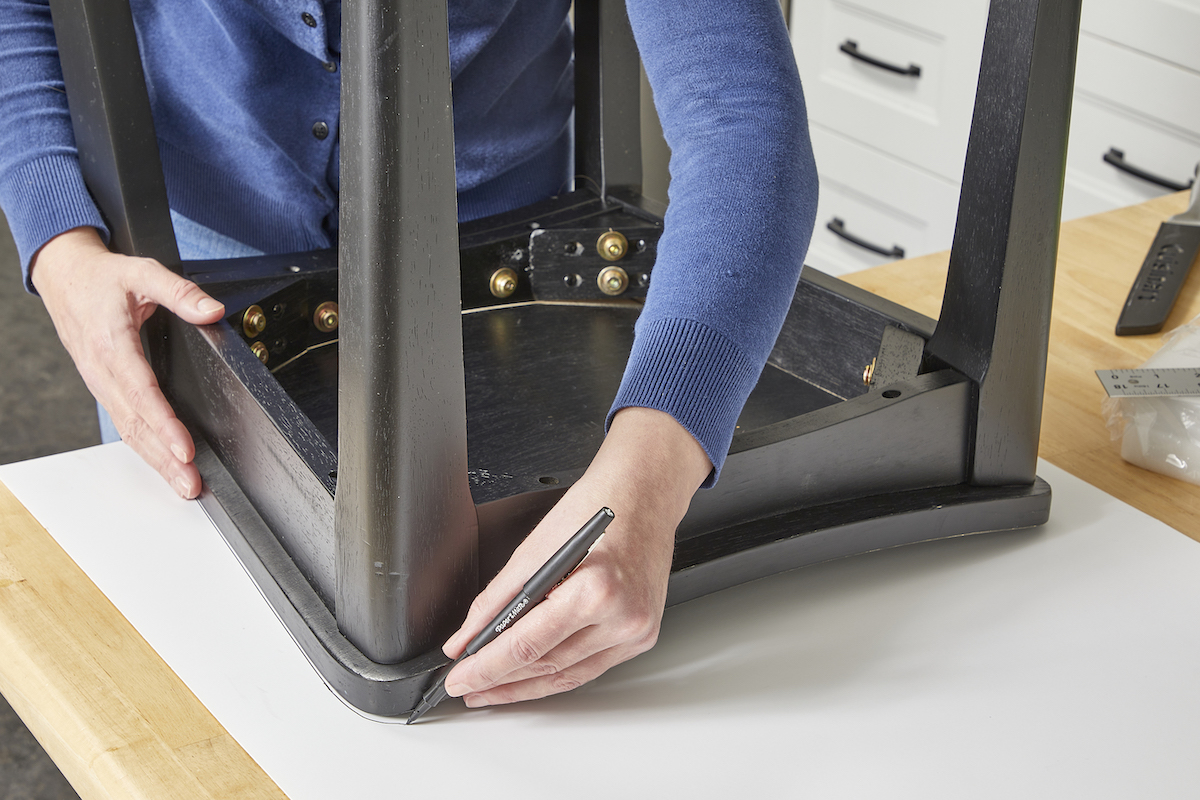
Photo: Tom Fenenga for Bob Vila
Final Thoughts
The methods described here center on how to trend high - density froth using a tried - and - tested approach path employed by both DIYers and professional upholsterers . This unconscious process works as well for any soft foam and helps check a in high spirits - quality finishing to your reupholstery undertaking .
The best way to ignore foam board , by contrast , is to use a sharp craft knife orbox cutter , with a straightedge as a guide . Do n’t rush : trim back too quickly can cause the vane to jump the straightedge and slue your fingers .
This Is the Year for a Kitchen Renovation
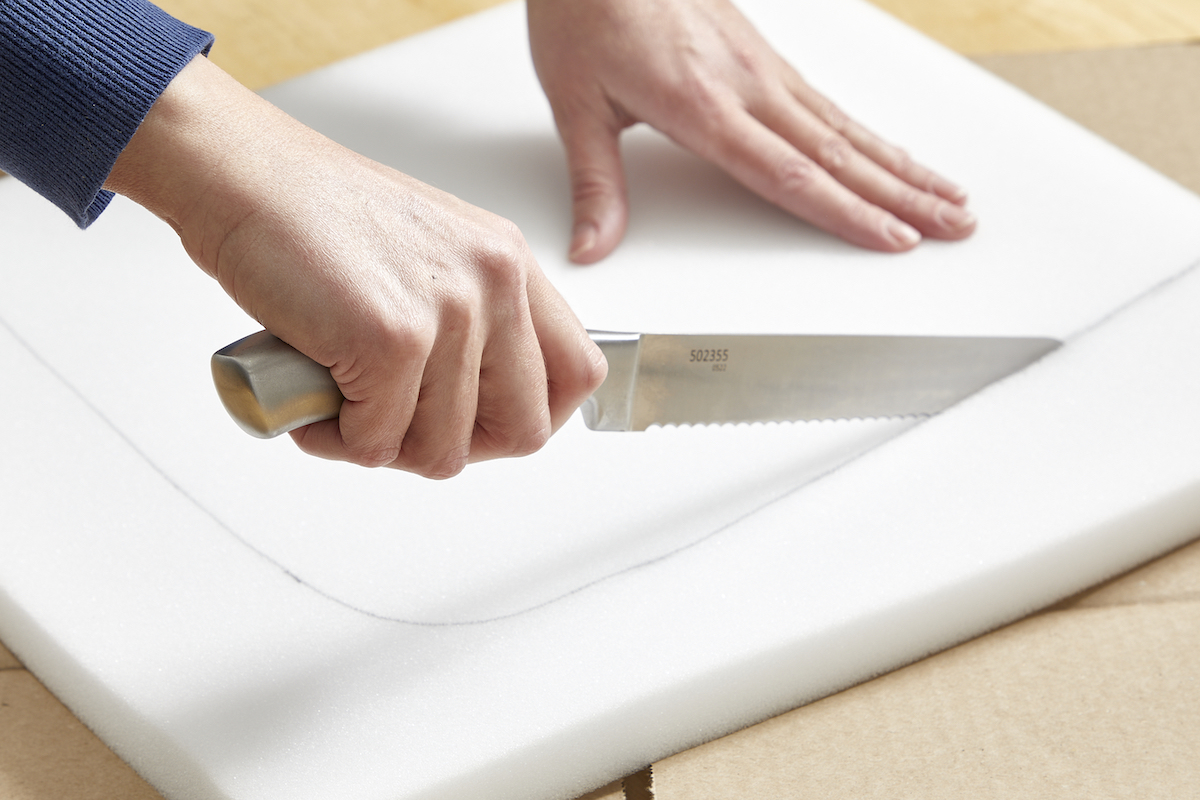
Photo: Tom Fenenga for Bob Vila
Whether you ’re selling or staying , everyone can get something out of a kitchen update . Learn why we consider this refurbishment the Most Valuable Project of 2025 and how to stay on budget .

Photo: Tom Fenenga for Bob Vila
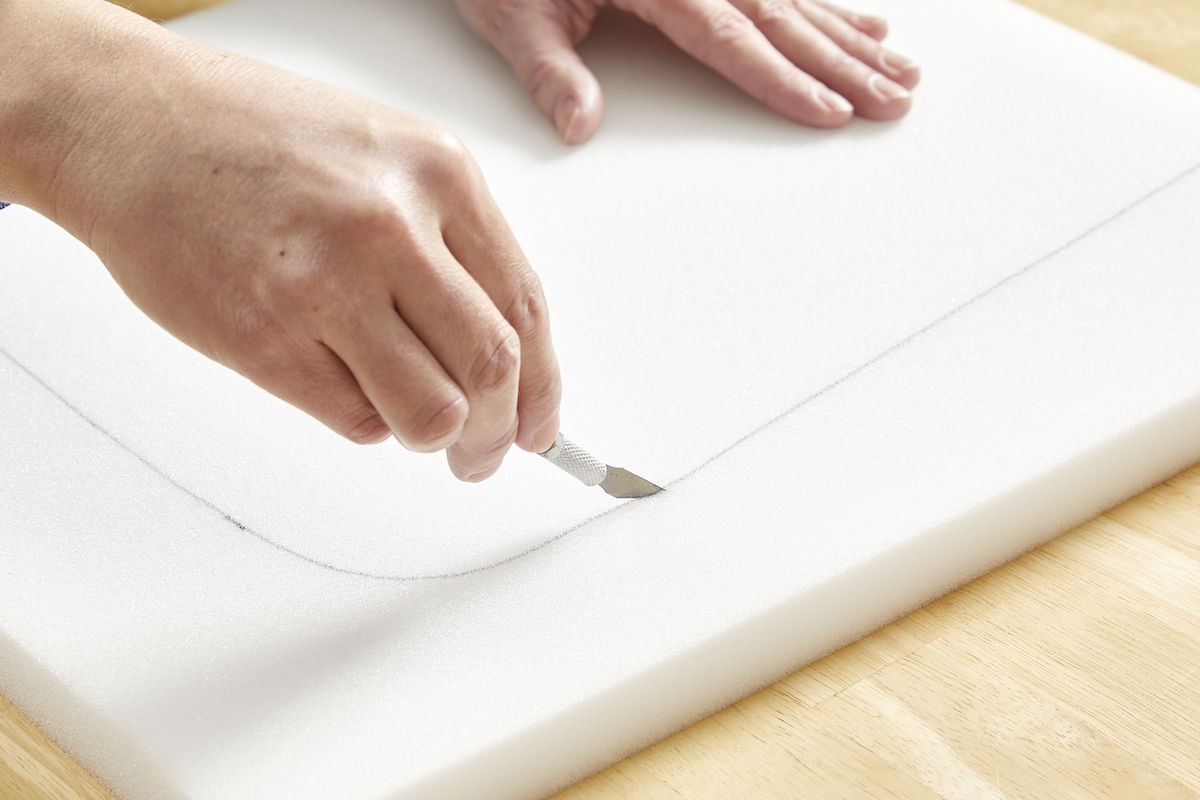
Photo: Tom Fenenga for Bob Vila

