We may clear revenue from the product usable on this page and take part in affiliate programs . Learn More ›
When you demand to repair a sidewalk , make a place to stack away a chalk can , or construct a little entrepot shed , a few basic concrete acquirement come in handy . A smallconcrete slab does n’t be muchto DIY , and the process is straightforward .
However , order the dirt , assembling concrete forms , and mixing and teem concrete require a bit of planning . It is also no small amount of physical study . Properly finishing the concrete will ensure that the young slab looks groovy , resists cracking , and remain functional for many year to come .
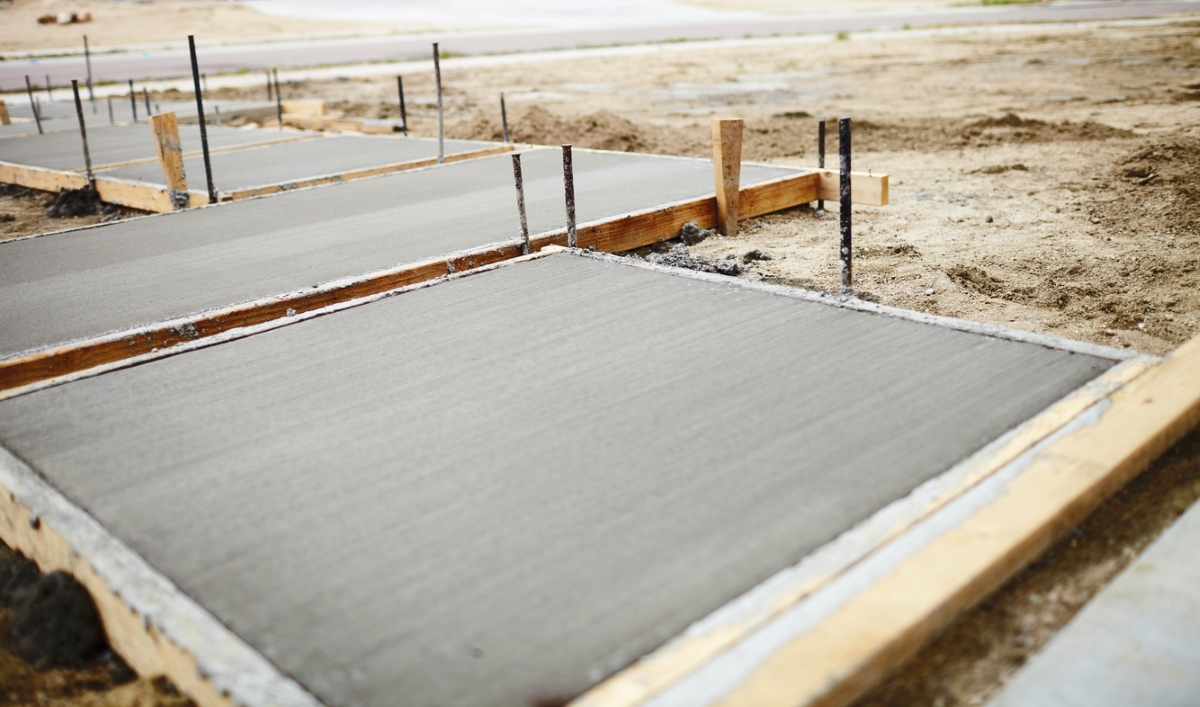
Photo: iStock
After the concrete has been poured into the forms , it ’s sentence to start finishing . The concrete finish process transitions the fresh pour concrete into a firm , smooth surface before it in full set . Doing it well call for close attending to the condition of the wet concrete , and decent timing each stride .
take on to learn about the necessary tool , techniques , and timing for a warm , indestructible , and attractive culture on concrete . After reading this article , you will better know how to land up concrete .
Tools & Materials
Bobvila.com may earn a commission from purchase made through these link .
Project Overview
Working Time : 30 minutesTotal Time : 2 hoursSkill Level : BeginnerEstimated price : $ 15 or more , depending on puppet that ask to be purchased
Before You Begin
Wet concrete is extremely alkaline , so the first ordering of business is to protect yourself from the risk of chemical burn . Whether you are mixing , pouring , or finishing concrete , be sure to wear rubber gloves to keep your hand dependable , and prophylactic glasses to protect your eyes .
Also wear long pants , a long sleeve shirt , and if you ’ll be stand in the pie-eyed concrete , rubber boot . If your bare peel issue forth into contact with wet concrete , wash it off with apparent piddle mighty away .
Before beginning the essential business of finishing , assume in idea these helpful tips :
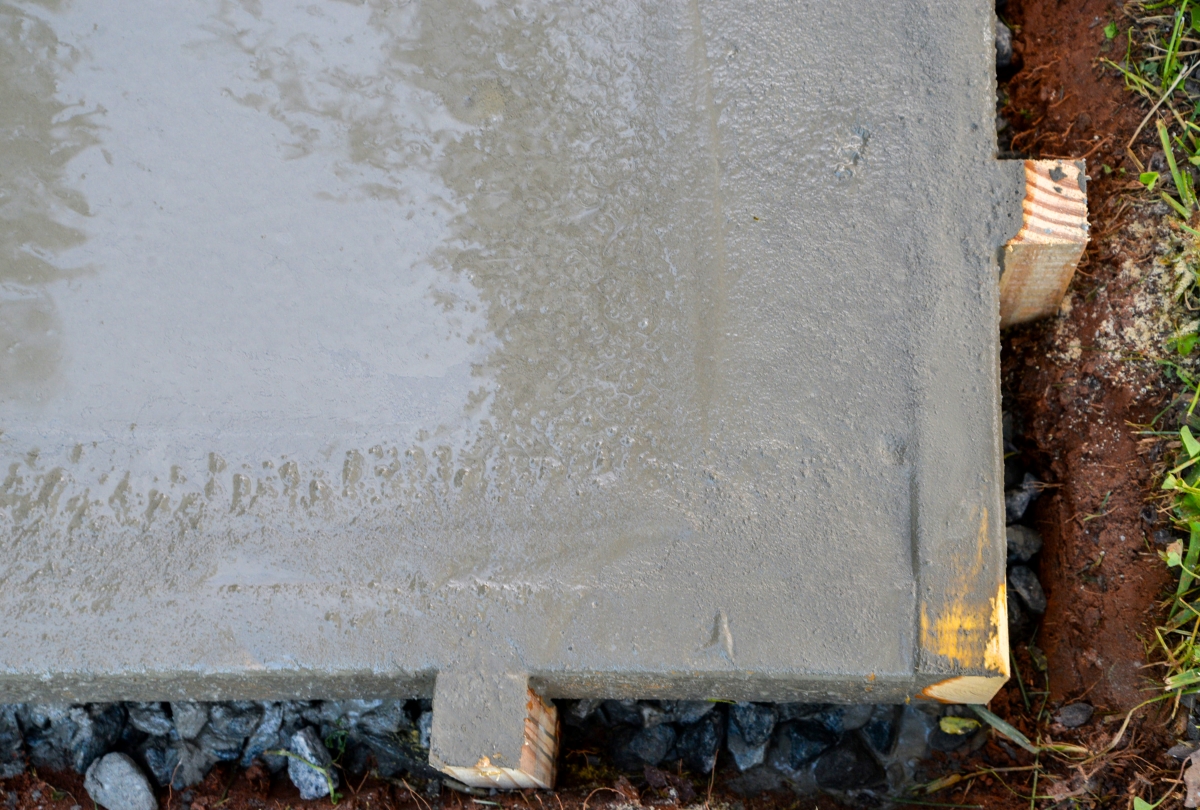
Photo: Debbie Wolfe for Bob Vila
Step-by-Step Guide to Finishing Concrete
Step 1: Spread the wet concrete evenly to completely fill the forms.
directly afterpouring the concrete , ensure that theconcrete formis completely and evenly replete . It may be necessary to move some of the soused admixture from high spot , using a trowel or flat shovel , to fulfill voids .
If the form seems to be full and the aerofoil is even , use a hammer to gently tap the sort on all sides . This vibrates the wet concrete and help it determine in position , preventing air pocket from form in the face of the concrete .
Step 2: Screed the wet concrete level at the top of the form.
The purpose of screeding is to make the concrete surface dead flat and level with the top of the form . For all but the little projects , it assist to work with a partner on this step .
Step 3: Float the surface of the concrete before bleed water appears.
Floating concrete implant the totality and start to get out supernumerary water to the top of the concrete . A handheld float or darby will suffice for small projects , but a Taurus swim bladder is a effective option for large slabs . For best event , raise the lead edge of the tool slightly as you move it across the Earth’s surface .
Use long wholesale stroking to smooth the entire surface of the concrete . Do n’t worry about creating a perfect texture at this point . We will cover up how to shine concrete in step 6 . After floating , permit the concrete to perch for at least 15 second before moving to the next step .
Step4: Edge the concrete after the water evaporates from the surface.
You may only call for to hold back 15 moment after blow the concrete , or it could take several hours . When the surface urine go away , it ’s time to begin the finishing touches , starting with the bound . A rounded edge help prevent breakage and chipping at the edges .
Use a hand-held edge tool to shape the rounded edge all the way around the border of the slab . As you move the edger along the form , keep the leading boundary slightly set up and apply gentle downward pressure on the following boundary .
Step 5: Add contraction joints at the proper depth and spacing.
A plane concrete surface is dependent to cracking that diminishes both the coming into court and enduringness of the slab . Adding grooves , or junction , minimizes uncontrolled crack by allow blank for elaboration .
With a clear 2×4 board as a pathfinder , use a handheld groover to score enlargement joints from edge to edge into the airfoil of the concrete . These joints should penetrate ¼ the depth of the concrete , or 1 - inch trench for a slab that ’s 4 in thick . Space them between 2 and 3 feet asunder for each inch of thickness , so every 8 to 12 feet for a 4 - inch - slurred slab .
Step 6: Broom the surface or refine it with a trowel.
The earlier stages of finishing concrete go away the surface monotonic and undifferentiated but with an inconsistent texture . The final tooling reckon on your project predilection . Brooming establishes an even textured surface , while trowel concrete at this stage progress to the surface of the concrete electric sander .
If you prefer smooth concrete you’re able to trowel finish concrete immediately after lend the expansion joints . start out at a removed edge and bring backwards to avoid marring the ruined work . Move the trowel across the aerofoil in broad wholesale motions with moderate downward pressure , always with the leading edge somewhat kindle .
For all - weather functionality , a broom finish search secure , remains durable for eld , and offers good walking or driving adhesive friction . Wait until the concrete has dry to the point that it no longer exhibit a tight sheen . Then , with a stiff bristle broom , applying just enough pressure to raise the grain of the concrete , encounter across the surface in recollective straight lines .
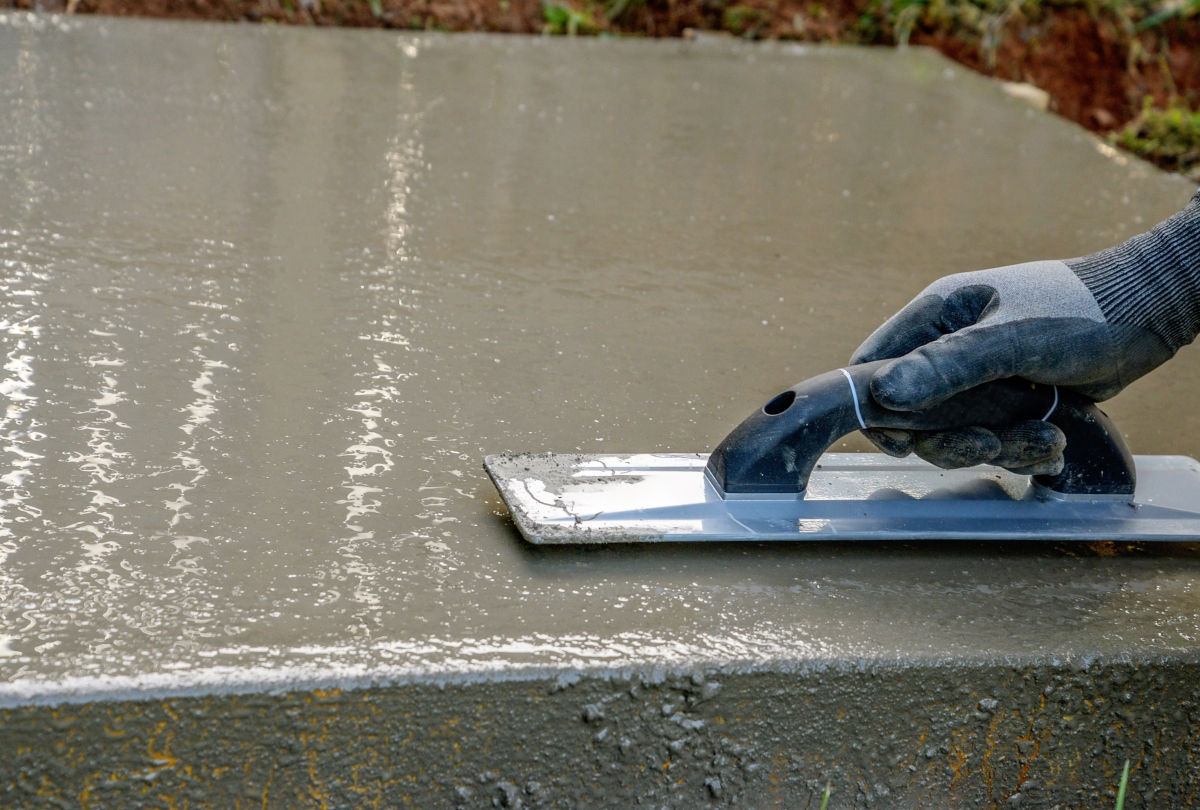
Photo: Debbie Wolfe for Bob Vila
Tried-and-True Advice
“ The slab is something you will look at on a regular basis so take the meter to tamp out breeze , trowel everything evenly and edge for a unadulterated form . I love a fluent trowel finis for pocket-sized slab , but brooming is far more efficient while working larger surface . Spend as much time as needed to get the final surface equally finished , and your project will front fantastic . ”
— Zach Lazzari , Contributing Writer
Step 7: Protect the slab until it hardens, then seal it after curing.
After all that punishing work , protect the still - pliable concrete open from metrical foot traffic , fall junk , and rain for at least 24 hour oruntil the concrete is teetotal . Use scrap lumber laid across the signifier to support a cover of tarps or plastic sheeting . This masking will also prevent the slab from drying too quickly which could cause crack under certain conditions . Do not appropriate foot traffic for 3 to 4 days , and no car for a week .
It takes about 4 hebdomad for a new slab to amply heal . After 28 day , it ’s meter to apply aprotective concrete sealant . Concrete sealant prevents surface damage , erosion , and staining , extending the life of the slab .
Final Thoughts
This Is the Year for a Kitchen Renovation
Whether you ’re selling or staying , everyone can get something out of a kitchen update . Learn why we deliberate this restoration the Most Valuable Project of 2025 and how to persist on budget .
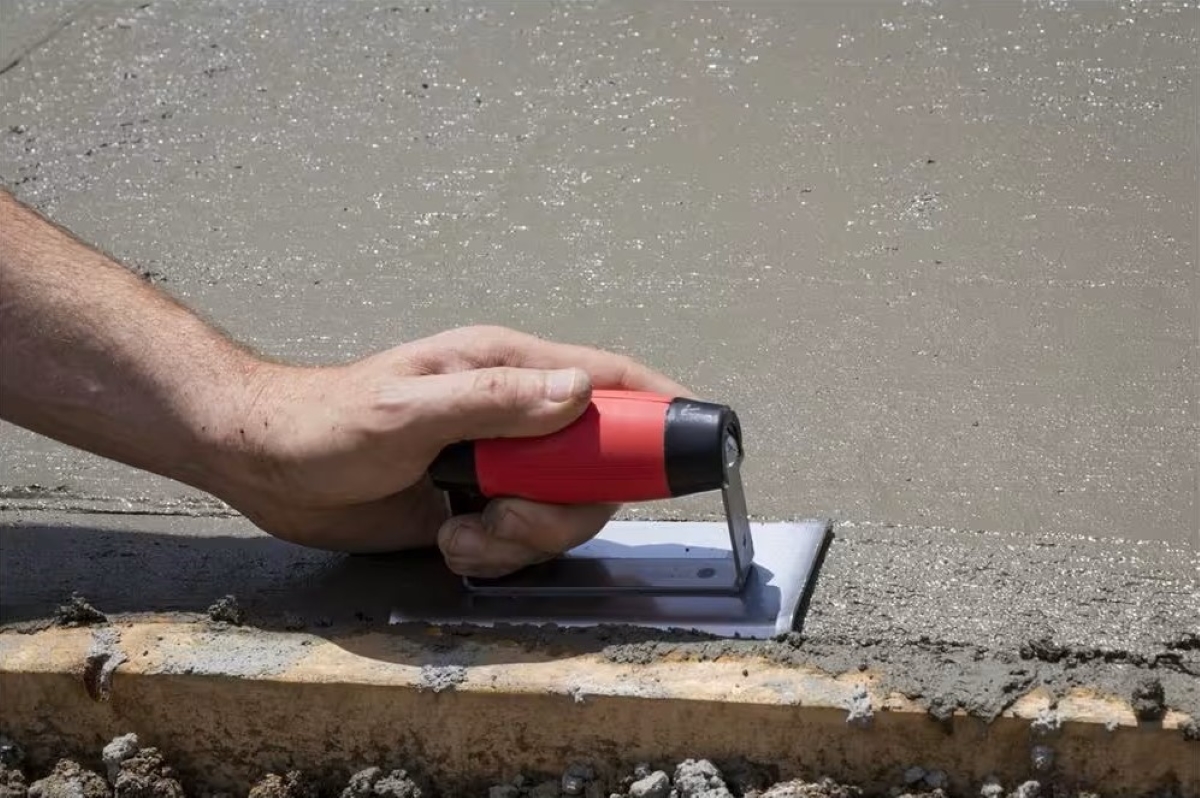
Photo: The Home Depot
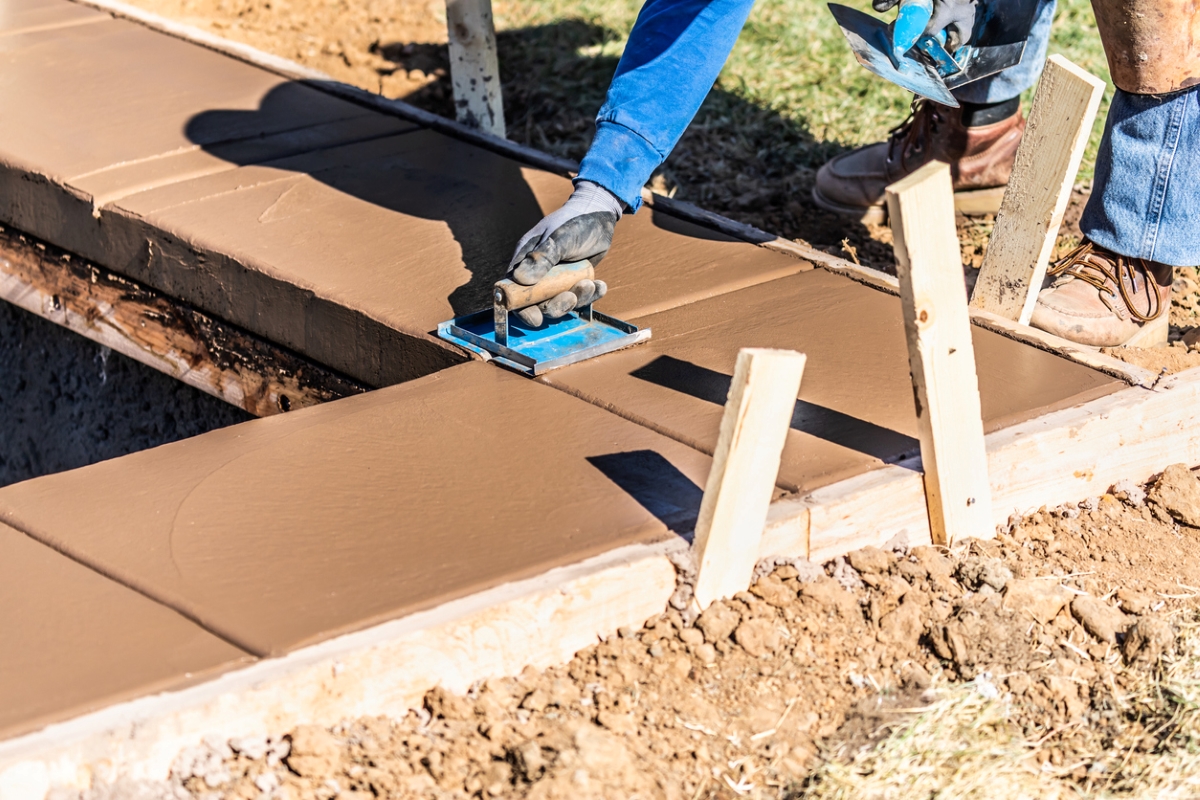
Photo: iStock
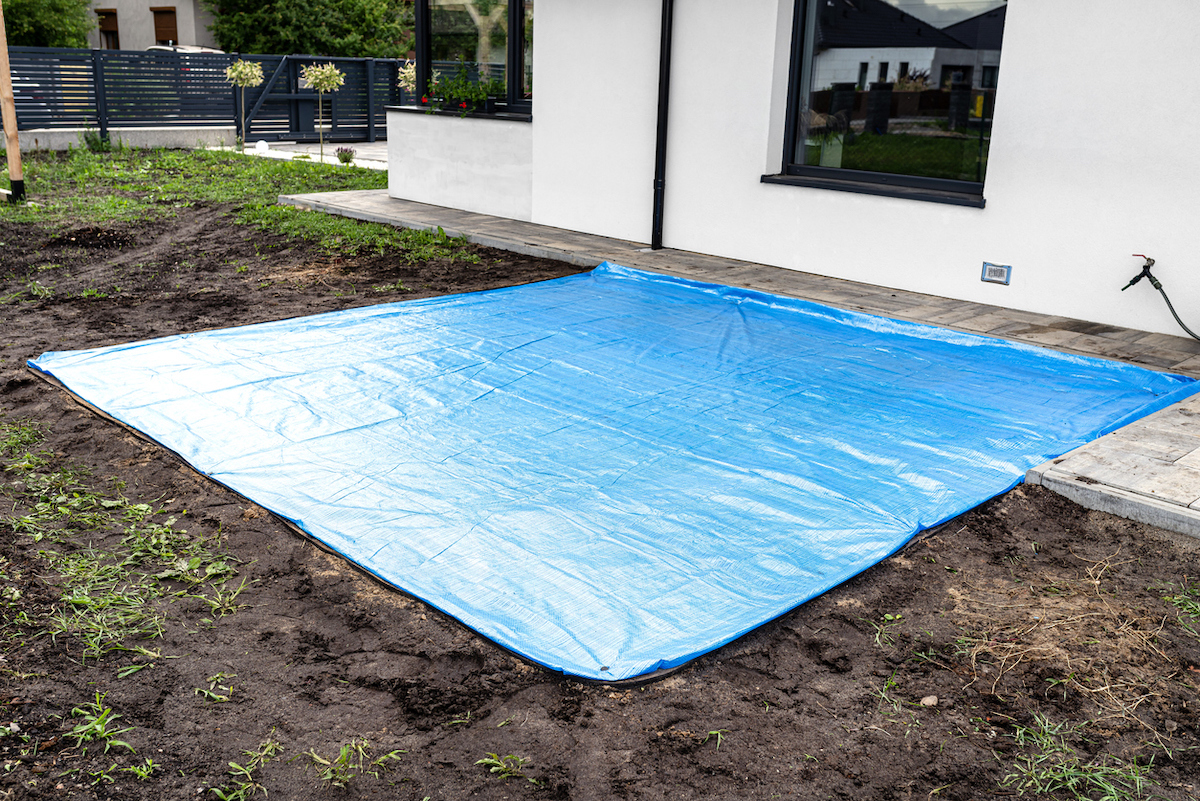
Photo: iStock


