We may earn revenue from the products useable on this page and enter in affiliate programs . Learn More ›
One of the most overlooked parts of abathroom sinkis the swallow hole plug ; this is because many the great unwashed do n’t understand the full design of the bathroom sink stopper . Even when the conversation stopper is n’t in the closed position , it is working to restrict the flow of water into the drain opening . This helps catch any debris that should not be washed down the waste pipe , like fuzz or cotton chunk .
However , to keep the cesspool debilitate stopper process properly , it should be withdraw and cleaned on a semi - regular basis . Learning how to fix a sink stopper is n’t difficult , but it is necessary to sustain your pop - up waste pipe . With this helpful pathfinder , you may also observe out how to put in a sink stopper replacement if your pop - up stopper is damage beyond fix .

Photo: Tom Fenenga for Bob Vila
Tools & Materials
Bobvila.com may garner a deputation from purchases made through these link .
Bathroom Sink Stopper Parts
Before you learn how to fix a sink waste pipe showstopper , first acquaint yourself with the most of import parts of a sinkhole stopple assembly .
Before You Begin
subside stopper assembly total with many humble persona , so it ’s advocate to have a bucket or another container nearby that can hold the parts when they are not in use of goods and services . This dewy-eyed stride can reduce the hazard of turn a loss these contribution before the sink stopper is reassembled . Additionally , when you are learning how to remove a bathroom sink stopper , keep in creative thinker that you should quash using force-out if the sump stopper is stuck .
Too much pressure can damage a porcelain cesspool , creating a more difficult state of affairs to resolve . Instead , use autility knifeor putty knife to dilute through the old plumber ’s putty in rescript to help loosen the swallow hole stopper . Remember to hold out protective gloves to help avoid personal combat injury when working with sharp objects .
Step 1: Determine what type of sink stopper you have.
The first step of cleaning and restore your sink stopper is to determine whether you have a traditional sink stopple forum with a pivot rod , reference bar , and lift rod to operate the plug , or if you have a universal bug out - up stopper with an intragroup spring mechanics .
Full cesspool stopper assemblies are easy to spot because they have a lift rod , which is typically located behind thebathroom faucetor between the hot and cold handles . you’re able to pull up on the gat to end the sink stopper . If you take a look under the sink , you ’ll spot the pivot rod extending out from the drain line to the university extension bar , which attaches to the pivot rod .
A universal sink stopple does not have this assembly . Instead , you may close down this type of stopper by pushing down on the stopper itself . reach the stopper by pushing down again . This simple fountain chemical mechanism is easy to apply and can be install in anysink drainwith the appropriate drain diameter . You do not require to set up a stopper drain pipe for this type of sink stopper .
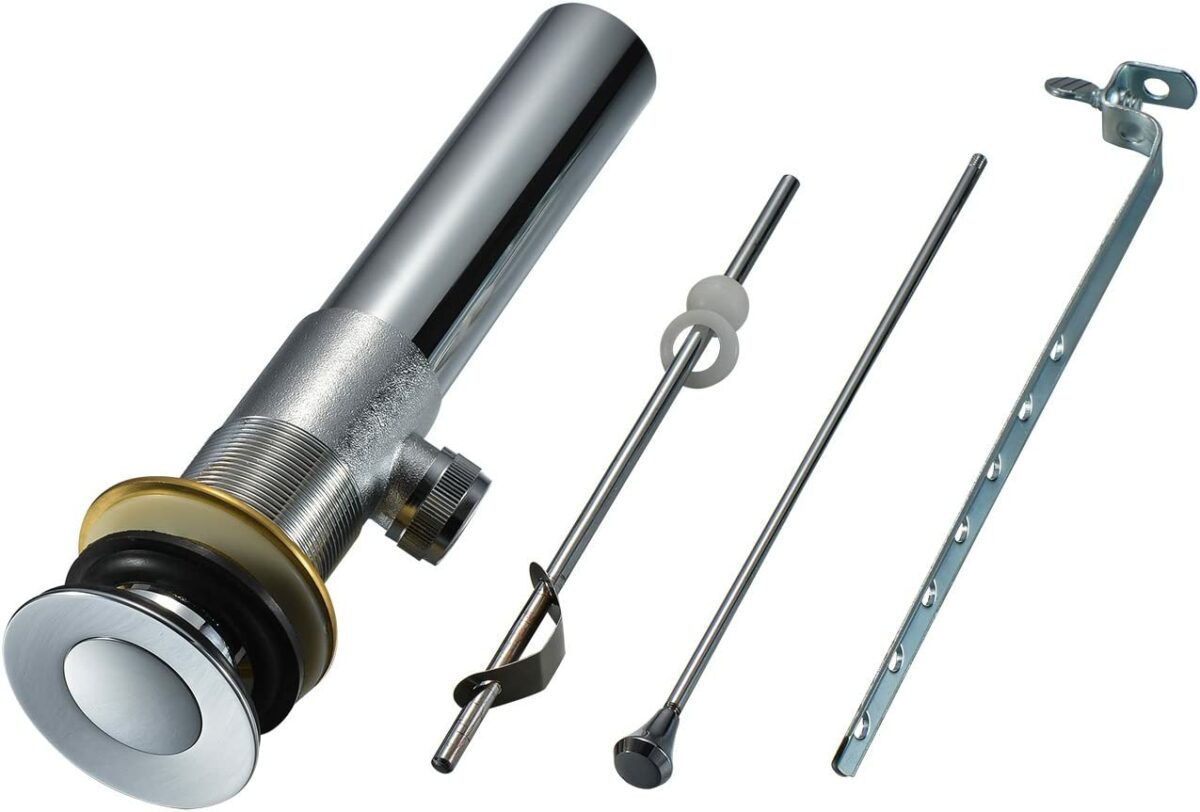
Photo: Amazon
Step 2: Take apart the existing bathroom sink stopper assembly.
If you have a ecumenical bathroom go down stopper , merely get to the existing stopper and pull up to remove it from the drain . The stopper should slide out relatively easier without puppet , but if it seems stuck , try usingchannel lock pliersto get a good travelling bag . Do not wrench the stopple out of the drain , as too much force can damage the sump . Gradually work the stopper loose by wiggling it back and onward as you continue to deplumate up on the stopper until it fall loose of the waste pipe .
For sinks with a sink showstopper assembly , you will demand to start by squeezing the give clip on the extension bar and disconnecting it from the pivot rod . Next , unscrew the pivot nut and pull it out of the stopper drain . You will also have to disconnect the extension bar from the lift rod , then root for the rhytidectomy gat up and out of the spigot .
Lift up on the sink stopper to pull it out of the drain , train aid to avoid damaging the stopper . Loosen the nuts on the atomic number 15 - trap and disconnect it from the drainage pedigree to give yourself enough space to unthread and remove the conversation stopper drain seat pipe from the undersurface of the sink . Finally , apply a set of distribution channel lock plyer to relax the safety nut that holds the drain in place , then labour up on the sump drain from below until there is enough protruding from the cesspit to get a good grasp . Pull it out of the drain hole , and sic the part aside for review , cleaning , and reassembly .
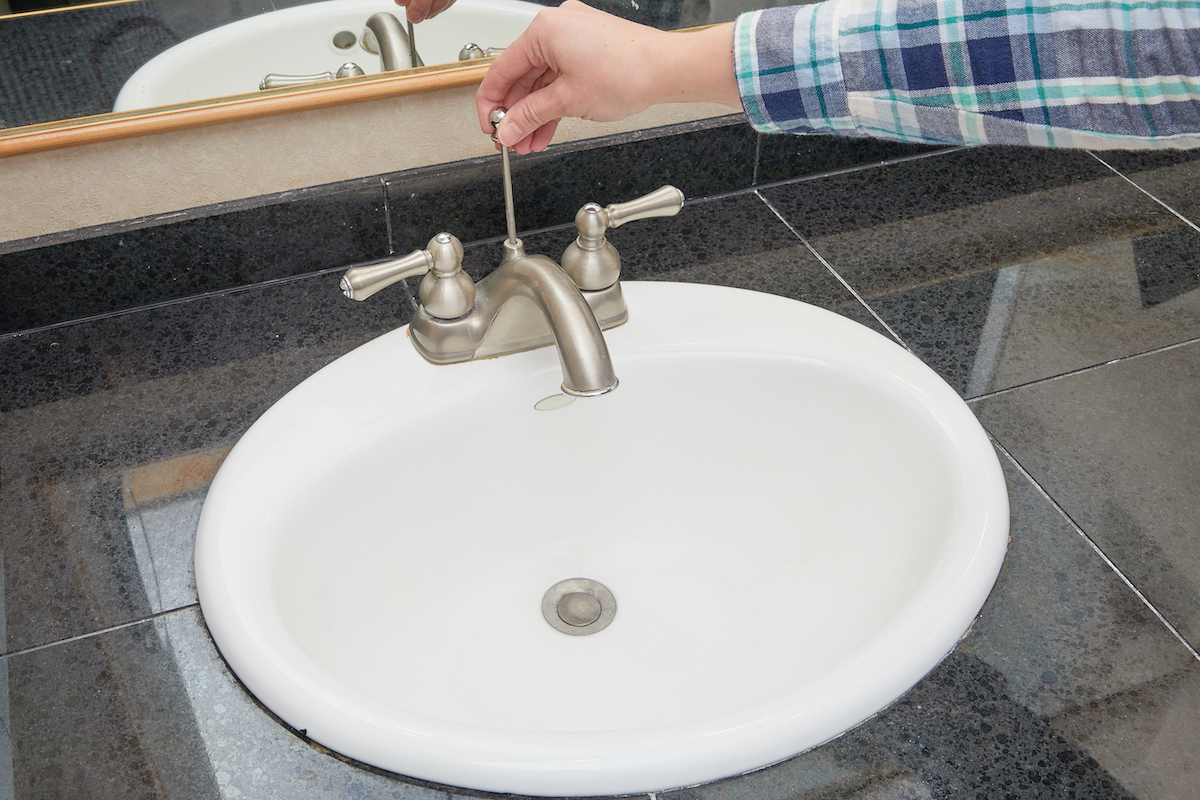
Photo: Tom Fenenga for Bob Vila
Step 3: Thoroughly clean and inspect the parts.
Stoppers can createsink clogsif they are not regularly cleaned due to the buildup of detritus . Often , if you are havingproblems with your cesspit draining slowlyor the stopple not sealing properly , the issue can be resolve by cleaning the section . Use a gentle - bristle brush with a mild cleaning resolution or even acetum to soundly make clean the various division of the sink show-stopper assemblage .
When the function are clean , you may inspect them for any signs of significant vesture or damage . If the component are in good stipulation , skip to Step 5 . However , if the parts are damaged or significantly careworn , then you will require to get individual substitution parts that are compatible with the current stopper or put back the entire conversation stopper assembly .
Step 4: Replace broken or severely damaged parts.
During your review , you may find parts that are sternly damage or break in entirely , but this does n’t mean that you will need to supercede the entire assemblage . channelize to your local home plate improvement store or search online for replacement parts that are compatible with your existing sinkhole stopper system of rules .
You could also purchase an exclusively fresh sump showstopper assembly , or take this opportunity to switch to an easy - to - maintain cosmopolitan start - up showstopper with an interior spring mechanics . Regardless of your choice , be sure to check the Cartesian product information before purchase to ensure that the sump stopper you opt is compatible with your cesspit . break up the pieces of the new pop - up gathering , then unscrew and slay the climb up screwball from the drain tailpiece . set up the plastic automatic washer , then the rubber washer ; bear on them all the manner down on top of the climb up nut .
Apply a thin layer ofpipe joint compoundto the top side of the rubber washing machine that will fit against the sink . Using joint compound on the rubber will ensure that it seal against the bottom of the sink drain opening . While pipe joint compound is not rigorously necessary , without it you might have hassle get the rubber to seal .
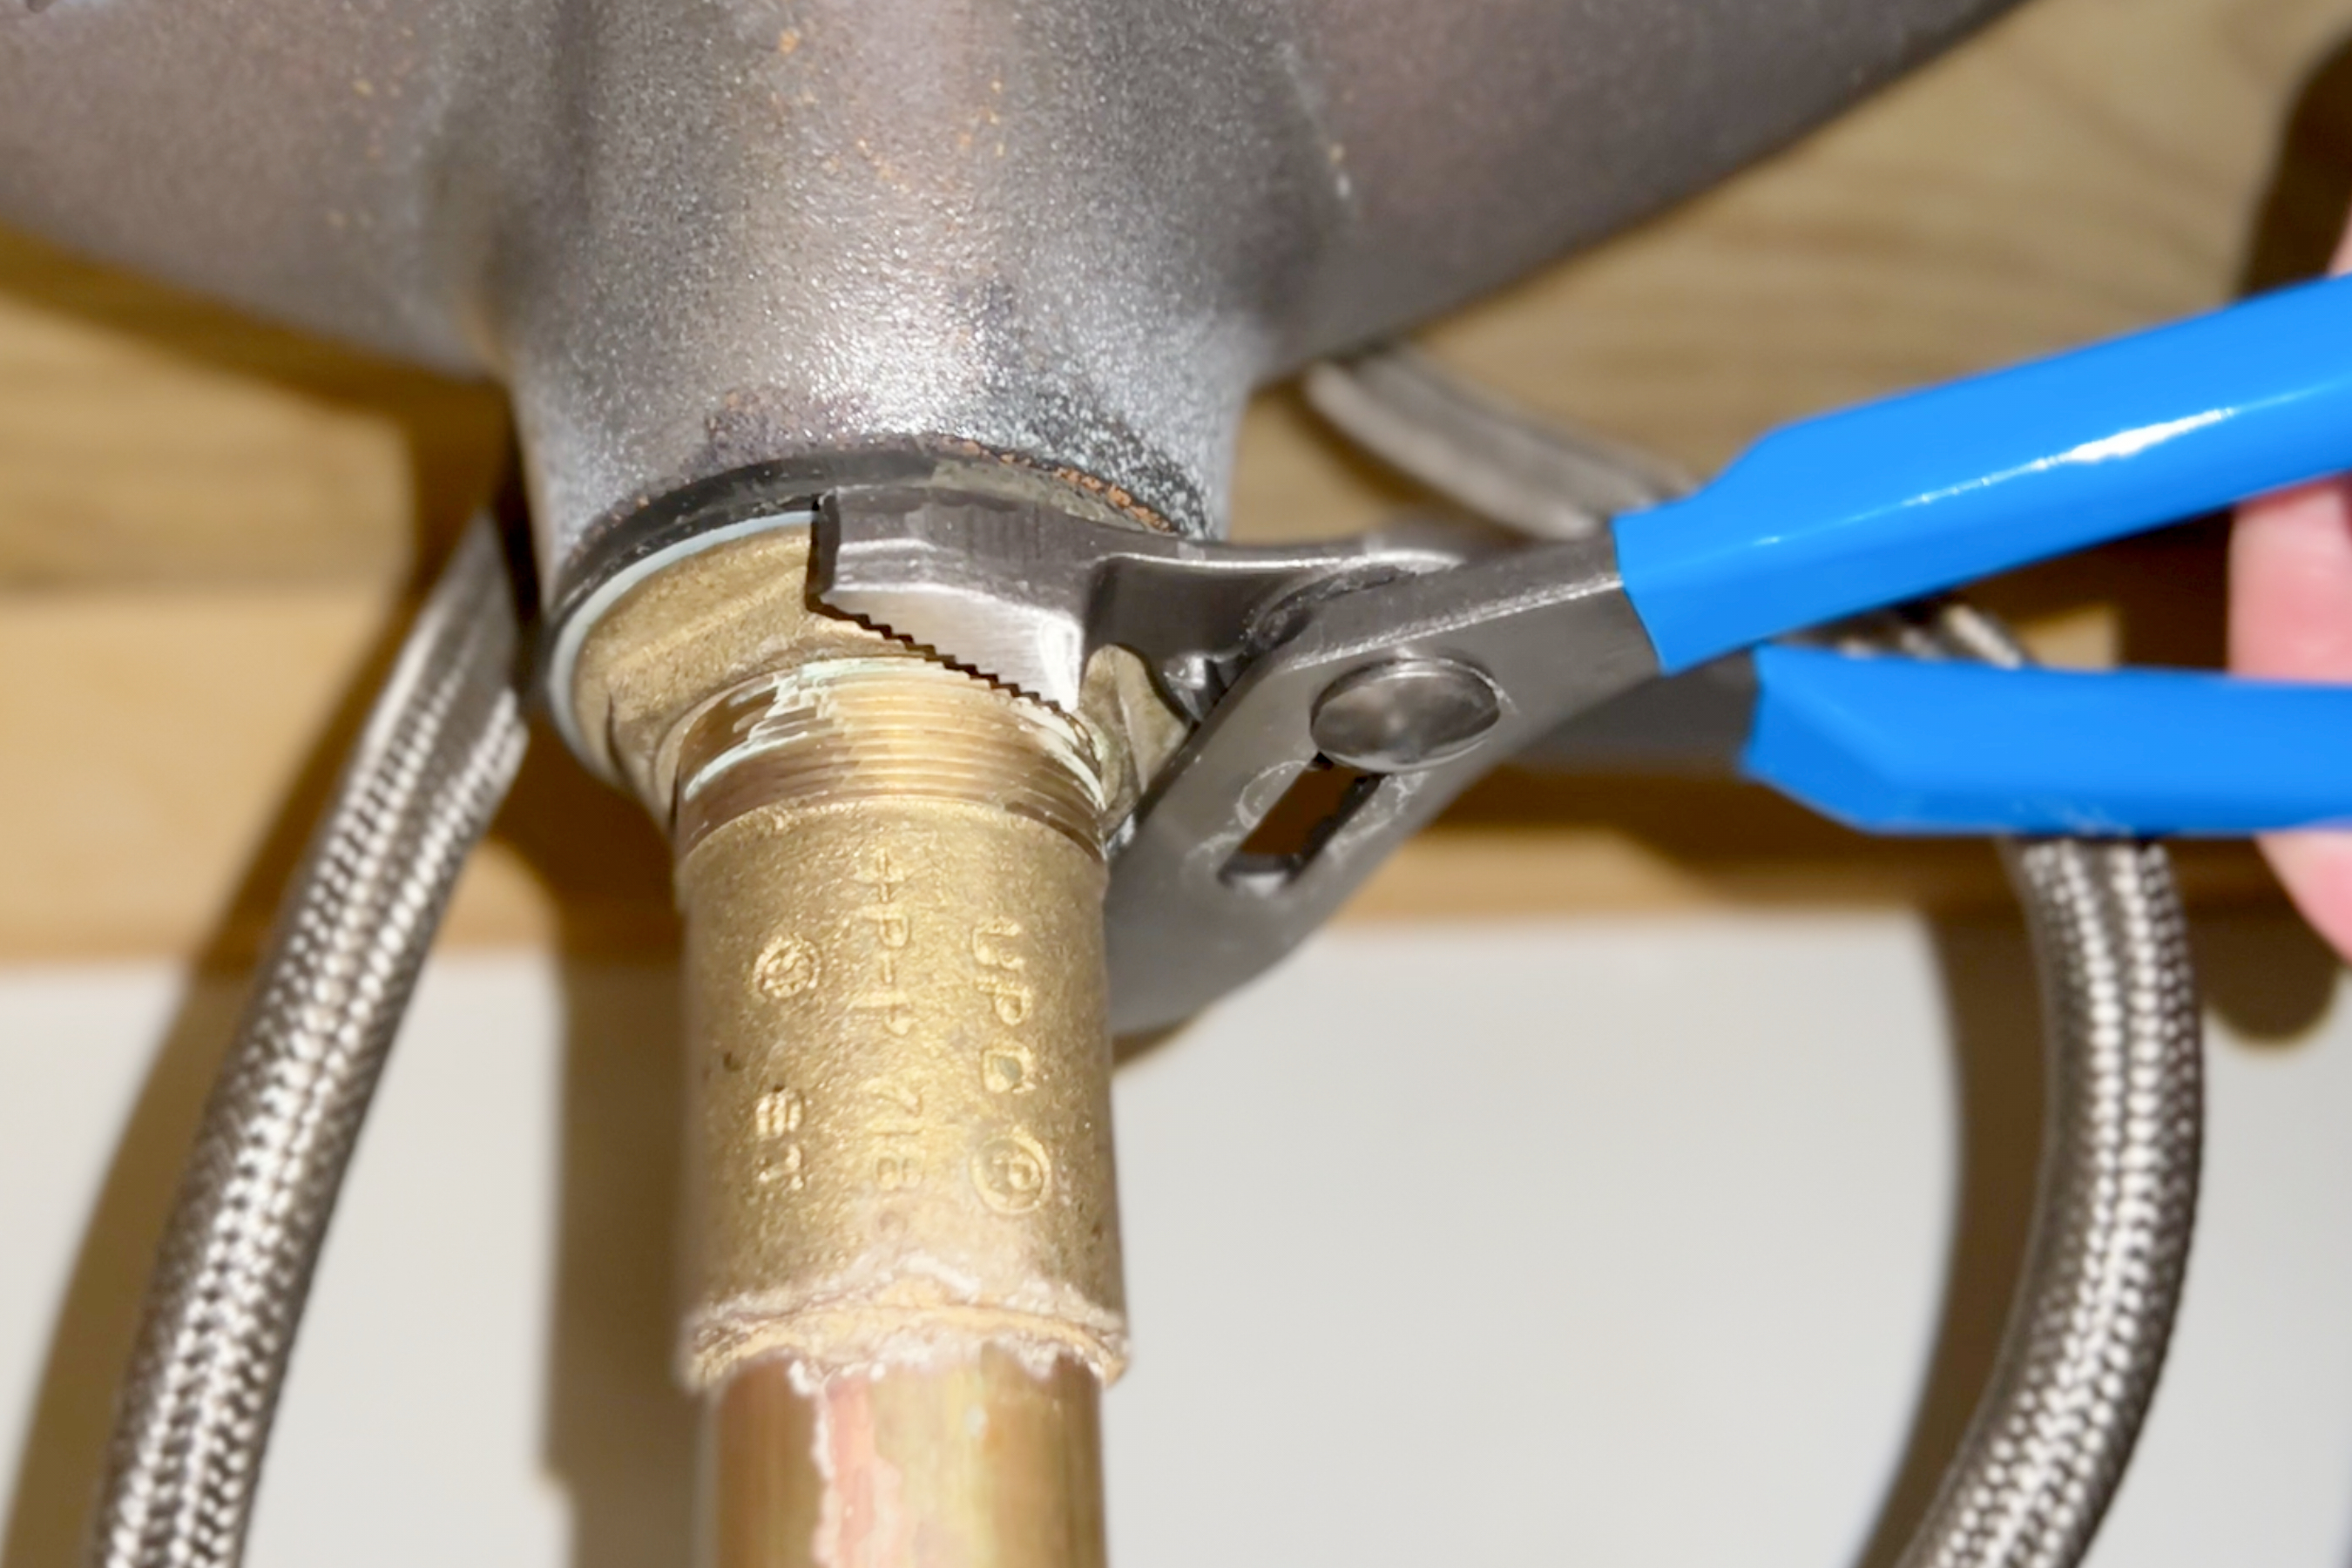
Photo: Tom Fenenga for Bob Vila
Push the pop - up drain tailpiece assembly up through the drain opening from under the cesspool as gamy as you could . While holding the drainage opus in place , go the drain gang into the opening from above the sink , and thread the closed chain onto the drain tailpiece as far as you may by hand . ( Make indisputable the piece are threaded correctly and are not crabby - threaded ) . For now , it only demand to be hand - tightened to hold it in place .
From under the sink , sustain the drain tailpiece motionless with one hired hand and fasten the mounting nut upwards toward the bottom of the cesspool . verify the opening in the tailpiece ( where the bulge - up pivot lever will fit ) is pointing straight back toward the wall . Tighten the mounting addict with channel lock chamber pair of pliers while continue to concord the tailpiece in place . Do not over - constrain this nut , only make water sure it ’s secure enough to keep the drain fabrication from spinning in the drain possible action .
Tried-and-True Advice
“ The clevis has numerous golf hole through which you’re able to thread the pivot gat . visualize out which hole is the right one when you ’re hunch over under the sinkhole with very small space in which to work can be an usage in defeat . Eliminate the guesswork by marking the right hole on the clevis before disassembling the stopper assembly . When you ’re reassemble the cesspool conversation stopper you ’ll know which golf hole to practice without any need for trial and error . ”
— Tony Carrick , Contributing Writer
Step 5: Reassemble the bathroom sink stopper.
After cleaning the existing part or sourcing fresh parts , you’re able to come out to reassemble the bathroom bury stopper . Roll out a ring of plumber ’s putty and target it around the drain chess opening , then slither the drain down through the drainage golf hole and ensure the safety nut with a stage set of channel ringlet plyers . Some of the putty will be squeeze out around the top rim of the drain , so just pass over away any excess putty with a moist tag end .
Apply the organ pipe joint compound to the threads of the stopper drain tail end pipework , then reattach the stopple drain pipe to the drain . realine the P - trap and secure it to the drain line by tightening the nuts , then enter the stopper into the drain until it fit snugly in the drainage hole . slither the lift rod down through the spigot and reattach it to the extension bar . Next , put in the pivot rod into the plug drain pipe and tighten the pivot nut to hold it in situation . Reconnect the pivot retinal rod to the extension bar by draw the spring clipping onto the gat . control to check that the pop up - up stopple opens and closes fully . If it does not , you could align the angle of the pivot rod cell by skid the spring clip up or down the extension measure .
Step 6: Test for leaks and functionality.
execute the piss and check the waste pipe line for making water coming from the P - trap , stopper drain pipe , drainage , or pivot nut . Also , take the chance to shut the sink stopper and meet the sinkhole with water to screen whether the stopple has a strong seal that can prevent the water system from flowing into the drain . When you are satisfied that the system is not leaking , you should also test the flow rate of water with the stopper open . Run piddle into the cesspool with the plug in the open position to see how quickly the water drains out of the sink . If the water seems to be draining slowly , the pivot pole may need to be adjusted to allow the stopper to open up further .
Final Thoughts
Maintaining the base of your plumbing arrangement is inbuilt to having a working home . Not every problem can be solve with adrain snake in the grass . While cesspool conversation stopper are not view as of import as a can or a shower pass , these parts still postulate to be regularly cleaned , rectify , and replaced to avoid dull cesspool drain . The aboveboard steps listed above provide a simple walkthrough for the norm DIYer to learn how to fix a swallow hole conversation stopper .
Just keep in mind that it is much easy to clean and maintain a universal toss off - up cesspool stopper than it is to work with a more traditional pop - up stopper because Modern worldwide pour down - up stoppers run with an internal spring mechanism , instead of relying on a complex pivot man rod , elongation cake , and lift rod assembly . The only drawback to cosmopolitan pop - up stoppers is that you do need to push down on the literal show-stopper to either close or launch the stopper , while you would be capable to keep your hands out of the sink with a more traditional sink conversation stopper forum .
This Is the Year for a Kitchen Renovation
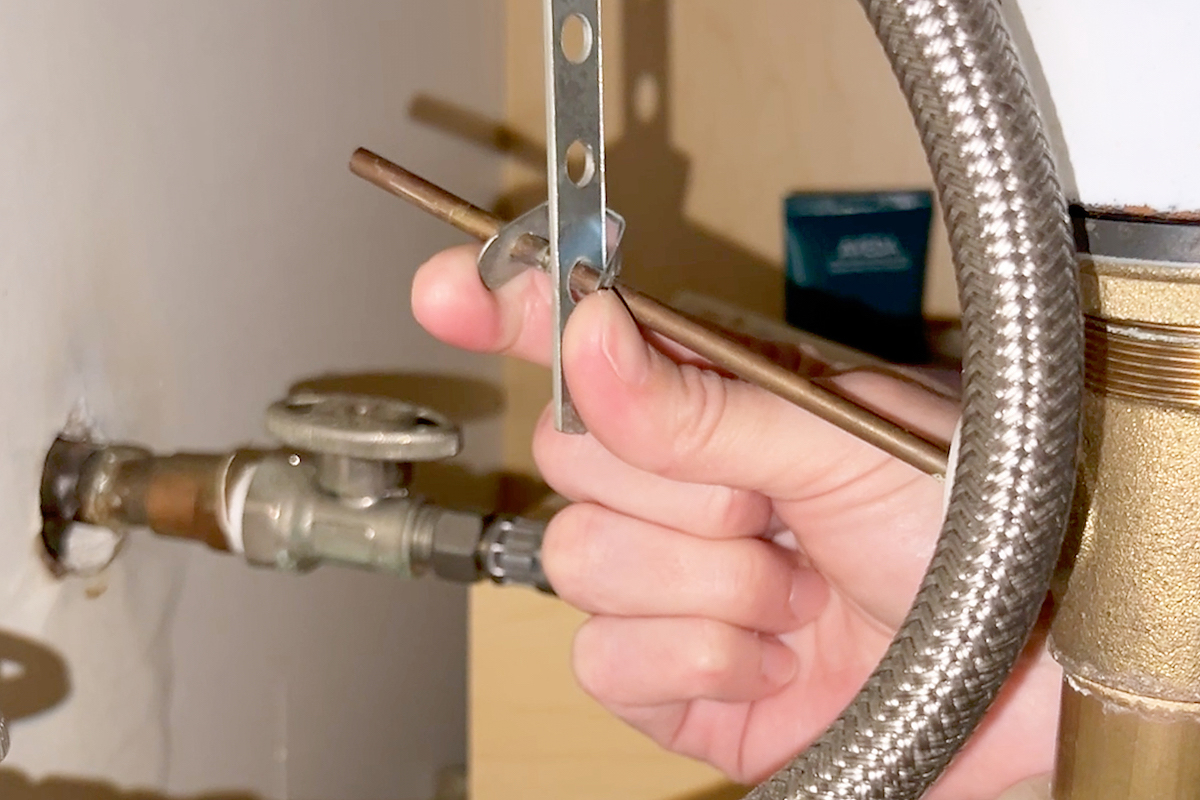
Photo: Tom Fenenga for Bob Vila
Whether you ’re selling or staying , everyone can get something out of a kitchen update . Learn why we look at this renovation the Most Valuable Project of 2025 and how to stay on budget .
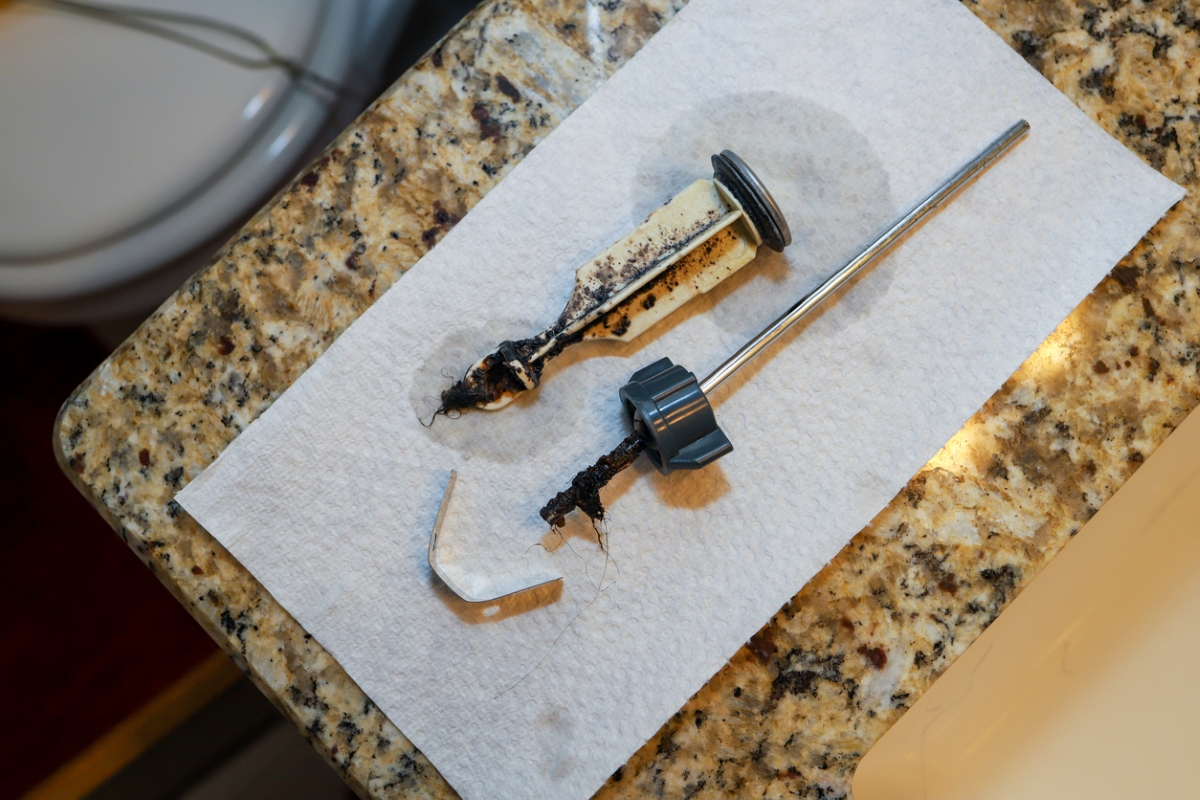
Photo: istockphoto.com


Photo: Tom Fenenga for Bob Vila

