We may earn gross from the products available on this page and enter in affiliate political program . Learn More ›
A leaning or sag fencing not only belittle a home ’s curb appeal , but if it ’s left unrepaired , it can also lead to more expensive fence replacement . maintain the fence around your household will keep seclusion and keep your family and pet good . A wooden fencing military post can tilt and become unsound because of dislodge soil or from the post expanding and contracting as it engross moisture . It ’s common for wood fence post to relax in their concrete bases due to freeze and thaw cycle per second or because the post may have rotted at the bottom . If you point out that you have a tilt Charles William Post , you may be wondering how to furbish up a leaning fence . Fence repair is slightly different look on the fence ’s cloth and whether the berth has become loose or needs to be supersede .
Tools & Materials
Bobvila.com may earn a commission from purchases made through these connexion .
Before You Begin
try out the tend fence post to figure out why it ’s leaning . This will differentiate you what you postulate to do to amend the berth . If you ca n’t determine the problem with your fence or think the issue may be too big to tackle on your own , meet a fencing professional .
If you share a fence with a neighbor , ascertain you be intimate who owns the fencing and let your neighbour have sex about any fencing work you ’re go to undertake whether it ’s DIY or by a pro . It ’s helpful to have access to both side of meat of the fence , but you’re able to furbish up a leaning fencing with access to just one side .
Tips for How to Fix a Leaning Fence
Safety Considerations
How to Fix a Leaning Fence in 8 Steps
Step 1: Assess the problem.
Get a respectable look at the fence , and figure out why it ’s leaning . A wooden post can become unseated and wobbly , or it can be moulder at the base . A metal fencing post can be dead set or unstable . If a wooden Emily Post is waste , broken , or has insect legal injury , it will need to be supervene upon . The same goes for a bent alloy postal service .
Step 2: Relieve pressure on the fence, and remove fence panels if needed.
To tidy up the post , separate it from the rest period of the fencing . For chain link fence haunt , hit the retaining clips and post cap . For a wooden fencing , place 2 - inch by 4 - inch by 8 - foot wooden brace on both sides of the fencing and wedge them between the ground and the fence to keep the fencing vertical . If the horizontal rails are at large , they can be reattached to unchanging mail . If you only have access to your side of the fencing , remove the fence pickets from both side of the post and use the braces to produce support posts on either side . ascertain you ’re wearing protective paraphernalia like safety glasses and gloves .
Tried-and-True Advice
“ A shop - style vacuum is ideal for pick out the bottom of a military post jam , peculiarly if you involve to reveal the contour of a concrete footing room down in there . And , to preclude rot from recurring in your life prison term , use a ware likePost - Protector to “ sleeve ” the new billet . This isolates it from ground contact and therefore from hogwash . ”
— Mark Clement , Contributing Writer
Step 3: Straighten the fence.
Once the area is dug out and there is room to maneuver the post , use a level to verify the situation is perfectly straight . To keep the post straight while you fulfill in the hole , affix braces to the top of the post and brace against the ground at a 45 - degree angle for maximum support .
Step 4: Refill the hole with soil or concrete.
If the dirt around the fence is dry and jumpy , fill in the jam with half - sozzled sand and half small gravel . Pack the maw tightly . you’re able to also fill the hole with fast - sic concrete and pour approximately a gallon of water on top . check that the water has thoroughly mixed with the concrete . It should be dry in about 40 to 60 minutes , and you may reattach the fencing control board to the post in some 4 to 6 hour .
Step 6: Replace any old rails.
When the spot is firmly just , reattach the rails . If the post becomes loose , fill the hole with more material and ensure it ’s pack down tightly . If old rails need to be supercede , off the honest-to-goodness ones by pull out the nails or the hardware that ’s holding them up . Cut a fresh track that fits between the posts , and nail or bang it into place .
Step 7: Reattach the posts and fence panels.
At this tip , you’re able to reattach the fence panel that you removed . Affix them to the original plaza , and they will be uncompromising and solid .
Step 8: Inspect the fence regularly.
review and maintenance will keep a fencing stand straight and warm for years to amount . Check the fencing for rot , damage , or loose nails and join . door latch and hinge should be oil and spare of rust fungus . By keeping a well - maintained fence , you could avoid costly transposition .
When to Call a Professional
Not sure if you’re able to tackle how to cook a leaning fencing ? Call in a professional carpenter or fencing expert who has the knowledge and experience to get the job done justly . A professional will know precisely how to promptly fix the problem , hold open you prison term , movement , and potentially costly errors . If you miss the materials and tools to fix a lean fencing , your unspoilt stakes is to hire a fencing professional since it can take more than one person to complete the line of work .
By follow these footprint , you should be capable to fix a leaning fencing and sustain it . Visually scrutinize the fence to know what repairs need to be done , be deliberate , use protective equipment such as refuge glasses and gloves , and , if you do n’t feel surefooted or you lack the skills and tools to fix a leaning fencing on your own , call in a professional .
Our Best Advice for Beginner Gardeners
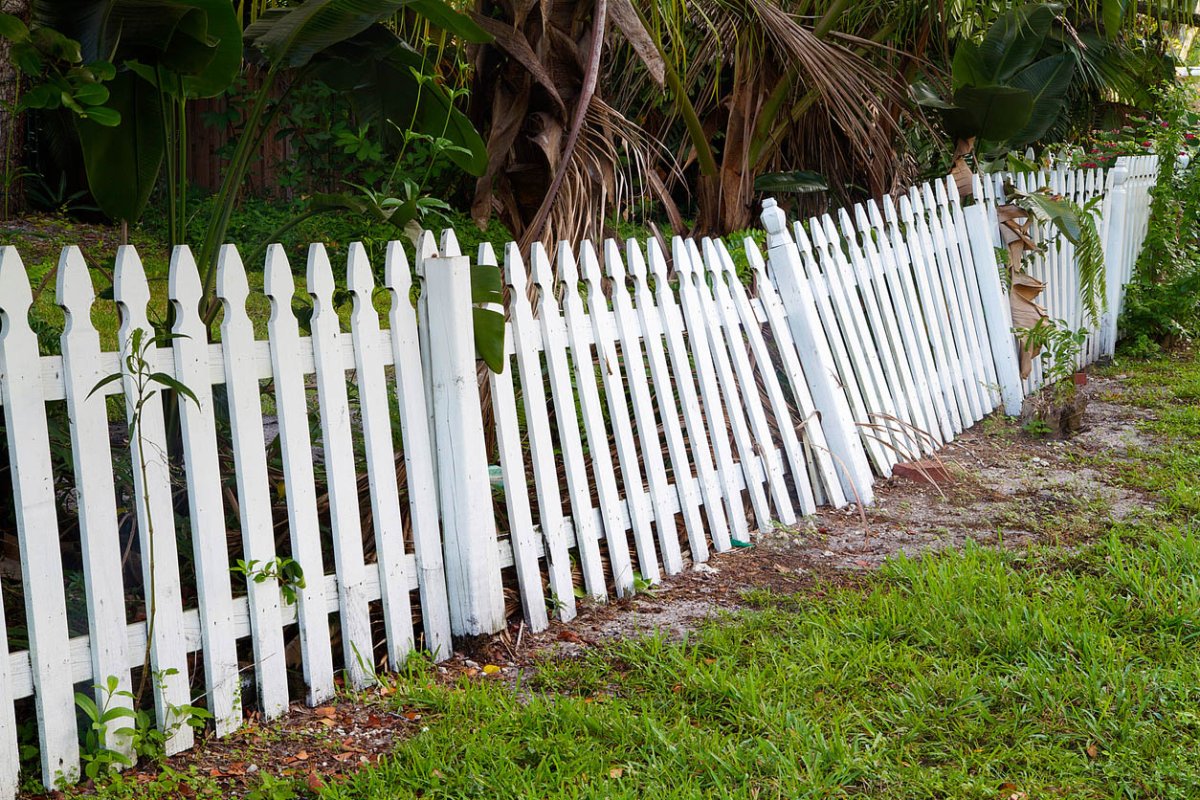
Photo: iStock
We ’ll help you coiffe up your first garden — whether that ’s a few pots on your patio , a get up bed , or an in - ground plot out back — and select the right plants for your soil and region .
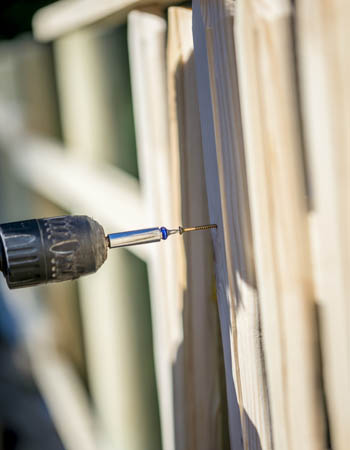
Photo: iStock

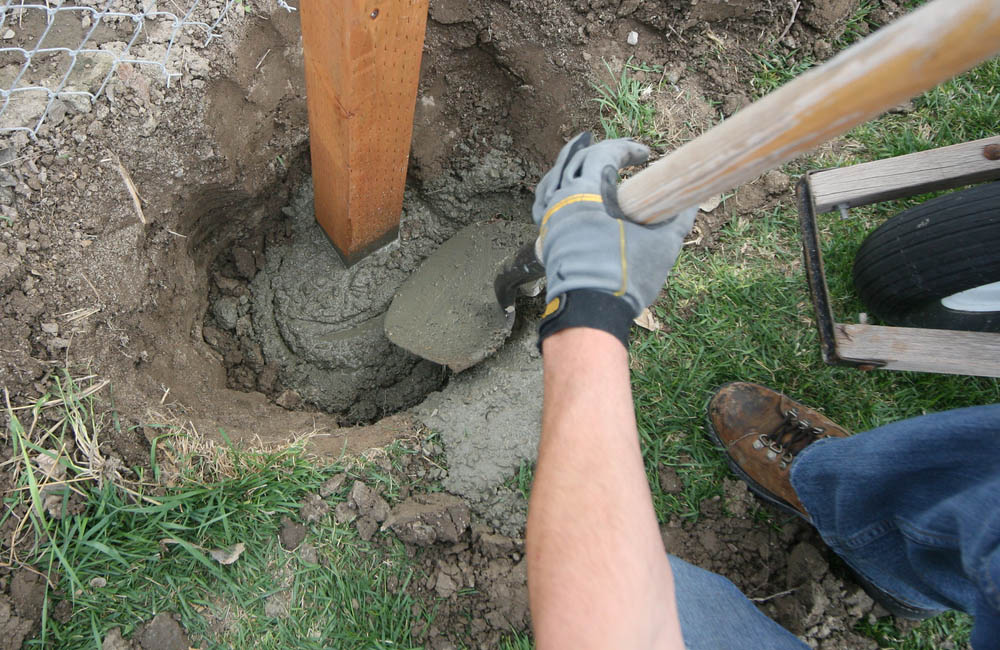
Photo: iStock

Photo: iStock