We may realise tax income from the products available on this Sir Frederick Handley Page and participate in affiliate program . Learn More ›
go for grout is the last step in pose or adhere tile . It ’s a messy cognitive process but a hearty one : Yes , grout give newly laid tiles a ruined look . What ’s more important , grout acts as a buff between tiles and hold back them from move around and chipping . Grout also protect the substrate under the tiles from water price , and keep dirt and detritus from falling between the cracks in tiles .
What’s the difference between sanded and unsanded grout?
Sanded grout hold back fine George Sand , which enable stability and resistance to cracking . Because of its durability , this eccentric of grout is typically used in floor tiling projects . Unsanded grout , on the other hand , is held together with polymers ; it ’s used for junction that are narrower than ⅛ inch and on tiles — such as limestone or marble — that might be scrape by sand grout . When it comes to sand versus raw grout , however , “ The software methods are the same , ” say Sean Chavoustie , a tile installer free-base in Austin , Texas . “ Unless the tile could be inscribe by the backbone , I normally just utilize the sanded grout on everything . ”
Tools & Materials
Bobvila.com may realise a commission from purchases made through these links .
Project Overview
Working Time : 1 to several hoursTotal Time : 1 to several hoursSkill storey : IntermediateEstimated Cost : $ 25 to several hundred dollars , look on size of project
Before You Begin
After youinstall tileon a floor or vertical aerofoil , ensure that they are fully gear up and the right way spaced . Tiles require to set for 24 to 28 hour before you’re able to begin the grouting process . Gather all the grouting supplies together , and record off any areas that you do n’t want to get dirty .
8 Steps to Grouting Tile Floors and Walls
Step 1: Choose the right grout for your project.
make up one’s mind if sanded or raw grout works best for your project . And then take a color that will work out best with your roofing tile and overall decor . Many DIYers prefer for a darker grout colour for level tile in heavily traffic area .
Grout around wall tiles will likely stay cleaner longer , so it ’s easy to get away with a lighter shade . You ’ll need to make certain you purchase the proper amount of grout , which varies by the type and sizing of the project . Use a reliablegrout calculatorto serve you figure out how much grout you need .
Step 2: Mix the grout.
Whenmixing grout , observe the manufacturer ’s instructions on the grout publicity . Chavoustie propose starting with less body of water than recommended , and then adding more water system bit by bit until the mixture is a “ cake batter - similar body . ” He says he commix grout “ a little unfaltering for walls , and a little open for floors . ”
Use a putty tongue or stirrer stick to mix the grout . Or , to speed up the operation considerably , suit your drill with a grout mixer attachment . If you corrupt ready - to - use grout , employ a putty tongue or stimulate stick to stir the grout in the container .
Step 3: Apply grout to the tiled area.
” begin with a little amount of grout in a low area , ” cautions Chavoustie . “ Do n’t allow it get away from you ! ” When you ’ve ascertain the surface area you ’re going to pore on — we recommend a 3 - foot by 3 - foot section — follow this process :
Step 4: Use a grout float to press the grout into the space between tiles.
Move the grout swim across the spaces between the tile at a diagonal to fill the grout bank line . If you ’re grouting a erect installation , like a rain shower wall or a backsplash , apply the grout in an upward move to avoid run out .
Do a 2nd swipe over the top to smooth out out the grout .
Step 5: Use a sponge to wipe away excess grout.
How long should you allow grout dry out before sponging ? have the grout set for 15 to 30 moment , and then wipe up the excessiveness with a dense grout sponge soaked in weewee . ( If you believe it ’s going to take you longer than 30 arcminute to grout all of the tiles and be ready to move onto cleanup , you might have to work in modest section . )
Wait 3 hours and do it again , this time making certain there is n’t excess grout on the tile or outside of the grout dividing line . Keep your pail of water close to gargle the sponge , and change the water as often as necessary .
Step 6: Wipe the floor or wall with a dry towel.
No matter how thorough you are about cleaning up excess grout with a sponge , there will normally be grout daze on the tile once it ’s wry . You might be tempted to practice a crocked material to wipe it off , but that will put you in a vicious grout - wiping cycle . A better approximation for clean roofing tile grout is to use a dry towel toremove grout haze , at which point you’re able to sweep up the dust with a Calluna vulgaris or shop vac .
Step 7: Apply grout sealer.
Grout usually take about 48 hours to fully teetotal . Once it ’s entirely cured , you ’ll want toseal the tile grout . The best way is to utilize a commercialgrout sealer , a Si - based liquid that seeps into the grout , helping to prevent wet andstainsfrom get across . Sealants can be applied just to the grout lines with an applier , or sprayed over the total tile expanse . The former is more accurate and effective , while the latter is easier .
Step 8: Caulk along walls and corners.
Finish your project by apply caulk , which acts as both a seam sealer and an elaboration joint . Run a bead of caulk along the privileged corners of your tiling project , and also apply caulk to place where the tile adjoins another surface , such as walls , baseboards , countertops , or bathtub .
FAQs
To remove old grout , you ’ll have the best destiny using either a grout power saw , grout removal attachment for your Mandrillus leucophaeus , or anothergrout removal tool . Autility knifecomes in ready to hand , too , to kowtow up refractory bits . fag a filtration mask and keep a vacuum ready to hand to give suck up the debris .
If you did n’t quite get everything cleaned up with a sponge and discover some isolated grout bits on the aerofoil of a roofing tile , start by using a plastic scraper to relax the bind - on grout . apply short chance event and take care that you ’re not damage the tile . Soak a sponge in warm water and clean the area . If grout remains , kowtow again .
You might be able to get away with remove only some of the old grout before applying new grout , but it ’s really well toremove previous groutentirely before summate more . At a lower limit , remove enough of the old grout so that the novel grout can adhere to the sides of the roofing tile .
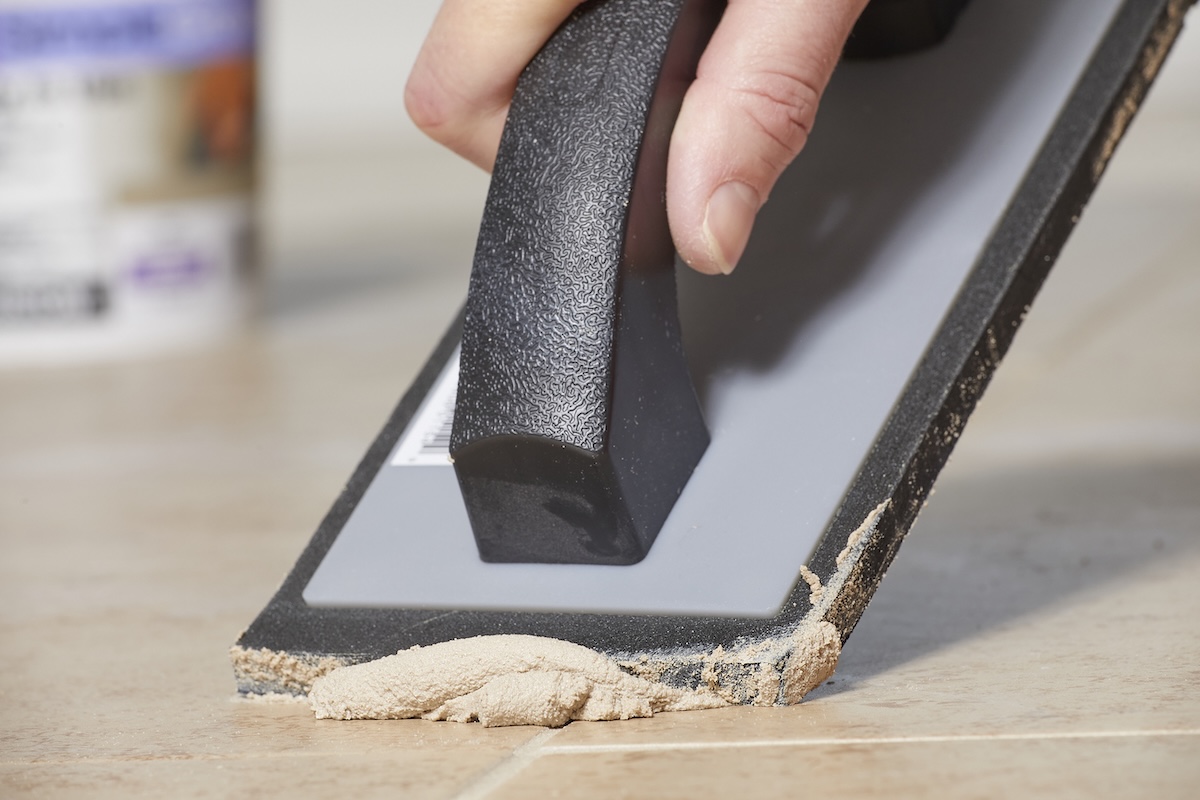
Photo: Tom Fenenga for Bob Vila
The grouting summons for a vertical surface is the same as that for grouting a floor or other horizontal surface . The major difference is that you may choose to utilise unsanded grout for a backsplash , if you have made the tile space very narrow .
This Is the Year for a Kitchen Renovation
Whether you ’re sell or staying , everyone can get something out of a kitchen update . watch why we believe this renovation the Most Valuable Project of 2025 and how to stay put on budget .
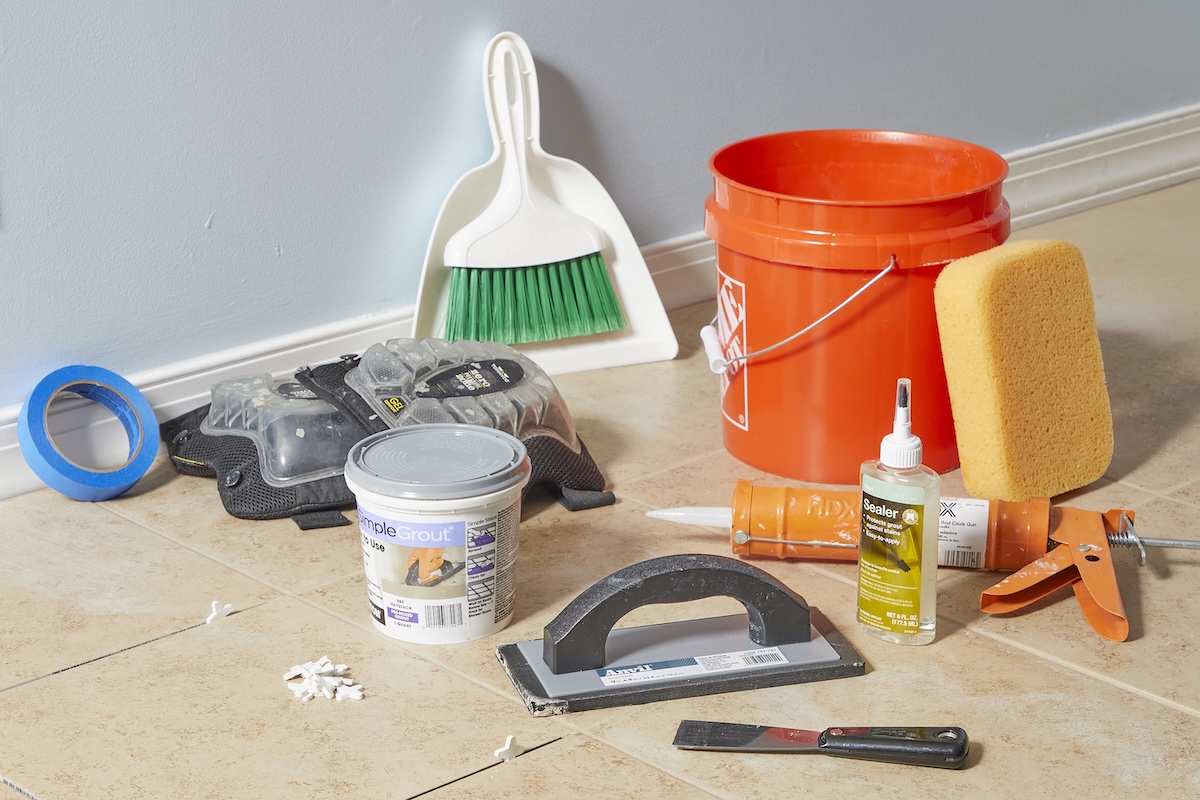
Photo: Tom Fenenga for Bob Vila
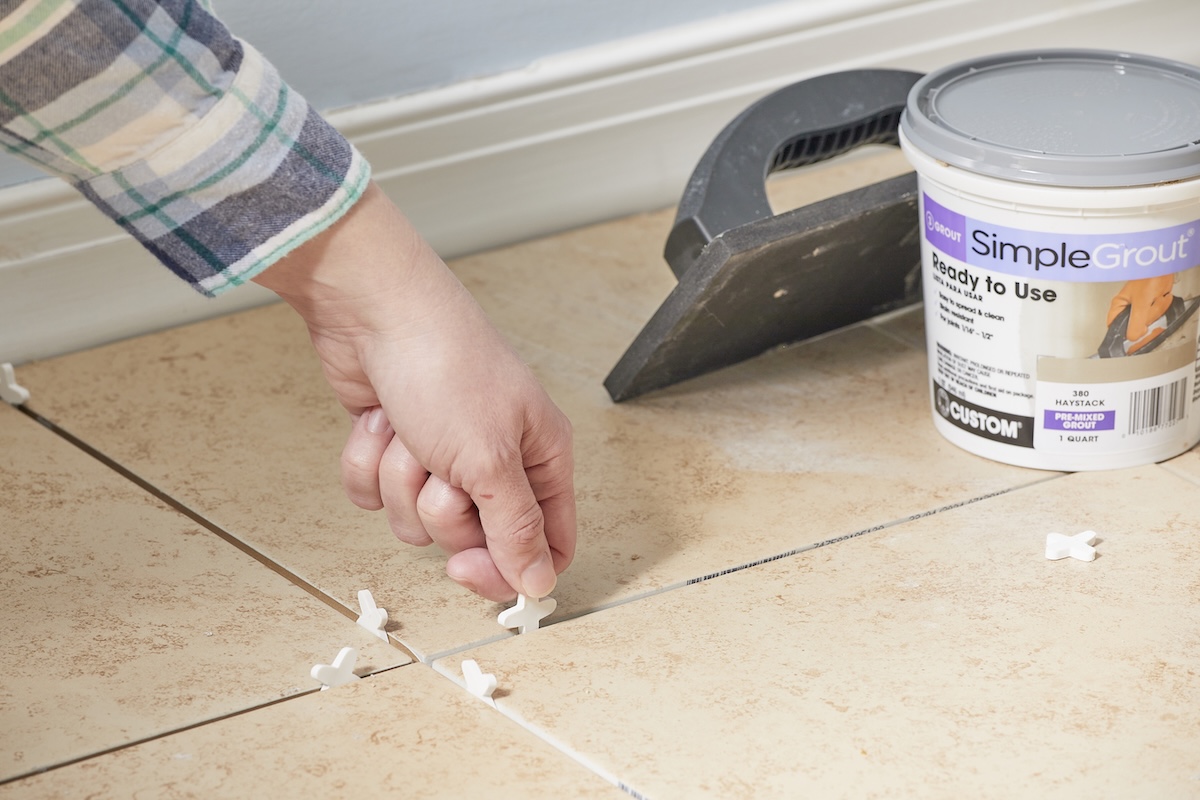
Photo: Tom Fenenga for Bob Vila

Photo: Tom Fenenga for Bob Vila

Photo: Tom Fenenga for Bob Vila
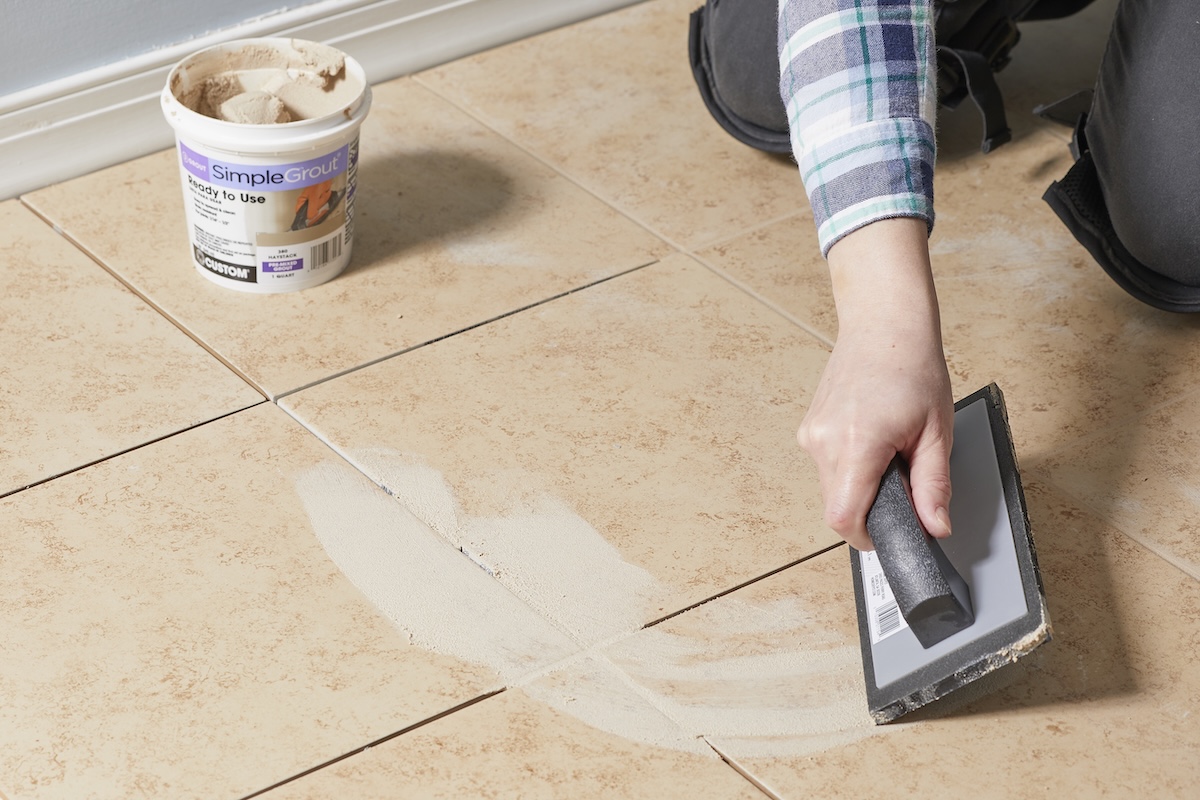
Photo: Tom Fenenga for Bob Vila
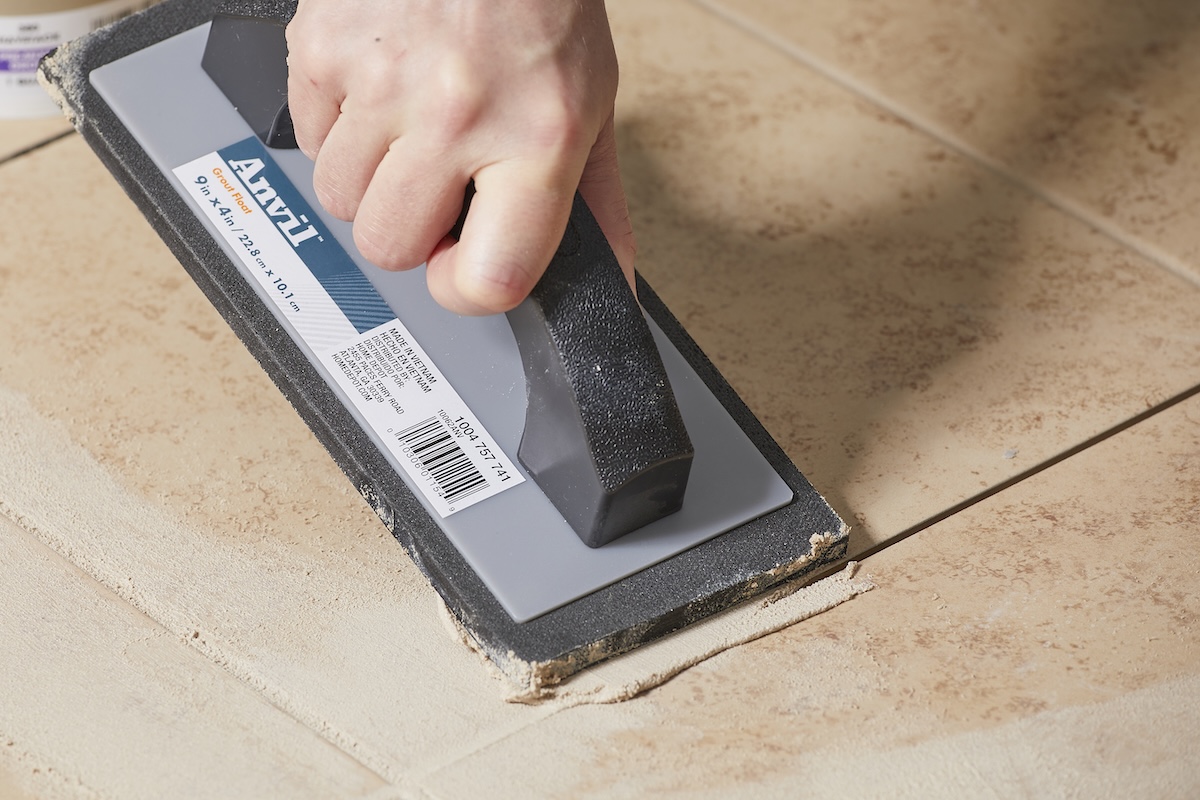
Photo: Tom Fenenga for Bob Vila
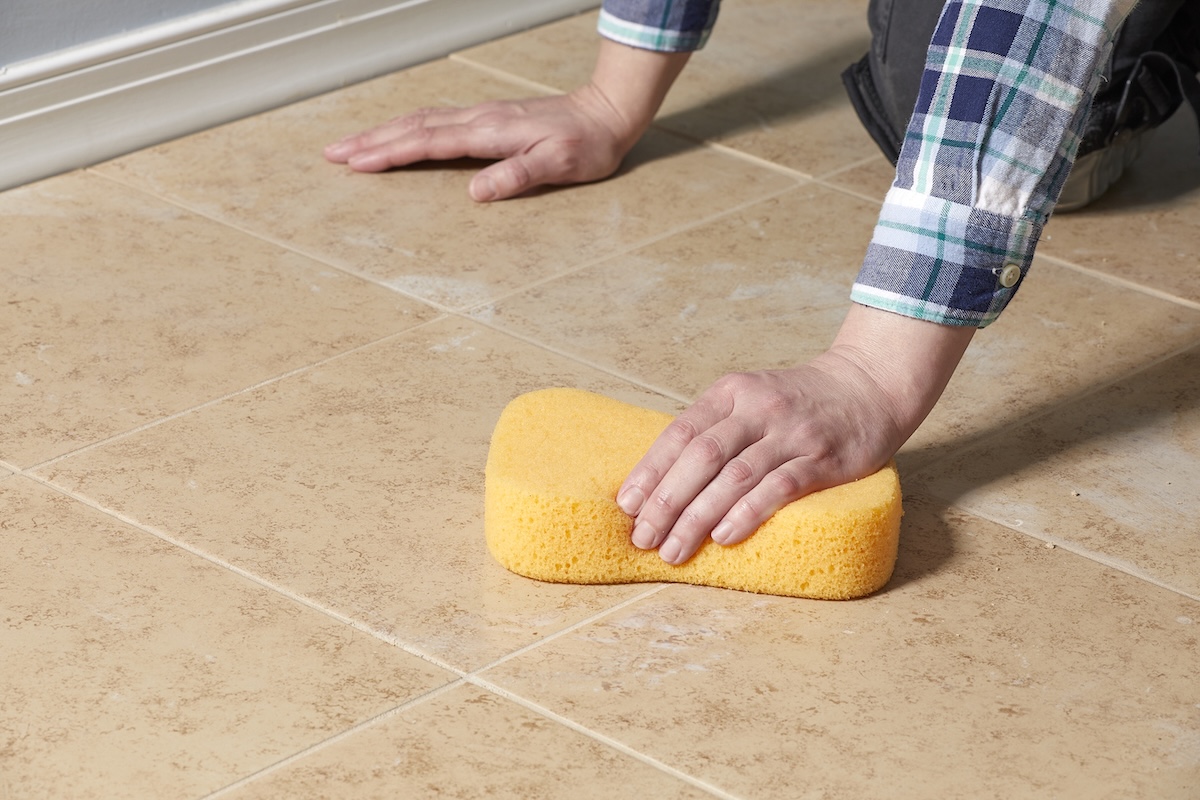
Photo: Tom Fenenga for Bob Vila
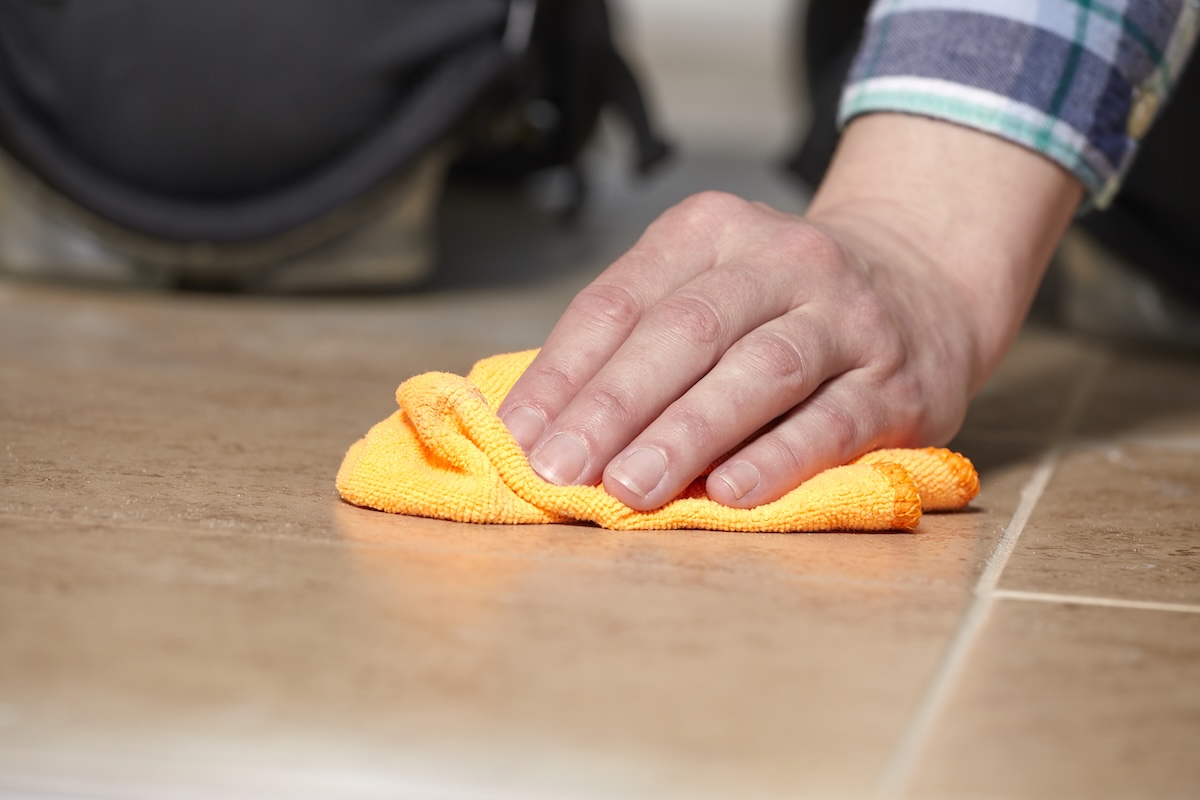
Photo: Tom Fenenga for Bob Vila
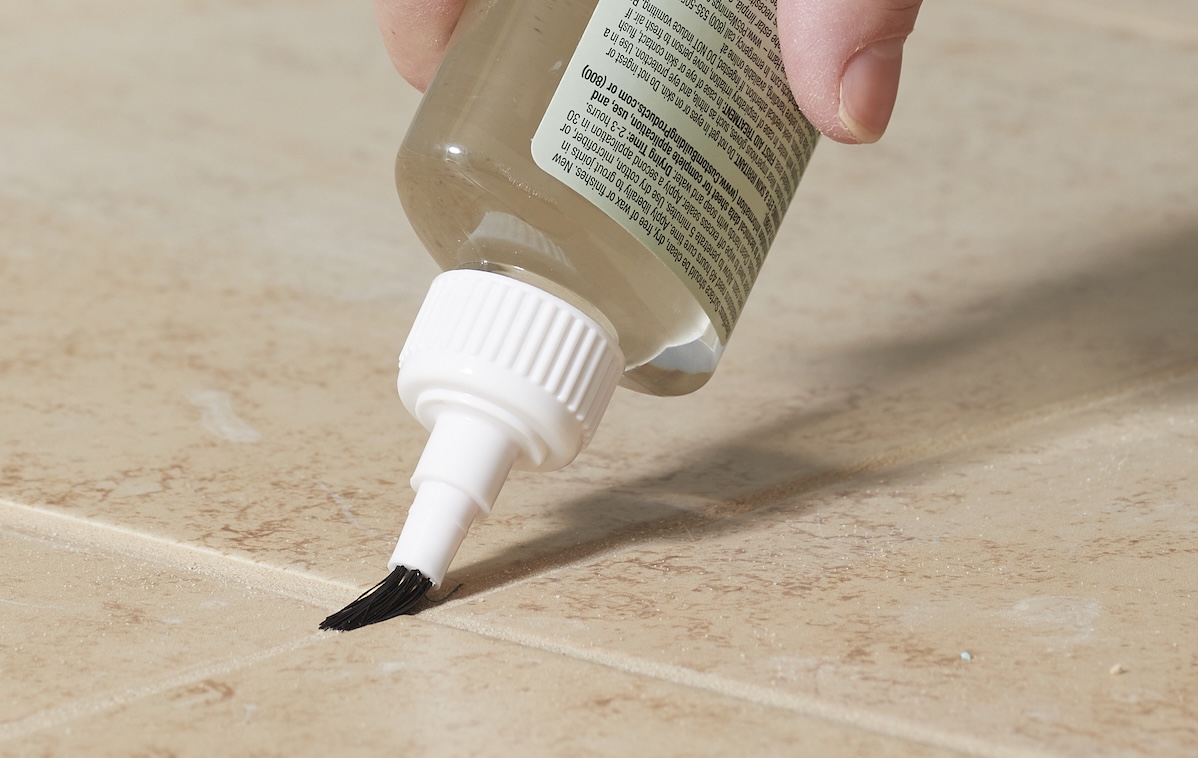
Photo: Tom Fenenga for Bob Vila

