We may gain revenue from the products available on this Sir Frederick Handley Page and participate in affiliate programs . see More ›
Beadboard is a type of wood paneling that has kick upstairs half - round upright beads milled between flat lengths of plug-in . Beadboard summate visual interest and a cozy feeling to a infinite , and it ’s particularly well suited to a traditional or advanced farmhouse - trend home .
A mutual decorative close in the 1890s , beadboard remain to be pop as wainscoting and for porch ceilings until it fell out of fashion in the 1950s . Today , beadboard is enjoy renew sake as householder seek to incorporate more interesting open and traditional elements into their home .

Photo: Wayfair.com
It ’s fairly easy to check how to instal beadboard panelling , but planning is important and detail matter , particularly in office where the beadboard meets the mopboard and other trimming in the room . This guide to installing beadboard will help handy homeowners rive off a professional - quality DIY project .
Beadboard vs. Wainscoting: What’s the Difference?
Although the term are often used interchangeably , beadboard and wainscoting are n’t the same . Wainscoting describes any decorative surface treatment applied to the lower portion of an home rampart , while beadboard is a fussy kind of wainscoting .
Beadboard was so pop as a wall treatment during the late 1800s to mid-1900s that it became a general condition to describe any wainscot . Today , beadboard is used for ceiling , walls , and cabinetry inlays too .
Beadboard is only one style of pane that ’s commonly used as wainscoting . Other wainscoting option include bring up or matte dialog box , gameboard and batten , shiplap , and overlay ( a combining of flavourless and raised panels ) .
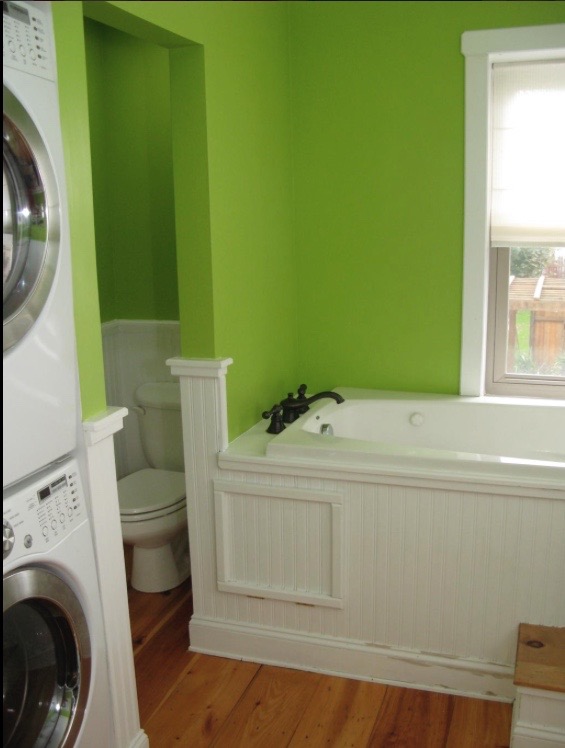
Photo:MyFixItUpLife
Tools & Materials
Bobvila.com may earn a commission from purchases made through these link .
Project OverviewWorking Time : 8 hoursTotal clip : 2 to 3 day ( admit fetch up pace like fulfill nail holes and painting)Skill Level : IntermediateEstimated Cost : $ 225 to put in and paint beadboard wainscoting in an average bathroom ( not including cost of tools )
Before You Begin
Installing beadboard is a flying , bold way to make over a room or produce a feature wall or ceiling . It does n’t command a zillion tools , and the payoff is closely instant .
Traditional beadboard is typically sell as 1×4 tongue - and - channel plug-in , which means that each circuit card is about 3 1⁄2 inches wide . Beadboard is often mill from woods like Douglas fir or knotty easterly white pine . Primed finger - articulatio pine tree is also common .
In the past , wooden beadboard was the pattern , but these twenty-four hour period beadboard is also made of composites like MDF , HDF , Acre by Modern Mill , and various other material from a compass of manufacturers . Beadboard is also sold in sheets of plyboard , PVC , and other materials , with beaded profile milled across their 4 - foot distance .
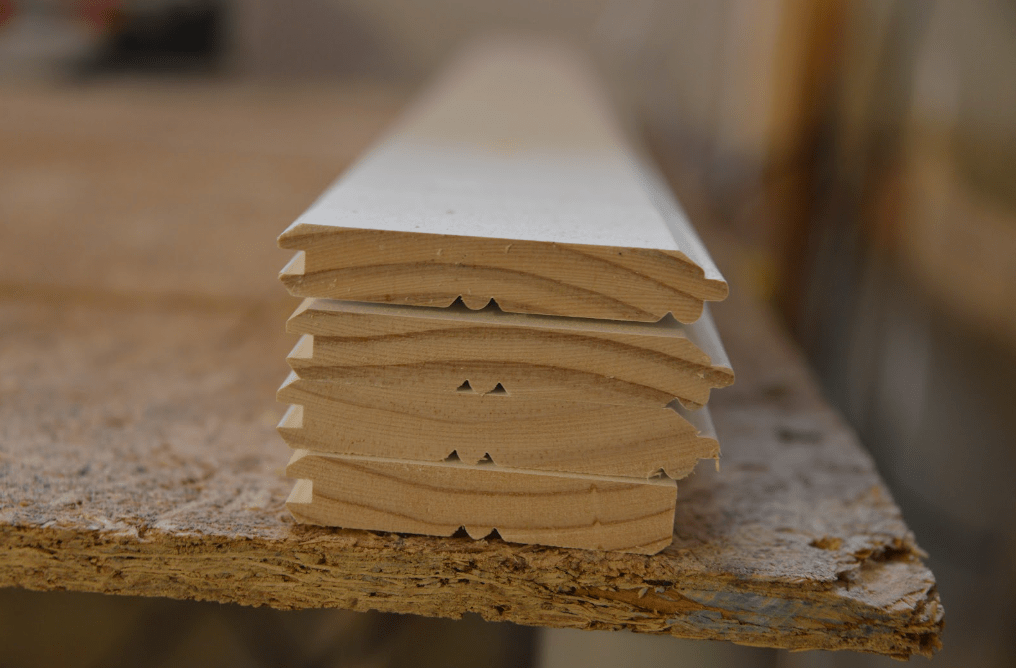
Photo:MyFixitUpLife
If you ’re design to paint your beadboard , we recommend purchasing prime beadboard dialog box to save picture metre later .
Beadboard Installation in 8 Steps
While beadboard is traditionally installed as along the bottom of a rampart , using beadboard as a cap treatment , or for floor - to - cap pane , can help oneself you reach a modern beadboard look . Use a tapeline cadence to figure out the idealistic wainscoting height for your way .
Typically , beadboard is sold as tongue - and - groove panel or individual gameboard . Most beadboard has one side that has a thin beading down the centre and along the tongue to conceal the articulation when the board is instal ; the other side is flat , with a V - groove along the tongue . induction is the same for both sides or “ profiles . ”
If you are installing beadboard wainscoting over dry wall , choose a panel with 3/8 - inch or 1/4 - in thickness . That will assure a reveal , albeit a narrow one , where the beadboard meet the room access molding .
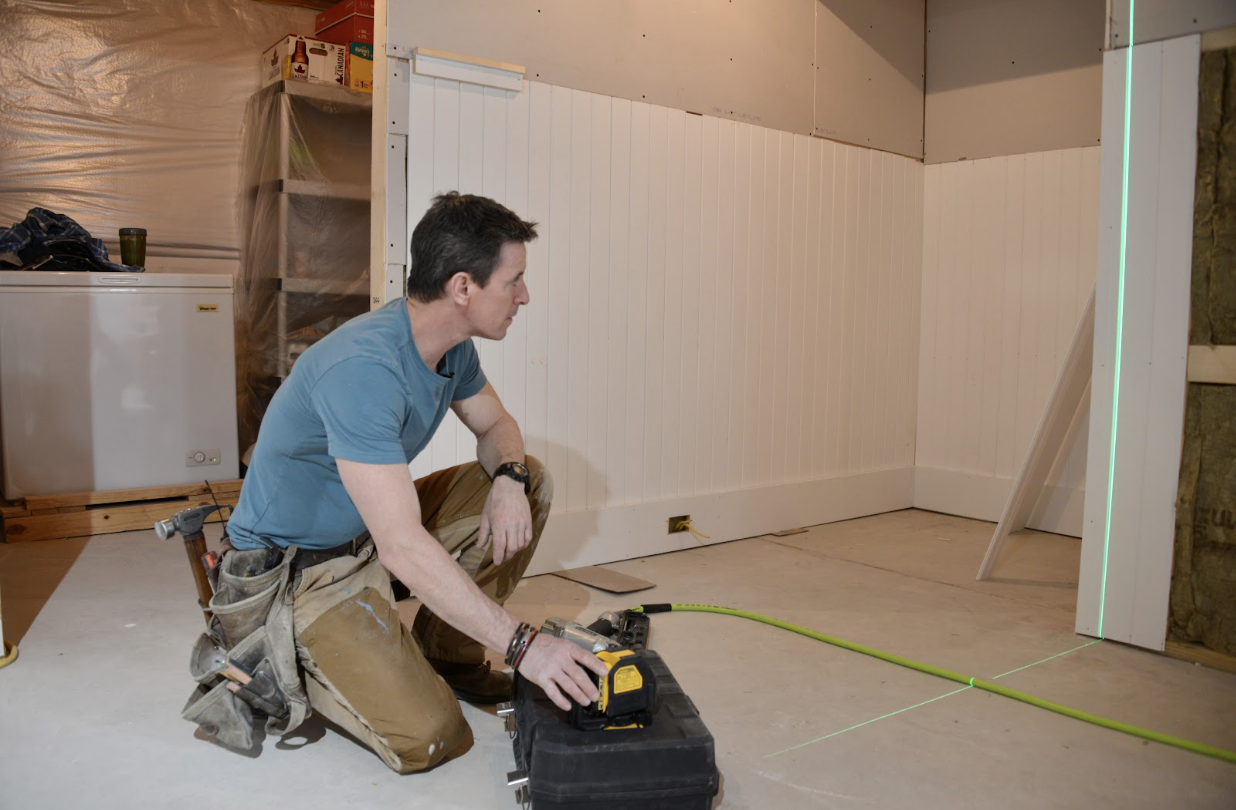
Photo:MyFixitUpLife
These beadboard installation direction generally give to shiplapfeature wallsas well .
Step 1: Prepare the wall surface.
After gathering all of the tools and material want for the project , the first step is train the wall surface . To achieve a strong installation , beadboard should be connected to rampart frame .
Open paries framing : In new construction ( or in a gut renovation ) , where the paries framing is undefendable , add horizontal blocking between the studs every 2 feet and wherever the beadboard terminate to ply sufficient nail surface .
Finished elbow room : In a ruined way , you could choose to slay the wallboard , add a layer of plyboard as a nailing surface , or add the beadboard over the wallboard using both structure adhesive and pneumatic polish nails .

Photo: istockphoto.com
Step 2: Mark your stud locations.
If you are utilise beadboard over a finished wall surface , stigmatize the stud locations with a pencil . Make the marks above the area where you ’re deploy the panels so you do n’t cover your fall guy with the beadboard .
At every studhorse location , you will face - nail the beadboard into the stud . in the end , chair rails or other trimming will help hold it in piazza . Where there is no stud , apply grammatical construction adhesive to the wall and nail directly to the wallboard . The nail will obtain the beadboard while the glue cure .
Step 3: Lay out the first beadboard panel.
Remove any exist baseboard molding or other trimness . If you are doing only one wall , remove a modest subdivision of baseboard molding on adjacent wall so the new board can tuck behind it . An oscillating tool is estimable for this task .
influence how much of the rampart the beadboard will cover . A typical height for wainscoting is 32 or 36 inches — roughly ⅓ of the wall height — which is the same as the recommend peak for chair rails molding . That aver , different heights can make well in different room . Another popular option is to get over about ¾ of the rampart ’s height with beadboard .
Once the desired meridian is influence , base a level line . A spirit level works for this , but a laser level works well .

Photo:MyFixitUpLife
lay the first plug-in in one corner of the room , tongue out . Get the first table as plumb — straight up and down — as possible . It does n’t matter if the adjoining wall is plumb ; just make certain the beadboard is plumb . Again , a spirit level whole works , but alaser levelis better . Once it ’s plummet , face - pick up the board to the bulwark .
Step 4: Install the rest of the beadboard panels.
Now that the first panel is installed , it ’s time to instal the “ field . ” The field consists of all the boards that are not corners or changeover . Install one board ’s channel over the lingua of the first board , but do not face - nail this board . Instead , toe - nail through the spit at an about 45 - stage slant into the drywall or other backing material . A pneumatic finish nailer is good for this .
If you are planning to install ( or reinstall ) baseboard moulding , the field boards do not have to run tight to the floor , although they do need to reach within ½ column inch or so of the base . You must , however , check that the tops of the panels execute along the stage line you previously mark .
ascertain for plumb as you go ; checking every three or four board should be o.k. . If you ’re starting to run out of plumb , circularize the next board or two ( or three ) about ⅛ inch until plumb has been reach . There will be a little gap between the chamfered edge , but it is very difficult to see . Out of plumb will be easy to notice .
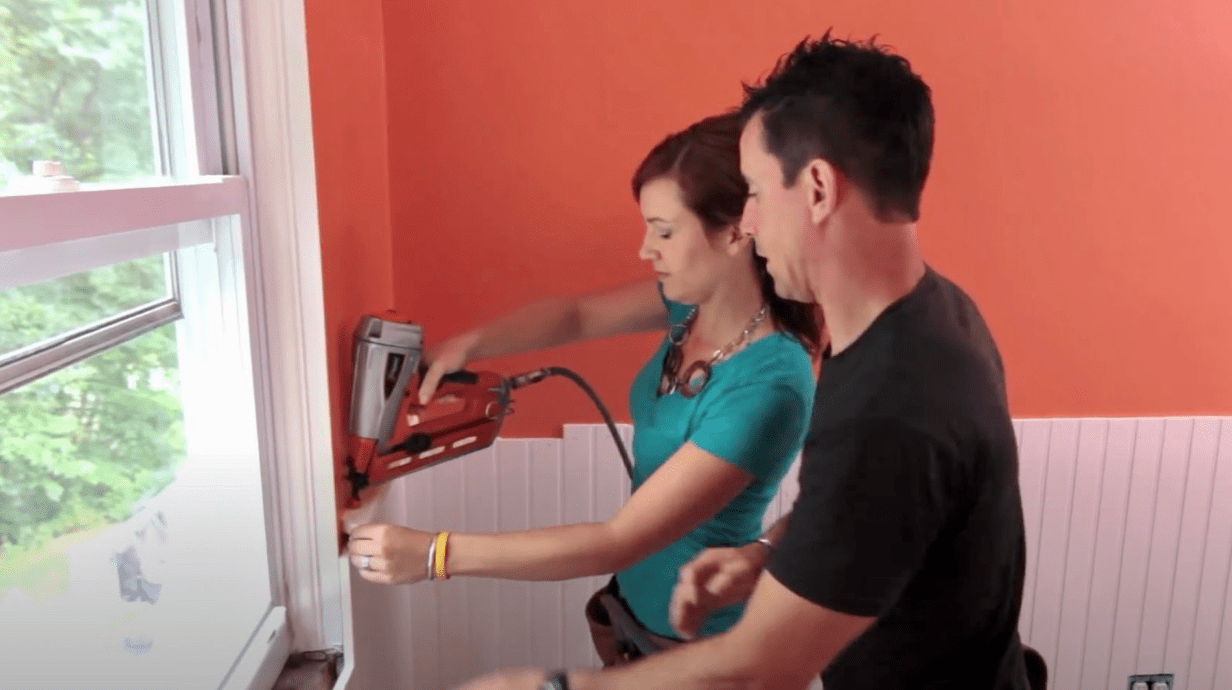
Photo:MyFixitUpLife
Pro tips : As you get close to an adjoining wall , the space will be too tight for you to be capable to use the nailer to angle nails into the tongue , so you ’ll credibly need to present - nail those panels to the dry wall .
As you approach the adjoining rampart , you may not be capable to slide the last board ’s channel over the tongue of the previous board . If this is the case , pull the back of the groove off the last piece so it will suit in property .
Step 5: Detail transitions and adjoining walls or casing.
As you ’re polish off up a wall , unless your panel conveniently give the sack at the adjoining wall , it is likely that the last board will need to be ripped ( cut lengthwise ) on a table saw to fit .
If you are installing beadboard along several ( or all ) of the rampart in the room , you ’ll involve to navigate the corner and the door and window openings . Here ’s how to cut beadboard for transitions .
For transitions to windowpane and doorway shell , start with a full plug-in along the case with the tongue side off from the trimming . When terminating the beadboard into encase with the natural language side , rend the tongue on a table saw to achieve a finished look .
Photo:houseofsparrows
For an inside corner , you may certainly go with a full gameboard . When it ’s an inside recess , however , we prefer to apply what we rip off the last board — unless it is just a sliver — as the first board on the adjoining wall . This way it looks like the board is just folded into the corner . Another option is to utilize a 1×1 as a wainscoting niche passementerie piece to fill in the corner .
For outside street corner , miter the pieces on the table saw . Again , it looks a slight cleaner if you use the same board to wrap the corner . Definitely discipline for plummet again and proceed with the next round of airfield boards .
Step 6: Finish the bottom of the beadboard with trim.
After all of the panel are installed , it ’s time to treat the bottom of the beadboard . While you could reinstall the skirting board that you removed or choose a typical baseboard profile , either one may stand out from the beadboard in an unlikable way of life . juiceless - fit a piece to see if you care it before secure the mopboard to the bulwark .
In our projects , we annul the bulk of a typical skirting board by establish 2 - in batting — a thin strip , approximately ⅜ column inch thick by 2 inch wide — along the bottom of the panels . It covers the buttocks of the boards efficaciously without detracting from the overall tone of the wall . you’re able to use the mesa run across to reduce these pieces out of the beadboard pedigree and trim them to length with a miter saw .
Step 7: Cap the tops of the beadboard panels.
The top of the inning of the control panel need to be capped . While this is often done with stock - bought profile or chair rail , this selection can be messy , difficult , and expensive . We ’ve recover it well-situated and cleaner to pull board out of beadboard panels on the table saw .
The top cap is usually a two - while assembly : one piece fasten to the case of the beadboard , and the other fasten on top . A batting can be used for the face - nailed piece , but a full - thickness board looks good there too . When cutting the detonating gadget , we care to make certain it overhangs the face - nailed piece by about ¾ of an inch .
Before attaching a top cap , expend scrap to experiment with pieces of dissimilar sizes and decide which compounding looks well .

Pro tip : For a cleaner finish , rate the cut edge of the board against the wall and leave the factory bound out . It ’s hard to see the difference between the sides without key , but there are vortex marking from the table saw blade . Paint or smear will immediately spotlight these marks ; sandpaper can do the trick to hide them .
Step 8: Paint or stain the beadboard.
For primed pine tree or other materials , apply a thin bead of caulk between the top capital and the wall , and satisfy all of the nail kettle of fish . After the airfoil is ready , put on rouge or stain . While beadboard is traditionally paint white , beadboard that ’s made from innate wood can be finished with urethane or boiled linseed crude .
If the stuff is already prim out , there ’s no need to utilise a paint - and - fuzee - in - one , but still plan on applying two coats . If you ’re using a really solid color like matte black , plan on at least three coating .
Pro tip : If you ’re using rags to wipe on a finish , never store the used rags crumpled up in a bucket , as they can combust . Always spread them out to dry exhaustively before throwing them away .
How to Hang a Beadboard Ceiling
Hangingbeadboard on a ceilingis similar to attaching beadboard to a feature wall . While it ’s potential to fall beadboard without an extra set of hand , the job will go much faster and more easily if someone can help defend the panels in position while you nail them to the ceiling .
The step are standardised to those for set up beadboard panel on a rampart , with a few exceptions .
Tips for Installing Beadboard
For successful , pro - prime results , whether you ’re installing beadboard in the bathroom or any other space , keep these backsheesh in mind :
Final Thoughts
install beadboard wall is a relatively quick DIY project that can really transform a way . Beadboard not only adds charm , but it also eliminates the pauperism to finish or repair ding in drywall . It can be purchased primed , which helps save time .
Whether you ’re installing beadboard in a bathroom or mudroom , on a bulwark or roof , it ’s essential that the bead are plumb and melt down parallel to each other across the full surface . Make certain to check for plumb as you cultivate so the finished tone is exactly what you imagined .
This Is the Year for a Kitchen Renovation
Whether you ’re selling or staying , everyone can get something out of a kitchen update . Learn why we consider this renovation the Most Valuable Project of 2025 and how to stay on budget .
