We may bring in revenue from the products available on this page and participate in affiliate programs . Learn More ›
enjoy it or hate it , there are at least a few upright reasons that homeowners choose rug . For one , it absorb the sound produced by television sets and stereophony system , overenthusiastic frankfurter , and raucous children . For another , carpet provides a cushy , well-fixed aerofoil upon which to walk . And because it ’s usable in countless colors and patterns , carpeting can complement the interior decoration of about any room . It can , however , be somewhat challenging to install carpet , but with forbearance , preparation , and some specialised cock , you could do the job yourself for a fraction of what it would be to hire a professional .
Tools & Materials
Bobvila.com may earn a commission from purchases made through these links .
STEP 1: Measure the room.
instal carpet is n’t of necessity complicated , but you do need to follow certain footfall to get the trust result . Start by set the square footage of the elbow room in which you wish to install carpeting . To do this , but measure out the length and breadth of the room , then multiply the two numbers to recover the total orbit of the floor . That said , most room are not all square or orthogonal . To make certain you have enough cloth to calculate for little discrepancy in the full size , regard adding 10 to 20 pct to your square footage reckoning .
STEP 2: Select your carpet.
When you ’re quick tochoose a carpet , impart your measure and a sketch of the room ’s layout with you to the store . Your carpet dealer will be able to tender advice and will have you know if you are neglecting any details . In make your decisiveness , consider the size of the room , the purpose of the elbow room , and the esthetics in that area of your home to make certain you end up with a product that meet your size and enduringness necessary and await great on your flooring . If you ’re on the fence about doing it yourself , ask about thecosts of carpet induction , and do n’t forget that you ’ll also take to purchase carpeting cushioning to lay beneath your rug .
STEP 3: Remove old carpet, doors, and baseboard molding.
You ’ll need to run with a entirely exculpated , matted airfoil , so it ’s necessary toremove the old rug , doors , andbaseboard molding . Use a screwdriver to remove door , and take hold of either a cock or a pry bar to gently get rid of the baseboards and conversion pieces that may be hold the old carpeting in place . Old carpet is typically loose than new carpeting , so it should n’t be too unmanageable to lift the rug off of the existing stable gear slip . If there ’s no sure-enough carpeting to rip out , then you ’ll just have to remove the doors and baseboard to ensure that your carpet will fit square against all edges .
STEP 4: Prepare the surface.
employ a hammer , putty knife , and sand to polish out the surface of the storey by hit any glob of glue , errant nail , or built - up paint . After clean out the Earth’s surface detritus , sweep , vacuum , and wash the storey thoroughly , taking this opportunity to tally the floor for scathe . The story must be totally ironical before you proceed , as residuary moisture can lead to mold growth .
STEP 5: Nail down the tack strips.
If you are design to install carpet with a pad , then you do n’t need to employ glue , but you do demand to install tack strips around the perimeter ( minus the doorways ) . The tack strips keep back the carpeting in place . If you ’re replacing a carpet , inspect the old sheet airstrip to mold if they are in salutary enough condition to reuse . If they ’re not , they will need to be poke up and replaced .
When you ’re purchasing mainsheet strips , there ’s a simple rule of ovolo to remember : Wider is better . place the strips about a half - inch from the wall , with the tacking lean away from the center of the elbow room . Aim to put two nails into each tack strip , adjoin one strip against the other , end to conclusion . Once you have apprehend in the stable gear strips around the entire room , even around obstructions like atmosphere vents , it ’s prison term to add the carpet cushioning .
STEP 6: Install the carpet padding.
employ a utility knife , or even a duad of heavy - duty scissors , to cut the carpet padding to the right size . Each strip of padding should extend from the inside edge of the tack strip to the opposite inner sharpness , and the edges of each strip show of padding should butt . It ’s a good theme to duct tape the seam between each funnies . When the storey has been to the full enshroud , work around the edge of the room with a carpeting stapler to secure the padding to the inner bound of the tack strips . The padding should lie all categorical . Any prominence or bumps postulate to be smoothed out before you could continue .
STEP 7: Lay out the carpet.
Recently purchased carpet should be unrolled and put down out generally in the way for at least 24 hours before installation . This lets the carpet acclimatise to the environment . During this 24 - minute period , you may determine that the carpet shrinks or expands slightly . allow this to happen prior to installation help ensure professional - stage results .
STEP 8: Cut the carpet.
Once the carpet has acclimated to the way , it ’s time to practice the mensuration you take previously to cut the carpet to size , although it ’s advisable to leave behind a little extra fabric to make certain that when the carpeting is debase and fix it will fit as intended .
STEP 9: Roll out the carpet.
Now that the carpet is contract , you are ready to put it in topographic point in the room . Start in one corner and leave about 3 to 4 inch of excess rug up against the paries . Position the carpeting so that it completely encompass the tack strip and the floor , while lining up the carpet edges to make pie-eyed - tally line . Also , ensure that you roll out each piece of carpet in the same direction to ensure that the grain is consistent across the room .
STEP 10: Tape and seal the carpet seams.
For the best results , it ’s a ripe idea to buy orrent specific tools necessitate to instal carpet , including carpet seam magnetic tape , a seaming iron , and a carpet roller . Seam tapeline is used to connect two or more section of carpeting . Apply the mag tape underneath the carpeting seam , adhesive side up , then use a seaming iron to melt the adhesive material . As the adhesive cool , press down on the carpet edges you are connecting , then seal off the seam with a rug hair curler .
It ’s important to note that tape , melting the adhesive , and sealing the seams with a carpet roller are essentially all part of one step . Take care of the line as you work on each section , not at the very end . If possible , assay to turn up crinkle in low - traffic or otherwise inconspicuous role of the room you are carpet .
STEP 11: Stretch and tack the carpet.
Beginning in a corner and working your way along the bulwark , attach the carpeting to the tack strips using a knee kicker , whichprevents lumps and bumps from forming . To do this , put the stifle kicker about 3 inches out from the rampart , then tally the flat , cushioned end with your stifle to extend the carpet and batten it to the tack strips . Continue this procedure as you move along the paries , arrive at the knee kicker about once per foot of rug .
When you ’ve finished attaching the carpeting along one wall , head over to the opposite side of the room , stretchingand pulling the carpeting along with you . reprise the same steps along this wall to stretch the carpet and attach it to the tack funnies . With two opposite side of the carpet in place , move on to stretch and fasten the carpet along the remaining walls of the room . For large space , view take a power stretcher to make easier piece of work of position the rug .
STEP 12: Trim the carpet.
After you ’ve used the knee kicker or stretcher to secure the carpet over the saddlery strip , you ’ll be left with excess rug around the edges of the elbow room . Cut aside the surplus with a public utility knife , ensuring that the remaining carpeting fit tightly against the wall so that the edge will be whole conceal when the mopboard are replaced .
STEP 13: Reattach baseboards and doors.
The carpet is now installed , but before you may at long last kick off your shoe and enjoy a luxurious saunter across the plush newfangled surface , you will need to reattach the skirting board and any doors that may have been removed . It ’s also a good idea to vacuum the carpet after installation to remove any cut carpet fibers , dirt , or other detritus .
Final Thoughts
Adding or replacing carpeting is a great agency to exchange the appearance of a way , but it also gives you a comfortable aerofoil to walk , sit , or even lie down on . Carpeting has the extra welfare of insulate a elbow room , facilitate to keep it tender in the wintertime . With a carpet story , air - conditioned rooms will also remain nerveless in the summertime month . Keep in mind that the cognitive process forcarpeting stairsis somewhat different , and you ’ll need to properly complete each step in the installation operation before moving on to the next point to get the better effect .
FAQs
lay carpet is n’t hard , it just postulate time and patience to ensure that each step in the summons is properly completed before displace to the next step . Errors in previous step can cause worry down the line . For instance , forgetting to remove mucilage or old nails from the floor before pose down the rug cushioning could leave you with swelling in the final merchandise .
It is potential to establish a carpet without a capstone , but it is n’t advised . Without a copestone or a knee joint kicker there is a high chance that the carpet will evolve seam or excrescence , ruining the show and feel of the unexampled floor .
rug that are elongate enough should consist altogether bland and unruffled across the flooring . If you are come to , look for rippled or wrinkle area in the carpet and also inspect the edge to determine if the rug is pile up along the baseboards . The carpet is stretched enough if it does n’t demonstrate any of these telling preindication .
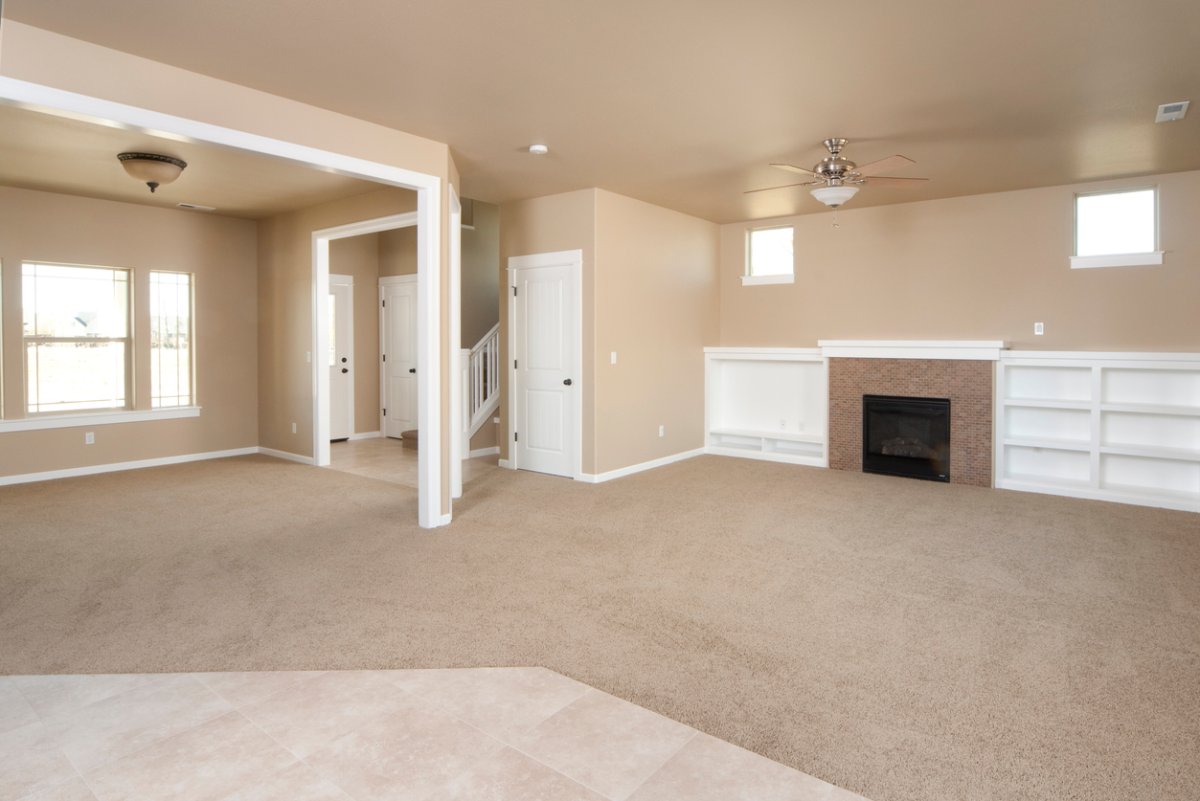
Photo: istockphoto.com
apply a coping stone or knee kicker to get disembarrass of ripples in the carpet . Simply release the carpeting from the tack funnies along one wall , then begin stretching the rug out with the capstone or knee kicker until you ’ve worked your direction along the rampart . Secure the rug on the tack strip and cut away any discredited or overlapping carpet outer boundary .
You may have heard of tackless carpet induction , but the term is actually a bit puzzling . The shroud strips used in the typical stretching carpet installation described here are also experience as “ tackless ” strips . The creation of these strips meant that installers no longer had to tack the carpet direct to the floor , an installing method acting that is now obsolete . So , while the physical process really is n’t , as the name imply , “ tackless , ” the tacks need sit on the strips and are n’t driven into the flooring .
Everything You involve for a Lush and Healthy Lawn
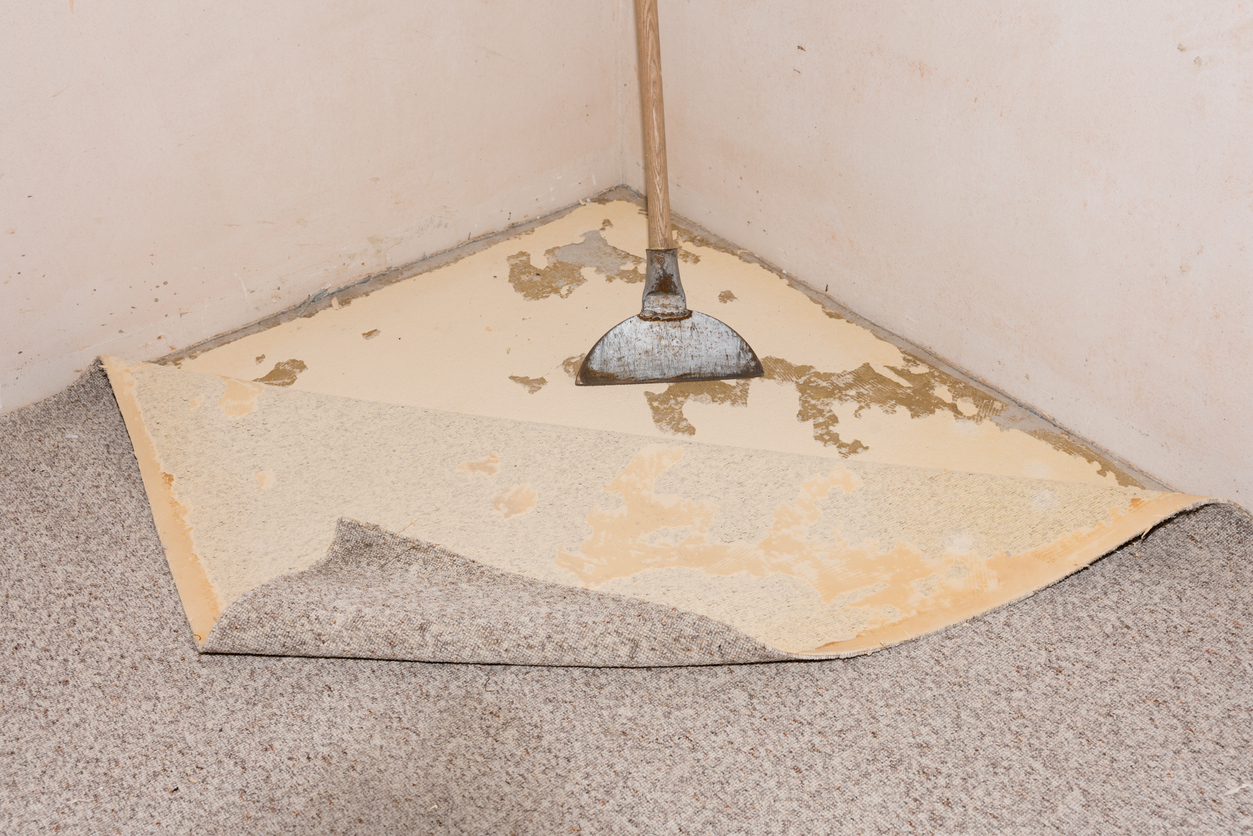
Photo: istockphoto.com
proceed your dope green and your plants fly high does n’t just take a fleeceable thumb — it starts with the right tools and supplies .
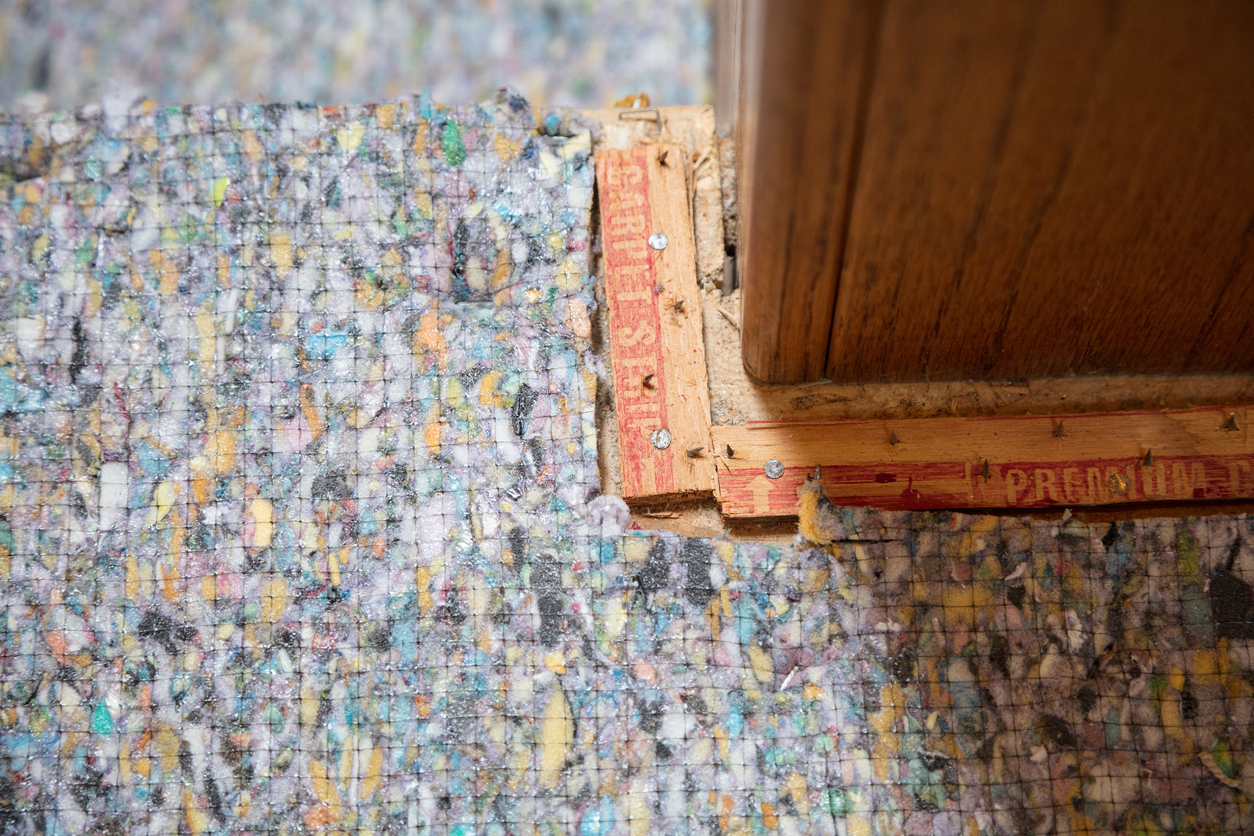
Photo: istockphoto.com

Photo: istockphoto.com
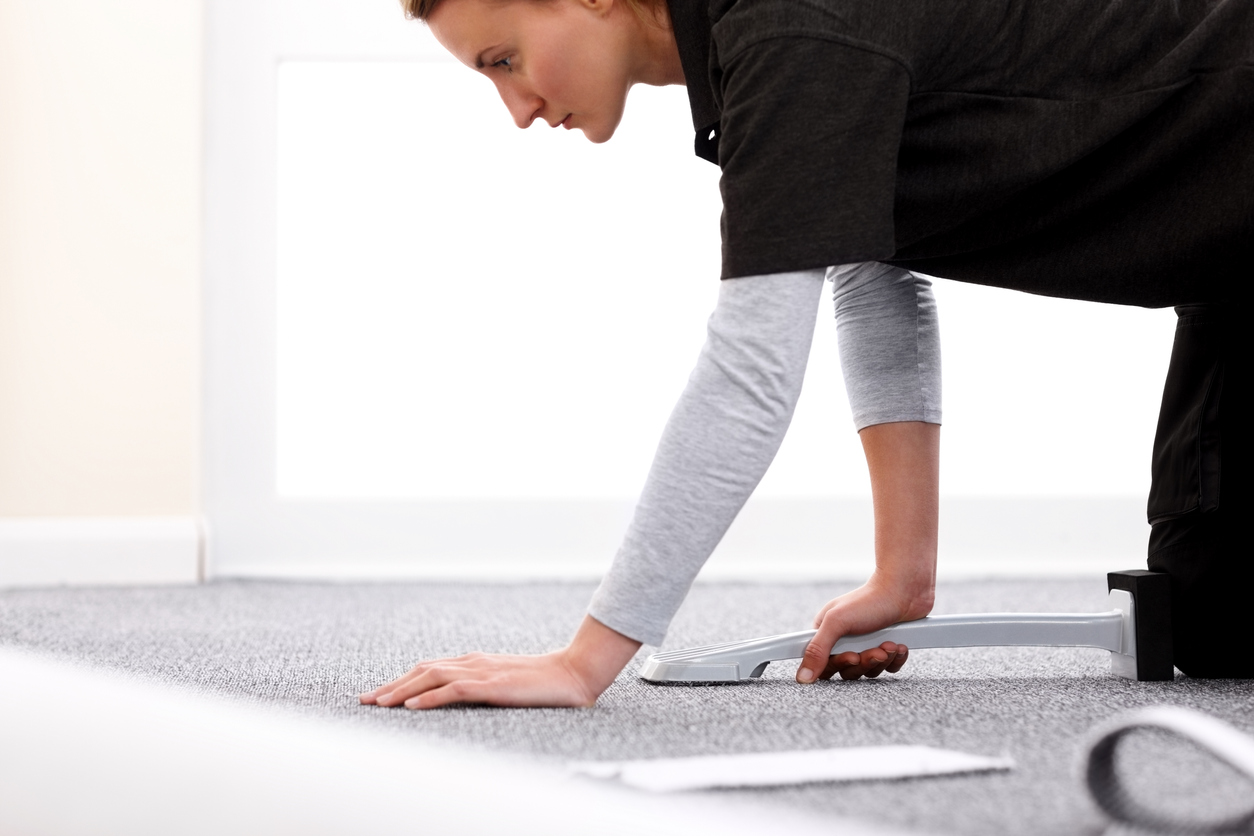
Photo: istockphoto.com
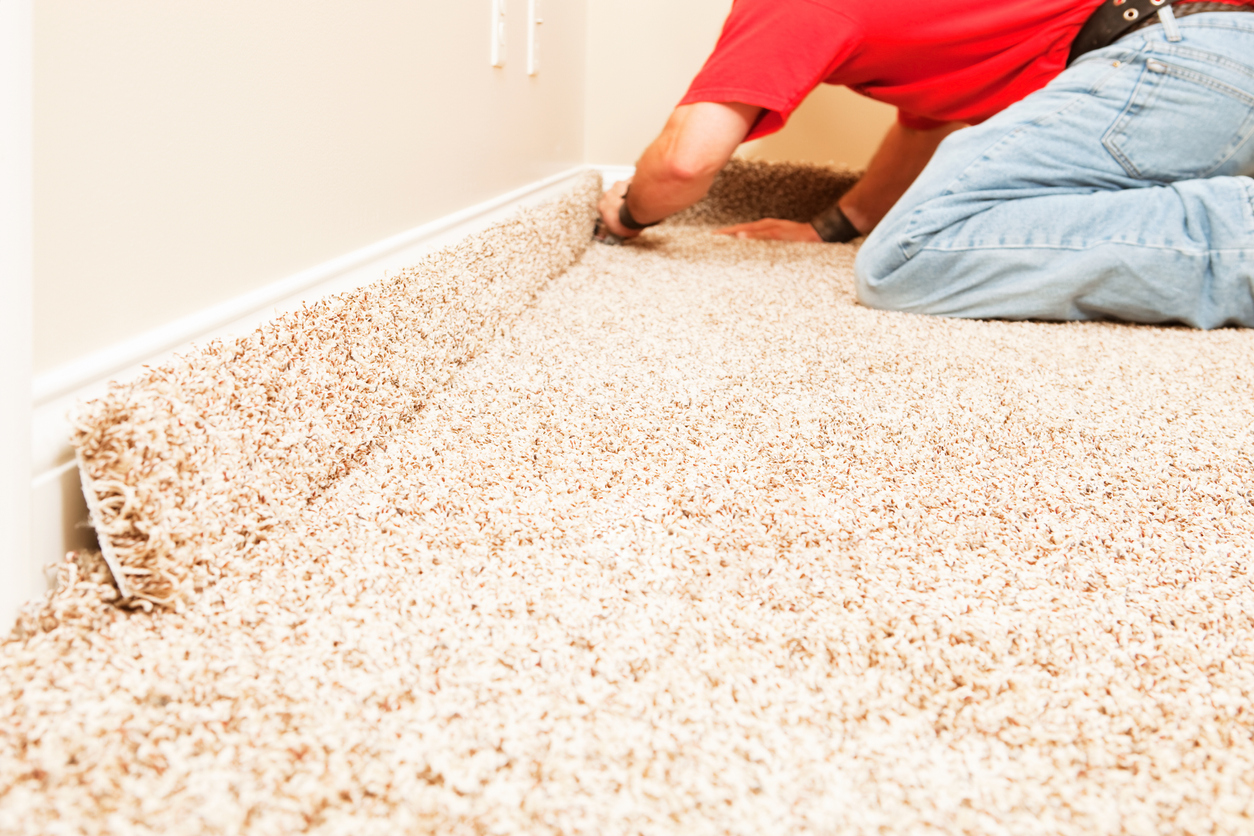
Photo: istockphoto.com

Photo: istockphoto.com

