We may earn revenue from the product useable on this page and participate in affiliate programs . Learn More ›
hunt for astatement piecethat really speaks to you requires a sure amount of prison term and forbearance . fortuitously for those of us lacking in the latter , there ’s often a homemade alternative to customizable to our precise vision to speed things along . Rather than resorting to picking through every estate cut-rate sale for the large marquee letter , symbols , and full signs that can be found slue in inner design today , this LED - power version emulate the typical reclaimed style in whichever design you desire . Though this DIY undertaking looks like made from weathered alloy , you’re able to really recreate its vintage vibe usingmere plyboard . Fashion one or enough to import out the phratry name following these aboveboard steps .
Tools & Materials
Bobvila.com may earn a commission from purchases made through these tie .
How to DIY a Marquee Letter
STEP 1
First , dream up the design for your three - dimensional , light - up sign . We made two : a 16″-tall “ B ” and a sun with a 20 - inch diameter . Whatever you opt , opt for angles over curves . This swap enhances the approximative industrial appearing of your finished study , but more importantly it simplify the processes of cutting the plywood and frame in its edges .
Once you ’ve determine the shape you want to build up , sketch it on the back of a 6 mm plywood sail , using a swayer for optimum unbent edge . Tip : For just results when it comes time to insert the unaccented bulb , scale your design so that its dimensions in inches are multiples of two .
STEP 2
Cut along the pencilled border of the shape using the jigsaw .
If your design includes a hole cut from the centre ( like the two small rectangles to make the openings in the letter “ B ” ) , drill holes in each corner of the interior physical body and cut along the lines with the saber saw so that it pops out well .
STEP 3
Smooth all slope and edge of the plywood with either emery paper or a laurel wreath smoother to remove every sliver .
STEP 4
Use your ruler to determine the placement of each lightbulb on the marquee letter of the alphabet and mark . ( You may line up it helpful to first pencil in lines of the path they will follow and then plot the holes . )
Aim to space bulbs over the width and duration of the marquee letter so that they are equidistant . In our case , we placed the first light bulb two inches from the edge and set the rest 2 inches apart from one another , but the length may motley depending on the dimensions of your marquee letter and the size of the bulb .
STEP 5
For every mark , practise a hole . The drill bit size must touch the sizing of the base of the bulb so that it can pop through . Here , we used a 3⁄8 - in drill bit .
STEP 6
Add profundity to your three - dimensional marquee varsity letter by make an edge with a shadowbox effect to run along its circumference . set off by cut the project ’s remnant plywood into a strip show or two , each 3 inches wide and as long as the board . Now , position a 3″-inch broad strip along the top side of your pavilion letter to match it in distance exactly ; denounce the distance on the plyboard slip , cut , and remain firm it up on edge against the marquee letter .
bring clockwise , put down the remaining 3 - inch plywood length against the side that connects on the rightfield . This fourth dimension , adjust ever so slimly — by roughly 6 millimeter , the heaviness of the plyboard — so that this length overlaps the edge of the last strip you cut and spans to the end of this side of the letter . ( This niggling bit of overlap minimizes gaps at at the corner between sharpness pieces . ) Mark where you ’ll want to make your snub , use your scroll saw , and remain firm this second edge up just the same . Repeat this process as you work your way around the pavilion letter . The final side should be farsighted enough to cover its side and the extra 6 mm of plywood at both death .
Now , prepare to glue . You want the marquee letter ’s 3″-wide case to stick out 2 inches in front and 1 inch in the back ( that ’s how you ’ll hide the electric cord ) , so it may be helpful to pencil a line length - wise along each plywood strip show to channelise your gluing . Then go for either hot glue or Sir Henry Joseph Wood glue to the strips along the drawn lines , and bid them to their coordinate side . Hold the sides with clamps while the glue dries .
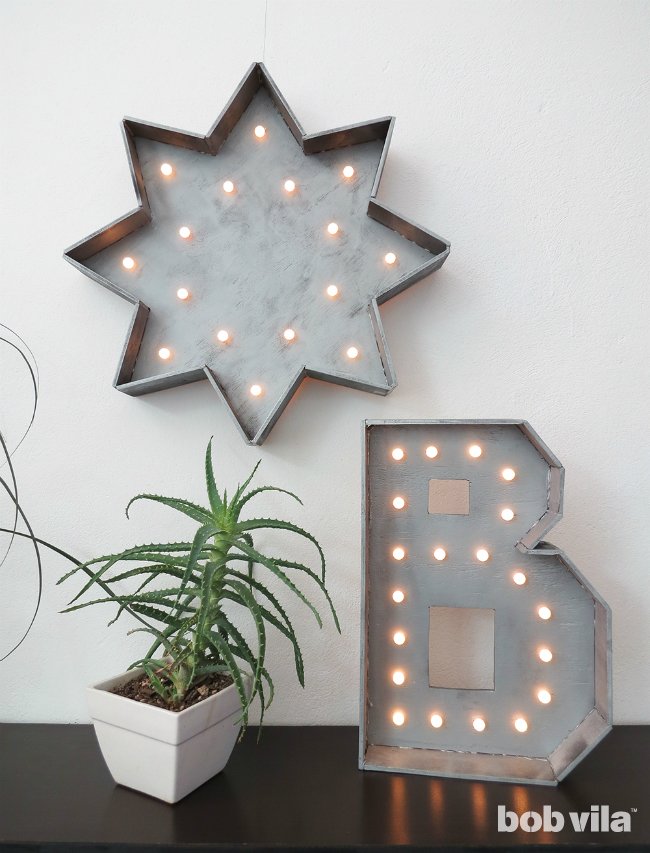
Photo: Ama Ryllis for Bob Vila
STEP 7
implement some wood putty using a putty knife to fill in and smooth over any remaining gaps at the corner . Once completely juiceless , sand the edges to withdraw any blemishes .
STEP 8
Finally , the key to transforming the plywood structure into a metal - look marquee like lies in the two - part picture technique . First , totally cake the piece with blackspray paintand lease teetotal .
STEP 9
After your black paint has completely dried , hold a top coating of silver forge spray paint . This round , it ’s less important to cover completely ; the dark paint peeping through — in add-on to the metallic atomizer paint ’s unique finale — will visually maturate the marquee .
STEP 10
Unscrew theLED bulbsfrom their string , and place one in each hole with a minuscule glue . When dry , you’re able to reconnect the train light to their bulbs from the back . Then take your one - of - a - variety marquee letter and display it either stand upright or advert on the paries . The unique design is sure to brighten up — quite literally — anyshelving arrangement , legal profession cart , or gallery wall .
Ama is a DIY addict and the creative mind behindOhoh Blog . She like abode decor , firing , and article of furniture projects that may involve painting , sewing , drilling … no matter the technique ! Whatever she has on hand is inspiration to produce , and cannon fodder for her serious addiction to upcycling .
This Is the Year for a Kitchen Renovation
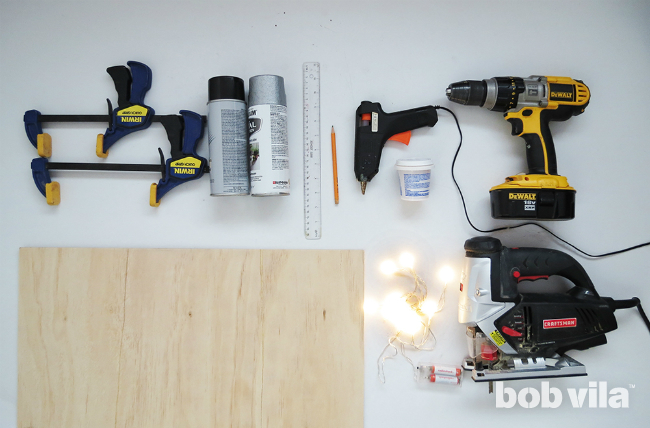
Photo: Ama Ryllis for Bob Vila
Whether you ’re selling or staying , everyone can get something out of a kitchen update . Learn why we consider this redevelopment the Most Valuable Project of 2025 and how to stay on budget .

Photo: Ama Ryllis for Bob Vila
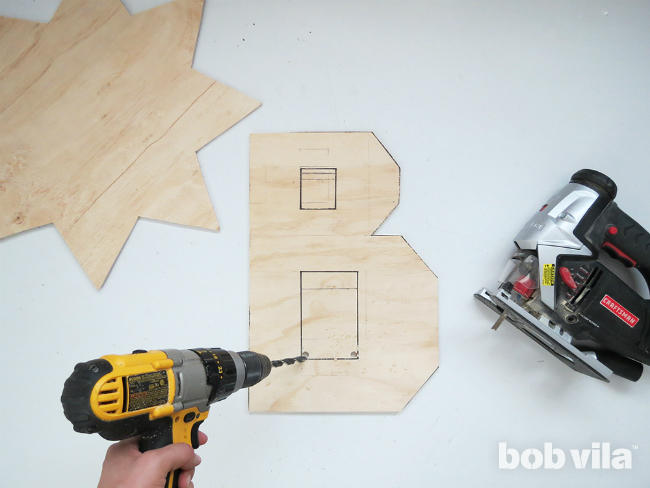
Photo: Ama Ryllis for Bob Vila
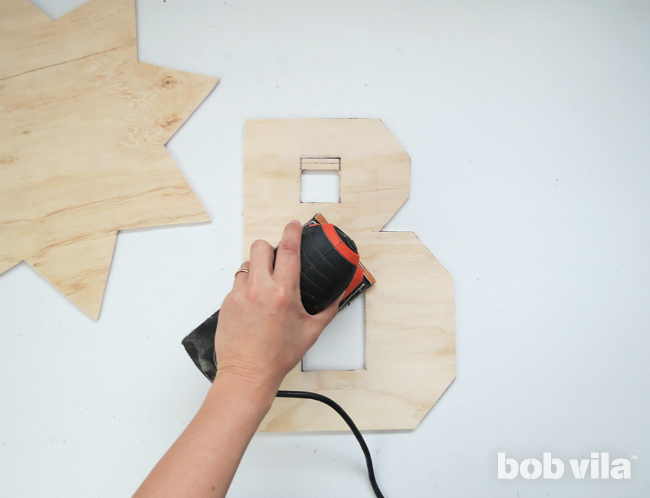
Photo: Ama Ryllis for Bob Vila

Photo: Ama Ryllis for Bob Vila
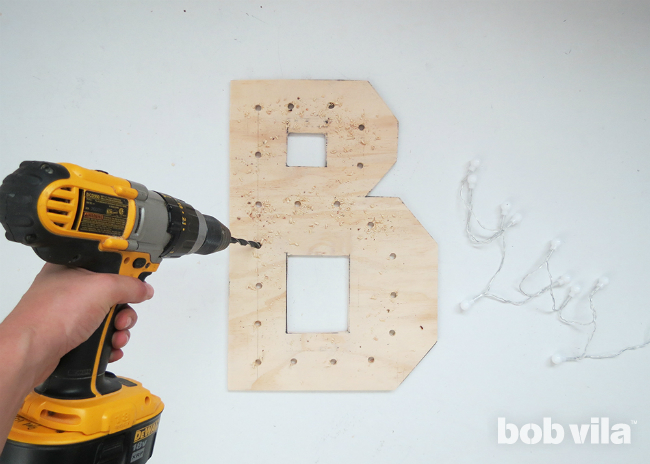
Photo: Ama Ryllis for Bob Vila
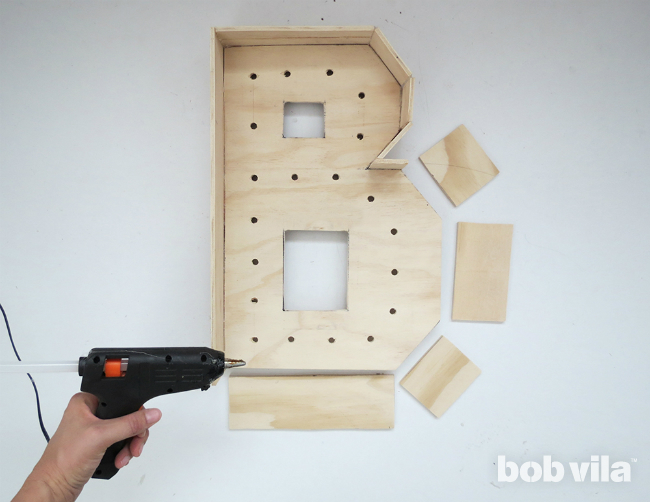
Photo: Ama Ryllis for Bob Vila
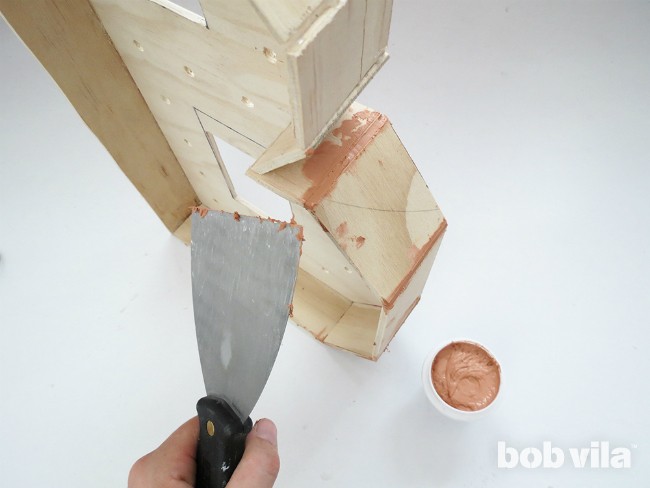
Photo: Ama Ryllis for Bob Vila
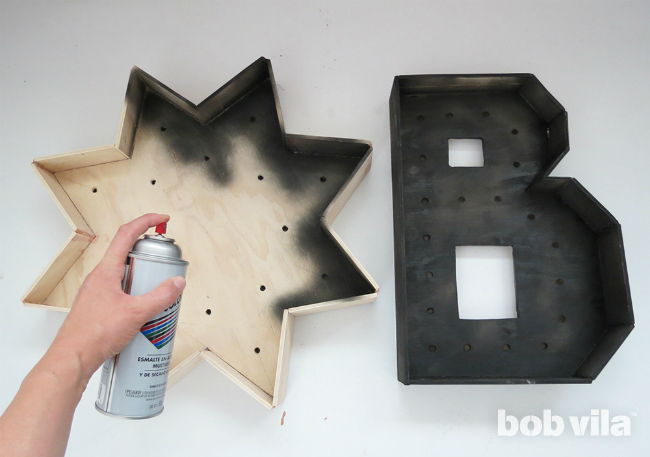
Photo: Ama Ryllis for Bob Vila
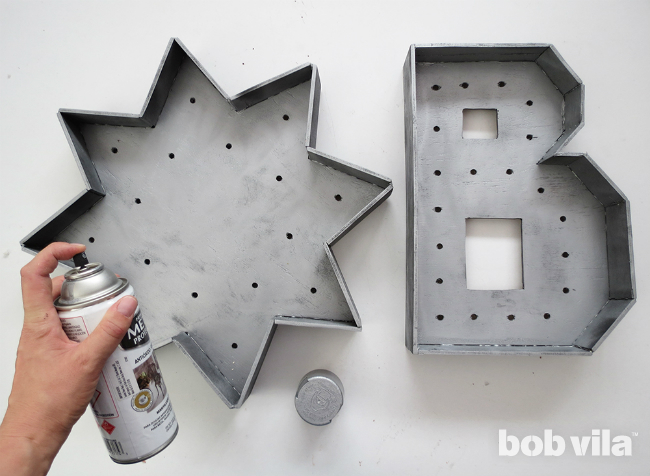
Photo: Ama Ryllis for Bob Vila

Photo: Ama Ryllis for Bob Vila
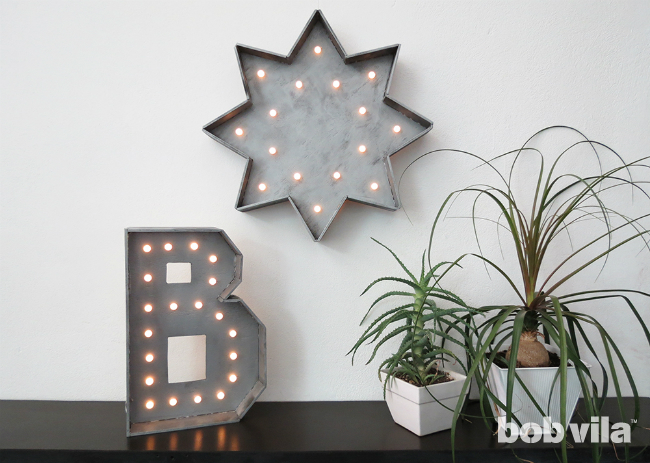
Photo: Ama Ryllis for Bob Vila

