We may gain taxation from the Cartesian product available on this page and take part in affiliate programs . Learn More ›
Grout , or the makeweight that confine roofing tile in topographic point , tends to be an afterthought . But there ’s good reason for homeowners to give more mentation to this material : When grout is not clean , smooth , and unvarying , it detracts from the overall look of your finished roofing tile projection . The cay to sound grout lines lies in amalgamate grout correctly so that it spreads easily and produces even lines between roofing tile . If you could achieve this , you ’ll get something near to a professional - expect conclusion .
Grout comes in several varieties ; we will focus on mixingsanded and raw grout . If the joint between the tile are less than ⅛-inch thick , raw grout will be easier to use and adhere better in those narrow spaces . For wider joints of ⅛-inch to ½-inch , go with sanded grout for best bonding and less shrinkage .
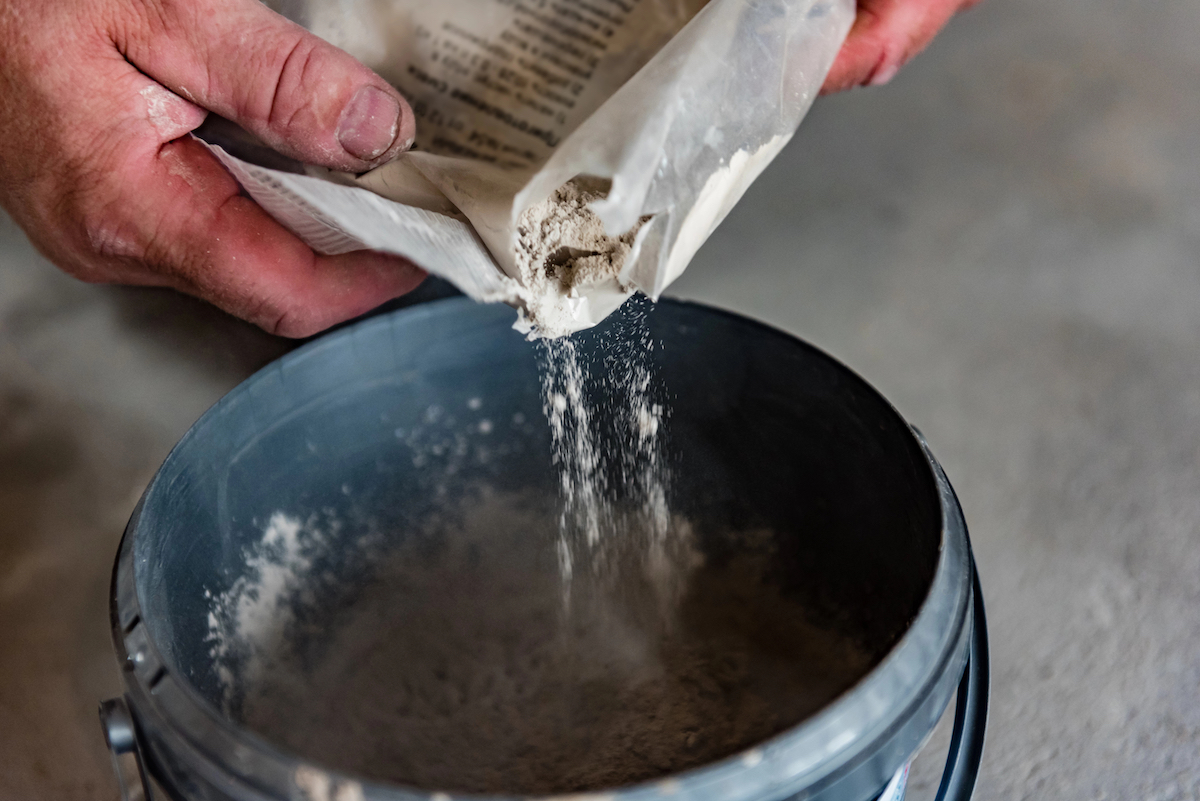
Photo: Natali Ploskaya / Depositphotos
Also , bear in mind that many tiling pros favor to sour with grout with a latex linear , claim it helps grout wry to a surd final product and resist staining . For bathrooms , consider grout that let in a fungicide to help resist molding growing .
Once you have chosen the correct grout for your project , you ’re quick to mix .
Table of Contents
Tools & Materials
Bobvila.com may earn a commission from purchases made through these link .
7 Steps to Mixing Grout Correctly
Step 1: Select the right grout for thejob.
In its ironic state , sanded grout is a mixed bag of cementum , makeweight particles , pigment , and sand . Sanded grout is recommended for joints larger than ⅛ column inch because the guts make it better able to stay on in the joints , and it is less probable to crock up as it cures .
Because this type of grout contains grit , it offers a coarser , grainy grain and appearing . Sanded grout may come up delicate surfaces , such as marble , and may not be desirable for use with polished or honed tile . irrespective of what you ’re tiling , you ’ll want to clean grout off the control surface of roofing tile before it has prison term to harden . Once cured , which is usually about 72 time of day after installation , sanded grout should be seal to foreclose spotting and discoloration .
The typography of unsanded grout is similar to that of sanded grout , minus the Amandine Aurore Lucie Dupin , of course . While this character of grout has less enduringness and binding power than sand grout , it yields a smoother grain and , without the mass of Baroness Dudevant , mould well for humble articulation , those less than ⅛-inch thick . It ’s also best for use with scratch - prone tile material , such as marble tile and most photomosaic , according to Austin , Texas - base roofing tile typesetter Sean Chavoustie .

Photo: iStock
Unsanded grout is stickier and while it may require a small more effort to push into the joint between roofing tile , you ’ll want to ensure every gap is soundly occupy to prevent the grout from collapsing .
Also useable in a wide range of colors , unsanded grout cures in about 72 hr , like sanded grout , and after that period should be seal for protection against splattering and stains , says Chavoustie . It cost about the same as sandpaper grout , he sum .
Step 2: Select a grout additive, if you need one.
Sealant is a pre - mixed , ready - to - economic consumption liquid that is combined with grout powder in place of water . Sealant is designed to make grout joints less susceptible to moisture penetration , protect the grout against stains , modeling , and mildew and take the place of secondary sealants typically applied post - facility .
Grout sealantsalso improve the consistency of the grout ’s color while also preserving the colouring material . Some sealant additives also say they strengthen the grout .
Note that there are sealants specifically design for purpose with sanded and raw grouts , and you ’ll want to check compatibility between the sealant you ’re turn over and the grout you ’re using . Some products do n’t work well together , according to Chavoustie
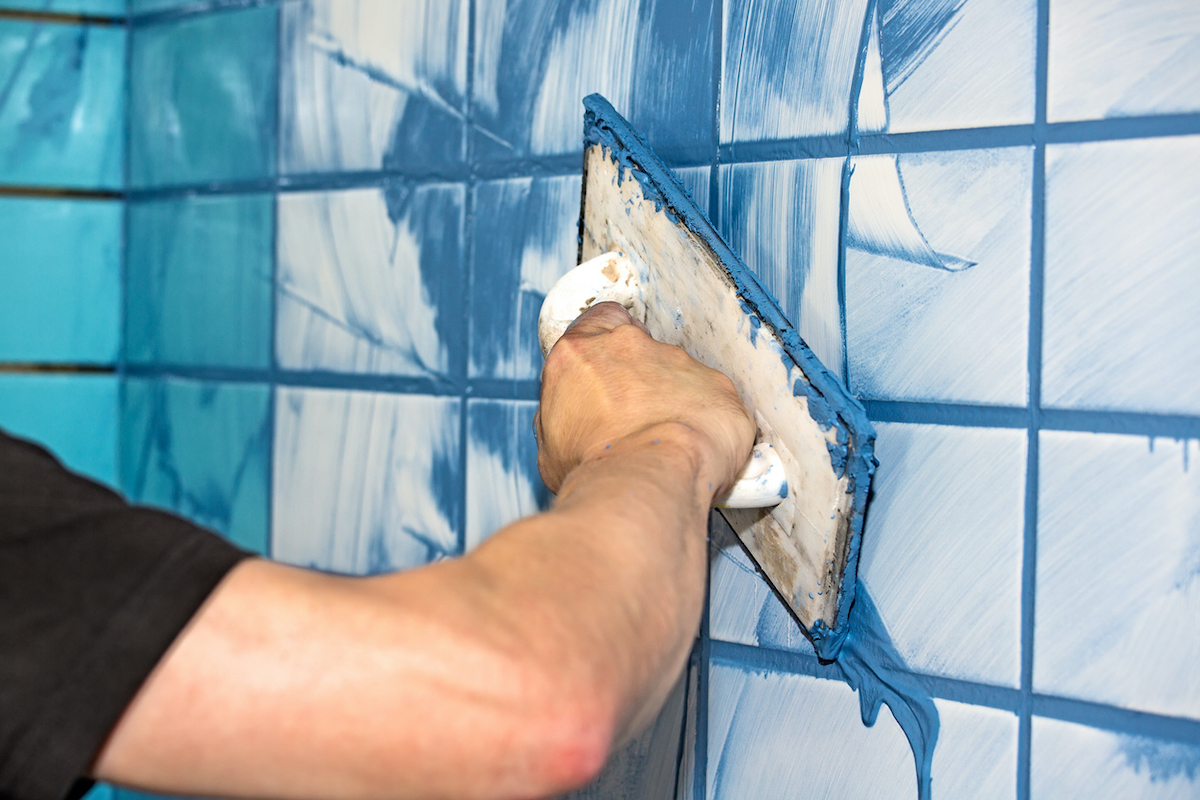
Photo: iStock
Sealant additive are typically stable in freezing / thawing atmospheric condition .
If none of the readily useable grout color are to your liking , you may take clean grout and customize it with any of a bit of grout colorants on the market place .
These powdered pigments simply mingle in with your grout and piddle . you’re able to adjust the amount of pigment you add to get the desired color , keep in intellect that the grout will dry out a routine idle than what you see when the grout is wet , grant to Chavoustie . Or adopt the manufacturer ’s guidelines for ratios of pigment to grout pulverization to get a more exact mate .

To boost the glam ingredient of the space you ’re redecorating , count tote up glitter — in any of a variety of shiny shades — to your grout mixture , or perhaps pigments that glow in the dark .
Latex additives are mixed into grout to improve workability , flexibleness , adherence , impact strength and freeze out - thaw impedance . These additives can also increase bond durability and make the grout curative harder , says Chavoustie . Another benefit is making the roofing tile roast less susceptible to water penetration .
Tried-and-True Advice
“ If you ’ve never tiled anything , it ’s utilitarian to do a test bleed with a chemical group of about six diminished tiles on a scrap angel . Go through all of the steps . You ’ll be grateful for the practice when you start the genuine tile caper , as there is some time press when setting tile and mixing grout .
Another tip : Do n’t leave to have a modest bucket of body of water on hand to make clean the knife while propagate the grout . ”
Step 3: Add water to the grouting powder per the manufacturer’s instructions.
Chavoustie recommend frame the right amount piddle in the commixture bucket before add the grouting pulverization . “ It ’s easier to mix if you put the water in first , ” he says , adding that you’re able to add more water if needed to get the right-hand consistency . Pour about a stern or one-half of the grouting gunpowder into the bucket — you’ll require extra usable in case you get the water - to - pulverization ratio ill-timed in the mixing phase . come to to the producer ’s mixing directions for how much water to use , and start with fraction less body of water than recommended ; you could always add more later
point : Avoid meld grout with well H2O or hard water , mineral from which can make efflorescence , an untempting white residue , as moisture seep into the grout . If you have a well or hard water in your area , use distill water system .
Step 4: Tilt the mixing bucket and stir with a grout-mixing knife.
Tip the bucket to about a 45 - arcdegree angle so it ’s easier to see the content and mix thoroughly with the grout - commix knife or small trowel . Continue mix until all the powder is blended , making sure to dispatch all goon .
bakshis : Resist the temptation to use a twilled drill with a paddle attachment to blend grout . Automated mixing can introduce too many air travel house of cards , weaken the grout and potentially induce stain .
Step 5: Adjust the grout’s consistency by adding powder or water.
tally the grout ’s consistence . Chavoustie says grout mixed for floors should be “ legato peanut - butter consistency ” while grout for walls should be a moment thicker . Other tile pros describe the unadulterated consistency as being kindred to mild bread dough , where you’re able to snaffle a smattering and it keep up its shape , and , if squeezed somewhat , does n’t leak water .
If grout is too slack or liquid - y , add more powder and mix well . leave too thin , it ’ll flinch and crack up . Good grout will need a little articulatio cubiti dirt to drive into the tiles .
If the grout is too dry and clumpy , moisten the parasite with H2O and squeeze just a dribble of weewee into the grout mixture . Do this in gradual addition until attain the right goober pea butter texture .
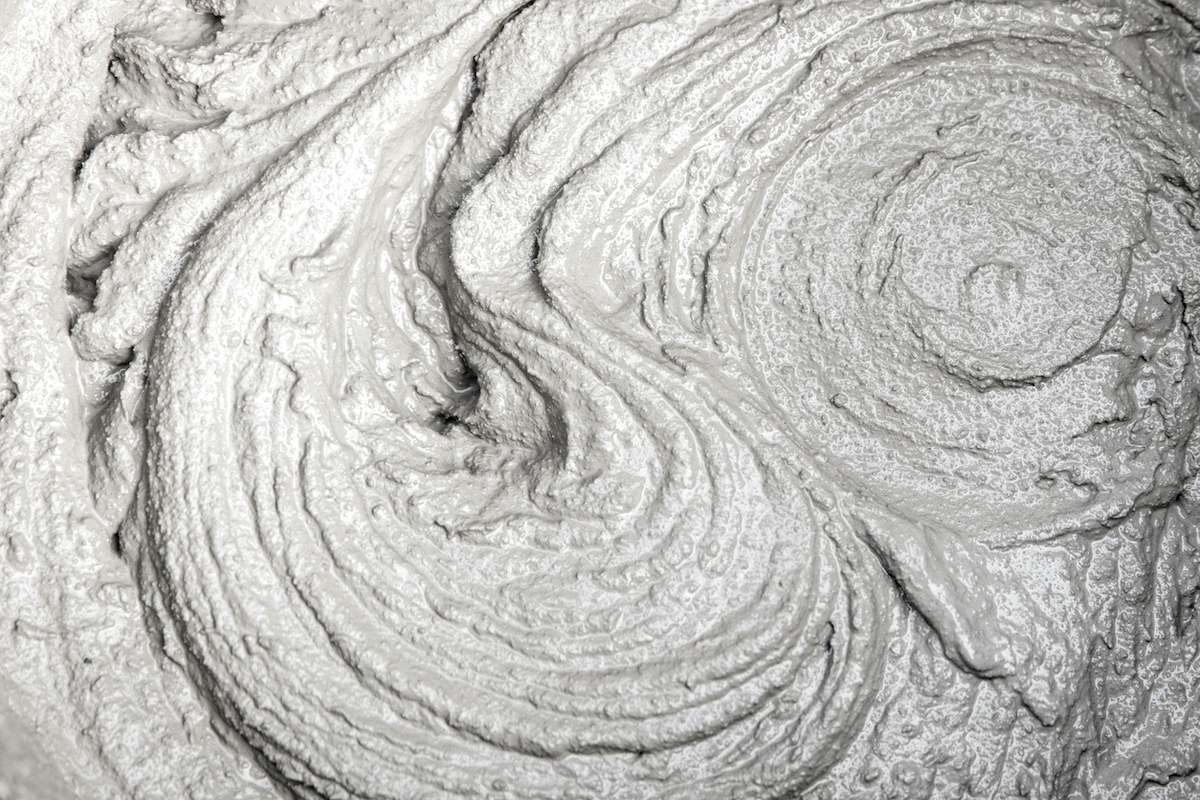
Photo: iStock
Step 6: Let the grout slake for up to 10 minutes.
Allow the grout to “ slake , ” the terminal figure for permit it rest for 5 to 10 minutes so that the chemical can bond . During slaking , wet amply percolate all the powder . Without proper slaking , grout will be sapless and more prone to snap and chip . Do n’t occupy — and do n’t summate water — if the grout seems a moment thicker after 10 minutes .
Step 7: Use a grout knife to mix the grout thoroughly again.
mix in your batch of grout good one more time , and get busygrouting the tileto fill in your DIY tile chore .
Final Thoughts
Mixing grout is n’t awfully difficult but may take a bit of experience to get it down utterly . Consider using an additive if it makes signified for your project . With the right tool and a routine of longanimity , you ’ll be a top - pass tile DIYer in no time .
FAQs
The proportion will change more or less from product to product , but typically you ’ll add two quarts of water to 25 Pound of pulverised grout .
look 15 to 20 minute before wiping off excess grout . It ’s a ticklish proportion , says Chavoustie . If you wipe it too shortly , you will pull too much out of the joint . If you wait too long , it becomes unmanageable to off .
If you ’ve made your grout mixture too blind drunk , simply add more powder to thicken it . If you assay to hold too - wet grout , it wo n’t bond aright and may drop or smear , leaking out of the joints and have a big mess . Wet grout , when it finally dries , may shrink and snap .

This Is the Year for a Kitchen Renovation
Whether you ’re selling or staying , everyone can get something out of a kitchen update . Learn why we deal this overhaul the Most Valuable Project of 2025 and how to outride on budget .
