We may take in revenue from the product available on this page and take part in affiliate programs . Learn More ›
“ Mudding , ” the process of applying multiple thin coats of wallboard compound to thejointsand screw indention in new hung drywall , sounds mussy , and it is . When done aright , the result is a wall so monotone that you may not make out the seams .
While professional drywall taper make mudding look easy , do - it - yourselfers find that it takes practice , skill , and — of course — the right appurtenance ( in this case , the mud itself and the tape that prevents cracks from come out in the seams ) . This guide to how to mud drywall outlines the materials require for the job , and walk DIYers through the process stride by step .
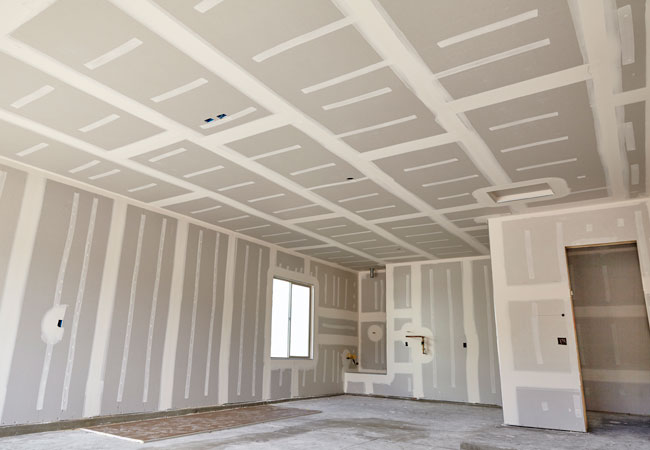
Photo: istockphoto.com
Types of Drywall Mud
There are two main types of drywall mud : premixed and powdered . There are variations on each type , too , which can make it baffling to choose the proper product for your job . Here ’s the lowdown on the types of dry wall clay you might rule at the home improvement store :
Premixed
Premixed joint chemical compound is just that : The mud has already been coalesce with weewee to a unruffled body and is ready to be applied . Within this class , you ’ll come up all - intent mud , top-hole mud , and lightweight all - determination clay .
Powdered
Powdered drywall clay , also called “ define clay ” or “ raging mud , ” contain chemicals that rush hardening prison term when water is bring to the powder . This eccentric of mud incline to shrink less than all - purpose premixed clay , but it hardens very quickly . quickly - setting clay work well for pre - filling large gaps in rampart , or smooth over crushed drywall corners before starting the literal mudding process .
Types of Drywall Tape
During the mudding process , tape recording acts as a bail bond to keep the ruined wall from developing cracks along the wallboard seams . The unlike character of mag tape are paper , mesh , and preform — and all three have their pros and bunco .
How to Tape and Mud Drywall
prime with an reason of mud materials , it ’s meter to familiarize yourself with the process as outlined here . Because report tape offers the most professional results , we ’ll detail how to mud sheetrock using composition tape . If you ’re using mesh mag tape , you ’ll regain some tips below that will help you use it correctly .
Tools & Materials
Bobvila.com may earn a military commission from purchase made through these linkup .
Step 1: Protect the floor and yourself from drywall mud splatter.
enshroud the level with a canvas tent drop material ( formative fall cloths can become dangerously slick ) and don goggles and old vesture . Mudding is a messy summons , and splatters can bite if they get in your eyes .
Step 2: If you’re not using premixed mud, mix the powdered setting mud.
Remove the lid from the bucket of premixed mud . If using fine-grained setting mud , shuffle as recommend by the manufacturing business , ticktock until fluent with a heavy dutydrillfitted with a paddle spot .
Step 3: Apply a first coat to the screw indentations and factory beveled joints.
Drywall panels come with slight bevel square on both of their long sides . When the bevels are fitted together , they form a small indenture , about 2 inches wide , along the joints . apply the 6 - inch videotape tongue to smooth out and sour the clay equally into the joint , fill the entire indentation and wipe aside excess clay .
Step 4: Cover the mudded joint with a piece of tape.
snub and meet a piece of newspaper tape over the junction while the mud is still wet for a process call “ bedding . ” Use the 6 - inch taping knife to lightly smooth the report onto the sloshed clay , working out bubble as you go . Wipe away spare clay with the knife .
Step 5: Tape the inside corners.
With the 6 - inch knife , use a thin coat of mud to both sides of an inner corner , piss sure to work it all the manner into the center . Cut , fold , and equip a comic strip of pre - creased paper taping in the corner over the blind drunk clay . Smooth the newspaper tape cautiously in the wet clay , using either a 6 - inch tap tongue or an inside - corner taping tool that feature a preform 90 - stage pattern for easy bedding . Use light stroking bowel movement to seam the tape without dislodging it from the niche . Wipe excess clay from the wall .
Step 6: Apply drywall mud to outside corners.
If using preformed magnetic tape corners , sequester them as recommended by the manufacturer , and then legato mud over the corner , using long vertical strokes on both sides to imprint a needlelike , unvarying corner .
Step 7: Mud the butt joints last, if necessary.
you’re able to avoid butt joints , which go on when un - tapered ends of a drywall panel are fit together , by using sheets of drywall that span the entire room . But if shell out with ends that have no beveled indentations , it ’s more challenging to get a smooth cultivation . Mud them as you did the bevel joints , accept charge to apply only as much clay as necessary to occupy the joint and bed the tape .
Tried-and-True Advice
Mudding dry wall can be messy , unmanageable , and time - eat , particularly without the correct wall homework . Before I start mudding the wall , it ’s important to burn away any tears or soft spots in the live drywall , as well as control nails or screw are properly driven into the bulwark . Corners that are uneven or have large gaps can also be a problem , but using a setting compound for recondite fill and metal corner bead to finish doorways is a great way to address these outcome .
— Timothy Dale , Contributing Writer
Step 8: Apply a second coat.
Let all the mud ironic before applying the next coat . Apply a second pelage of mud to the nookie indentations , chamfer joints , and inside and outside corners in the same order as the first coat — only this time , use only clay . No need to add more tapeline ! Just apply a thin layer of mud and wipe off all nimiety .
Step 9: Apply a second coat of mud to the butt joints, too.
To do a second coat for backside joints , take the 10 - inch tap knife , apply two swath of mud , approximately 8 inches wide , along both sides of the first joint coat , butnot on top of the original joint . This unnoticeably builds up the wall deepness over a wider orbit to reduce the appearance of a bulky butt - joint seam . fledge out the edges of the swath well with the knife for a politic look .
Step 10: Apply a third coat of drywall mud.
Step 11: Apply a final coat to the butt joints.
When the mud dry , apply one last thin coating only over the butt articulation . Feather out the edges very well and let the clay dry . Before moving onto the net footstep , an important question to ask is , “ How long does drywall clay take to dry ? ” Approximately 24 hours is the solution for most type of drywall mud , but refer to your product ’s label for particular on drying time .
Step 12: Sand the dried mud at the joints and indentations.
assume your respirator masquerade party and goggles prior to sanding . Use a wallboard pole sander or , if it ’s important to keep airborne debris at a lower limit , lease a power drywall sander from your local mental synthesis rental storage . Sand all joints and nail indentation until the wall is absolutely suave . Now you ’re quick to paint or wallpaper !
How to Mud Drywall With Mesh Tape
Unlike composition tape measure that postulate bedding in wet clay , self - adhesive mesh tape is enforce over seams and then , when mud is applied , an adequate amount seeps through the mesh into the seam beneath . The monastic order of taping is the same : Do screw indenture and chamfer joints first , indoors and remote corners next , and butt joints last . If you use mesh tape on flat joints , note that it ’s not worthy for corner . Use pre - creased newspaper tape for inside corners and preform tape measure for outside corners .
This Is the yr for a Kitchen Renovation
Whether you ’re sell or staying , everyone can get something out of a kitchen update . Learn why we look at this renovation the Most Valuable Project of 2025 and how to stay on budget .
Photo: istockphoto.com
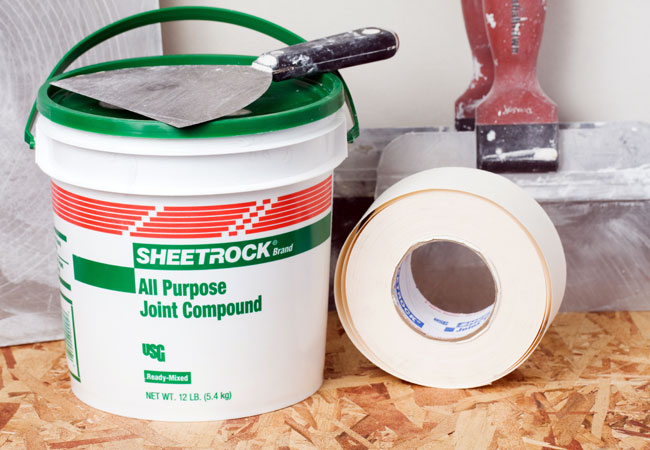
Photo: istockphoto.com
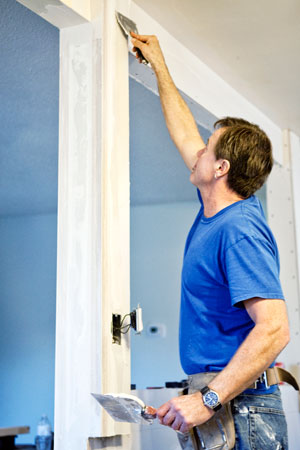
Photo: istockphoto.com


Photo:: istockphoto.com

