We may earn revenue from the products useable on this Thomas Nelson Page and enter in affiliate programme . find out More ›
If you ’re looking to give your bread and butter space a fresh new spirit in a short stop of time for not a lot of money , painting the walls a new chromaticity can be the perfect room to do just that . While it sounds like an well-off DIY project , it can easily move around into a DIY vexation if you do n’t know what kind of pigment to purchase , how much you ’ll need , and pro tips for achieving a satisfying result .
What Do You Need to Paint a Room?
To paint a way , you ’ll need essential supply like high - quality pigment , brushes , rollers , drop cloths , and more .
Tools & Materials
Bobvila.com may pull in a committee from purchases made through these links .
Project Overview
Working Time : 2 to 8 hoursTotal Time : 1 to 3 daysSkill horizontal surface : BeginnerEstimated Cost : $ 50 to $ 175
Before You Begin
Before you dive in , weigh prophylactic as you set up your distance . Do n’t forget to ventilate the room by opening a window and room access for mark - public discussion . Even lowly - VOC paints containchemicals that evaporatein the air and can have wellness issues if you are display to them for long periods of time .
If there are no windows in the space you ’re painting , fag a mask to avoid breathe in anyfumesand consider running an breeze purifier during and after house painting . to boot , low- and no - VOC paintscontain few fickle chemical substance than other types of blusher , and can serve keep yourindoor air qualityhealthy .
Step 1: Clear and prepare the room.
Step 2: Choose your paint colors and tools.
Choosing the ripe paint colorfor a elbow room can significantly affect the overall aesthetic of the space . turn over the way ’s function and the temper you are trying to convey should help you narrow down down your choice .
select thetype of paintand sheen is also a big decisiveness . Flat sheens are great for older spaces as they do n’t convey small imperfections as well . Satin is often helpful for busy support rooms and kid bedroom as they can be more easily cleaned , while high-pitched - dealings areas like the kitchen and hallways benefit from easy - to - clean finishes such as satin or semi - gloss .
snaffle a few pigment swatch from the computer storage to sample on your interior wall and observe how the sparkle affects their appearance throughout the day .
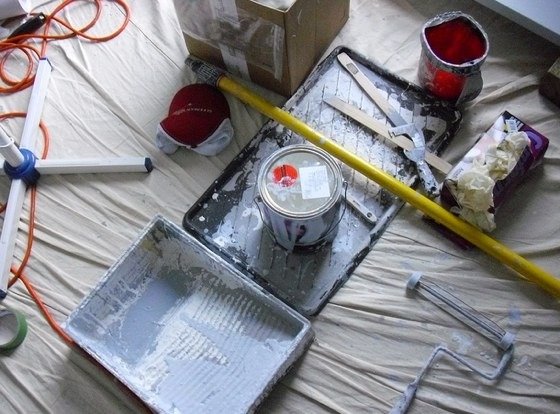
Gather all thepainting toolsyou’ll need : In addition to paint roller inning , paint tumbler pigeon covers , paint light touch , and paint , have a drum roll of paper towels , former newspaper publisher , a grip to dispose of towel , a catamount ’s multi - puppet to hit the paint can lid , a step ladder or defecate for hard to reach country , and a damp lint - free rag week .
Step 2: Apply painter’s tape (if needed).
Experienced catamount edit out - in along the edge of a rouge job , but beginners apply puma ’s tapeline to protect wall crop , windows , and fixtures . This can help keep pigment from accidentally dripping blusher on surfaces you want to keep uninfluenced . Here ’s how to use painter ’s tapeline properly :
Step 3: Protect floors and furniture with drop cloths.
To protect your floors and furnishings from accidental paint splatters , lay down a drop material before painting .
Pro backsheesh : If you expect you ’ll be moving around the elbow room , create pathways with drop cloths to forestall rouge from dripping from one area to another .
Step 4: Prime your surface.
To ensure a smooth and successful surface when painting walls , pro ground the surface first . This will enhance the overall quality and longevity of your key job , treat any color or light blot repugnance , and will allow the blusher to adhere better .
However , the right primerfor your project depends on where you ’ll be working , the surface you ’ll be painting , and your predilection for the timeframe of the job and its terminal flavor . If you ’re painting on bare forest , hold an oil colour - based or latex primer . For wallboard , a latex paint primer will be fine .
Additionally , if you are painting over a sour colour with a lighter people of color , or attempt to traverse up old stains , utilise a coat of primer . To prime a room in effect :

Photo: istockphoto.com
If you ’re handle with stubborn grunge like roll of tobacco impairment , apply a stain - obturate primer to prevent them from bleed through the paint .
Step 5: Paint the ceiling.
A room is usually painted from the top down . If you are painting the cap , paint it before the walls to reduce splattering on the walls .
admit the first coat to dry according to the manufacturer ’s instructions . Apply a second coat for uniform color and enhanced durability .
Step 6: Stir (or shake) your paint.
Using a mountain lion ’s multi - tool , cautiously pry launch the lid . If your paint was just assorted today , habituate a clean wooden paint cling to gently stir the paint in circular motions . now and then purloin the stick to suss out the pigment colouration . It should have a uniform vividness and smooth texture .
If the paint has been sitting for a day or more , shake it vigorously before opening , as it can separate over clock time .
Step 7: Paint the walls.
If using painter ’s tape , employ it along the edge of the walls .
Pro pourboire : If you take a break during the project , do n’t leave yourbrushesor rollers sitting in paint . Clean them . Latex paint can dry out quickly .
Cover paint trays with a dampish rag if you need to walk away for a few minute . If the pigment has a plastic chapeau , snap it back on . If it has a metal lid , clean the rim , put a piece of newspaper or a rag over the top , and gently tap the hat closed with a hammer .

Photo: istockphoto.com
Step 8: Remove painter’s tape.
After the blusher on the ceiling and walls is dry to the touch , the painter ’s tape recording can be removed . Carefully slay the painter ’s taping , pulling it away at a 45 - degree angle to avoid peeling off unfermented paint .
If you expect too long after painting to remove tape measure , you ’ll need to score the magnetic tape ’s edge to make indisputable you do n’t lift dry paint from the walls or ceiling .
Step 9: Paint the trim and woodwork (optional).
After the tape is removed and the wall are dry , the next step imply prepping for painting the trim , baseboards , or windowpane / door frames .
Step 10: Clean up.
If you ’ve followed the above steps exhaustively and correctly , it ’s time to straighten up so you may enjoy your beautifully painted elbow room and showcase your fresh refresh space .
Final Thoughts
And just like that , you ’re now armed with the right gradation to paint like a pro and give your space the makeover it deserves . Keep in nous , to ensure a smooth and successful finish , you ’ll need to prep your surfaces , magnetic tape offany areas you do n’t need painted , and choosehigh - character toolsand pigment . wrap up your sleeves and learn as you transform your space with a fresh coat of paint !
FAQs
Q: What’s the correct order to paint a room?
There ’s a right order to paint a room to ensure thorough coverage : Start with the ceiling , then the surrounding paries , and lastly the trimwork .
Q: How long does it take to paint a room?
The clock time it takes to paint a room depends on the size of the space and complexness of the surfaces . It typically ranges from 1 day to 2 or more twenty-four hour period .
Q: How much does a professional paint job cost?
How much does it be to paint a room ? Rates alter depending on the size , preparation , and complexness of the projection . For most typical manse , expect to yield roughly $ 200 to $ 1,500 per room .
This Is the twelvemonth for a Kitchen Renovation
Whether you ’re trade or staying , everyone can get something out of a kitchen update . Learn why we consider this redevelopment the Most Valuable Project of 2025 and how to stay on budget .
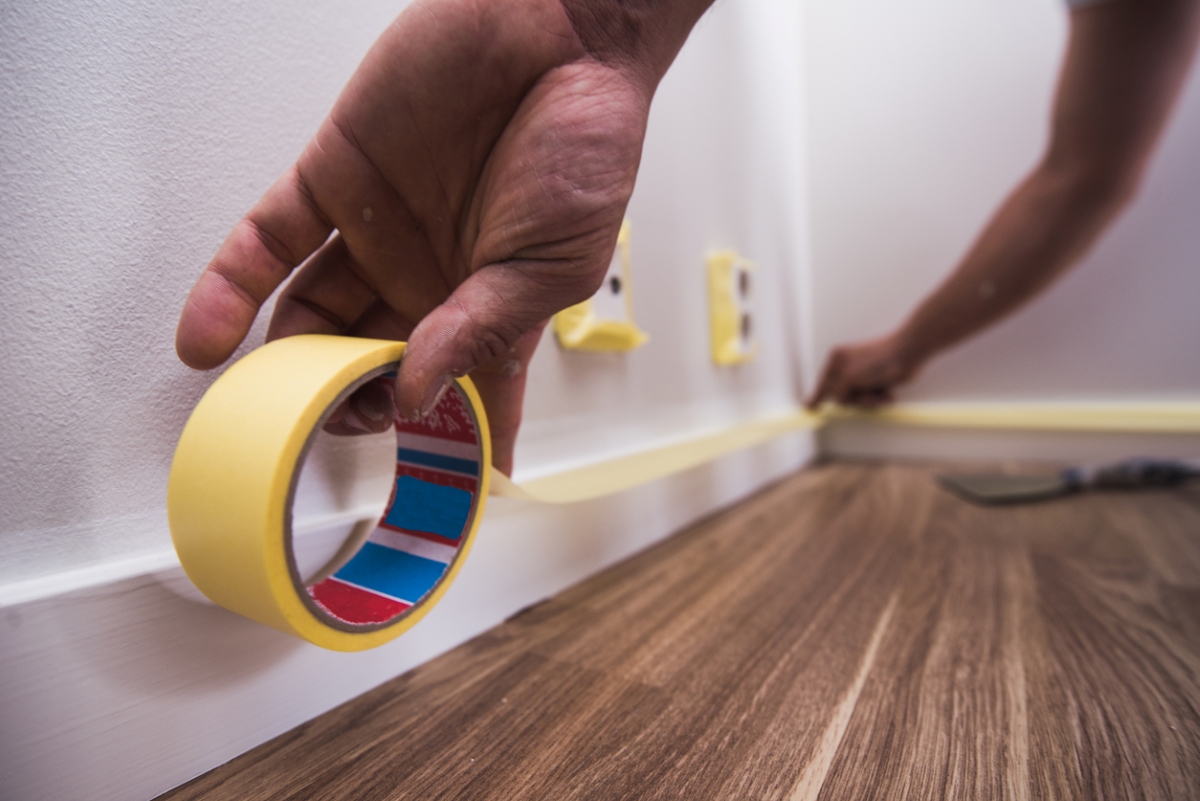
Photo: istockphoto.com
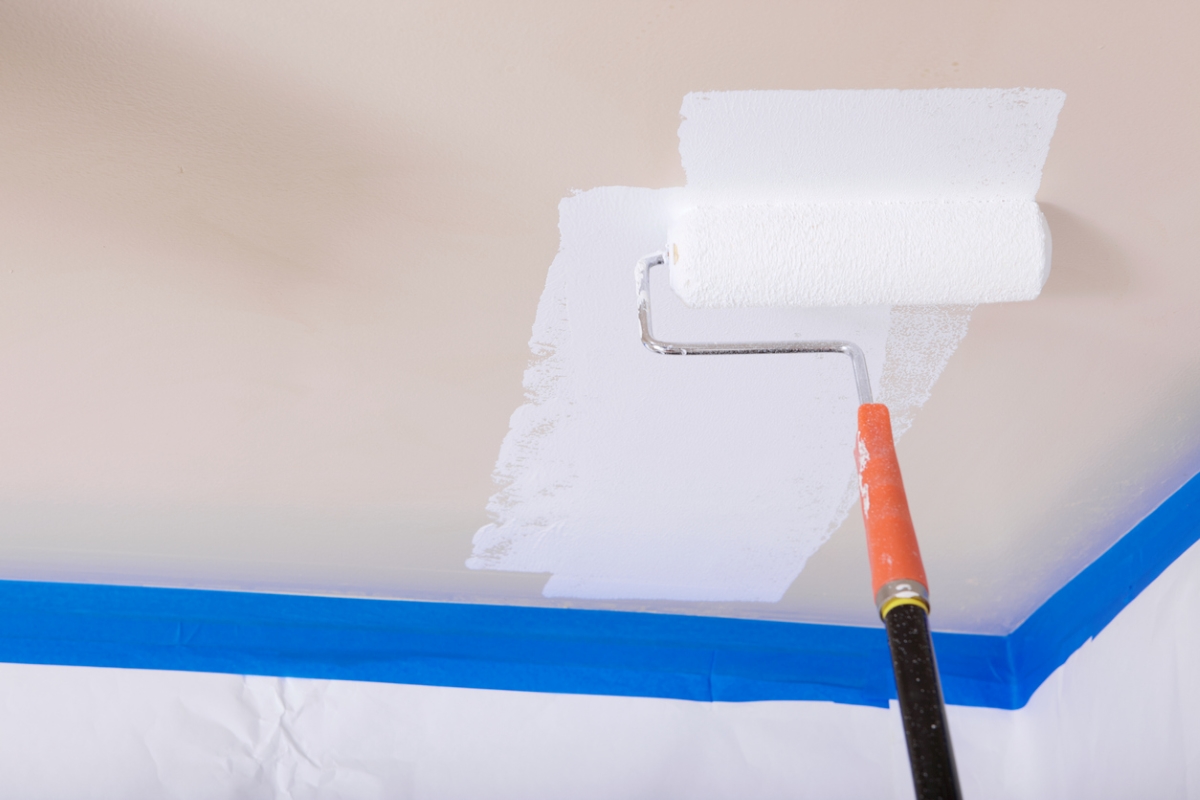
Photo: istockphoto.com
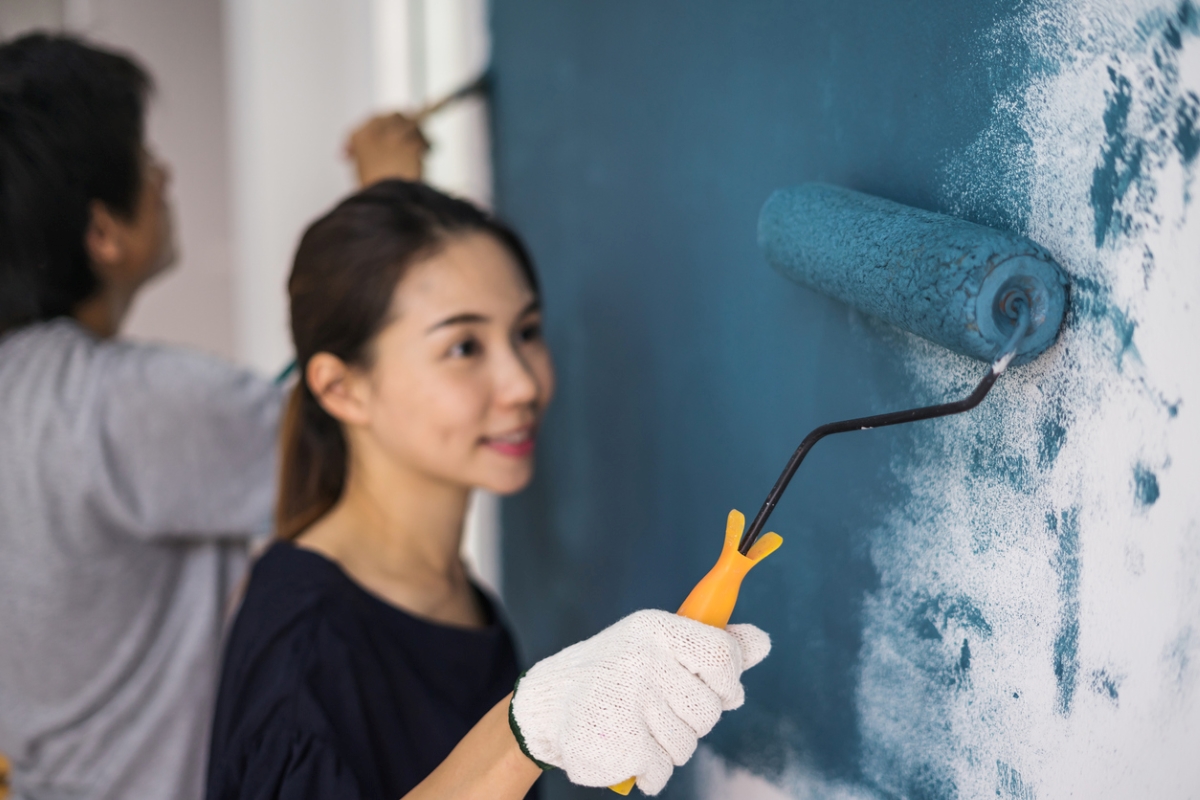
Photo: istockphoto.com
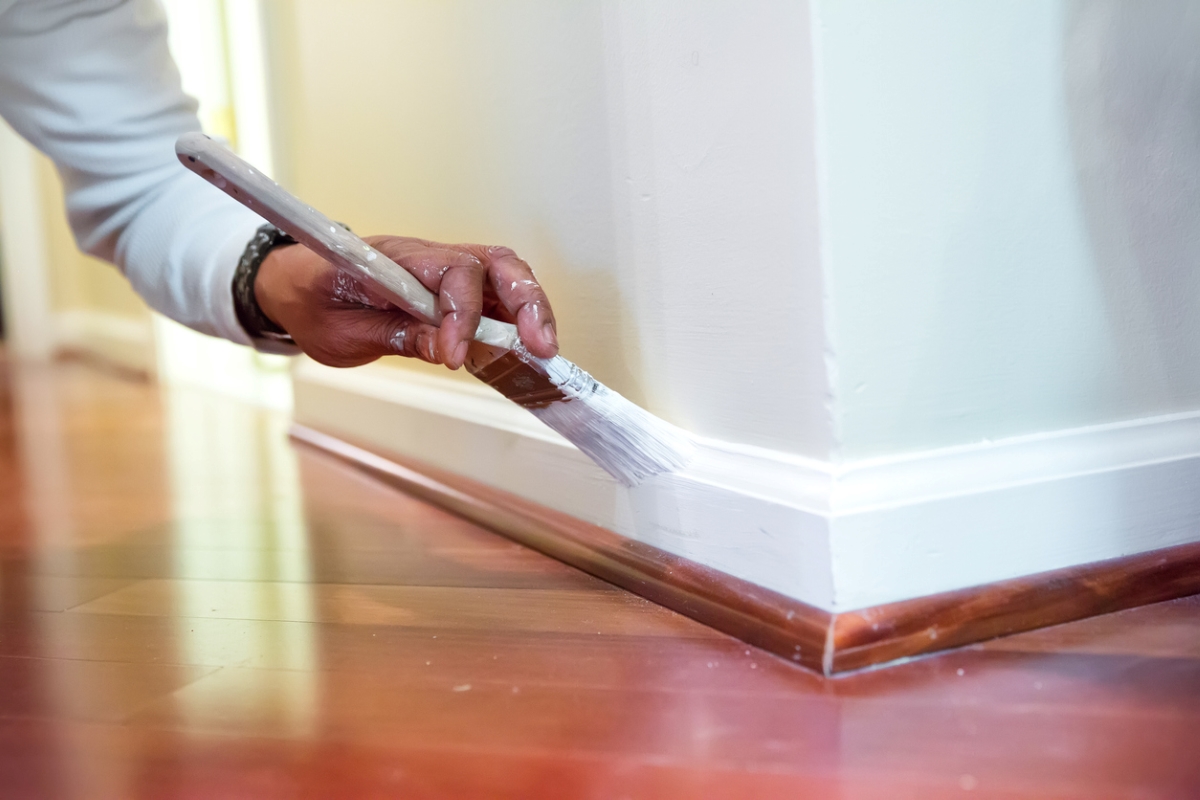
Photo: istockphoto.com

