We may gain gross from the products available on this page and participate in affiliate programs . instruct More ›
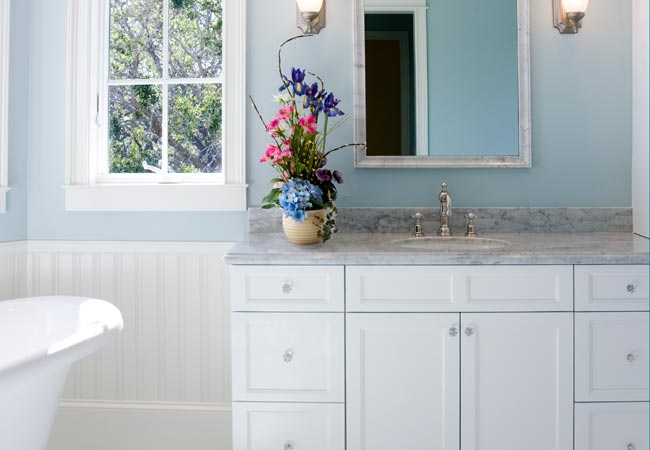
Whether your toilet self-love has gone dingy with heavy use and picture to moisture , or it ’s just look dated , paint your lavatory storage is an soft manner to refresh it . Yes , you’re able to successfully paint both substantial Grant Wood or orchestrate Natalie Wood , no matter whether the privy cabinets are bare , certain , or previously painted . Careful surface preparation , meticulous proficiency , and the right product are primal to professional - caliber result . Get originate with our thorough scout on how to paint bathroom cabinet ; you ’ll ascertain all the tools you require togive that vanity a beautiful and durable unexampled look .
Project Overview
play Time:9 hoursTotal Time:24 hoursSkill storey : IntermediateEstimated Cost:$200
Before You Begin
Painting your bathroom vanity is not a hard project , nor one that necessitate a lot of forcible strength or acquisition with dick , but there are heaps of things DIYers must do and conceive through before they pick up a rouge brush . Determining the kind of primer and paint to expend is one concern . What ’s more important to think about is how you ’ll protect yourself as you harness this project . bath are typically middling small spaces , and smoke from paint , primer coat , and trisodium phosphate can become bothersome promptly if the room is not well ventilated . Always be certain to execute the exhaust system sports fan and opened windows while you ’re paint in the can . We also recommend protecting your body by wear protective goggles , clothing that covers your pelt , and a respirator .
Tools & Materials
Bobvila.com may gain a commission from purchases made through these links .
STEP 1: Prepare the space for painting.
Laydrop clothson the floor around the bathroom cabinet to protect it from sand junk and paint . get rid of all point from the cabinet and temporarily stack away them elsewhere .
STEP 2: Remove the cabinet doors.
take away the cabinet door will help you achieve a cleaner , more uniform paint close .
set up the doors and hinges apart where they wo n’t get swash withpaint .
STEP 3: Take the drawers out of the cabinet.
dispatch the cabinet boxers , starting with the upper drawer and knead your style down . Pull out the drawer as far as possible ( it will course check rolling onward when the wheels give the end of the drawer rail ) . Tilt thedrawerdownward and toward you to lift its wheel off the rail , then perpetrate the drawer straight out to remove it . placed drawers aside .
STEP 4: Remove the cabinet hardware.
With a screwdriver , slay the hardware from the threshold and boxershorts . ( The screws that secure each pull or knob are usually located on the back of the doorway or drawer face . ) Lift hardware from the front of the threshold or drawer and correct it all aside , away from the house painting sphere .
STEP 5: Protect surfaces you don’t want to paint.
Usepainter ’s tapeto deal any toilet cabinet open you do n’t desire to paint , such as the bottom of the self-love top and wall areas side by side to the cabinet . Tape oldnewspaperto the inside of the bath cabinets unless you also project to paint the cabinets ’ interior .
STEP 6: Clean the cabinets with trisodium phosphate.
Open toilet windows and turn on the exhaust fan because TSP can have respiratory irritation . After donningwork gloves , safety goggles , and arespirator , dilute one - poop cup oftrisodium inorganic phosphate ( TSP)in one gallon of warm water in a5 - gallon bucketful .
Vigorously scrub the out and inner cabinet frame , the door and draftsman front end , and , if desire , the backs of the doors , with aspongesaturated in the TSP solution . Make a second offer over the cleaned open with a water - dampened sponge to remove the TSP solution . Towel - dry out the console well , and then allow all pieces to air - dry altogether .
STEP 7: Sand the cabinets.
With a knife , test an invisible area of the cabinet to learn whether it is surface with a sealer . If a finish flakes off , you ’ll need to do some surplus sanding . verify that your gloves , gasmask , and goggles are still in place before proceeding .
Sand the KO’d and/or inner cabinet frame , the room access and drawer fronts , and , if desired , the threshold back with emery paper .
STEP 8: Clean up the sanding dust.
Vacuum sandpaper junk from the cabinetusing the dust - brush attachment . pass over down the sanded areas with a water - dampen cloth , then make a net pass over the cabinet with a tack cloth .
STEP 9: Prime the cabinet surfaces.
To prime the storage locker , pour a small amount of shellac oroil - based primerinto apaint tray . Both shellac and oil colour - base ground are generally more effective than rubber-base paint primer in defend bathroom cabinets against moisture . Shellac primers , however , derogate brush label more efficaciously than oil - based primers . A shellac fusee also gives you more flexibility , because you could use either an oil - establish or body of water - based paint over it .
Coat thepaint roller coverwith fuse , then work the primer over the outer and/or inside cabinet frame in the centering of the wood food grain . Next , undertake monotonic areas of the doorway and drawer fronts . For groove in doorway and draftsman fronts , applyprimerwith anatural - bristle blusher brushto better get to inlet and tight corners .
Let the first pelage of fuse cure grant to the manufacturer ’s pedagogy .
How to Paint Bathroom Cabinets Photo: istockphoto.com
STEP 10: Add a second coat of primer (optional).
If you are prime bathroom locker that have been previously painted , especially if you ’re going from a darker to a lighter paint colour , apply another coat of primer coat on each cabinet surface and allow it to bring around totally . ( If you ’re prim out an unfinished cabinet , you’re able to usually skip the extra coating . )
reprise Steps 9 and 10 to undercoat the backs of the cabinet door , if you are painting them .
STEP 11: Paint the cabinet.
To paint the bathroom cabinet , pelt a small amount ofoil - based paintormold- and mould - proof latex paintinto a paint tray . ( The secure paint for woodfurnishings in bathrooms and kitchens is oil - based blusher , but mold- and mold - proof latex - based internal paints can be swapped in for vegetable oil pigment if you choose a quicker - drying rouge that emits fewervolatile organic compound . ) When choosing paint , note thatsemi - glossand gamey - gloss finishes repel moisture more efficaciously than flat and eggshell finish , and darker shades hide dirt better than lighter colors .
For a professional - looking goal , work with the tool best beseem for the type of paint you ’ve selected :
laden the crimper cover withpaint , then utilise a root coat to the tabu and/or privileged locker frame . Next , paint your bathroom cabinet ’ flat areas ( the door and drawer front ) in the direction of the wood grain . Do n’t leave to paint the nooks and crannies !
Photo: istockphoto.com
Let the base coating dry accord to the manufacturer ’s instructions .
STEP 12: Apply another coat (or two) of paint.
Give your bathroom cabinets an additional coating of paint or two over the understructure as ask to achieve the trust profundity of color . countenance each coat to dry in full before applying the next , then let the top coat dry out altogether .
iterate step 11 and 12 to paint the backs of thecabinetdoors , if desired .
STEP 13: Clean up and reattach the cabinet doors.
Roll up and remove the drop cloth , and transfer the mountain lion ’s tape from the locker . Retrieve the hingescrews(or clips ) to reattach the doorhingesto the storage locker . Reinstall the cabinet room access and draftsman as you removed them , then reattach the door and draftsman hardware .
Final Thoughts
paint a bathroom locker is a relatively easy DIY for those with a work knowledge of sanding and painting . Indeed , the most challenging part of this job is belike train the space for the fuse and picture : take away drawers , console fronts , and hardware , and protecting surface that you do n’t want painted . Speaking of protection , always commend to bust gloves and proper respiratory protective cover , andopen windowsand turn on yourbathroom exhaust fanwhile you ’re working . It ’s easy than you think to transubstantiate a timeworn - lookingvanity !
FAQs
When painting a can storage locker , there are lots of decisions to be made regarding the appropriate primers , paints , and tools to habituate . These frequently asked interrogative will help you learn more about the best mathematical product to use and procedure to postdate in your picky office .
Q. What kind of paint do you use on bathroom cabinets?
The best type of paint for bathroom cabinets is oil - based paint because it can withstand damp and humidness . Alternatively , you could also expend a latex - base paint that has mold- and mildew - proofread dimension , such asZinsser paint products .
Q. Can you paint bathroom cabinets without sanding them?
blusher adheres best to cabinets that are sanded , and this is particularly true of cabinets that already have paint or a protective coating on them . For professional - looking results , we commend at least one pass with 220 - moxie emery paper .
Q. How do you paint over stained cabinetry?
Because most stained cabinets are protected with a coating of lacquer or varnish , you ’ll first want to remove that with aliquid deglosser . Then , stick to the centering above for cleaning , flat coat , and painting the cabinet .
Q. How do you use chalk paint on bathroom cabinets?
To paint cabinets with chalk paint , train the console as point in Steps 1 through 5 . Clean the cabinets ’ surfaces with a rag and soapy water , dry exhaustively , and utilize the glass paint in slender layers . Seal the paint with awater - establish polycrylic protective finish .
This Is the Year for a Kitchen Renovation
Whether you ’re selling or staying , everyone can get something out of a kitchen update . Learn why we believe this overhaul the Most Valuable Project of 2025 and how to stay on budget .

Photo: istockphoto.com
Photo: istockphoto.com
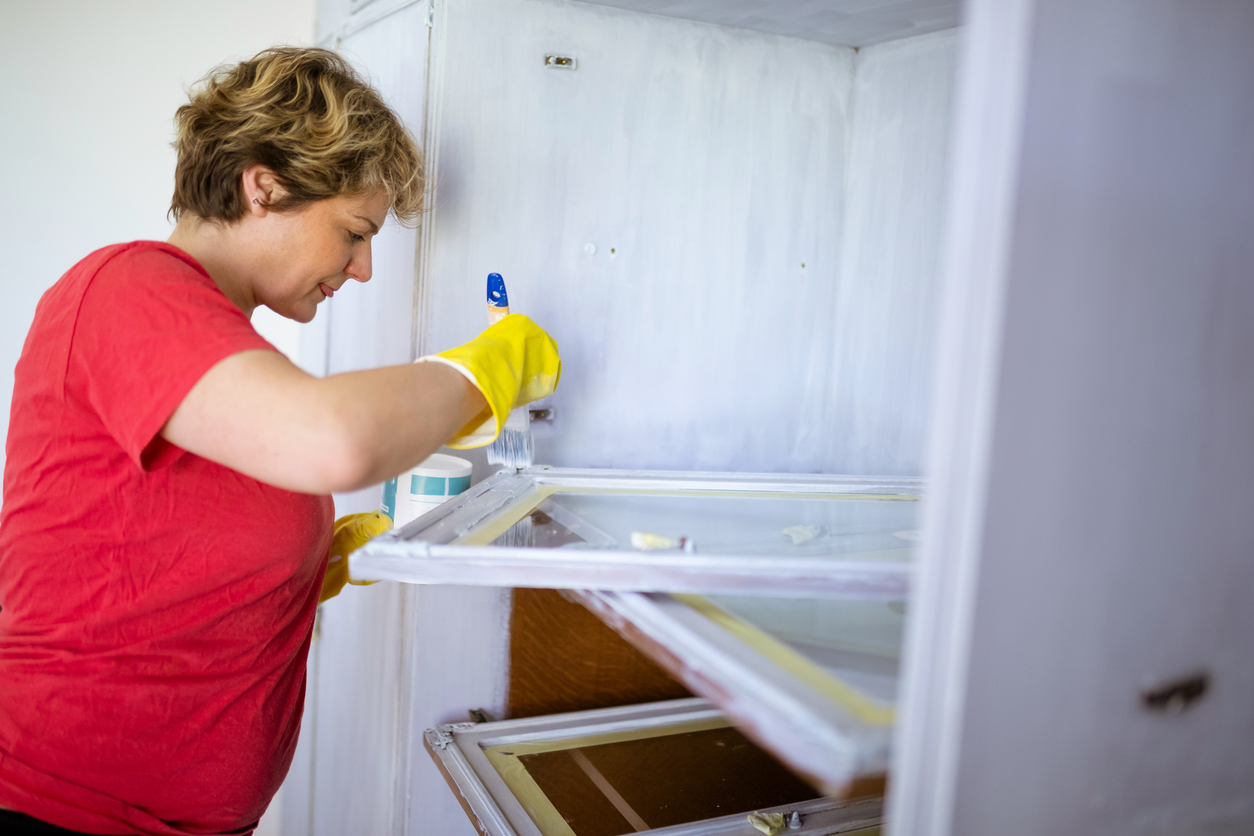
Photo: istockphoto.com
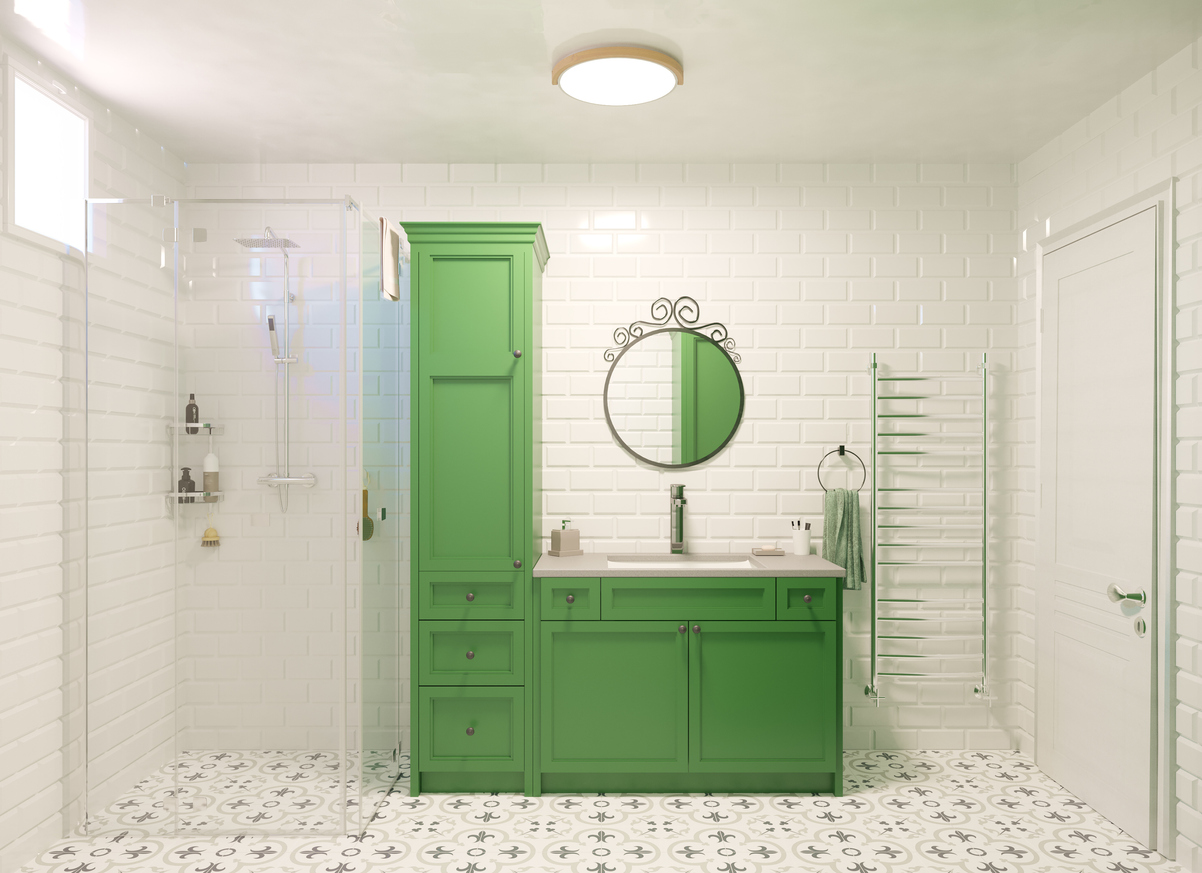
Photo: istockphoto.com
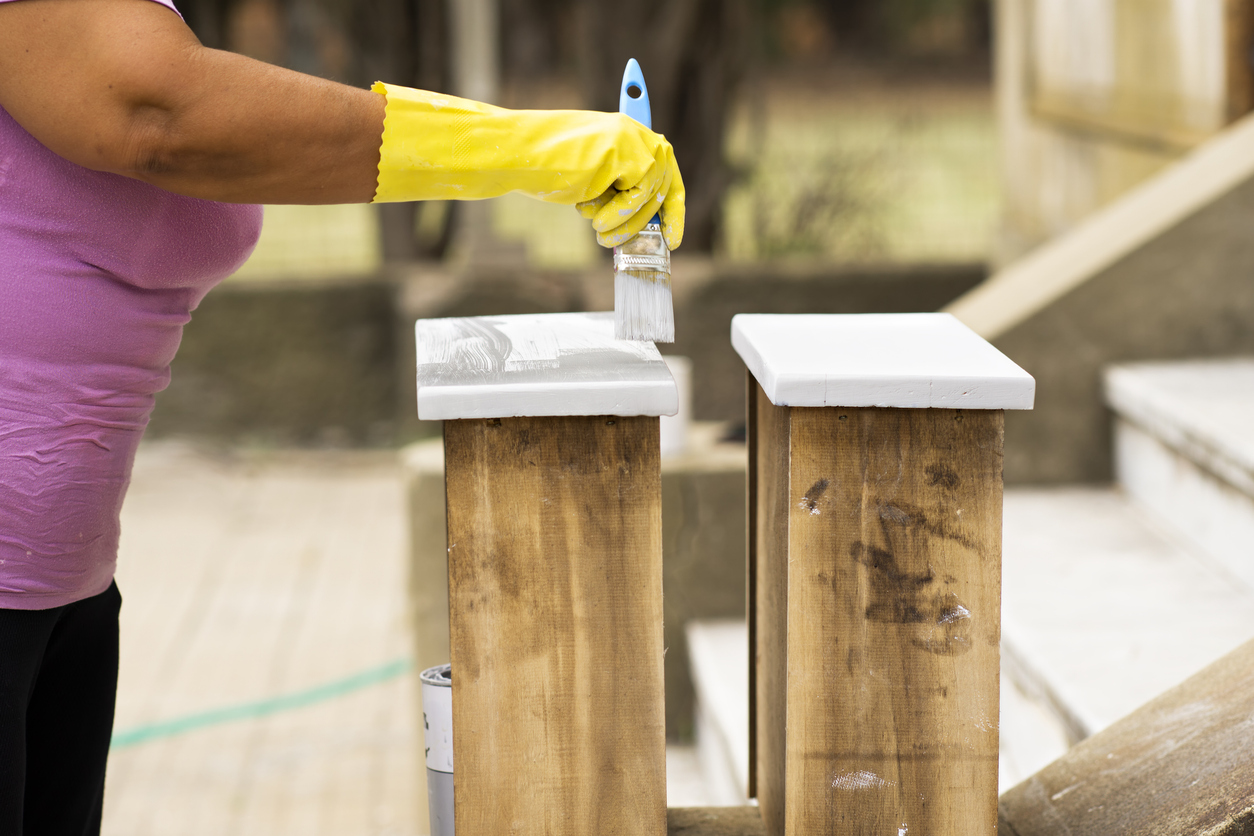
Photo: istockphoto.com
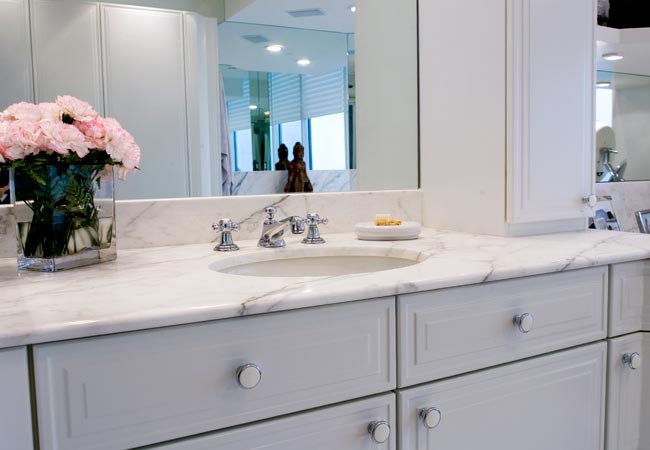
Photo: istockphoto.com

