We may make receipts from the products available on this varlet and participate in affiliate programs . ascertain More ›
The strangle space behind the toilet is a unmanageable portion of the bathroom to maintain , put a challenge when it comes clip to dust and an even larger one when repaint . A can tank situated not quite flush against the wall leaves very little way to engage a brush or pigment roller but just enough that it would be noticeable to leave the color unchanged while the rest of the elbow room gets a refresh . Fortunately , DIY - inclined homeowners and renter have two easy alternative for how to paint behind a john , neither of which require moving the bulky ceramic out of the way .
Before you begin , make certain toselect the right priming coat and blusher . Bathrooms , of course , are exposed to a lot of wet and humidity , so your paint choice should be design to hold the combining . Consider a rouge with anti - microbial additive , likeBenjamin Moore ’s Aura Bath and Spa ingathering , or an interior key with semi- or gamey - gloss finish — this luster repels moistures better than matte paint . And do n’t forget to start with a top - calibre , moisture - repellent key primer . The correct primer will prevent peeling and water hurt for years .

Photo: iStock
Tools & Materials
Bobvila.com may earn a committee from purchases made through these links .
OPTION 1: Cover the toilet with a trash bag, then brush freely.
When painting the total john , prep the throne with a bead cloth before you start but spare the real picture of the tight quad behind your toilet for last — it involve the most elaborate care .
Step 1: Ventilate the bathroom.
Bathrooms are often small , wrap spaces with poor air circulation . Materials like exhibitor curtains and towels that retain moisture also keep them systematically humid . Toboost bathroom ventilationand denigrate paint drying time , dispatch the shower drape , base rug , bath , and handwriting towels . If your bathroom has windows , make trusted they are open . hunt down the external respiration fan or punch in a diminished circulate fan .
To prevent paint fume inspiration , you may also wish you wear a painter ’s masquerade party .
Step 2: Clean and prepare the area behind the toilet.
pick the walls , floor , wall , and toilet surface with a cellulose sponge dipped in a mixing of dish max and urine . This will help remove dust and dust and whisker build - up . Dry the area thoroughly with terry cloths .
Next , cover the level around the toilet with a tarp or plastic sheet stop up with cougar ’s tapeline .
Then , cover the crapper with an extra - large plastic garbage bag . ( Tip : You ’ll incur declarer clear - up suitcase at your local household improvement memory board in sizes of up to 50 gallons , and these resist inadvertent tearing . ) record the bag in place around the toilet ’s base . Take guardianship to wrap any pipage or trim that might be exposed with painter ’s magnetic tape .
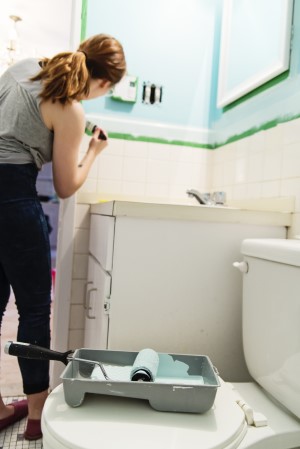
Photo: istockphoto.com
Tried-and-True Advice
“ There ’s no fashion to paint behind a toilet with it being a bit clumsy . bump off the sewer is an pick , but that tote up a series of step to the process that are unmanageable and best avoided unless you have plumbing system attainment . I witness that murder the lid and covering the toilet with a trash bagful is efficient , and it allows for full paint insurance coverage when using narrow , squishy brush . Look for recollective hold alternative to make the cognitive process easy . ”
— Zach Lazzari , Contributing Writer
Step 3: Prime and paintthe wall.
start out with one to two coats of primer to check the good paint adhesion . To touch behind the can and around pipe , you ’ll want to do the following :
Let the primer dry out thoroughly before applying paint . ( The rouge ’s dry timewill look on the temperature and humidity level in your bathroom , as well as the paint undercoat you opt ; bring up to the can for an estimated wry clip between coats and before paint . )
After priming , clean your paint pan before pour out fresh paint into it . To use your paint , follow the same tips . After the first coat , wait the amount of time recommended by the manufacturer ( longer , if your lav is not well ventilated ) so that the wall is totally dry before applying a top pelage .

OPTION 2: Purchase a special painting tool to access the area behind a toilet tank.
Painting the wall behind the toilet tankful can be less of a pain in the neck when you use a tool plan to match the narrow-minded crack between the toilet tank and wall . Sure , it may be that you only have a pigment job like this once every five to 10 age ( peradventure more , if you are a renter who appreciates a fresh coat of key when you move in and then often postulate to repaint before you move out ) . There ’s an innovational painting prick you’re able to buy online to access hard - to - hand areas anticipate thePaint Behind . It ’s a unconditional , extendable - to-12 - inches blusher light touch that can attain behind potty , pipes , radiators , and other soused spots .
Step 1: Ventilate the bathroom, then prep for painting.
go in establish good bathroom ventilation and a clean slate for best adhesion , just as you would in Steps 1 and 2 of Option 1 .
Clean the wall behind the toilet with a cellulose sponge dipped in a mixture of dish scoop and water ( you might also try dipping a microfiber cloth in the cleaning resolution and wrapping it around the Paint Behind , and extending the tool to clean behind the armoured combat vehicle ) . While the wall air dries , cleanse the stick and let it dry completely before painting .
Cover the bathroom level with a fall cloth held in place with painter ’s tape , but skip bagging the john . Keep a dampish paper towel nearby to pass over up any stain .
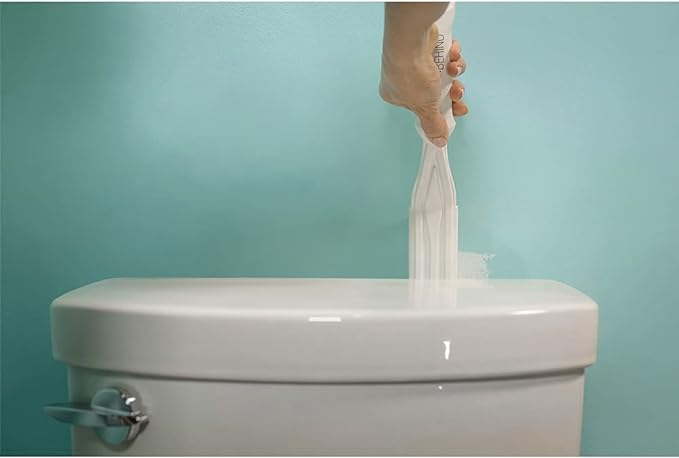
Photo: Amazon
Step 2: Dip the tool into primer, and glide it across the wall. Repeat the process with coats of paint.
Dip the Paint Behind ’s applicator launch pad into the paint tray to get primer on inkpad . Then , glide the key wand the wall behind the toilette , urge on firmly to check that the entire paint - saturated airfoil meets the wall .
Apply two coat of primer this path , leave time between them as recommended by the paint manufacturer . Then , clean the Paint Behind with water and rent it dry . Repeat the process with two coats of blusher using the Paint Behind .
This Is the Year for a Kitchen Renovation

Whether you ’re betray or staying , everyone can get something out of a kitchen update . larn why we count this renovation the Most Valuable Project of 2025 and how to appease on budget .
