We may bring in revenue from the products useable on this Sir Frederick Handley Page and enter in affiliate programs . Learn More ›
Whether your destination is to reincarnate a melt formative pack of cards chair or change the color of a home decor item like a picture frame , flower pot , or holiday ornament , there are two chief affair to know about painting plastic : It ’s possible and it can be easy . Although there are traditional paints give voice for use on plastic , spray paint is the easiest type of key to use .
“ While using spray blusher on plastic is always advocate , you could also sweep and roll paint onto charge plate but you will not get the nice smooth finish you would get when spray it , ” says Ryan Adamski , Sr . Production Manager atCertaPro Painters .

Photo: Tom Fenenga for Bob Vila
What type of paint should you use for plastic?
It ’s important to purchasespray paintthat ’s designed for use on plastic . “ There are paints that are specifically designed to cleave to credit card , like Rust - Oleum spray cans andKrylon Fusion , ” allege Adamski . In accession , there are charge card - well-disposed multisurface paints that may also be appropriate for wrought iron , ceramic , metal , glass , and vinyl , so you may notice another use for any pigment that befall to be left over .
Among the several brands that make spray pigment for plastic , I ’ve in person had a lot of achiever usingKrylon ’s COLORmaxxand Fusion on a variety of plastic surfaces . Beyond their stock colors , the brands bid metallic options for charge plate , too . Even though a label might say that the paint needs no fuse , I always use a primer coat for plastic to ensure the ruined look is as professional as possible .
Another matter you ’ll want to check is whether the rouge is designed for interior or exterior software . Some multipurpose nebuliser paints are designed for both , which further carry the possibilities of use .
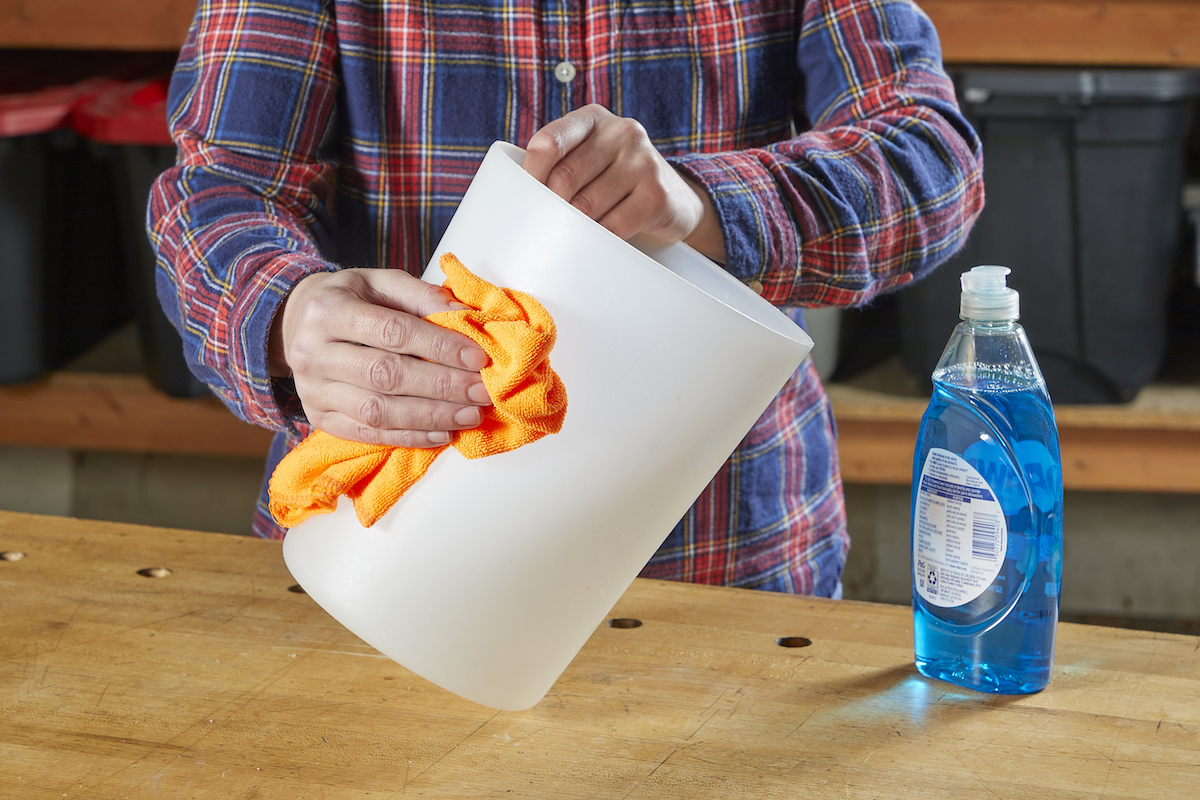
Photo: Tom Fenenga for Bob Vila
Tools & Materials
Bobvila.com may earn a commission from purchases made through these links .
Project Overview
Working Time : 1 hourTotal Time : 3 hoursSkill Level : BeginnerEstimated Cost : $ 20 to $ 30
Before You Begin
How to spray - blusher plastic start with take a location where the zephyr temperature is between 50 and 90 degrees , which is ideal to avail attachment and forbid bubbling or pass while nebulizer - painting . verify to localize up the labor in a well - vent that does n’t have much air motion so dust and rubble ca n’t call for on the control surface while the rouge is drying . It ’s good if there are n’t tree diagram overhead , since junk can knock off and wrack a perfect blusher finish . Wear a mask and gloves while spray - painting , too .
Another condition for paint a plastic object is that there is unremarkably a top and bottom , so the object will need to be flipped over to be paint . I usually paint the bottom of an object first , so that the top draw the final coats and I am less likely to mar the finish unintentionally when riff it over .
How to Paint Plastic Surfaces
house painting charge plate is alike to painting other character of surfaces . However , there are a few specific details that are unique to fictile house painting succeeder . Those details are included in the steps below .
Step 1: Clean the plastic surface.
Proper preparation is the key to a smooth and lasting finish . This first step postulate sic up the work region and preparing the plastic surface for paint . To help forbid accidents andminimize cleanup , set up a protected employment area , lining it with newspapers , rag of composition board , or a tarp . The tarped area should be at least 2 or 3 animal foot wider than the plastic point that will be paint to preventaccidentally spraying other surfaces . After the work area is quick , it ’s time to prep the plastic surface .
“ Prep is very important when paint plastic . You want to first make certain the open is wholly uninfected , ” says Adamski . There are a few ways to clean the surface . Adamski says that steady cleaning products or a 3:1 ratio of water to discolorize work well .
Step 2: Lightly sand the plastic.
This sanding step is n’t entirely necessary for all plastic surfaces . Some spray paints like Krylon ’s Fusion do n’t ask sandpaper plastic or priming , but not all paints will bond to a slick plastic aerofoil . If the airfoil is slick , it ’s a good melodic theme to softly sand withhigh - sand sandpaperor a sanding block , like 220 or great . ( When in doubt , always accomplish for the highest grit . )
Step 3: Remove the sanding dust.
After sanding the surface , exhaustively pass over it down with a cloth to remove any dust . Then , use itch alcohol to remove any lounge residue . There ’s an crucial reason why it ’s crucial to dispatch any particles on the surface : Paint will sequester to the particles and not the surface underneath , which can wreck a perfect paint finishing .
If there are any parts of the objective that you do n’t want to paint , cover them up with painter ’s tape .
mention : While mineral spirits also do the trick to remove remainder and prep the surface for paint , there may be local ordinance and guidelines for disposing of cloths covered in mineral spirits . It ’s usually easy to use scratch alcohol .
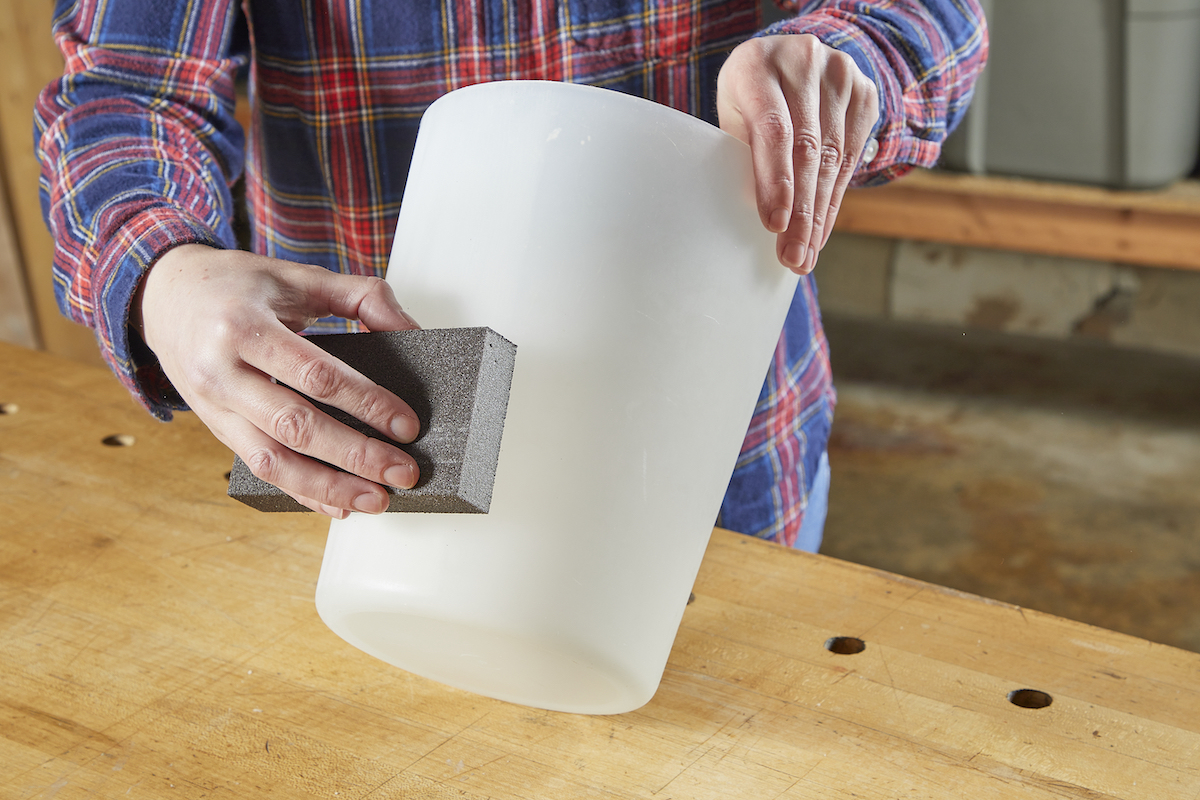
Photo: Tom Fenenga for Bob Vila
Step 4: Prime the surface.
Now that the surface is ready for paint , it ’s time to prime . prefer a flat coat that is designed for use with credit card . While there are some paint and primer for plastic option on the market , I always use just a even primer . Shake the can vigorously for about a moment to prepare the paint . Before spraying the object , commit your technique on a scrap of cardboard .
The technique for priming is the same as painting . Keep the can a distance of about 12 inches from the surface , and use farsighted sweeping dot slash across the plastic . Do n’t discontinue at the bound , as paint will build up anywhere you pause while spraying . Spray across and past the airfoil , back and forth . enforce a light coating , then hold back for the manufacturing business ’s recommended time to go for another dust coat . I usually practice two to three light coat before moving on to the paint color .
Step 5: Apply the first coat of paint.
After waiting the recommended amount of time for the fuse to dry — normally about 25 minutes — it ’s time to go for the chosen key colour . Again , stir the can and then essay the paint on a scrap to ensure the spray is uniform and you are comfortable with the technique . Then entertain the nose of thespray paintcan about 12 to 18 inches away from the charge card .
set out spraying with promiscuous dust coat in a spot slenderly to the side of the Earth’s surface , then move the can across in a smooth motion , stopping only once you ’ve gone a few inch past the edge . cover in this elbow room , overlapping your strokes , until you ’ve lightly coated the entire area .
Step 6: Apply additional coats as needed.
There ’s a honeyed speckle when it comes to time additional coat . Wait the recommended metre — usually about a minute — and then give another dust coating . If you expect much longer , most brands will recommendwaiting until the paint is fully ironic , which can be about 30 mo . It will take several light coats to build up to the color on the top of the can . Do not festinate the process and avoid over - spraying that can take to frustrating drip or house of cards on the control surface . Slow and unwavering is the key to achieving a professional finish .
require the paint to be dry to the touch within about 20 instant , but wait at least 30 minutes before attempting to bear on the Earth’s surface .
Step 7: Protect the paint with acrylic sealer.
This is optional , but if the charge plate you ’re paint will spend metre out of doors or will have heavy use , consider protecting the item with aclear acrylic resin sealant . Sealers are available in shining or lusterlessness , so there ’s no worry that you ’ll call for to have a shiny finish if that ’s not the tone you desire .
Once you ’ve given the terminal stratum of paint plenty of sentence to cure , spray on the sealer using the same smooth , overlapping stroke with which you applied the literal blusher . A unmarried coat of sealer may do the legerdemain , but I usually spray on two or three coat . Between each , allow 30 bit of drying clock time . After the final sealer coat , waitress 24 hours before handling the physical object to make certain the surface is fully dry and located .
Tips for Painting Plastic
Those inquire can you spray - paint plastic , the result is you’re able to . It is n’t tough , and it ’s an easy sustainable way to keep using older items like deck of cards chairwoman that have faded in the summer sun . It ’s crucial to call up these substantive tips :
Final Thoughts
Learning how to paint credit card can be fun and comforting , especially when you’re able to brush up dingy or pass off objects to extend their useful life . The most significant steps when paint charge card include choose the right blusher and using the right technique . build up with this knowledge and ability , you ’ll be quick to transform plastic decor and piece of furniture into fresh gems around your home .
Theresa Clement is a handy room decorator who has been improving abode for more than 20 years . A certified colour expert , she is known for work out excogitation dilemmas with paint , and has spray - painted everything from woods piece of furniture , to charge plate hopper testis , to gum balls to nail a look for a client . Starting with her oeuvre at architecture house , she has author DIY books ; writes forArchitectmagazine , JLCmagazine , andRemodelingmagazine ; and play as a design manufacturer on makeover show . She now works with her carpenter husband on secret home and their household improvement brand MyFixitUpLife .
This Is the class for a Kitchen Renovation
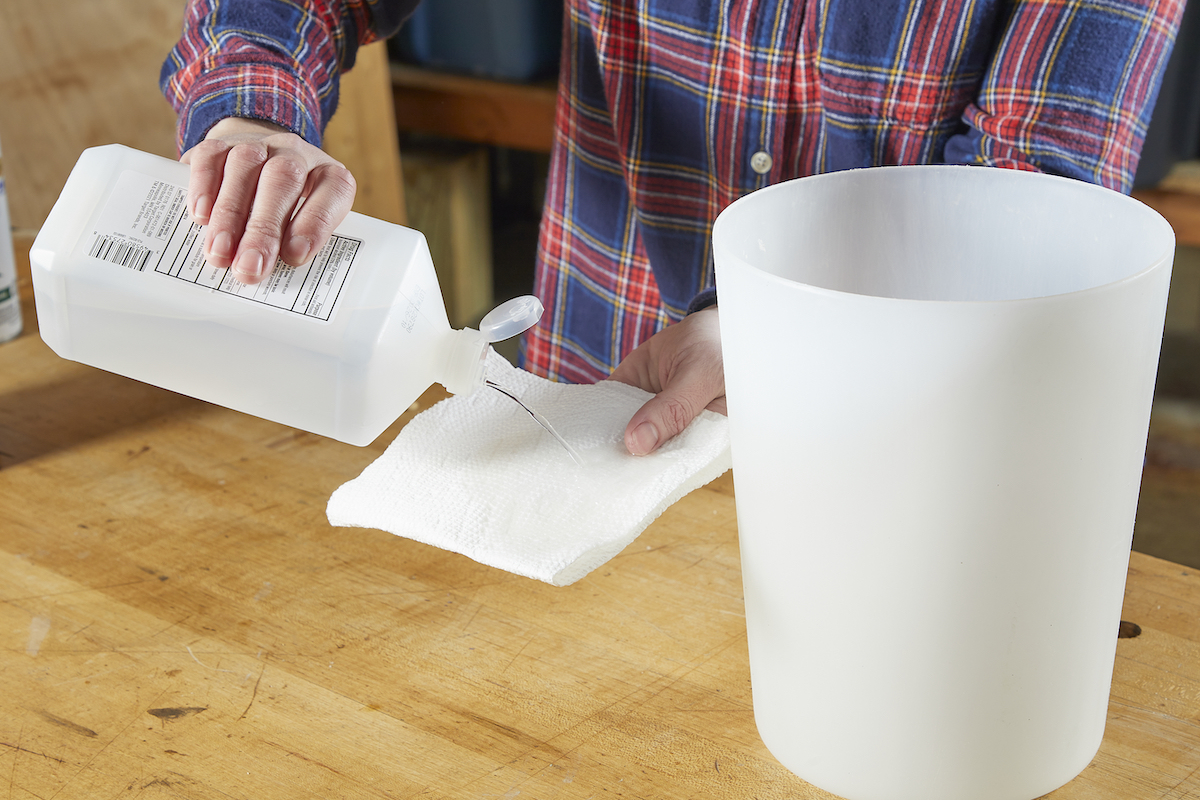
Photo: Tom Fenenga for Bob Vila
Whether you ’re selling or staying , everyone can get something out of a kitchen update . ascertain why we consider this renovation the Most Valuable Project of 2025 and how to stay on budget .
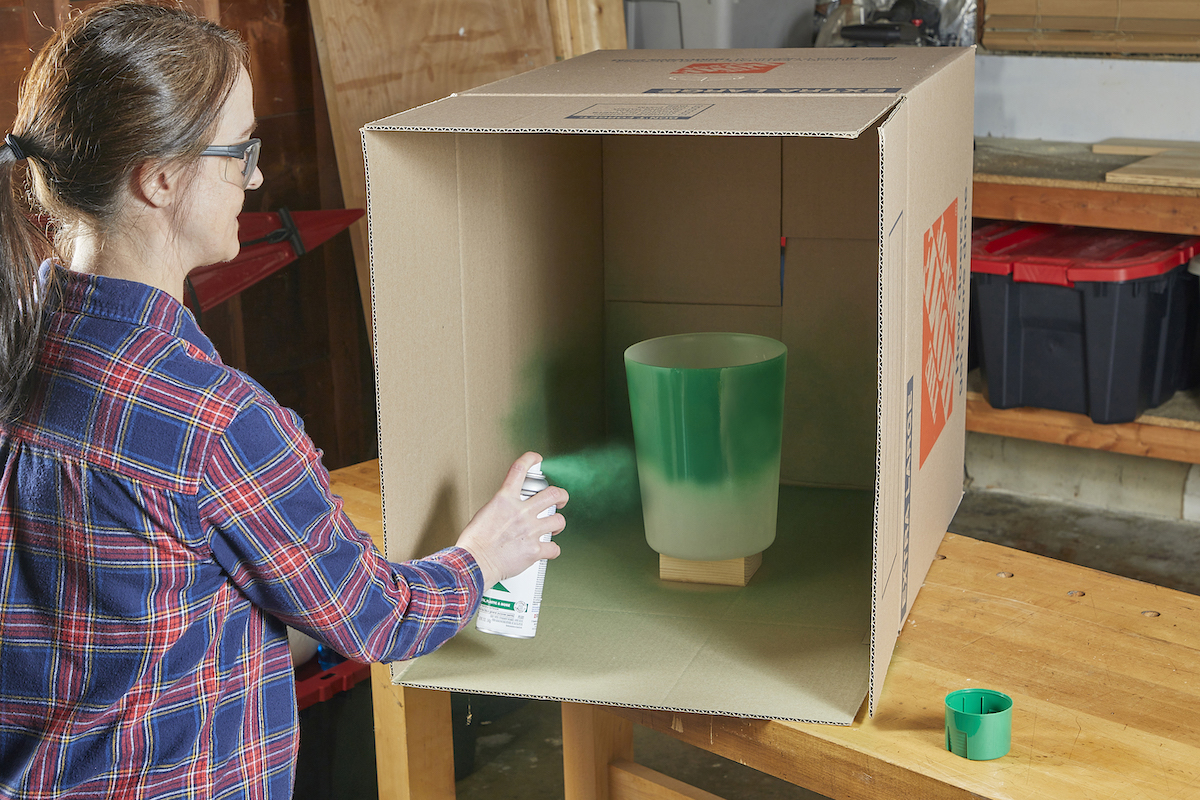
Photo: Tom Fenenga for Bob Vila
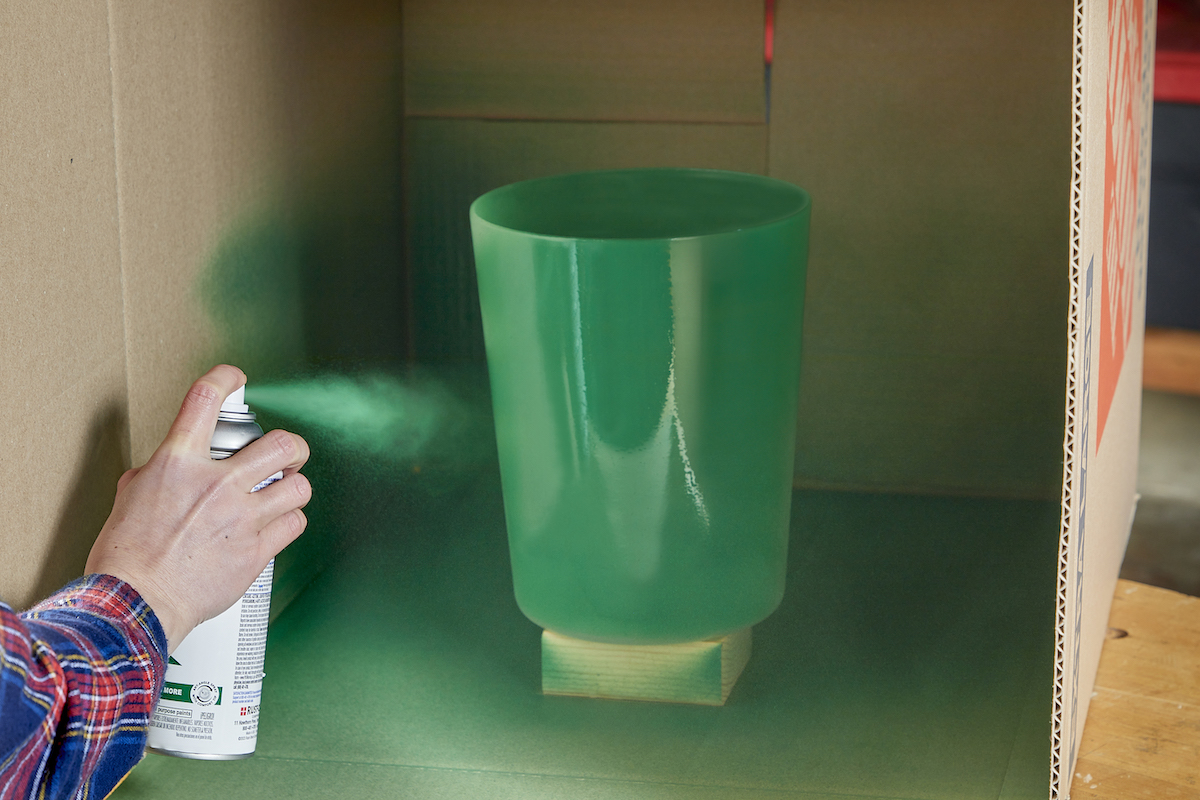
Photo: Tom Fenenga for Bob Vila
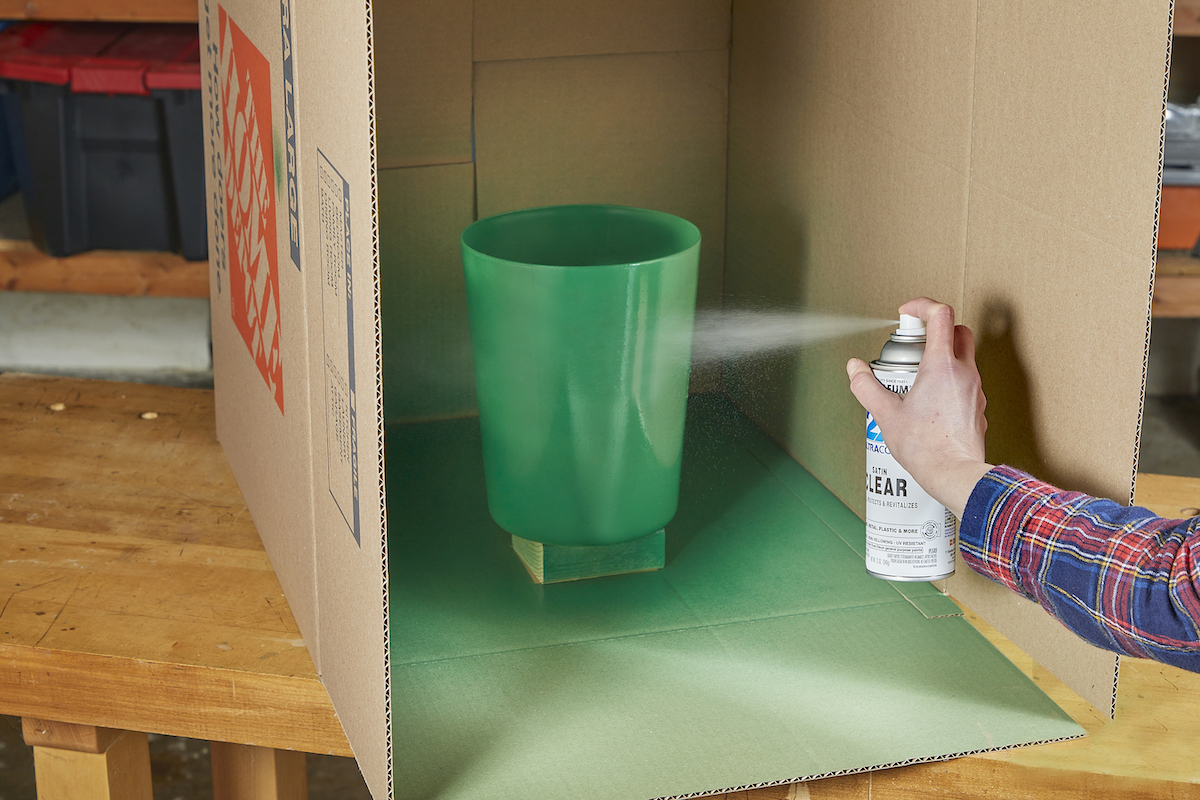
Photo: Tom Fenenga for Bob Vila
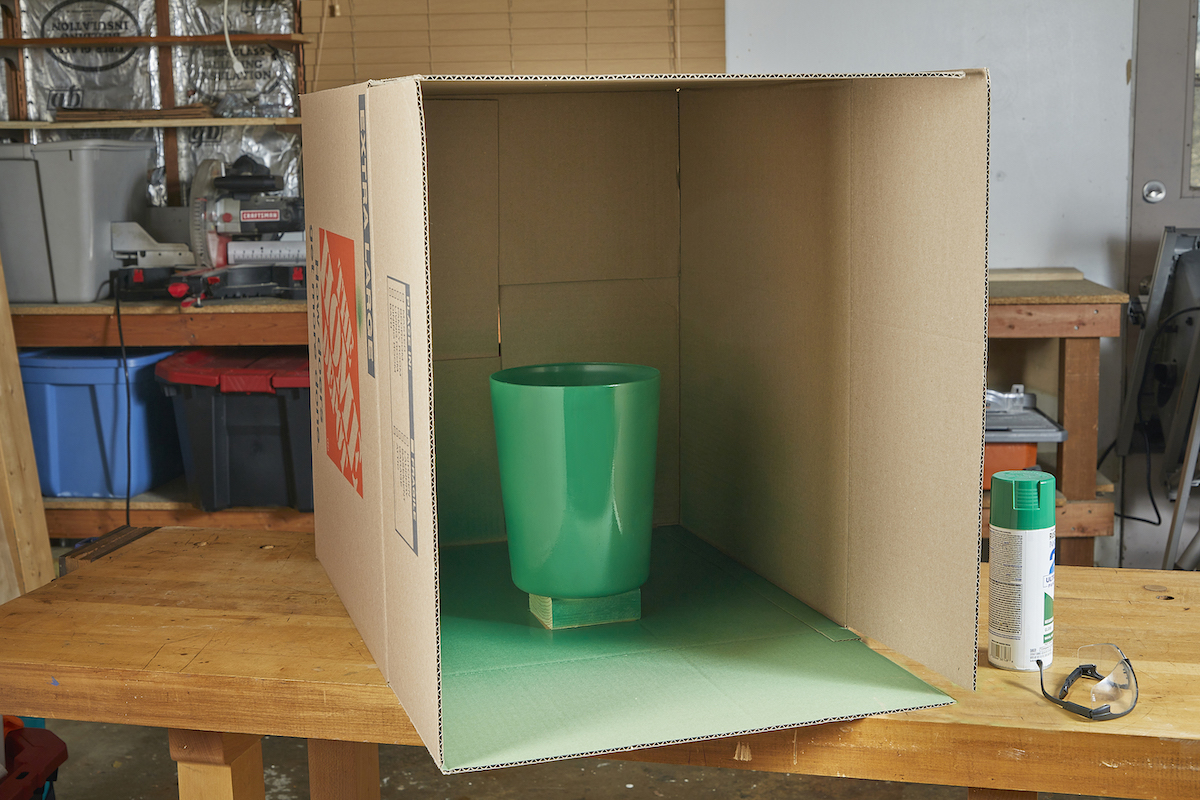
Photo: Tom Fenenga for Bob Vila

