We may earn tax revenue from the product uncommitted on this page and enter in affiliate programs . Learn More ›
Tough and indestructible yet easy to slue , polyvinyl chloride piping ( PVC ) , originally develop for plumbing , is ideal for use in a potpourri of do - it - yourself projects , from wall - mounted organizer and funky herb planter to vino racks and even lighting fixture .
While the piping comes in a spectrum of brights these Clarence Day , you ’ll still want to larn how to paint PVC if you ’ve get a more advanced palette in mind . Except there ’s one hitch : Due to a molecular makeup that prevents most liquids from bonding to its surface , paint on PVC has always been probable to peel , bubble , or rub powerful off .
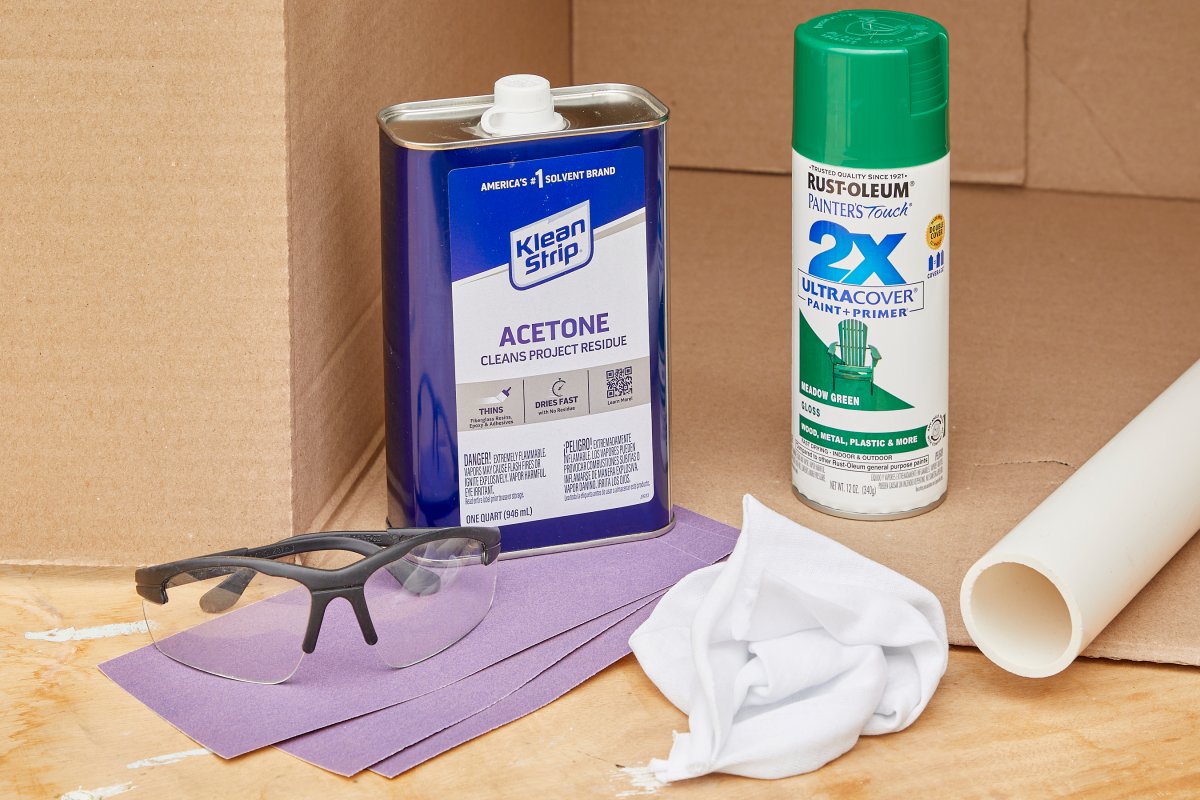
Photo: Tom Fenenga for Bob Vila
Fortunately , of late developed spray rouge that chemically bond with all kinds of plastics make it potential for find DIYers to paint PVC pipe . Just keep in thinker that while some plastic - rated paints intent not to require special grooming , we advise that you follow the prep steps here for the just possible upshot .
Tools & Materials
Bobvila.com may earn a committal from purchases made through these connexion .
How to Paint PVC Pipe
The key to a good rouge job is to employ aspray rouge that ’s blackleg for manipulation on charge card . Krylon Fusionis a consumer favorite that ’s wide available , as is Rust - Oleum blusher for credit card . Once you have the right paint in hand , be sure to follow these whole tone for surface grooming .
Step 1: Prepare your work area.
design to paint PVC on a low - humidness day , ideally between 50 and 85 degrees Fahrenheit . Choose a well - ventilated yet wind - free area to work in , such as a garage with doors and window undetermined for airflow . Note that acetone is extremely flammable , so it should be used and stored away from oestrus rootage . Do not smoke while puzzle out with acetone , and wash up well after use .
Step 2: Sand the pipe.
light scour the PVC piping ’s outside by paw with 220 - gritrock sandpaper . Skip the galvanic sander , as such a instrument can wear down the pipework too much , too quick . Sand in all directions to avoid straight - line stria that can create an unwanted well-grooved surface . Be soft , so you wo n’t weaken the pipe , but be thorough enough to void creating uneven surfaces . Have plenty of emery paper on deal , because the waxes in PVC pipe will arrive off on the paper , induce it to lose pitting .
Step 3: Clean the pipe.
wear down rubber gloves , tone down a clean rag week with acetone , and then wipe the surface of the PVC tobacco pipe . Allow to dry out for 20 to 30 minutes . The acetone will get rid of all sanding dust while swelling the surface of the PVC to make it more porous for house painting .
Step 4: Protect the space from paint spatter.
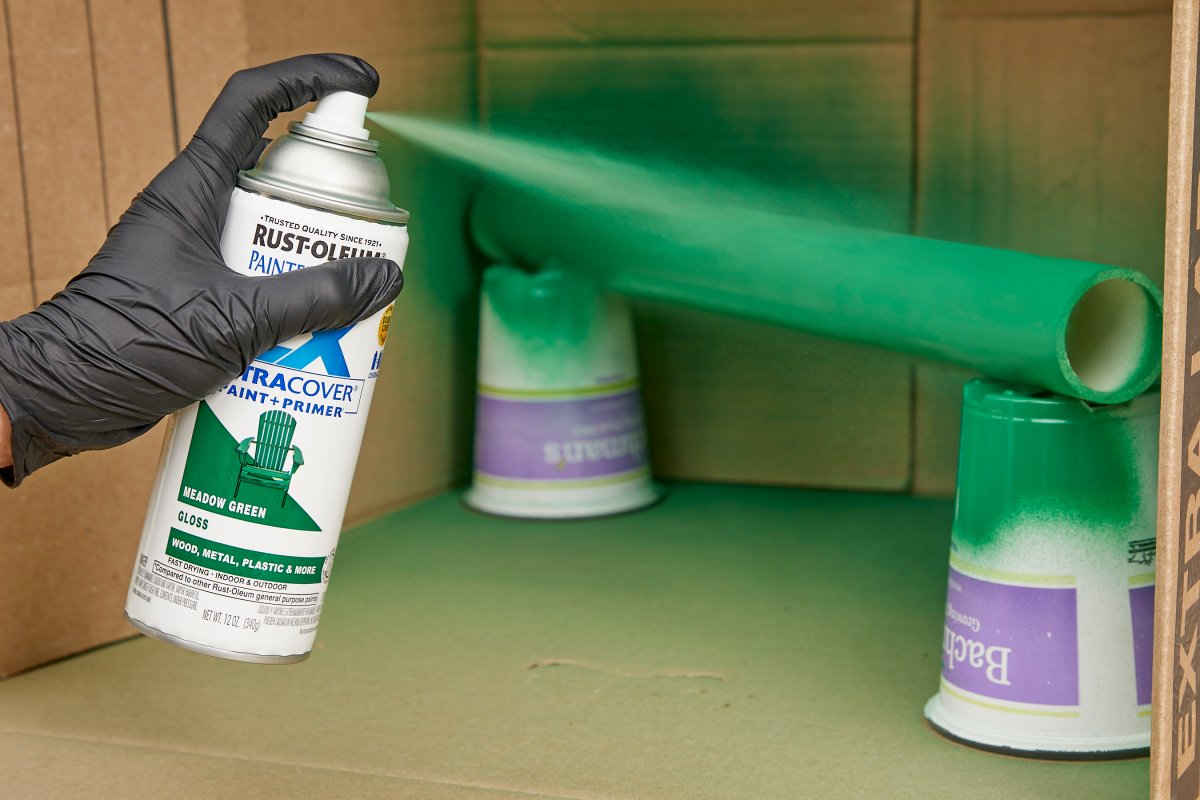
Lay drop cloths , charge plate sheeting , or erstwhile newspaper over the floors or wall that could be open to spattering or overspray , then typeset up the pipework for nebulizer picture . If you ’re painting recollective pieces of pipe , overlay a rampart , ravel , or chair with sheeting and prop the pipes against it . ( Or , you might stand prospicient pieces on a sturdy dowel for support so you’re able to access all side at once . ) curt piece of PVC may be able to stand without additional support , or shore up on plastic containers inside a cardboard boxful , make believe it mere to get an all - over coating of paint .
Step 5: Apply spray paint.
Shake soundly for 15 to 20 seconds . In a side - to - side sweeping motion , spray - paint the pipe , starting from the top and work your way down to the bottom . Paint PVC in thin , consistent layers , overlap the paint as you move down the pipage , to nullify any drips .
Step 6: Apply a second coat of paint.
Allow paint to dry per manufacturer ’s instructions 20 to 30 minutes , before applying a second coat . If you had to lay the piping down to paint , wait until the first side is dry and then turn it over to get at the other side . debar overlap spray on areas you ’ve already painted to accomplish a nice , even coat . As in all atomiser - painting jobs , you ’ll involve to use several pelage in fragile layers until the “ true color ” is reached .
Step 7: Let the PVC dry for 24 hours.
Allow paint to atmosphere - dry and cure for at least 24 hours before using it in your project . For projects that could genuflect or nick the pipe ’s Modern coat of paint in the cognitive process , consider expect a full week . If you ’re uncertain , look into the blusher can for specific maker - recommended dry time . Once your undertaking is complete , keep paint piping white by wipe gently with a water - dampened tag end .
This Is the Year for a Kitchen Renovation
Whether you ’re selling or staying , everyone can get something out of a kitchen update . Learn why we consider this refurbishment the Most Valuable Project of 2025 and how to remain on budget .
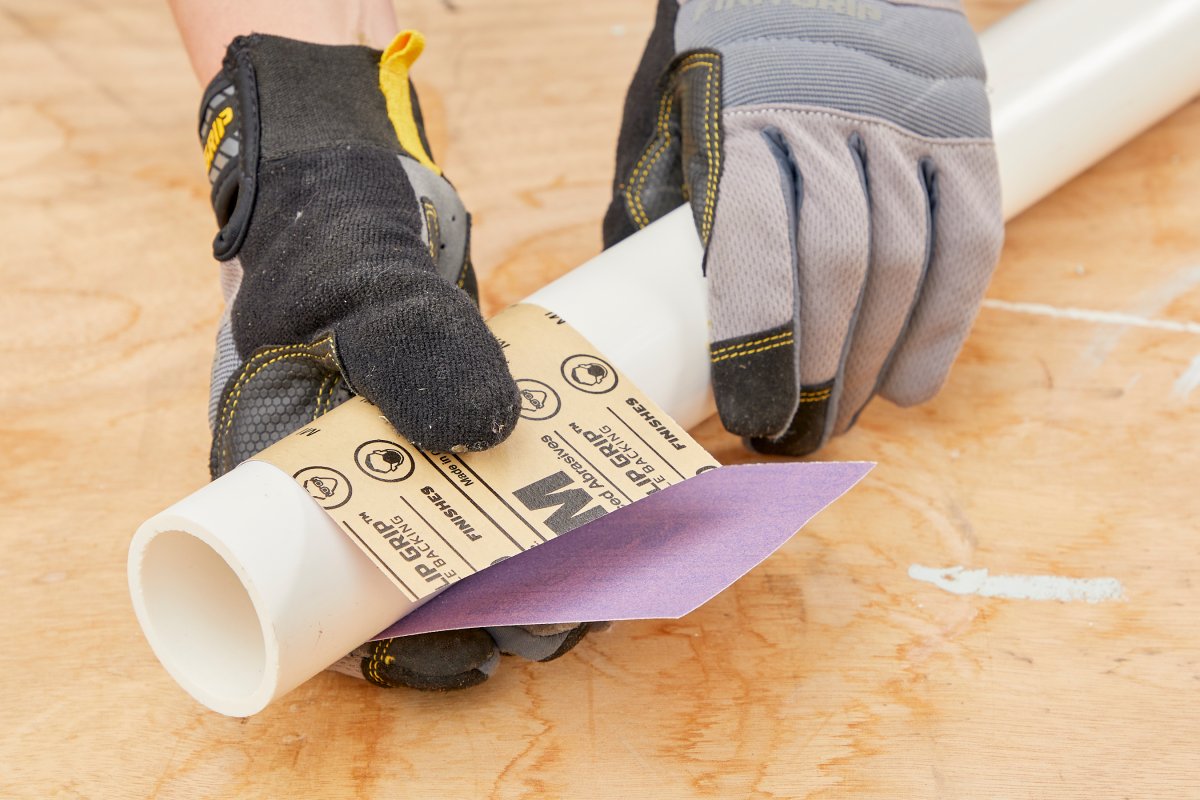
Photo: Tom Fenenga for Bob Vila

Photo: Tom Fenenga for Bob Vila
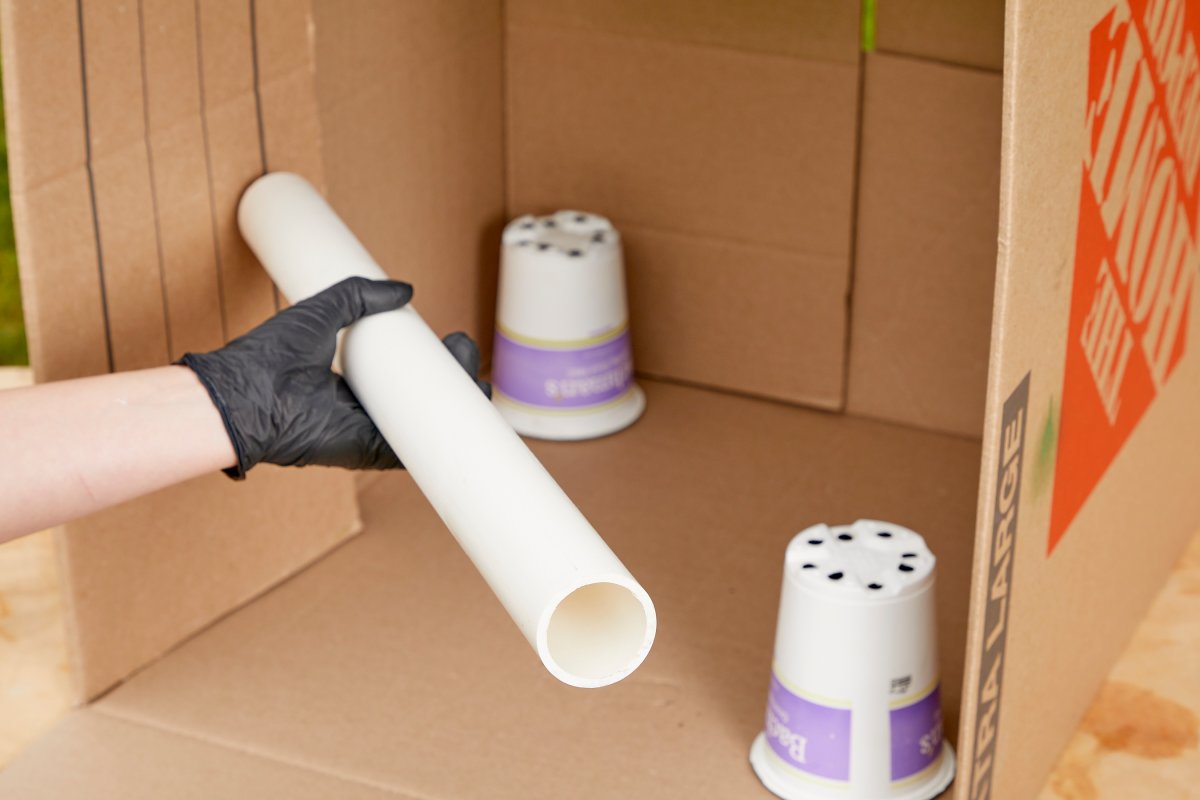
Photo: Tom Fenenga for Bob Vila

Photo: Tom Fenenga for Bob Vila