We may take in revenue from the products available on this varlet and participate in affiliate program . pick up More ›
preferably or later , most of us need to patch drywall , whether for strictly cosmetic cause — filling nail muddle , for model — or for comfort or base hit — say , a hole has left wiring exposed . Although accomplishing the latter require a greater investiture of time , rest assured that a do - it - yourself solution be , no matter the scale of the repair . take on for guidelines for patching drywall in small- , medium- , and tumid - size projects .
Patching a Small Area
The small the hole , the easier it is to piece . This DIY should only take you a few minute , not include dry clock time .
SUPPLIES
emery paper or sanding blockSpackling pastePutty tongue
Step 1 : Start the cognitive process by sanding the area smooth .
tone 2 : charge a second of spackling paste onto yourputty knifeand apply the merchandise like a shot to the mess . lick in enough of the spread so that it leaves a little cumulation over the hole , then press the unconditional side of the tongue firmly against the mound so as to flatten it .

Photo: Tom Fenenga for Bob Vila
dance step 3 : at long last , swipe the blade in a broad motion across the repaired area , lead the fill up - in golf hole utterly level with the finished wallboard .
whole step 4 : Allow the spackling sufficient metre to dry out . Dry times motley , so refer to the producer ’s education for an accurate estimate . Sand thinly when dry .
Patching a Medium-Size Area
If you want to patch a fairly large hole — an area with a diameter of 1 or 2 inches — the cognitive operation becomes slightly more complicated , if only because it involves a material you might not have on hand : mesh mag tape . ( you’re able to bribe engagement tape either as a roll or as a precut public square . )
emery paper or sanding blockPutty knifeJoint compoundDrywall mesh tape
stone’s throw 1 : Sand the surface area to be patched with emery paper or a sanding block .
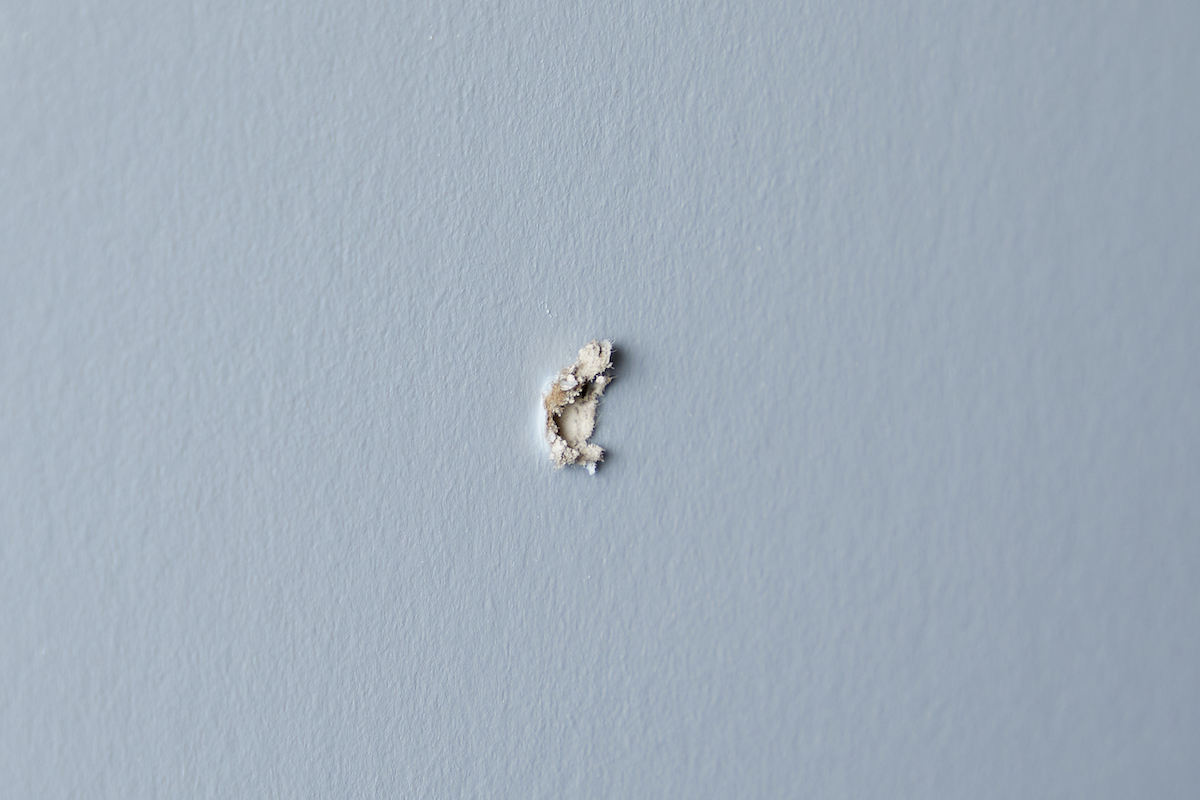
Photo: Tom Fenenga for Bob Vila
Step 2 : totally cover the golf hole with net . This now becomes the base to which you ’ll bestow joint compound , a product that goes on like spackling paste but achieves a stronger result .
Step 3 : As you spread the joint chemical compound , pay off special attention to the seam where the mesh tape meets the surroundingdrywall . Once you could no longer see the mag tape , habituate the putty tongue to flatten out the mounded joint chemical compound , then scrape the open in all-encompassing , fluent side - to - side movements that make an even finish .
dance step 4 : at last , countenance the joint chemical compound to dry out for about 8 hours — consult the manufacturer ’s counsel for guidance on the mathematical product you ’re using — before sanding and repaint the wall .
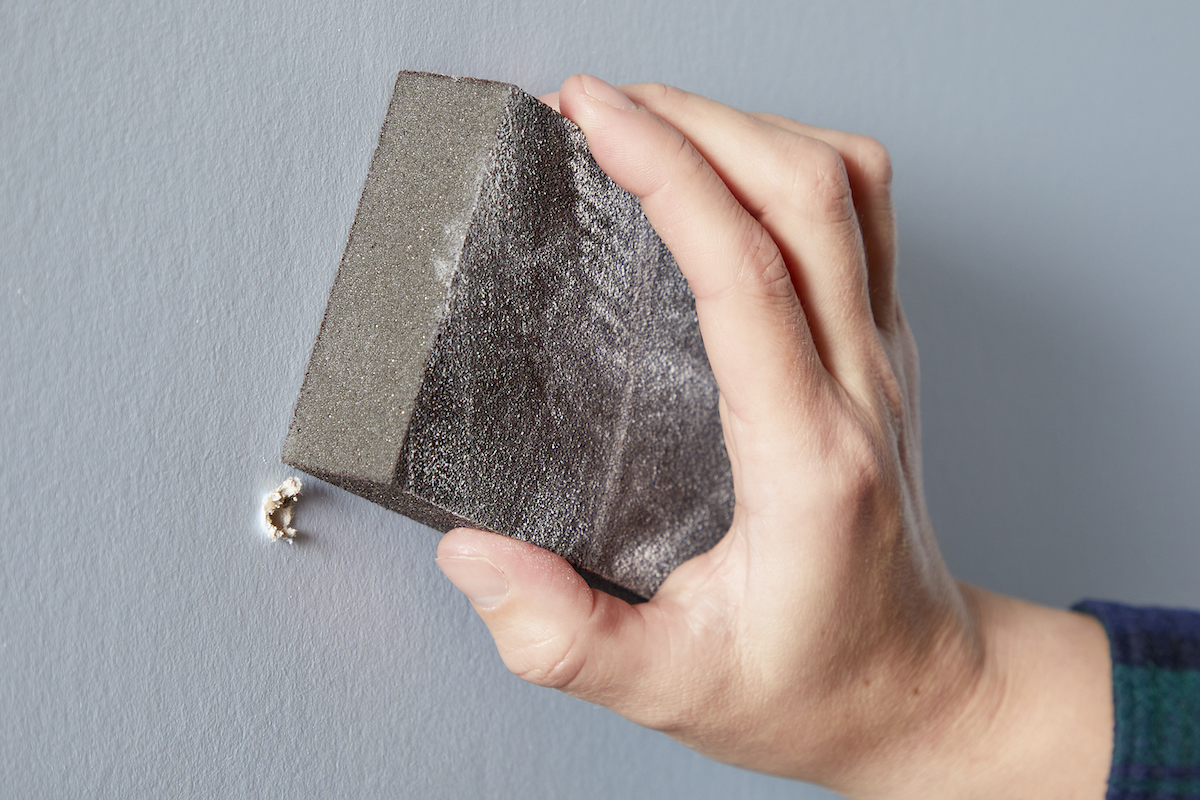
Photo: Tom Fenenga for Bob Vila
Patching a Large Area
A large plot of ground involves a commensurately greater commitment of clock time and elbow grease to discharge . In fact , the piece process here is not very different from the one that was used to install your dry wall in the first office .
Drywall panelUtility knifeDrywall sawDrywall screwsScrewdriverDrywall enmesh tapePutty knifeJoint compoundSandpaper or sanding block
Step 1 : Use a drywall saw to cut evenly around the trouble area . You should be get out with a kettle of fish that ’s orthogonal in form . manipulation autility knifeto pick up the edges , if necessary . If potential , make your hole big enough to expose one of thewall studs . Failing that , you ’ll require to run a wooden phallus horizontally between the two close studs . Why ? You ’re pass to fill the hole in the wall with a piece of Modern drywall , and that piece demand a surface to which it can be securely attach .
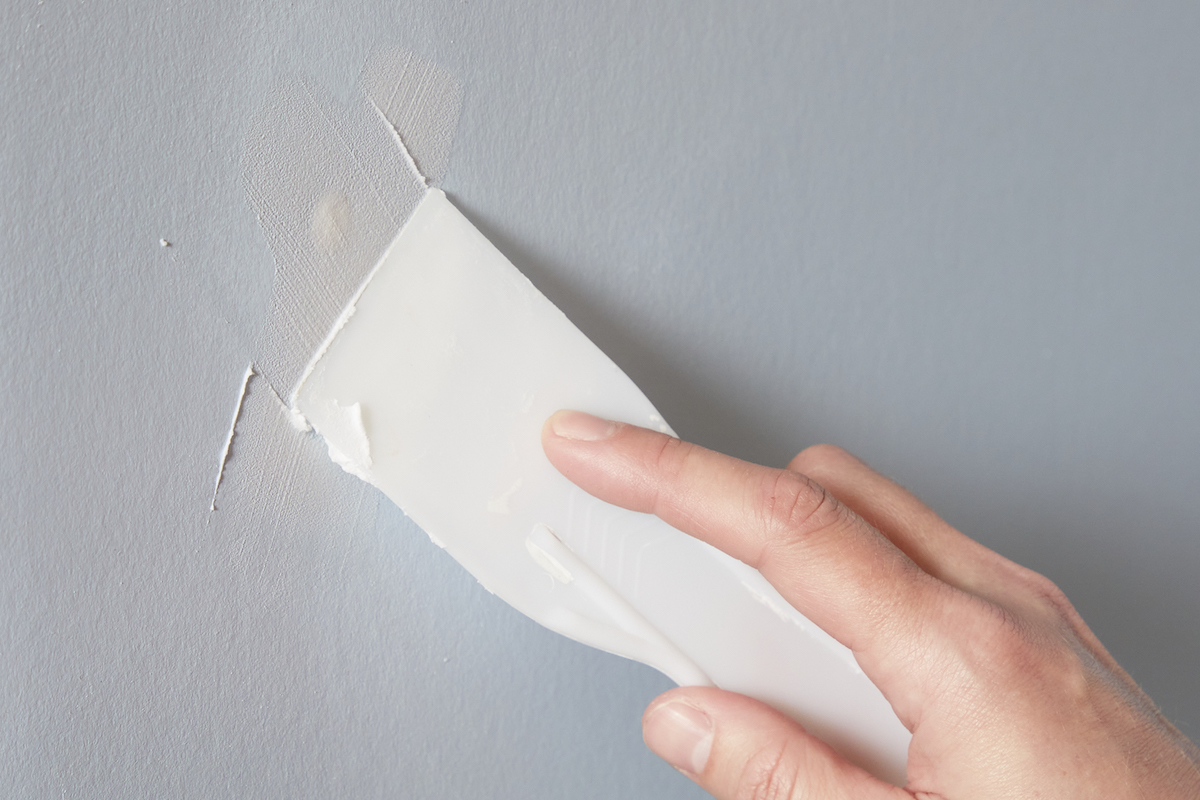
Photo: Tom Fenenga for Bob Vila
Step 2 : Use a drywall sawto cut out a part of the wallboard panel . Measure and rationalise cautiously , as the piece must outfit dead into the rectangle you ’ve cut in the wall . Once you ’re certain that you ’ve got a snug fit , employ drywall screws to sequester the newfangled drywall to the stud ( or horizontal extremity ) .
Step 3 : Apply mesh mag tape over all the furrow between the patch and the existing dry wall .
Step 4 : Load your putty knife with joint chemical compound and proceed to overcompensate the mesh all . ( Do n’t bury to smooth compound over the drywall screws , too . ) Use the steel of the putty knife to drop out the chemical compound in any spot where it ’s mound , then scratch across the seams in wide-cut strokes , either side - to - side or top - to - bottom , depending on the predilection of the mesh topology .

Step 5 : Allow the chemical compound to dry for about eight hr before you begin the concluding microscope stage : sand the patched area and repainting the newly repaireddrywall .
This Is the Year for a Kitchen Renovation
Whether you ’re betray or staying , everyone can get something out of a kitchen update . Learn why we consider this redevelopment the Most Valuable Project of 2025 and how to delay on budget .
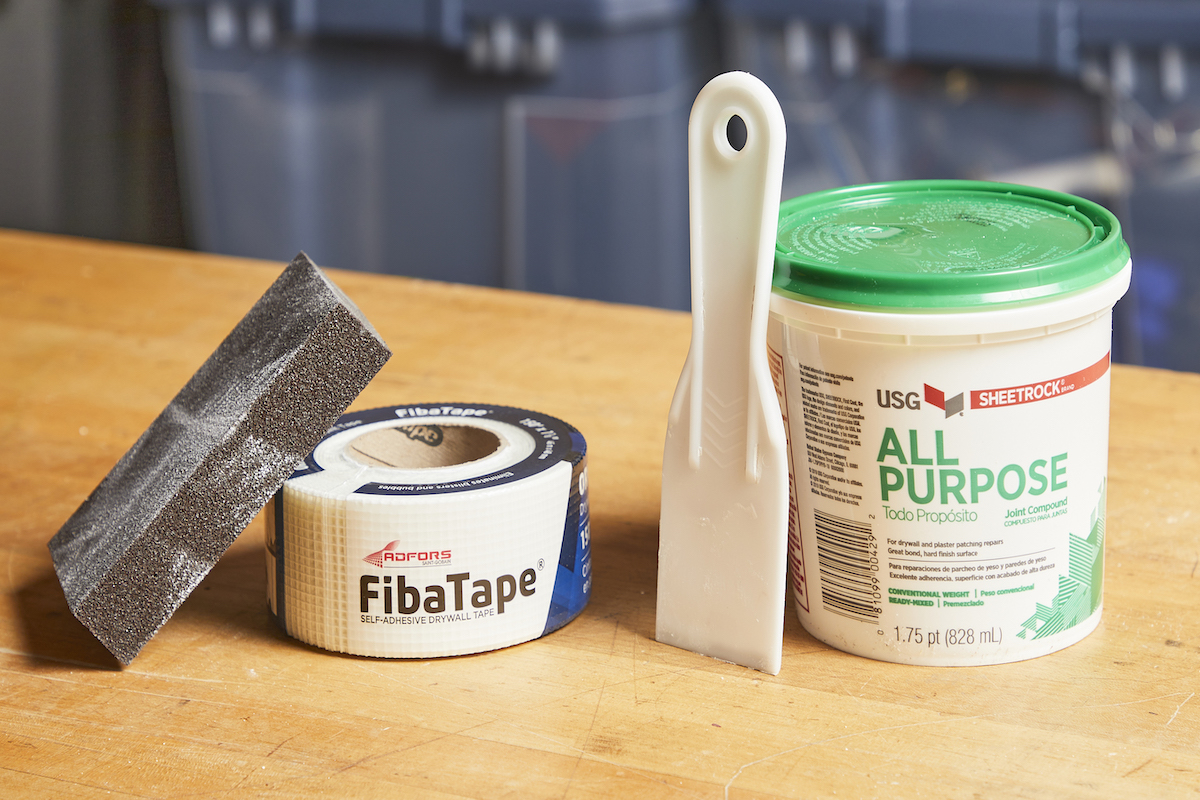
Photo: Tom Fenenga for Bob Vila
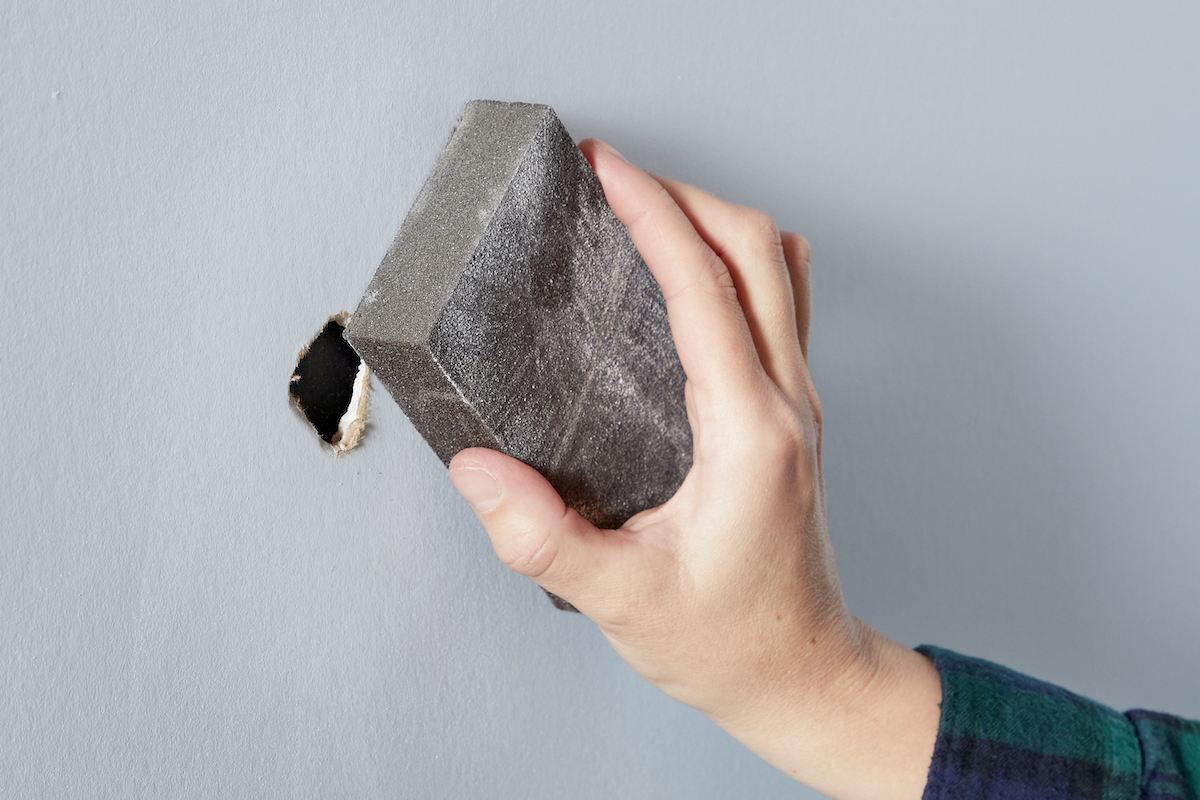
Photo: Tom Fenenga for Bob Vila
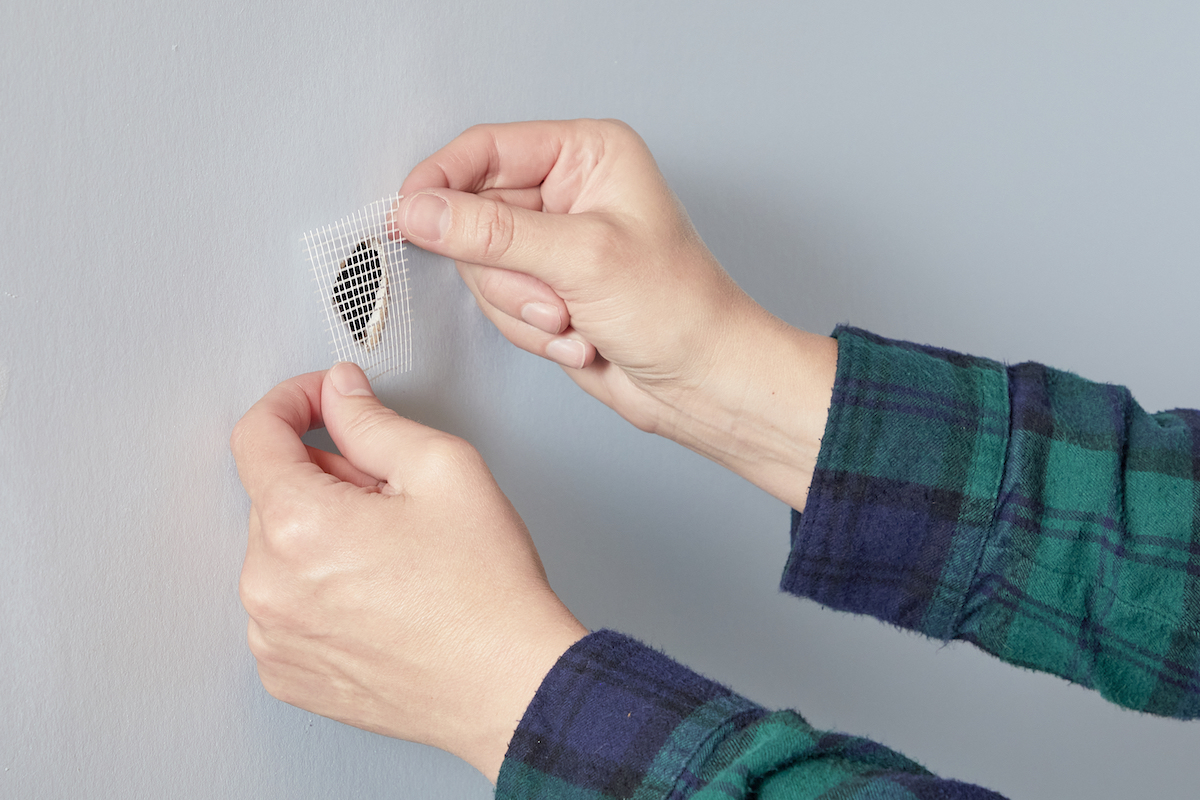
Photo: Tom Fenenga for Bob Vila
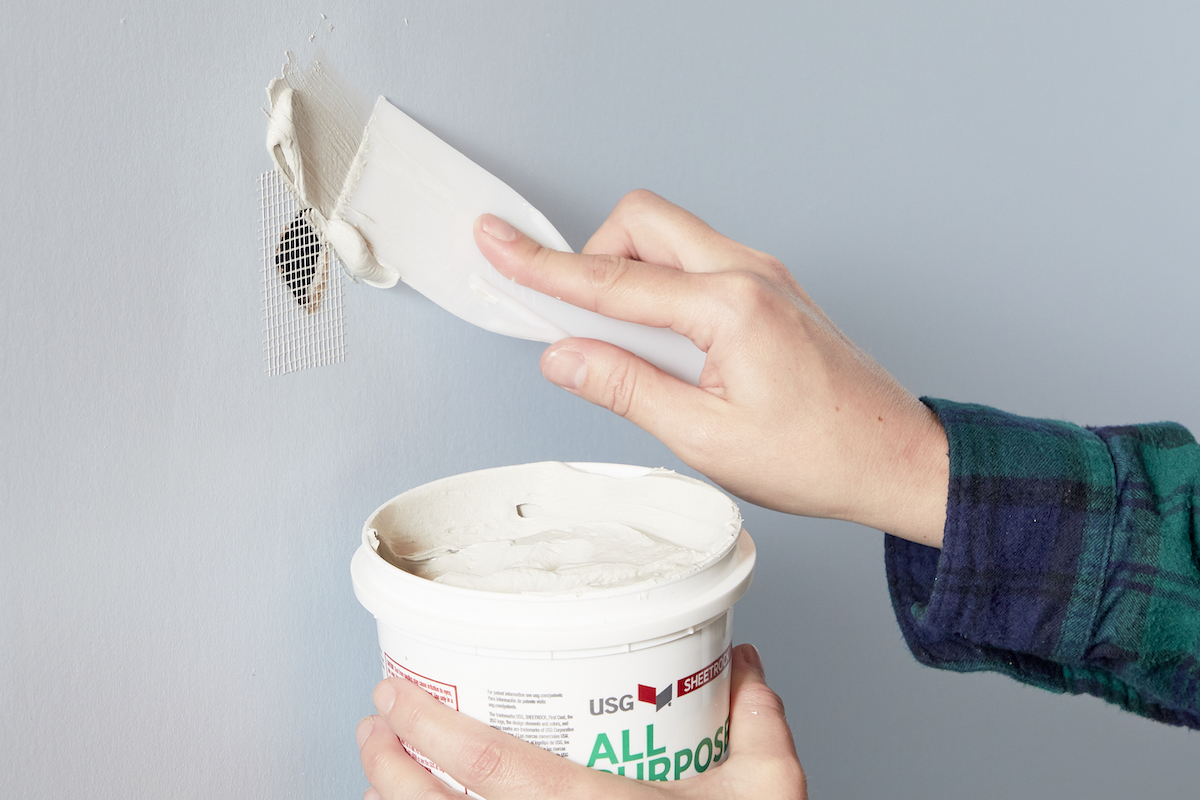
Photo: Tom Fenenga for Bob Vila
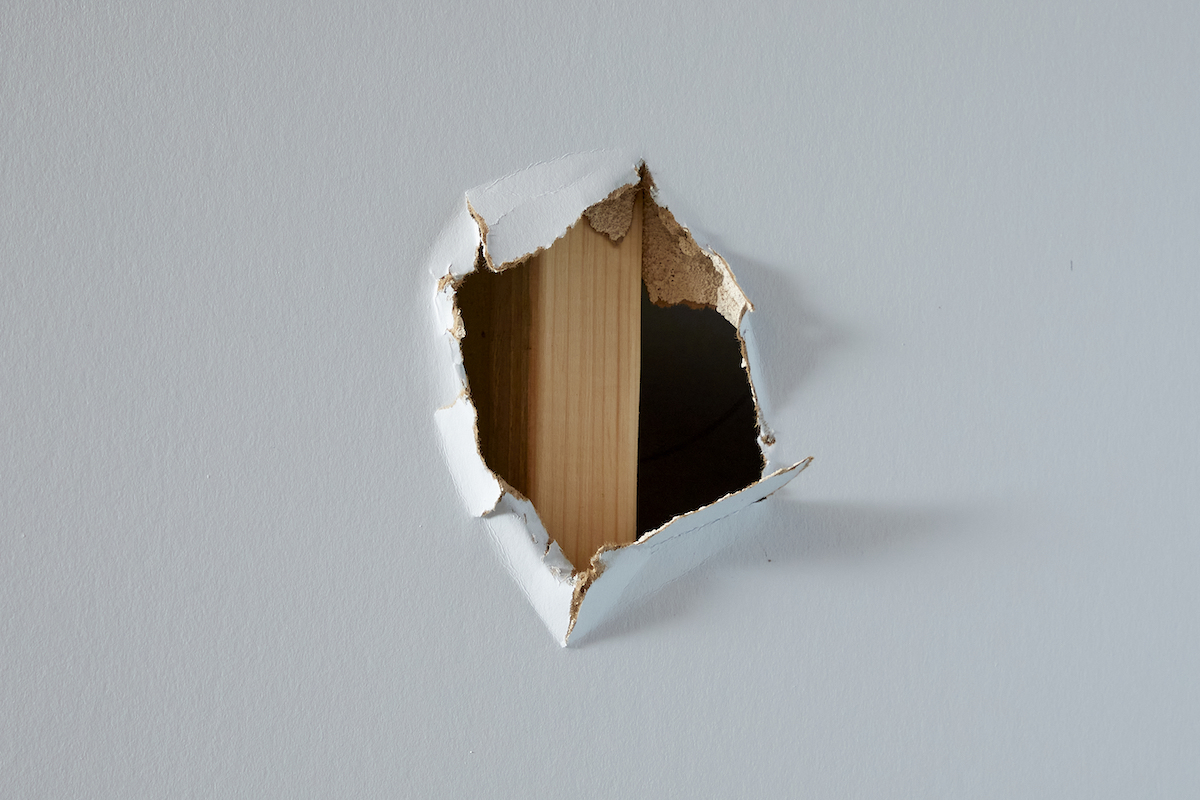
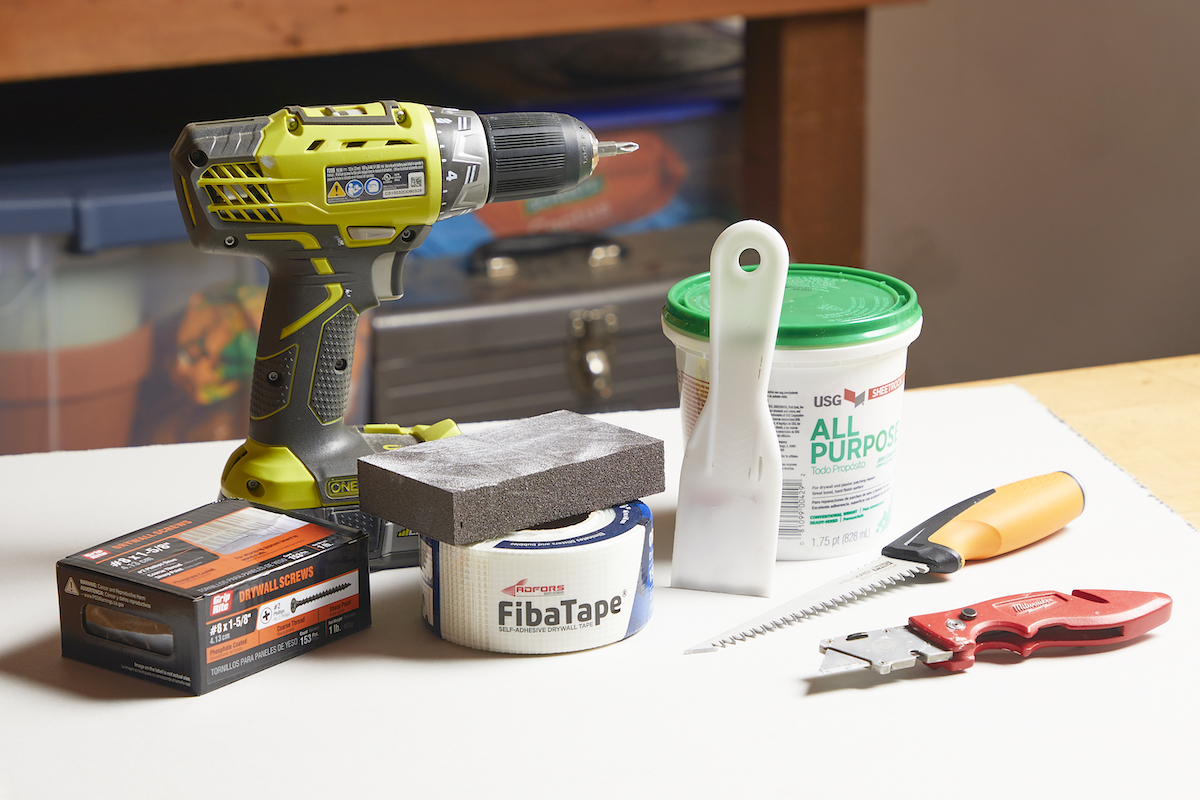
Photo: Tom Fenenga for Bob Vila
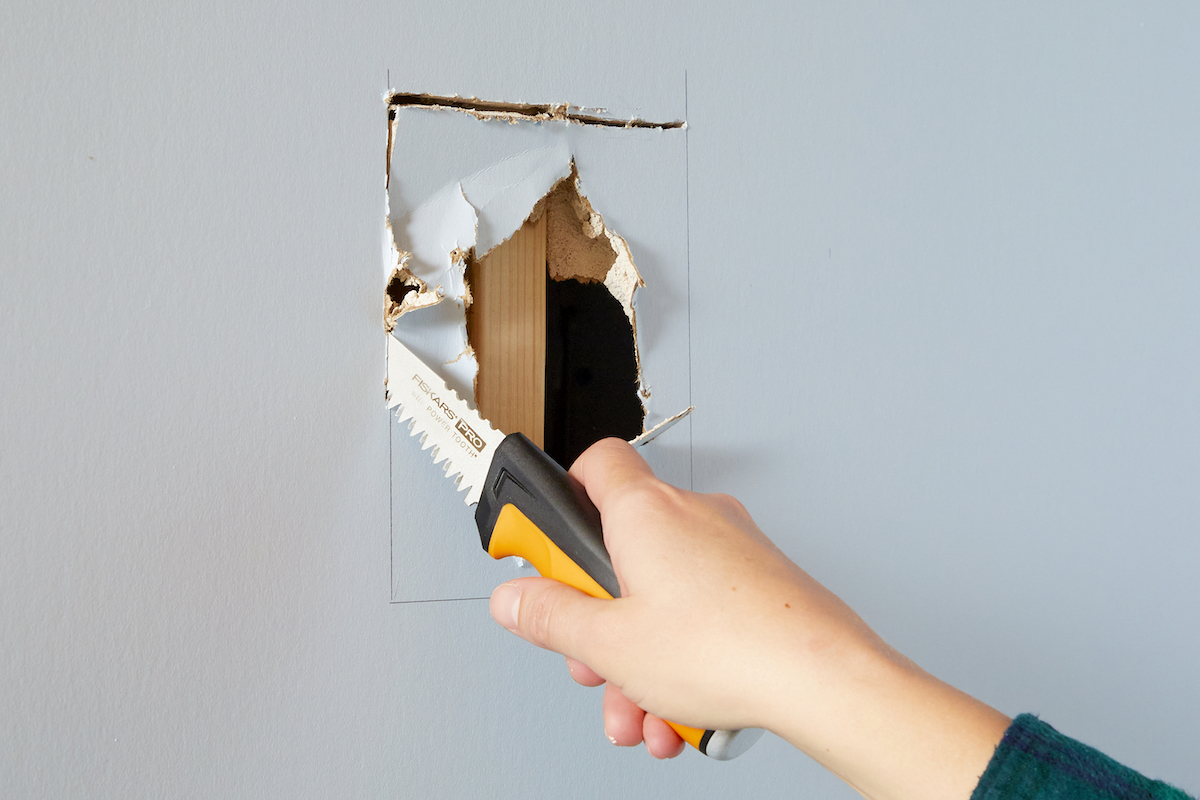
Photo: Tom Fenenga for Bob Vila
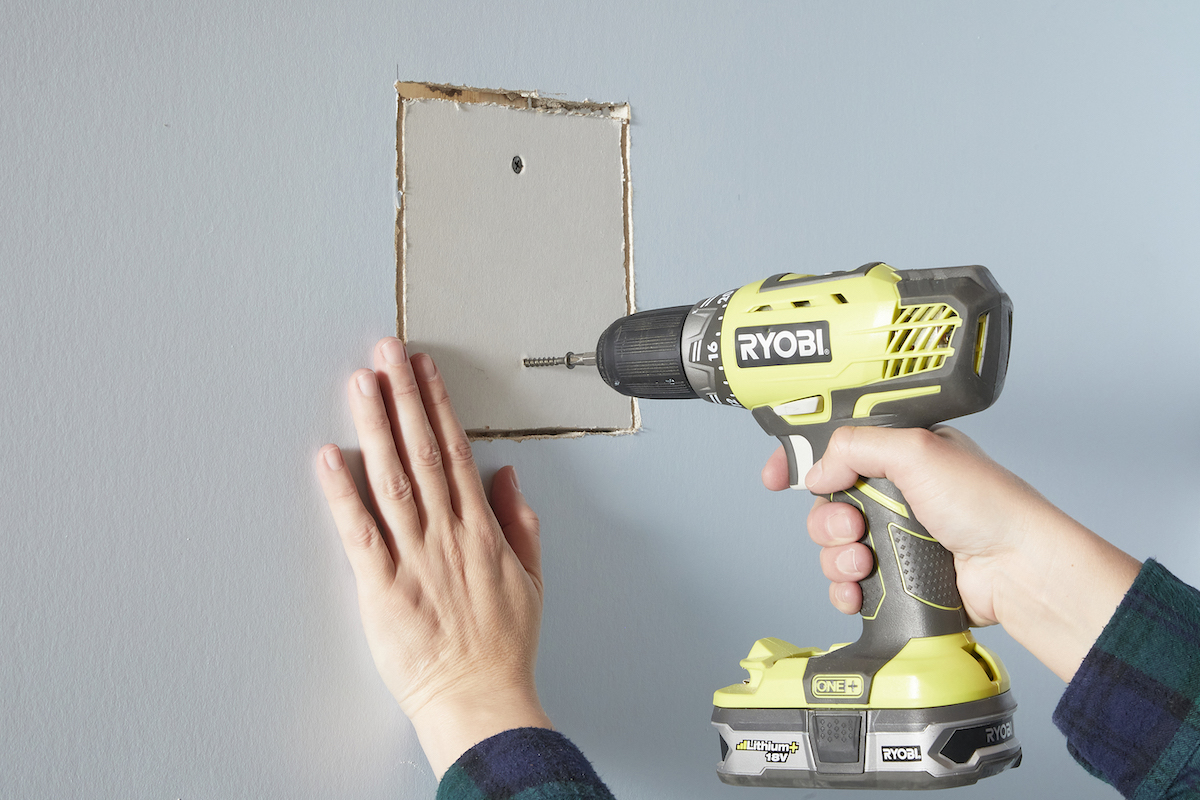
Photo: Tom Fenenga for Bob Vila

Photo: Tom Fenenga for Bob Vila
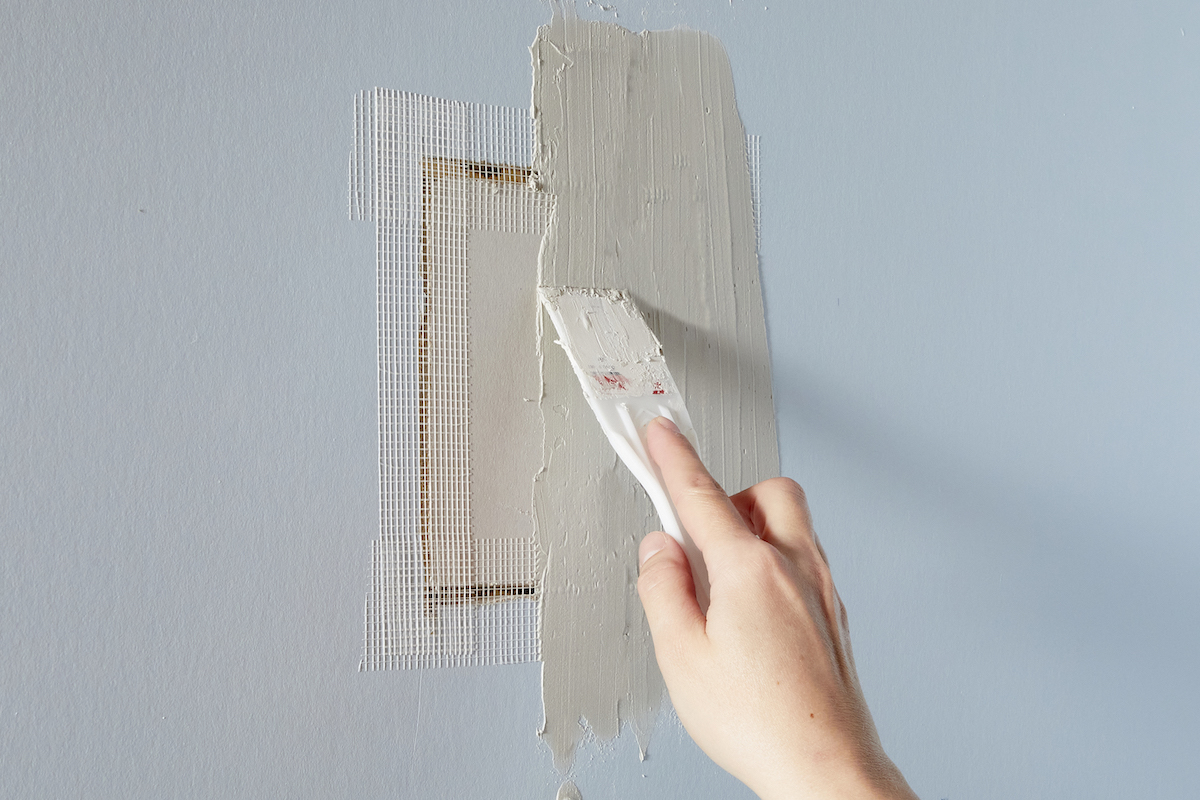
Photo: Tom Fenenga for Bob Vila

