We may gain revenue from the product available on this Thomas Nelson Page and enter in affiliate programs . Learn More ›
get wind to pullulate concrete may relieve money and build your skills , but without proper equipment and aid to detail , the termination can look far from professional . Concrete — generally a combining of cement , guts , crushed rock , and water — can be tricky to unify and misrepresent . Moreover , its moderately quickly - drying makeup tends to make any mess - ups permanent .
luckily , whether you plan to make a patio slab or adriveway , working in small areas divided by concrete shape and using bagged concrete mixing can make the job easier for a DIYer . While there are many variant to concrete mixes and use of goods and services , this how - to - pour - concrete templet take the fundamental principle of using a bagged concrete commixture in a little residential setting to aid make pouring concrete more manageable .
istockphoto.com
What to Know About Concrete Mix
There is a lot to hump about working with a concrete intermixture . While bagged concrete is what most DIYers apply , quick - commixture concrete is worthy for large Book of Job and is render by concrete motortruck . It ’s purchase from a concrete supplier and delivered by a concrete mixing truck that mixes it while it drives to the pour internet site . The welfare is that supplier can create a mix that ’s formulated for the specific job , and it ’s professionally delivered and dropped into station .
However , for most little DIY projects , pocket concrete mix that can be purchase online or from a place improvement center is like to what a provider produces . A concrete mix has all the ingredients in the bag , except for the piss . While it ’s still important to work quickly to achieve optimal results , the bagged formula allow a DIYer to mix smaller batches and have a little more ascendency over the appendage .
One authoritative detail to consider is the strength of the concrete mix and making indisputable the right pounds per straightforward inch ( psi ) is used for the job . For example , 3,000 psi is appropriate for a terrace or driveway . Footings require strong concrete of about 3,500 to 4,000 pounds per square inch . Here ’s a simple-minded way to cipher how much concrete is needed for a labor : multiply the foundation ’s length by its breadth by its stature to come up with its three-dimensional footage . Divide the three-dimensional footage by 27 to watch three-dimensional one thousand .

istockphoto.com
The Best Time of Year to Pour Concrete
While it ’s potential to mix and pour concrete nearly year - round , not all weather condition conditions are ideal for creating strong and break - spare concrete . Since concrete include water in the mixture , cold or hot temperatures can affect how the pee move during the chemical reactions that wrench the mix into hard concrete .
During freezing conditions , the water in the mix can stop dead and expand . The expansion can cause cracks , and the colder temperatures can slow the chemical reaction enough that the result is weak concrete .
When temperatures rise above 80 degrees Fahrenheit , the pee in the mix can evaporate . While this might go like the destination for get concrete to indurate , it is n’t . The concrete mix needs that water system to aid the chemical substance curing process . Without enough water , concrete can shrivel , weaken , and crack . If temperatures move up above 90 degree , concrete can stiffen too quickly and “ flash set . ” Preparing the intermixture at a gamey pee - to - mix ratio may sound like a overbold path to foreclose this , but it can de-escalate the concrete , making it more likely to crack or flake over time .
istockphoto.com
Note : If you ’ll be using the planned concrete projection for heavy lode - bearing , like a driveway or a infrastructure for a work shed , it might be wise to use conducting wire meshing to help reinforce it . For thickset drive that are about 6 or more column inch deep , rebar could be used to assist strengthen the slab . For projects like pouring concrete step , rebar is needed .
For an ideal pour , work in temperature around 60 degrees Fahrenheit , or in early morning 60 minutes to avoid the afternoon heat energy .
12 Steps to Pouring Concrete the Correct Way
You ’ve got enough concrete mix for the problem , and you ’ve pick the perfect fair - weather condition day to pour . Next , follow these step - by - footfall instructions for completing a concrete pour .
Tools & Materials
Bobvila.com may bring in a commission from leverage made through these link .
STEP 1: Take necessary safety precautions before you begin.
The first step in a concrete undertaking is making sure the job site is safe , legal , and conducive to a concrete pour . Not only does this necessitate contacting the local building department to learn about building reverse and licence , but it also involves call thelocal “ call before you labour ” numberto coiffure for mark the locations of pipes and wires in the ground .
Since pour concrete is n’t a chore that can be easily stopped and restarted without negative consequence , it ’s important to get the site ready and have all the cloth and tools on hand before starting a DIY concrete pour , including personal protective equipment . baseball glove , sturdywork boots , long trouser , a long - sleeved shirt , andsafety glassesprotect eye and skin from possible chemical substance suntan cause by slopped concrete on skin .
STEP 2: Flag and outline the form.
The next step is figure out the size and form of the concrete pour . It ’s easiest to work on ground that is unwavering , as it melt off the amount of site work needed to create a flat subbase and an even concrete pour .
After the site is determined , mug and measure the area where you plan to pour concrete . set out a slab can be done with string and stakes , placing a stake at each corner . Using flags can become confusing if masthead were also used to mark gas air , wires , and sewer melodic line , as specific coloured flags are used to point different functions . If a rectangular shape is desired , measure out the diagonals to make certain those two distances are equal .
STEP 3: Prepare the site.
In most situations , some ground is removed to prepare a site for concrete . If the goal is for the concrete patio or driveway to be even with the existing surround undercoat , remove enough dirt so that the depth for the subbase of crushed rock can be 4 to 8 column inch and the concrete slab on top can be 4 column inch . ( The depth of subbase and concrete may vary reckon on your specific projection . )
Remove all sticks , twigs , unpaired - size Harlan Fiske Stone , and other obstructions that could cause breeze pockets or an uneven concrete surface . Then use a 48- to 72 - column inch - farseeing layer to insure the ground is perfectly flat . If it ’s not level , adjust the grading by moving soil around with a shovel and trial with the story again .
Compact the subgrade — the earth or soil that will lie beneath a subbase layer of gravel — by compressing it with a hand tamping bar . This prostrate - bottomed plate with a broom - length upright handle allows you to apply weightiness by pressing down or digest atop it . sour the hand tamper equally over the integral sphere to create a firm subgrade , which will prevent the concrete from cracking down the line .

istockphoto.com
STEP 4: Build a frame for the concrete slab.
The next measure in how to pour concrete involve ramp up a form around the circumference of the site work . The interior of the form is where the concrete will be place . create a analog form involves using standard timber like 1×4 control board with duplex nail , which have two heads to make it easy to take them later when the concrete is cured . If a curving element is part of the pour , a piece of ripped - down synthetic railroad siding or a pliant concrete form can be manipulated into a sturdy constituent shape .
After theconcrete formis constructed , practice the level to control the form is of even peak . This is important , as level concrete in the finishing stage depend upon the accuracy of this preparation work now . Then , reinforce any articulation with an additional circuit card on the outside of the sort to strengthen the shape . Recheck the class for level before moving on to the next step .
STEP 5: Create a gravel subbase.
Depending on the climate and soil condition , a gravel subbase may or may not be want . Some locations are frost - detached and others have filth that can expand or contract as temperatures change . In stead where frost occurs , a 4- to 8 - inch layer of subbasegravelor stones is laid over the bundle subgrade to protect the concrete from the changing ground conditions .
candid - level stones are loud and permit more water drainage , but fine - course stone or rile compact car intimately and can sometimes ensure a more unchanging result . Use the hand tamper to constrict the crushed rock over the subbase . If you are adding wire mesh to reinforce the concrete , lay out the sheets before motivate on to the next step .
STEP 6: Mix the concrete.
Don your employment glove and safety glass to devise for mixing the concrete . A concrete mixer can be hire for about $ 85 a day , but a wheelbarrow , shovel , and elbow grease will answer for small line . If you have a helper , using two wheelbarrows can help pelt along up the process .
Before mixing the bag of concrete mix with water , you may want to verify the water system is ideal . If you have hard water in your region , using filtered water can help avoid the whitish look of efflorescence blooming on the concrete . backbreaking water also speeds up the cure prison term of concrete , which can weaken the result for bombastic jobs . ( For detailed information on shuffle concrete , including how much you ’ll call for and right eubstance , gohere . )
While working with concrete admixture , keep an spare 5 - gal bucket of water or garden hose nearby for cleaning tools and the mixing vessel to prevent concrete from determine .
istockphoto.com
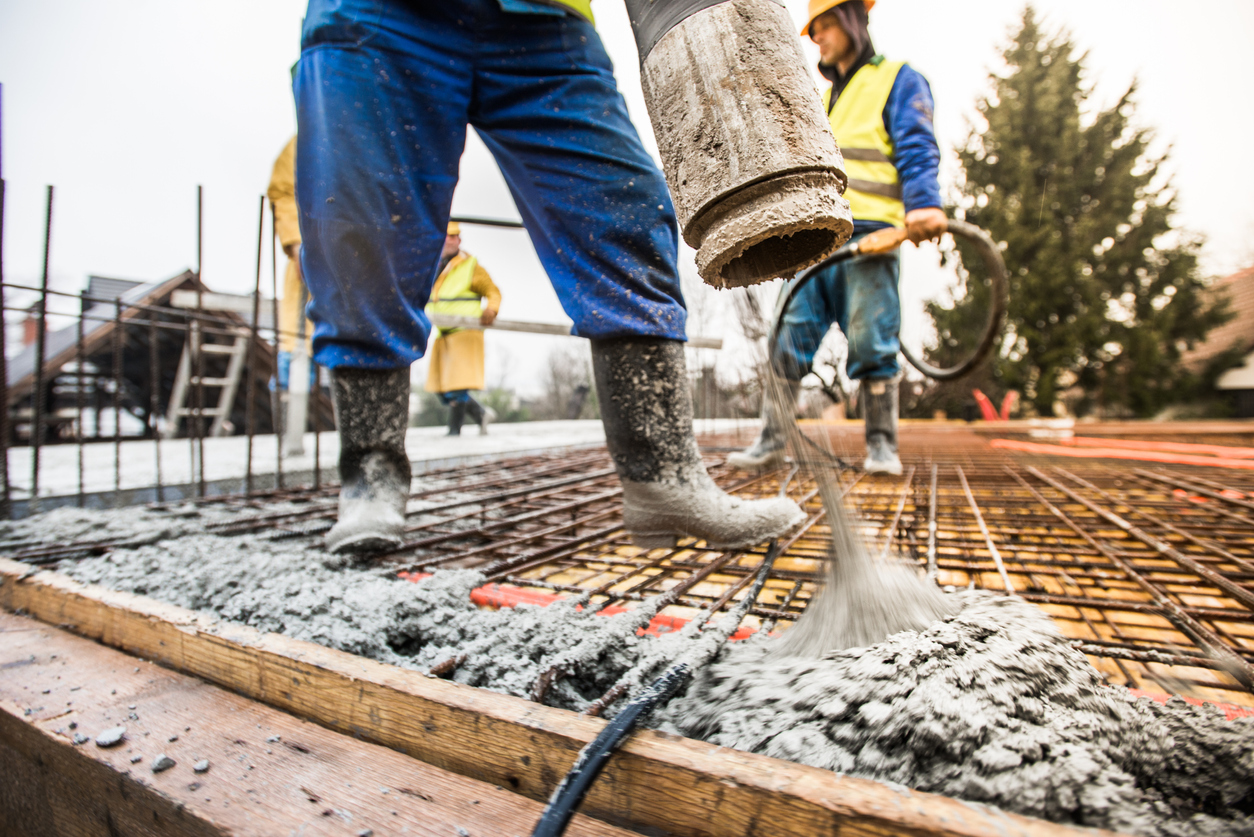
STEP 7: Pour the concrete into the form.
Now that the concrete is mixed , it ’s meter for concrete pouring . arguing yourwheelbarrowof mixed concrete into the form to pour the contents . If you ’ve enlisted protagonist to aid , get all hands on deck of cards and scrape the concrete into the mannequin as quickly as possible .
Be sure to site enough concrete to fill up to the top of the grade board , which will make finishing the concrete easier . gargle the wheelbarrow as soon as it ’s empty to keep residue from harden .
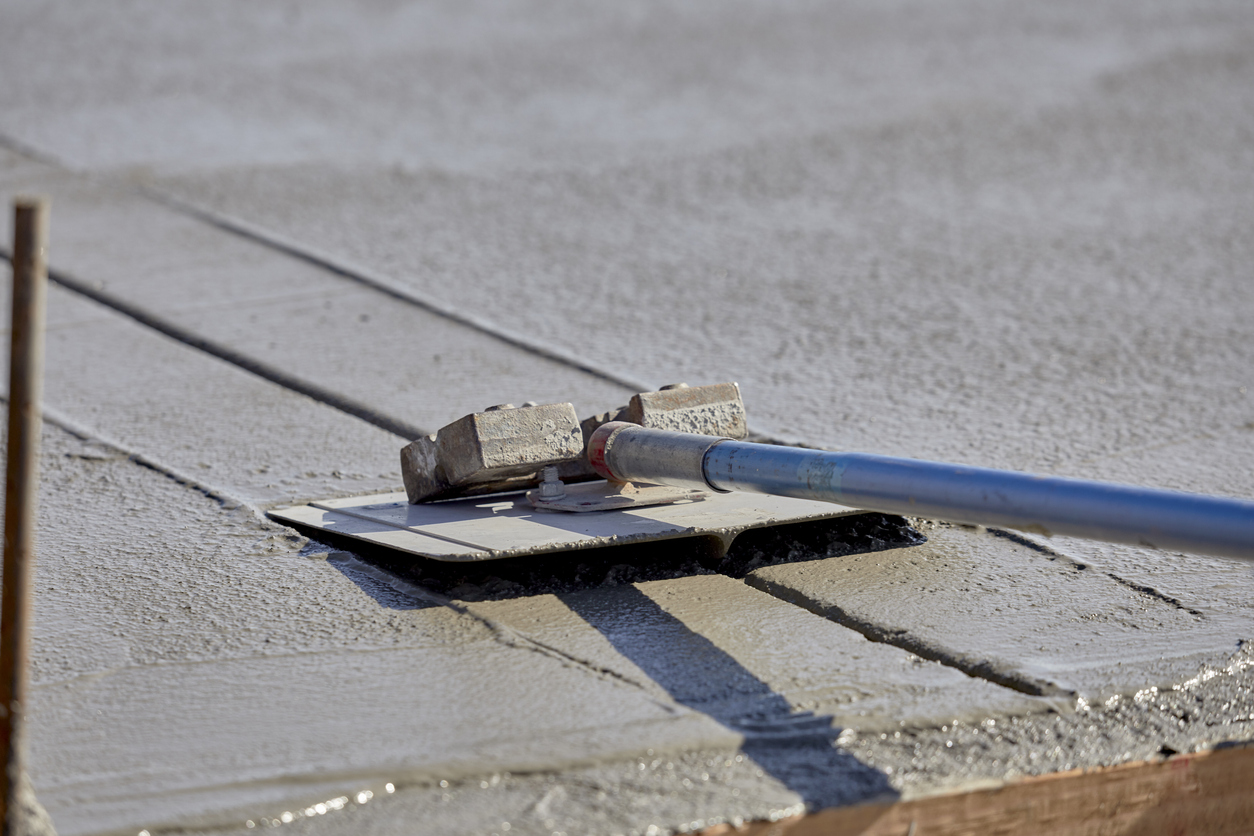
STEP 8: Level the concrete with a screed board.
rapidly level off the top of the poured concrete before it begins to define with a clean , long plank of wood that can reach two sides of the concrete shape , like a 1x4x16 or a 2x4x12 . This prospicient board of Sir Henry Wood is known as a screed instrument panel and is used to smooth concrete after it ’s been placed into a form .
Ideally , lie the minute side of the screed board over the top of the phase boards on either side of the perimeter , with the screed control board in contact with the concrete airfoil . Using a back - and - forward sawing motion , hand - drag the screed board from one end of the concrete undertaking to the other close to smooth out and level out the concrete . recapitulate this whole step as want till you attain a smooth open .
STEP 9: Using a float, smooth the concrete.
For a unfeignedly professional job , use both a Grant Wood or bull air bladder and a magnesium “ mag ” float to further smooth the concrete . First , enforce the larger flat - bottomed wood or bull ice-cream float to the concrete .
When pushing the wood float away from you , keep the far side slightly idealistic . When fetch the plasterer’s float back toward you , the side facing you should be slightly kick upstairs — this will help stave off retarding force Saint Mark . Use the magnesium helping hand float next , with sweeping semicircular apparent movement for the final finis .
STEP 10: Groove the concrete to create control joints.
Groove the concrete every 4 to 6 feet in width . This will allow it expand and contract with temperature changes , preclude surface cracks .
“ Groovers ” can be long - handled pecker for work while brook and reaching , or they can be hand shaft used when bow for close - up workplace . Both function the same way , turn out a groove through the depth of the concrete . A long - handled groover will make it well-fixed to cross a wider projection with a uncoiled melodic phrase .
STEP 11: Brush the concrete and allow it to set.
For an edge against slippage in cockeyed conditions , “ thicket ” the concrete by drag abroomover the surface . Allow concrete to set just enough so that brush wo n’t cause clumps . ( How long to hold back will reckon on the temperature and humidity . ) If clumping occur , smooth the discussion section again with the magnesium ice-cream float and give it a little more time to define .
Once the concrete is no longer clumping on the heather , do light dragging normal across the integral orbit . Be deliberate that the brushed radiation pattern ’s grooves are n’t so abstruse that water can pool in them , as this can induce open flake off over time . Once the whole surface is grooved , you ’ll have created good , nonslip traction .
STEP 12: Wait for the concrete to cure, then seal it.
Take measures to protect the concrete by roping it off , so it can safely cure for the industry - recommended 28 days . It ’s usually good to walk on a newlypoured slab of concreteafter a day or two , and safe to drive on it after about a workweek . However , to ward off any chance for scuff marks or gouges , it ’s better to wait until it in full cures .
After it cures , protect its longevity by sealing the concrete with a concrete sealer recommended by the concrete maker for the character of concrete used , the project , and the climate . Once you ’ve apply the sealer , wait about a day before walking on it and wait at least 2 or 3 Clarence Shepard Day Jr. before driving on a newly sealed driveway .
To keep concrete look nifty for decades , sporadically clean concrete with soapy water . reseal it every 5 age will further protect it .

FAQs
Yes , you’re able to pour concrete directly on dirt . However , in geographic areas that can freeze , the concrete may be susceptible to break up as the soil freeze and thaws . To foreclose this from happening , use a subbase of crushed rock to protect the concrete ’s morphological integrity .
The fabric for concrete slabs can cost about $ 6 per square foot . However , there are the additional toll of gravel for the subbase , formwork , concrete finishing shaft , and other supplies . Depending on the location , the thickness , and the supplies that ask to be purchased , it may cost about $ 800 to pour a 12 - column inch by 12 - in concrete slab .
Bagged concrete mix maker Quikrete urge mixing an 80 - pound bag of concrete mix with about 3 quart of water ( pour 2 dry quart into the mixture to start , and tot the rest gradually as ask ) . The amount of water used to meld concrete also depends on the character of concrete mix used , the climate , and the site circumstance . If the mix is too dry , it ’s easygoing to add a slight more water . If it ’s too wet , add up more dry mix can help adjust it . The assorted concrete should have the consistency of biscuit batsman .
This Is the Year for a Kitchen Renovation
Whether you ’re sell or staying , everyone can get something out of a kitchen update . get word why we deliberate this renovation the Most Valuable Project of 2025 and how to stay on budget .
