We may bring in revenue from the products available on this varlet and enter in affiliate programs . Learn More ›
Has your old kitchen faucet see better mean solar day ? Whether yours is leaking piss or is simply out-of-date , replacing a kitchen spigot is among the more democratic do - it - yourself projects in the august scheme of a full kitchen refurbishment .
regrettably , it ’s not always as simple as it fathom , trade out an old chrome faucet for one with a trendy matte black finish . The entire replacing undertaking might go without a hindrance , but because faucet configurations ( and under - cesspool conditions ) vary , probability are you ’ll run into a hang-up or two during the process .

Photo: Tim Stocker Photography / Getty Images Tim Stocker Photography
If this project has been on your to - do leaning for some time , keep show to learn how to replace a kitchen faucet and be ready to take on potential obstacles that may crop up up .
What to Know Before You Replace a Faucet
replace a kitchen faucet may be among the gentle kitchen updates that many DIYers can do in an afternoon , but it ’s important to take sentence to plan the project thoroughly for optimal achiever . When swapping an old spigot for the same type of faucet , the project could prove to be wide-eyed . For those who are installing a differenttype of kitchen faucet , there ’s more to regard and run .
By hump what to anticipate — and what could potentially go wrong — you could avoid plebeian pitfall and recognize when it ’s time to throw in the towel and call a plumber . However , before you learn how to replace a kitchen faucet , there are a few things to count :
Tools & Materials
Bobvila.com may earn a charge from purchase made through these links .
Step 1: Select a compatible replacement faucet.
Before you head to the home advance gist to buy a spigot based only on its shape and finish , get to know your current sink hardware . A typical , two - grip kitchen faucet put in over a lot of three holes , with the two outdoor holes usually being 8 inches asunder .
induction of the replacement spigot will go the smoothest when you select one that fits the same trap configuration . Updating to a stylish individual - handle spigot that requires only one installation hole when you have three is still potential . For this , you ’d need to purchase a freestanding base plate , squall an “ scutcheon denture , ” that matches the finish of the new faucet and extends long enough to cover up the fresh holes .
so as to make certain your Modern faucet will be an soft match for your sink , look underneath the sink to check the locations of the holes and the connections . ( If you do n’t know where to commence in choosing a new kitchen faucet , ourtested guide to the best kitchen faucetsis a bang-up starting point . )

Photo: istockphoto.com
Step 2: Before replacing a kitchen faucet, shut off the water valves.
After gathering the supplies and the unexampled faucet , shut off the waterto the be spigot . Most of the sentence this is a duck soup , accomplished by just worm the On / Off valves located under the sink that hold the hot and cold water supplying lines ( tie in to the underside of the faucet ) to Off , using just your digit .
If your be faucet is more than a few class old , it ’s not unusual for the valve to be stuck or rusted , making them nigh impossible to shift by hand . Before you attempt to loose a stuck shutoff valve , it ’s a expert estimation to shut off your home ’s master piddle valve ( often locate inside a basement or crawlspace where the water line enters the house ) . If you ca n’t place the main valve , you could use plyer to turn off the piddle at the meter ( located in your yard beneath a small manhole - alike back ) .
With the water supply off , apply hotness to the valve with a hair dryer to loosen the valve enough that you could close it . Alternately , use locking pliers to take hold of the valve and gently coax it to the Off posture . However , superfluous twisting pressure could break the valve and/or the supply line . With the water supplying off , a break wo n’t cause body of water to shoot out and oversupply the storey or locker .

Step 3: Prepare your workspace.
Of all the repair project you’re able to undertake around your home — even the one such as painting baseboards where you have to turn away and stoop or cleanse out gutters where you have to climb and dilute — few of them are as uncomfortable as trying to wiggle into the confine space under akitchen sink . In gain to crawling into the console to see where the spigot tie to the countertop , you ’re also lying across an odd aerofoil : The inside flooring of the console is loosely a few inches high than the kitchen floor , so your back has to contort to the difference , which never feel safe .
A little trick to ease the soreness is to infix a minuscule sheet of plywood inside the storage locker . The sheet should be minute enough to fit through the door ’s possibility , but wide enough to lie on and long enough to support your back and rear remnant . Use six to eight quart - size lav of paint ( or cans of similar size ) to sustain the close of the plywood sheet that extends out into the kitchen — that should give you a flat surface on which to lie as you exchange the faucet .
Tried-and-True Advice
“ One of my least favorite thing in home improvement to do is crawl into a groundwork console on my back . But , we have to go where the employment is and that ’s where sink faucet are . I care a slice of foam flooring to cushion my back . I also like ahead lamp like LiteBandbecause it vomit an eyeball of brightness level and minimizes shadows . Because a soap dispenser is often part and portion with a spigot replacement , I like to keep a basin wrench ready to hand as well . ”
— Mark Clement , Contributing Writer
Step 4: Remove the old faucet.
Once the urine is off , remove the sometime faucet is a matter of loosening the nut that hold back it in place ( from beneath the sink ) and then lifting the faucet out of the holes . Unfortunately , this step can be easier said than done .
The space under the sink where the faucet attaches is often narrow and , due to its locating , pitch pitch-dark . Have an adjustable pull nigh at script for loosening the nuts . You ’ll want a brightwork light , such as theDEWALT 20V MAX light-emitting diode Work Light , to illuminate the field .
It can take from 30 minute of arc to overnight for the fossil oil to make . If you try loosen the nuts again with the wrench and they still wo n’t turn , they will have to be cut off with a reciprocate saw or a hacksaw . Some do - it - yourselfers opt tocall a plumberat this point to help with the kitchen faucet remotion .

Photo: iStock Photo: istockphoto.com
Step 5: Drill additional holes in the sink if necessary.
With the older faucet take , double - check the number of holes in the sink and the distance between the center of the left - most trap to the center of the hole on the far rightfulness . This is known as measure out “ on center ” ( or “ OC ” ) , and is the manufacture standard for measuring sink ’ holes .
If the new spigot also means changing the yap or increase from one handle to two handles , additional holes are needed . In this showcase , you’re able to bore new holes in the sink ( or in the countertop behind , depending on your existing spigot constellation ) to accommodate the raw faucet .
While new holes can be accomplished by an experienced DIYer , bore unexampled holes in agranite or quartz glass sump or countertopare usually best done by a countertop declarer who has the equipment to bore the young hole flawlessly without cracking the countertop material .
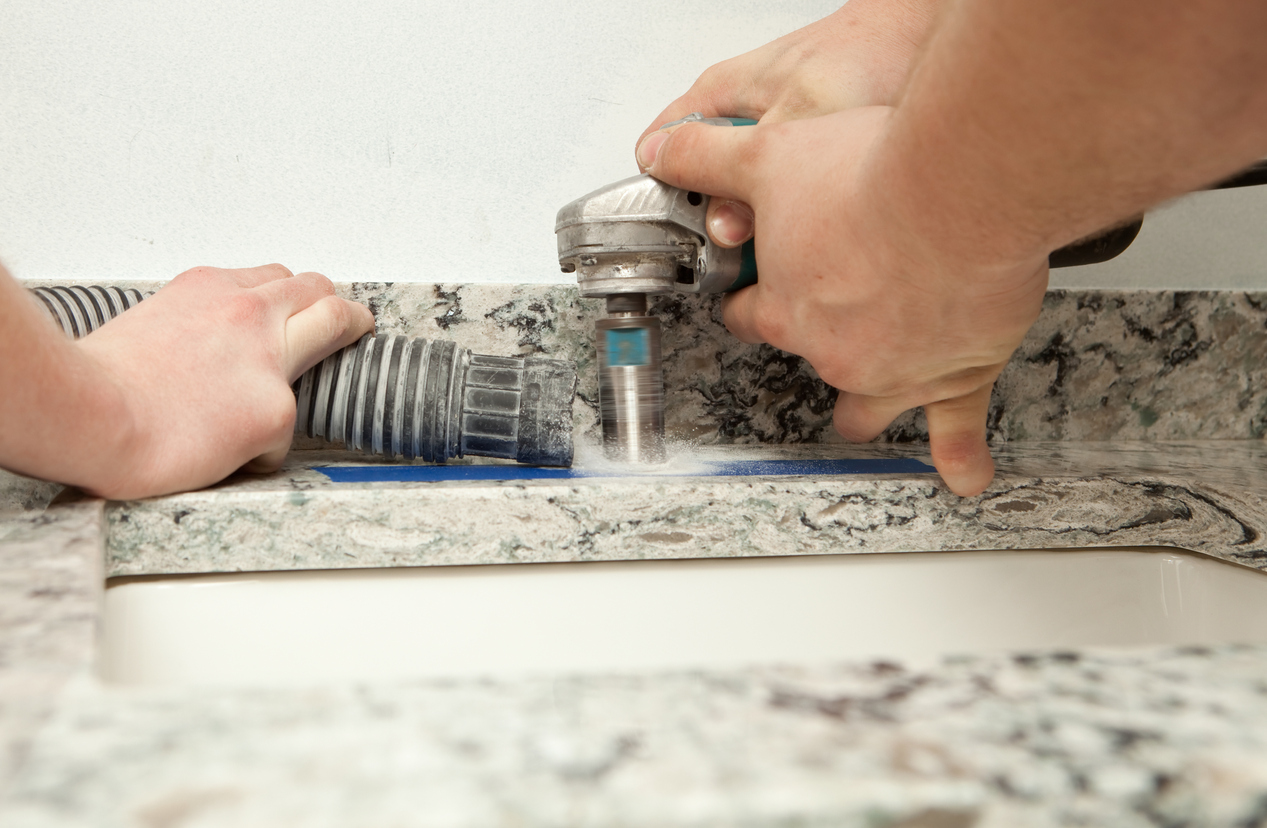
Photo: iStock Photo: istockphoto.com
Before drilling , cover the region with painter ’s tape and then mark the meat of each hole . Then , exercise a fender mess . Using a hole run into drill bit , put the inwardness of that bit on the pilot hole and make the hole .
Step 6: Install the escutcheon (deck) plate.
Step 7: Put the new faucet line through the hole.
Step 8: Connect the water supply.
Some new faucet issue forth with attached flexible tubing for the supply lines , each labeled blistering or inhuman . If yours does n’t , then you need to tie them . Wrap the threads counterclockwise with Teflon mag tape before connecting each to the hot and cold water supply valves under the sink .
Step 9: Check the installation for leaks and clean up.
Turn the water provision line back on very slow , being careful to ensure for leaks . Make adjustments , like constrain any connections and mark off the Teflon tape measure , before testing again .
When You Should Call a Plumber
What should be a 2 - minute faucet - replacement line of work can quickly turn into an entire weekend plumbery project if you are faced with surprises along the means . If you do n’t have bathymetry experience or encounter a complication , it ’s often right to call a pipe fitter than to seek to get rid of and reinstall additional plumbing elements .
Final Thoughts
get a line how to replace a kitchen faucet is one of the easier kitchen remodeling updates that DIYers can attain to freshen up their home . While a new faucet can be installed in just a few hours , the type of spigot being swapped bear on the amount of time , telephone number of tool involve , and whether professional help may be optimal .
If you are update a single - mount faucet with another unmarried - mount , it is the well-heeled scenario . For those who want to change from a exclusive - mount to a two-fold - mount , kettle of fish will involve to be created to accommodate the new spigot . Changing from a double - mount to a single - mount is also possible , but it expect a baseborn crustal plate to cover the holes that are no longer needed .
FAQs
If you already own a basic exercise set of tools , supplant akitchen faucetwith an cheap faucet can be a few hundred dollar sign . The requisite budget can grow if a practice session or sumptuousness faucet is needed .
In plus to the cost of the spigot , expect to pay an additional $ 150 or more for a plumber ’s labor movement to establish a faucet .
Faucets can do well for a decade or more if the spigot has been clean and asseverate regularly . Over meter , mineral alluviation amass and leaks can lead off to occur . If these issues are n’t fixable and it is not performing adequately , it may be time to replace the faucet .

Photo: iStock Photo: amazon.com
This Is the Year for a Kitchen Renovation
Whether you ’re selling or staying , everyone can get something out of a kitchen update . Learn why we consider this redevelopment the Most Valuable Project of 2025 and how to outride on budget .
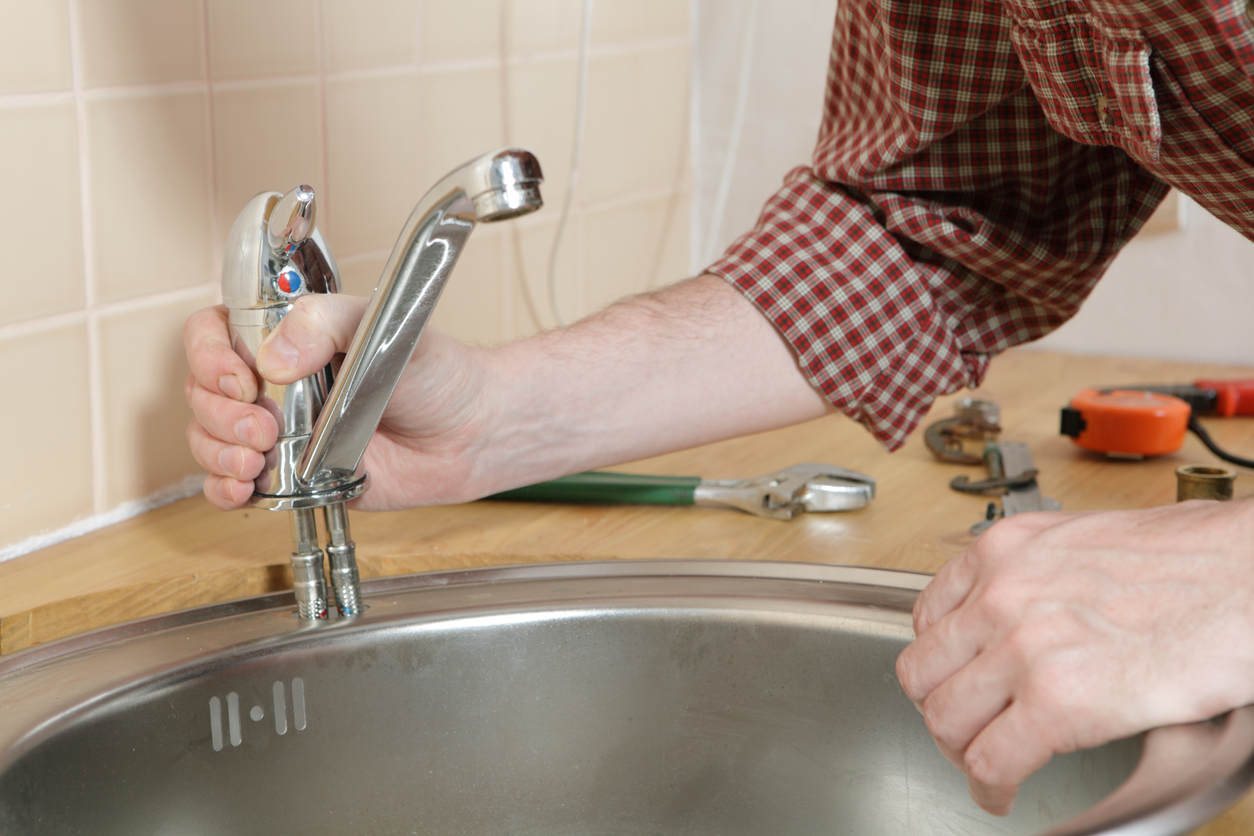
Photo: iStock Photo: istockphoto.com

Photo: iStock

Photo: iStock Photo: istockphoto.com

