We may realize gross from the ware uncommitted on this page and participate in affiliate programs . Learn More ›
lav are significant rooms in the menage , providing a convenient place for people to bathe , sweep their tooth , shaving , do their haircloth , and more . So , when there is a problem with the sink , shower , or throne , it ’s necessary to trouble-shoot the take and make repair before the job can get worse . One such issue is a faulty toilet flush valve .
A moneyed valve is responsible for rapidly releasing the H2O from the crapper storage tank to flush the contents of the toilet bowl . It is typically set in the centre of the toilet army tank . Toilet flush valve parts include the overflow subway system , the valve opening in the bottom of the cooler , and the pencil eraser armored combat vehicle ball or flapper that cut across the valve opening .
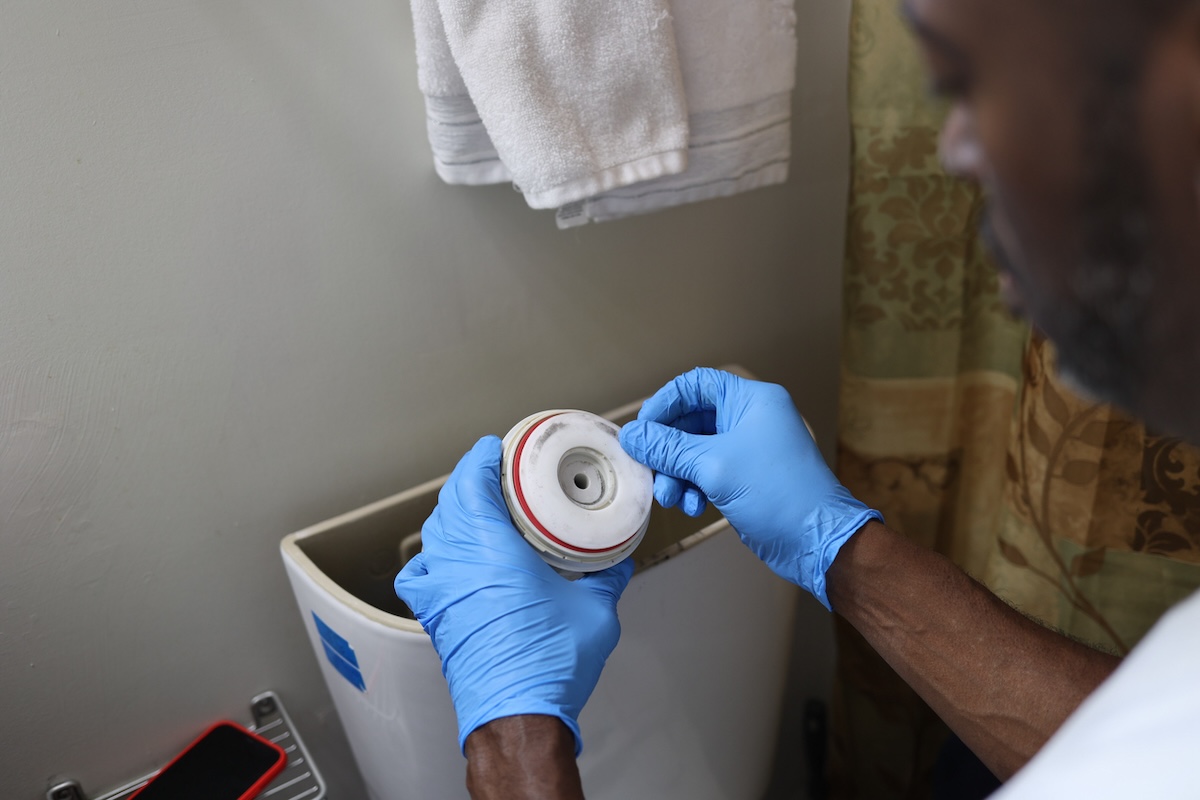
Photo: istockphoto.com
Generally , a gutter flush valve replacement is necessitate if the toilet is frequently running , even after addressing other possible cause . A cracked or severely have on toilet flush valve may also cause a leak at the connection between the toilet tankful and the toilet bowl . utilise this guide to find out more about the parts of a crapper and how to substitute a toilet flush valve .
Tools & Materials
Bobvila.com may earn a charge from purchases made through these link .
Project Overview
Working Time:1 hourTotal Time:1 hour and 30 minutesSkill Level : IntermediateEstimated Cost:$20 to $ 50
Before You Begin
When seem for privy replacement theatrical role , mark thattoilet flush valvesare not universal , so you need to find a sewer valve replacement that is compatible with the can . Most toilets will use a standard 2 - column inch moneyed valve . This measurement refer to the size of it of the flush valve initiative in the bottom of the toilet armoured combat vehicle . Some toilets may practice a 3 - inch flush valve , though this is n’t as vulgar . determine the size of the affluent valve gap to determine the correct size for the replenishment theatrical role .
In some situations , a running toilet may be due to afaulty flapper , an older chain , or a short overflow underground . If this is the cause , DIYers can replace moneyed valve part instead of supplant the entire moneyed valve assembly to shorten the price of mending . Just verify this is the sheath , or you may replace a certain part only to find the issue is still come .
Once you have see that the flush valve needs to be supersede , go forward with the follow steps to remove the old parts and deploy the newfangled loaded valve assembly .
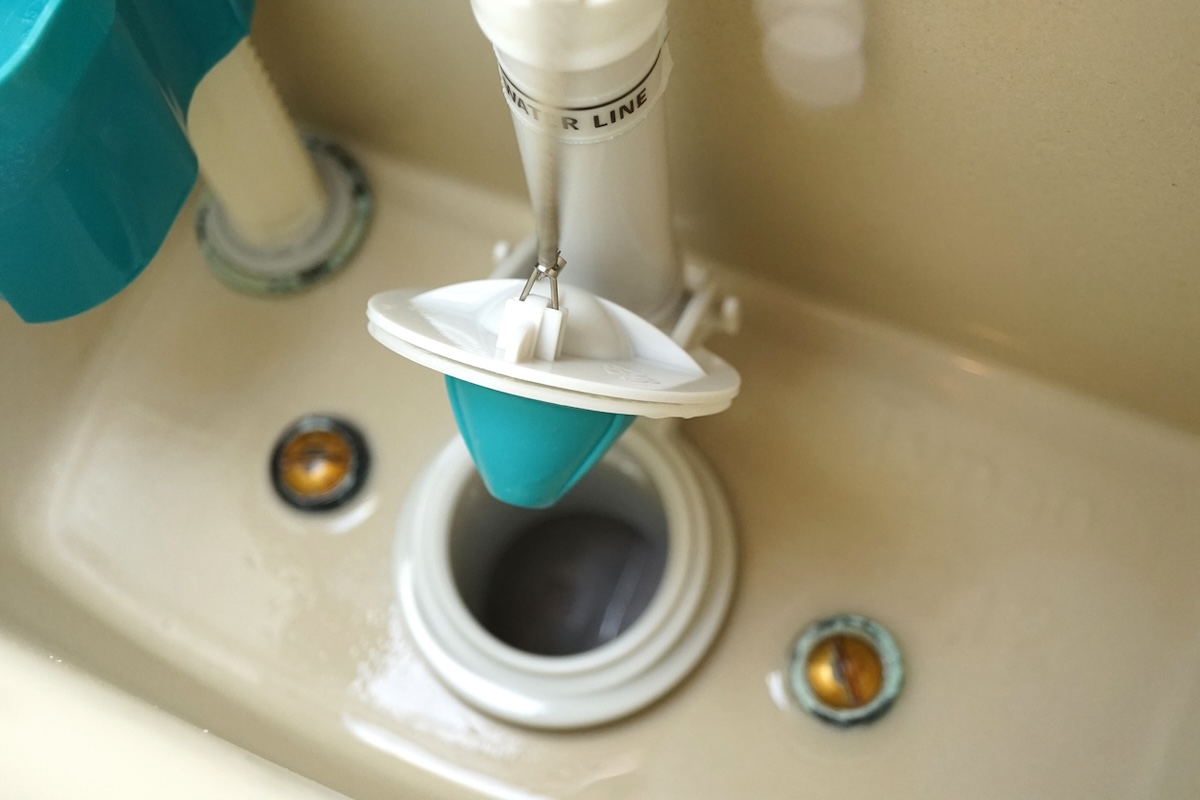
Photo: istockphoto.com
STEP 1: Turn off the water and drain the toilet tank.
get going this job by locating thetoilet shut out - off valve . It should be just behind the pot on the incoming water blood . Turn off the valve to stop the flow of water to the toilet . The toilet tank car will still be full of water , so the next footstep is to flush the commode to enfeeble as much H2O out of the tankful as potential . employ a sponger and bucket to inebriate up and slay the remaining water system .
STEP 2: Disconnect the water supply hose and remove the toilet tank.
The incoming water supplying hose tie in to the base of the toilet army tank where thefill valveis instal . This is normally on the left side of the sewer cooler if you are facing the toilet . Use plyers to unplug the piss supply hosiery , then range the assailable death of the hose into your bucket to catch any remaining water .
situate the two crapper tank bolts in the bottom of the can tankful . utilise a screwdriver to guard the head of each deadbolt in place , while using an adjustable pull or a set of canal lock pliers to loosen and remove the nuts .
If you may not unscrew the nuts due to austere rusting or corroding , then you may need to habituate a metal saw to cut through the bolts . Although , if the tank bolt are in estimable condition , then they can be reused . After removing the armoured combat vehicle bolt , cabbage the tank off of the toilet stadium and place it in a safe location .
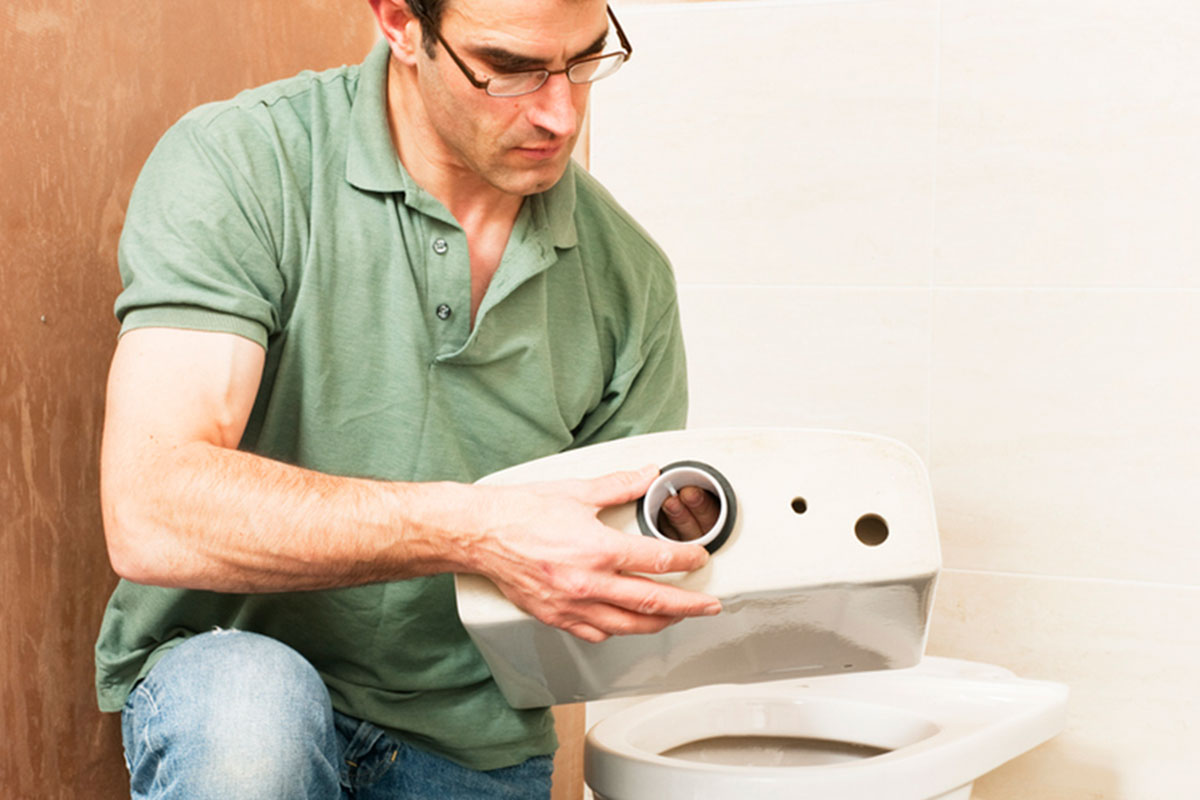
Photo: istockphoto.com
STEP 3: Remove the old flush valve.
The next step in thiscommon pot repairis to remove the old affluent valve . In Holy Order to get at the flush valve mounting nut , remove the big foam gasket on the bottom of the tank car . habituate an adjustable wrench or aset of Channellock pliersto unscrew the mounting nut , then root for the honest-to-god affluent valve out of the sewer storage tank . Use an former towel or material to pass over down the bottom of the bathroom tankful so that it is clean and free of debris before proceedings .
STEP 4: Install the new flush valve.
Grab the new potty flush valve from thetoilet repair kitand ensure that all the necessary role are included before proceeding . Insert the raw flush valve into the opening in the bottom of the toilet tank . ensure that the bevel side of the washing machine faces down , then spread out the flush valve until the placement matches the manufacturer ’s directions for induction . Thread the mount up nut onto the affluent valve tailpiece from underneath the tank and tighten it with a wrench or pliers . Once the raw moneyed valve is securely fastened to the storage tank , place the large froth gasket over the flush valve tailpiece .
STEP 5: Mount and secure the toilet tank.
Place the toilet armoured combat vehicle back into position on top of the toilet pipe bowl , ensuring that the flush valve opening is right aligned with the opening at the back of the privy bowling ball . Insert the storage tank bolt through the bottom of the tank on either side of the flush valve . Thread the mounting nuts onto each deadbolt , using your fingers to fasten the nuts as much as possible . Once the nuts are hand - tightened , use a wrench or pliers to snug up the connection .
If you had to thin out the tank bolts or decided to interchange the tank bolt at the same time , then you will need to first deploy the new tank bolts and prophylactic washers before climb and securing the toilet tank to the potty bowl . After reinstalling the toilet armored combat vehicle , learn to make trusted it is plane .
STEP 6: Connect the water supply line and turn on the water.
Reconnect the urine supply line to the filling valve tailpiece on the base of the toilet storage tank , thenturn the shut - off valve onto start fill up the toilet tank car with water . Check the water provision crinkle connection , the tank bolts , and the flush valve link for any leaks .
If the job was done correctly , thewater should cease runningonce the lav tank fills up because water is no longer leaking out of the toilet or down into the toilet bowl . After the sewer stops running , even out the stool to test the functionality of the flush valve .
Final Thoughts
When larn how to replace a commode loaded valve , it ’s significant to operate slowly to avoid lose any share or making costly mistakes . Keep in mind that a toilette tankful is both heavy and thin , so when disconnect and removing the toilet tank , it ’s necessary to have a good space to put the armored combat vehicle where it wo n’t get damage .
Similarly , before attempting to replace a throne flush valve , it ’s a good estimation to scrutinize thetoilet flushing mechanismto determine the character of affluent valve the lavatory usage .
purchase a replacement flush valve with a alike design and size as the existing loaded valve is typically the best option for a successful repair . If you are n’t sure about the sizing or style , take a few pictures before lead to the local plate advance storage . Alternatively , you could turn the water supply off , drain the tank , and get rid of the old flush valve , then take the old flush valve to the store to receive a suitable substitute .
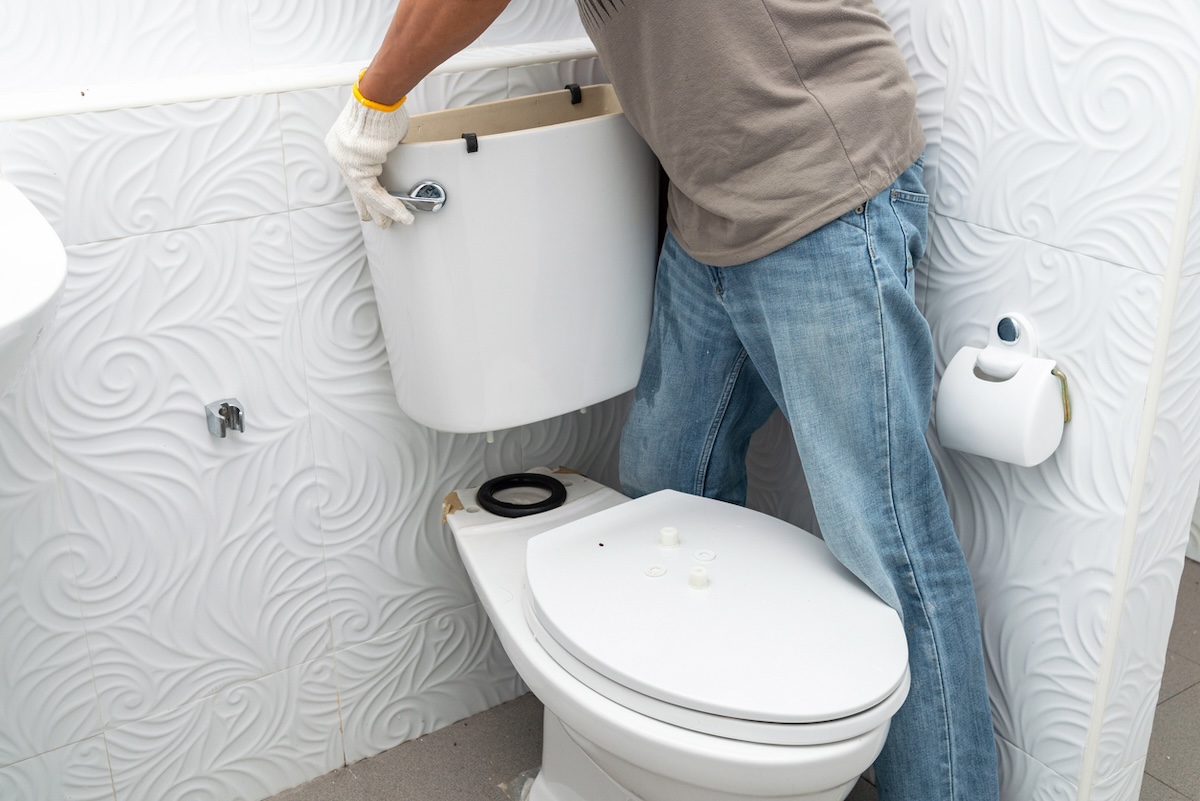
Photo: istockphoto.com
This Is the Year for a Kitchen Renovation
Whether you ’re trade or staying , everyone can get something out of a kitchen update . Learn why we moot this refurbishment the Most Valuable Project of 2025 and how to continue on budget .

