We may earn receipts from the products available on this Thomas Nelson Page and participate in affiliate programs . hear More ›
Restoring a weather deck is a peachy project to tackle unaccompanied or with a partner , and it turn back a noticeable and satisfying artistic upgrade . It demand a smaller budget than replace a deck but provides amajor wages , particularly if you ’re turn over putting your house on the market . If you lack the time , tool , or equipment , or if structural hangout are needed , do n’t hesitate to reach out to a skilled pack of cards professional . But if the upshot is just enhancive and you ’re ready to tackle the project on your own , these steps will show you how to restore a weathered deck .
Tools & Materials
Bobvila.com may earn a commission from purchases made through these links .
Before You Begin…
Before you take on this project yourself , it may be wise to get a 2d opinion to verify your deck of cards is n’t beyond DIY mending . An expert may be able to see whether you need a novel deck or if it just take to be revamped with cleaning and restaining . molder wood or loose boards could indicate a more significant issue that warrants professional aid and mending or replacement .
mensurate the area of the deck of cards before purchasing deck stripper or deck stain . This way , you may ensure that you ’ll grease one’s palms the correct amount and wo n’t require to make a last - minute trip to the menage improvement depot in the middle of the project .
Plan your labor for a few days when there ’s no forecasted pelting , or be prepared for the labor to take longer : The deck will need to dry out after cleaning , and the filth will need to sit for a while before getting wet .
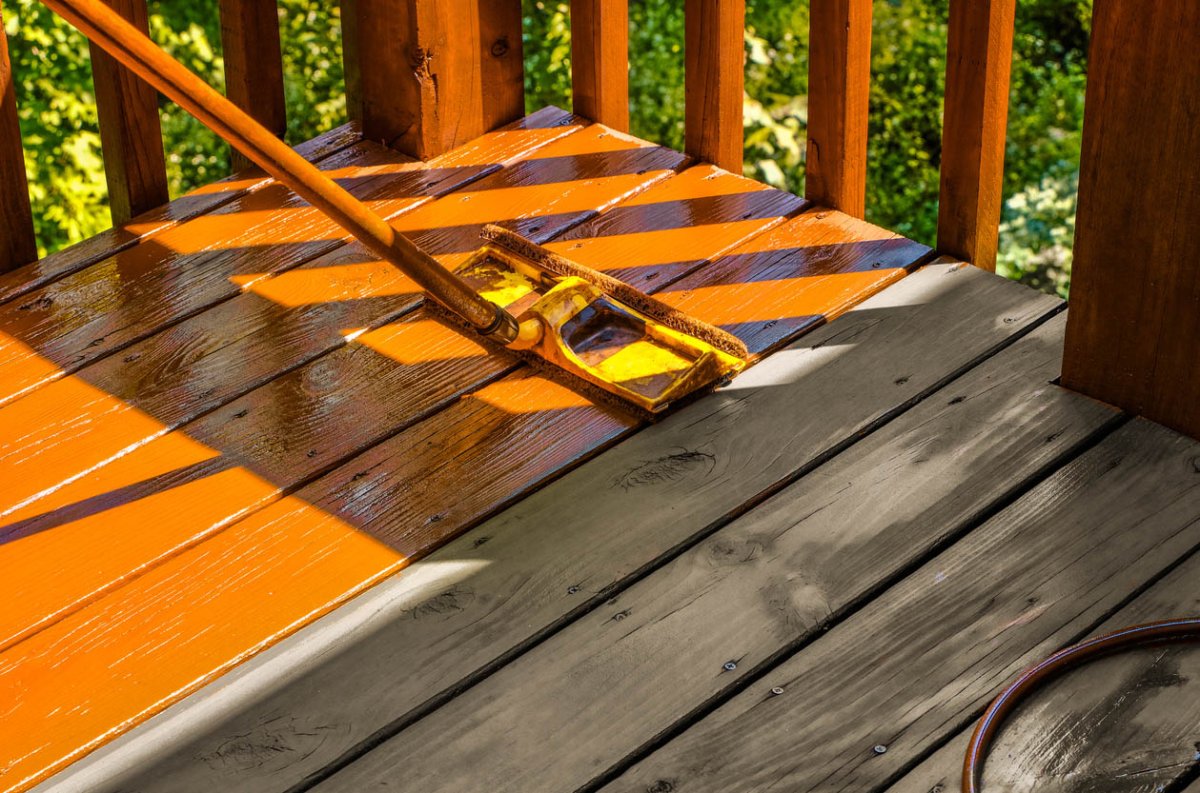
Photo: istockphoto.com
Tips for How to Restore a Weathered Deck
Safety Considerations
STEP 1: Inspect the deck and repair any damage.
Before bribe supplies or jumping right into repair mode , it ’s a expert idea to cautiously inspect your pack of cards to get an idea of the scope of work it will postulate to restore . valuate deck board , Emily Post , stairs , joist , handrails , and handrail for scathe . Any wood rot will need to be replaced , as will any assume - down nail or screws .
STEP 2: Remove any flaking, loose finish.
practice a scraper prick to take away any loose paint or finish from preceding staining jobs . This will give you a clean canvass and make cleaning and sandpaper easier . secure that you check all railing and panel for flake finish . If there are any expectant Natalie Wood splinters , trim them or sand them down with rough-cut emery paper . A sanding rod can make sand the pack of cards easier than sanding on your hands and knees .
STEP 3: Protect the surrounding area.
Before moving on , protect the surroundings . tape recording plastic sheet over nearby landscape gardening and house siding to preclude the soil from splosh the house or deck striptease artist from killing any plants . If you ’re not refinish the rails , protect them with plastic sheeting as well .
STEP 4: Clean an unfinished deck or strip a previously finished deck.
Before you embark on cleaning or strip , check that you are wear protective gear like rubber glass , a mask , work gloves , and rubber boots . For an unfinished pack of cards , add 1 dry quart of bleach ( sodium hypochlorite ) and ⅓ cup of powder laundry detergent to 3 quarts of strong water in a bucket . Apply this mixture to the deck with a scrubbing thicket . Scrub any arena of buildup or stain . Once applied , rinse thoroughly with a hose or power washer and give up to dry completely , at least overnight . The whitener is specially effective for mold .
STEP 5: Sand the deck to prepare it for staining.
A bland Earth’s surface is essential for an even , long - lasting stain app . Using coarse ( 60 - moxie or lower , if useable ) emery paper and a sanding pole , sand the deck ’s Earth’s surface . If you ’re refinish the railings , use an electric smoother or sanding block . expanse or vacuum away any dust . verify you ’re wearing safety glasses and a mask so you do n’t inhale any dust .
STEP 6: Stain and seal the deck.
Before you begin staining , ensure that the weather forecast does n’t predict pelting : Most grease need time to set before getting wet .
If your deck is new and the wood still has much of its original color and splendor , a transparent stain can add refulgence without color . For previous deck , or if you ’re looking to channel a totally Modern colour onto the wood , a semitransparent or colored stain would be a better choice . use the stain with a synthetical brush , commence with the railings , and watch the focusing for your particular mark . Some sort of smirch will be apply with the grain , while others will be apply transversal - food grain . Start with a thin coat of stain , as it ’s easier to append more but nearly impossible to remove excess dirt .
Many stains and sealant come together in one Cartesian product , which mean a one - step lotion . If your stain does not include a sealant , follow the manufacturing business ’s instructions and apply a sealant on top of the discolouration .
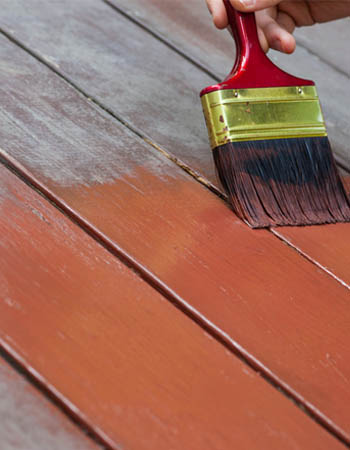
Photo: istockphoto.com
Restoring a weathered deck may be a great undertaking for a skilled DIYer . However , if these steps seem outside your accomplishment hardening , the time dedication is too much , you ’re not interested in purchasing tools , or create stamping ground is beyond your scope of expertness , a deck professional can handle the job for you and ensure it ’s done correctly .
This Is the twelvemonth for a Kitchen Renovation
Whether you ’re selling or staying , everyone can get something out of a kitchen update . Learn why we consider this renovation the Most Valuable Project of 2025 and how to stay on budget .
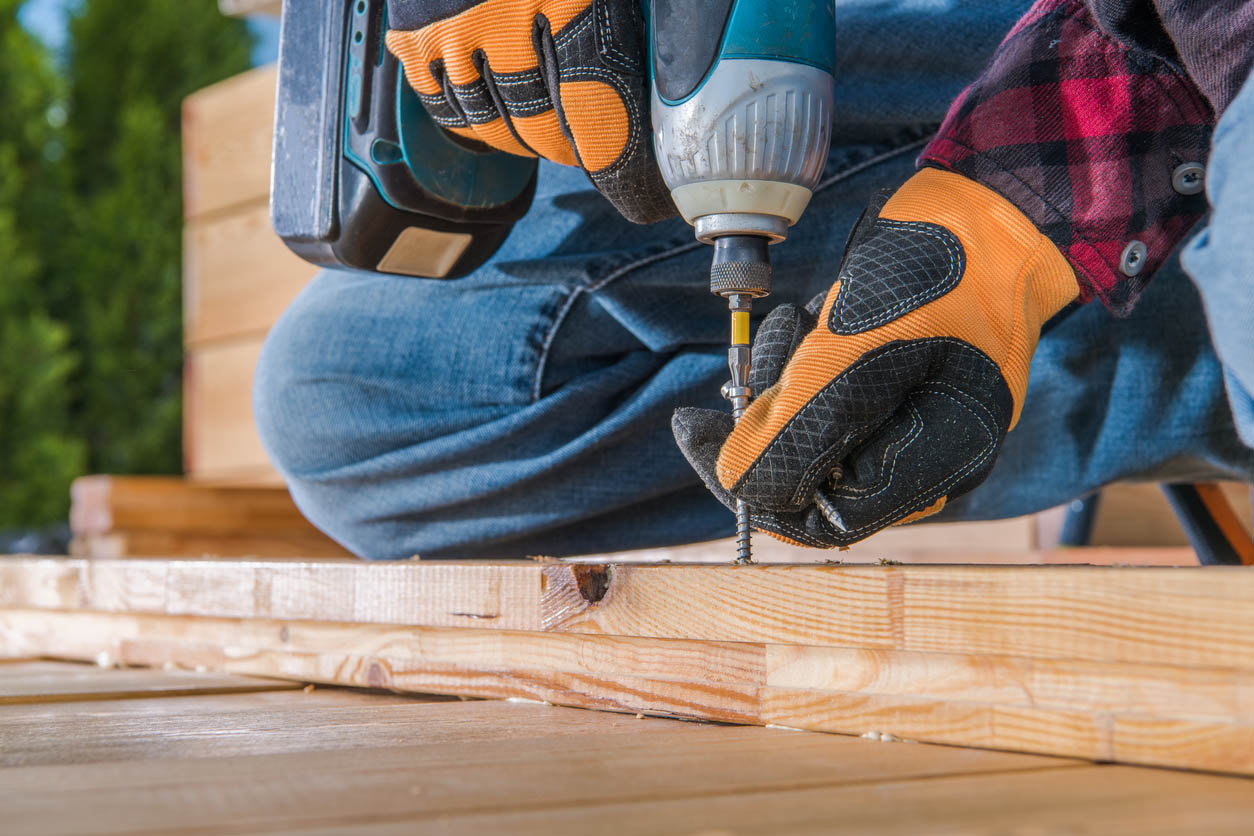
Photo: istockphoto.com
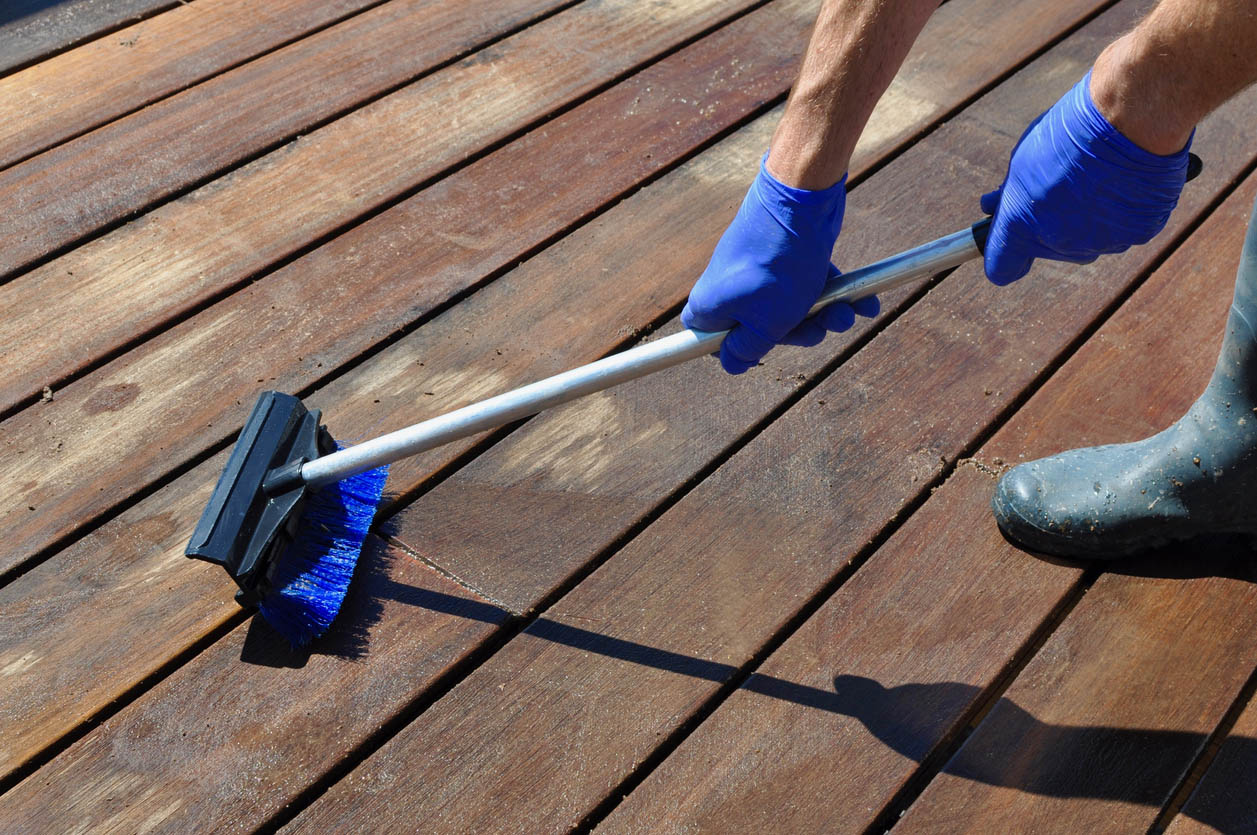
Photo: istockphoto.com

