We may realise revenue from the product useable on this Sir Frederick Handley Page and participate in affiliate programme . Learn More ›
Keeping a workspace organized andfree of clutter , regardless of the undertaking , improves the overall safety conditions and increase your efficiency . However , many home shop and office spaces have roll of hurriedly hidden file name extension cord and power strip that make for prime misstep endangerment , in addition to posing other safety concerns and just looking unsightly .
When it come toextension corduroy safety , wrapping your cables and putting them in the right indoor depot infinite is a must . Not only does it remove potential trip hazards , it also forces you to check whether or not an extension corduroy is unplugged and whether it has ding , frays , or other wrong . Using a damaged extension cord dramatically increases the hazard of starting a fire , according to theUS Consumer Product Safety Commission .
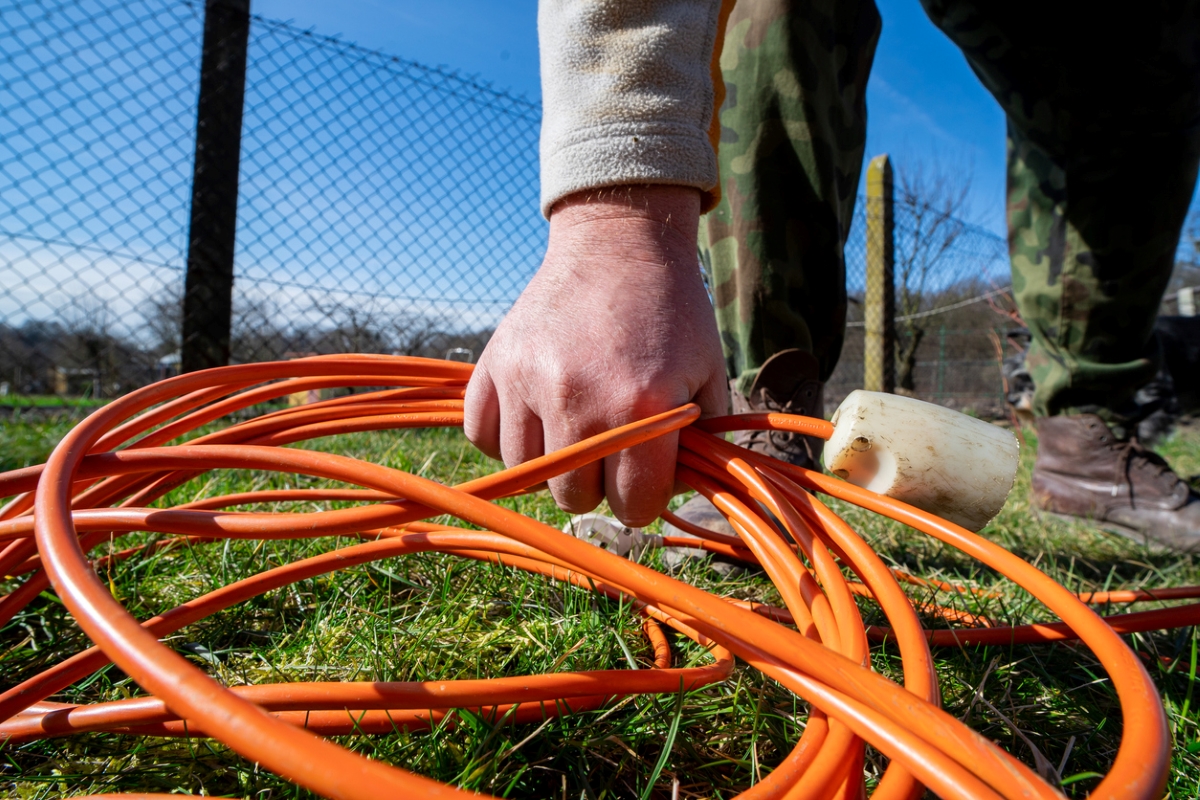
Photo: istockphoto.com
Beyond guard , the esthetic impacts of place organized cords is like the cherry on - top . At the end of the mean solar day , learning how to drift up an extension cord by using one of the four method outlined below is an easy way to make your blank space cleansing agent , secure , and more pleasurable .
Braid Wrap
Also know as the declarer wrap or the chain - inter-group communication wrap , the braid wrap is often the preferred method of construction and craft professional because it does n’t require any extra tools and it go out the corduroy ready for use . you’re able to give away it in section , which means you do n’t have to go through the fuss of rolling the whole thing back up if you have an superfluous - longextension corduroy .
Although there ’s a slight learning curve when it comes to the braid wrap , it is frequently the best way to vagabond up extension cord because it increase the life-time of your corduroy and leave the corduroy in an idealistic positioning for storage , whether that be sit around in a drawer , hang on the bulwark , or tuck inside a storage locker . In short , the braid wrap is functional and various and make it safe to hive away , all while looking pretty fancy .
STEP 1: Plug the male end of the cord into the female end.
Once you ’ve transfer any tangles and knots in the cord , one way to get the process started is by punch the prolongation electric cord into itself . Doing this keeps the prongs protected from any unwanted link during the wrapping process or while in storehouse , which is specially significant if you work in a shop with inflammable textile . Plugging the pronged male end into the female end of the corduroy cuts the length in one-half , which is crucial for the next step in the cognitive operation .
STEP 2: Make a loose loop at the opposite end with an overhand knot.
After you connect the two end of the extension corduroy together , work your means towards the end opposite the male plug , straighten the corduroy as you move along . Once you get within 6 to 8 inches of the opposite end , grasp the cords together to produce a diminished closed closed circuit . Using your other hand , simply get to through the loop you just created , and pull up both cords back through the loop at the same time .
STEP 3: Continually repeat the loop-and-grasp process.
Now that you ’ve made your first loop , continue doing so back towards the remnant of the extension cord with the sparking plug . Each loop involves reprise the cognitive operation from Step 2 . Once you ’ve made the first loop - and - range motion , you should have a 2d loop through which you’re able to pass and deplume the corduroy .
Make trusted that you keep your grasp at the base of the loop for each repetition . If you do n’t , you ’ll end up with a loose braid that wo n’t hold its integrity . Once you ’ve coil your means back to within 1 ft of the male and female chaw , arrest bring in new braid .
STEP 4: Slip the joined male and female plugs back through the last braid.
This is the last footprint before you get a fully pleach annexe cord . Simply take both plugs in one script and the base of the final braid in the other , and draw in the plugs backwards , through the loop of the final twist . Finally , pull the fire hydrant in the inverse direction to fasten the total braid . ensure that you do n’t accidently pull them back through the braid you just pushed them through during the tightening cognitive process .
Elbow Wrap
The elbow wrapper is the straightaway - and - unclean method of keeping your propagation cord and cables organized . However , that ’s not to say it ’s a sorry direction to oversee cord . While the elbow wrapper method does n’t have the structural durability of the braid or over - under loop topology , it ’s the fastest method of the three manual options . It ’s also the easiest to learn . Make indisputable you do n’t constrain it too much when you use the elbow wrap method acting to deflect coerce new defects into the cord by accident .
STEP 1: Hold one end of the cord in the crook between your thumb and forefinger.
First , you need to get a good bag on one close of the extension electric cord . squeeze the cord in the malefactor of your ovolo and index and pull it back until the plug is lightly pushing against your fingers , which will act as a “ wall ” for the plug to rest against . This will keep the plug from slipping in the process , which also lets you roll up the corduroy faster .
STEP 2: Begin wrapping the cord around your elbow and back between your fingers.
STEP 3: Connect the male and female ends.
The final footmark of the cubitus wrap is to enwrap the remaining substructure or so of both sparking plug ends around the middle of the wrapper , vertical to the direction of the wrapping . Then , pull them away from each other so the heart of the wrap becomes tight . Finally , connect the male and female ends together before store .
Over-Under Wrap
The over - under method is an nonrational and popular fashion to coil extension corduroy that strikes a good counterpoise between the convenience of a simple elbow wrap and the length of service and enduringness of the braid wrap . For many , this is the good way to wrap extension cord because it does n’t have a steep learning curve ball , and can easily be raise by just tally inexpensive velcro cable ties likethis extremely rated option available at Amazonor a variety of other affordablecable management accessory .
STEP 1: Make a single overhand loop at either end of the cable.
If this is your first maraud into the over - under wrap , you might want to lie your denotation electric cord out on a flat open to make the process a flake easier . Within a few practice round you ’ll be able to do it freehand without a problem . Another tip you desire to consider if your extension corduroy is unexampled and relatively stiff is to taste laying your electric cord in the sun or a affectionate space to get it to relax a bit .
Regardless of whether you take it in your bridge player or do it on a table , the first footprint involves making a roofy by slue the ending of the cable back onto itself and then holding the lap . Either clockwise or counterclockwise is fine .
STEP 2: Flip the cable’s orientation to create a second underhand loop.
Repeat the same unconscious process as the first , but make an underhand loop this time . This figure of repeating is the origin of the name “ over - under wrapper . ” To make the underhand loop , comprehend the cable at the end of the first overhand iteration in one script , and habituate the other script to grasp the cord behind the first mitt and then gently roll it onward under the first paw to make the loop .
STEP 3: Continue alternating between overhand and underhand loops until you reach the end of the cord.
Once you ’ve created the first set of over- and under - hand loops , you ’ll probably discover that it does n’t take too farseeing to get used to the distortion motion used in the underhand loop . Thankfully , propagation cords are designed in a path that naturally accepts this method acting of swathe , which make it fair sluttish to tell if you ’re gain the under - handed loops right . By the time you achieve the end of the electric cord , you’re able to finish it off by plugging the male and distaff ends into each other or by securing them with a tie .
Extension Cord Reel
Although Virginia reel can be costly , and they can cause more hassles than solutions if poorly made , there are some that standout from the crowd in term of durability and functionality . When done right , using an extension cord reel can save even more time than received manual coiling methods .
Reels are considerably suited for heavy - tariff extension cords that are farsighted than 50 feet , because these are a pain to manage and they become increasingly difficult to control as you become naturally pall when trying to wrap them . Furthermore , if you on a regular basis utilise and transport extension cords , you may want to consider a spool with high - tech feature such as automobile - abjuration or built - in USB port for jobsite charging . Keep in brain that these feature film may compromise the reel ’s outdoor versatility , however .
Our Recommendation : Masterplug Power At Work on Amazon for $ 133.49This Masterplug wing cord reel comes with a 100 - foot - long electric cord and four outlets that are grounded to the reel for powering tools on the jobsite .
Photo: istockphoto.com
Final Thoughts
Once you know how to wrap extension electric cord , you ’ll be able to keep them in working precondition for longer as well as keep your workspace safer and less littered . The welfare are abundant and the drawback is that it takes just a petty bit of time .
If you ’re an infrequent DIYer who rarely use an annex electric cord or cable , it ’s probably not worth the time to learn how to do the braid wrap , nor is it worth your money for a reel . The over - under and elbow wrapping methods are often the easiest , and are suitable for most users . If you on a regular basis transport your file name extension cord , we recommend using the braid wrap because it ’s the most stable . Lastly , if your cords are longer than 50 feet or with child duty , look at suffer a Virginia reel that minimizes the effort needed to keep those cord coil .
The cost number here are accurate as of publishing on October 20 , 2022 .
Photo: istockphoto.com
This Is the Year for a Kitchen Renovation
Whether you ’re selling or staying , everyone can get something out of a kitchen update . Learn why we consider this redevelopment the Most Valuable Project of 2025 and how to stay on budget .
Photo: istockphoto.com
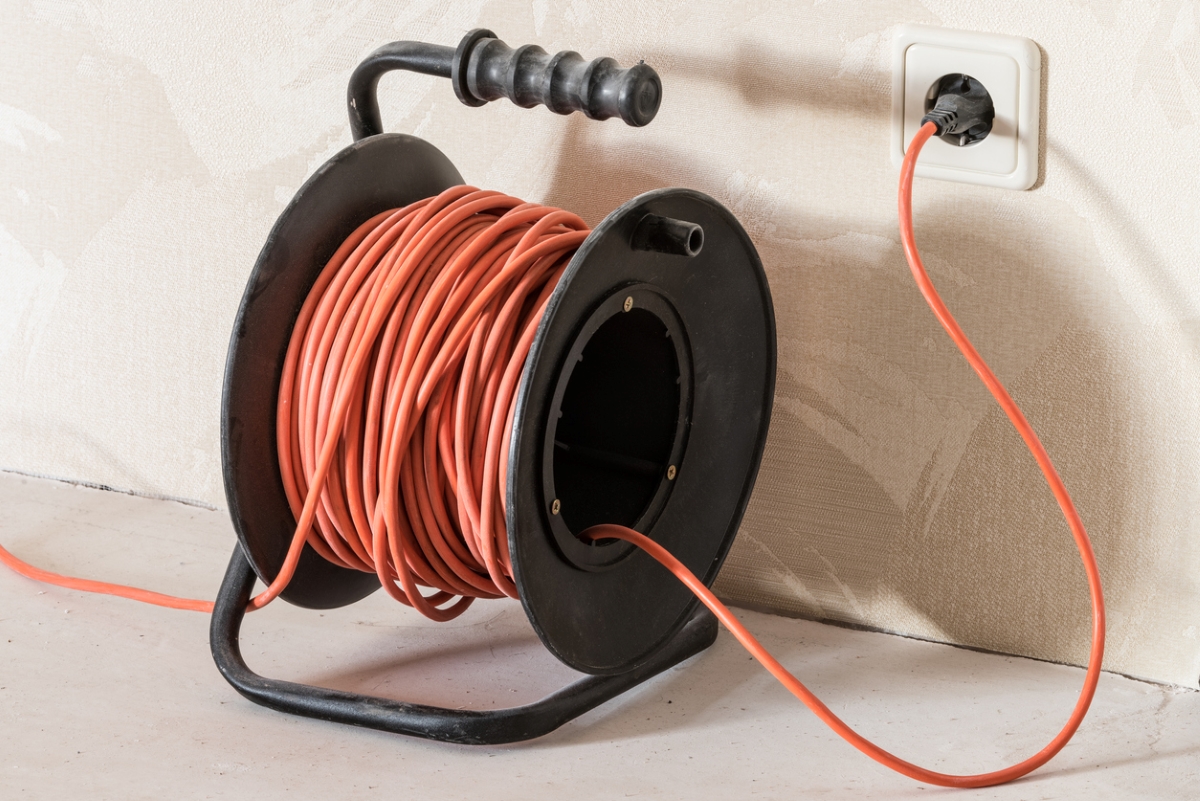
Photo: istockphoto.com

