We may earn taxation from the mathematical product available on this varlet and participate in affiliate programs . check More ›
In This Article
sandpaper a wood deck of cards is an all-important part of home sustentation , and it sounds simple enough . Rent a drum sander , take a few laps around the deck aerofoil , tune up the guard rail ’s top crownwork , and voila : a just - like - unexampled deck ! Right ?
Not quite . Before sanding a deck , it ’s imperative to fully understand all of the steps involve . Beyond the amount of time it takes to fastidiously walk back and onward with a vibrate deck sander , there ’s also the travail it deal to set all of the fasteners so they do n’t damage the sander .
Whether you want to know how to sandpaper a deck to ready it for paint or blot or if you are just hoping to reveal new woods fiber , follow the footprint outlined below to reach that impudently sanded wood deck you want .

Photo: Getty Images
Note : For this clause , the focus is on the horizontal Earth’s surface . While sanding 2×2 wood balusters ( “ spindles ” ) is possible , it is an unbelievable amount of labor . I often commend replacing the bannister when updating an older wood deck
Tools & Materials
Bobvila.com may earn a commission from purchases made through these links .
Project Overview
Working Time : 2 hours per 100 square feetTotal Time : 3 hours per 100 substantial feetSkill layer : IntermediateEstimated Cost : $ 150 +
Before You Begin
Getting ready to sandpaper is probably harder than actuallysanding a wood pack of cards . In summation to rent the flooring sander and gathering all of the supplying , it ’s of import to get with a unobjectionable deck of cards that ’s not in pauperism of any deck of cards repairs and that has fastener set below the bedeck surface . Just these two steps can take several hours , calculate on the size of the pack of cards surface .
Before work on the sander to start your deck refinishing project , put on safety glass to keep rubble and debris out of your heart , ear protection due to the sander ’s noise grade , and a face mask to keep dust out of your lung . You may also want to use knee stamp pad while lay all of the nails or screws in the decking .
Step 1: Clean the deck.
Whether you ’re sandpaper a deck to reveal new wood fibers , stripping astained deck , or justgetting it quick for stainorsealer , make clean the deck . While the smoother will sandpaper the dirt off , the dirt will clog the sanding discs faster than if you are sandpaper clean wood . practice a 3 - in-1 cleansing agent / brightener / antimycotic and a steady - bristled brush to clean house the deck of cards . You might get hold that just pick it will do wonders for making the wood look better .
summit : ensure whatever detergent you apply has oxalic acid in it . This is what brightens the deck and makes the wood face newer .
Step 2: Sink the fasteners.
The decking fasteners involve to be successfully sunkat least⅛ in below the deck airfoil .
Nails . If you have a deck that ’s 25 or so years old , you may have 16 - penny nail holding the deck of cards boards down . Every last one of them take to be countersink beneath the deck of cards control surface . Most of the older decks I see have been hand nailed and the nail heads are flush - ish with the deck table . For pack of cards that were gun - nail , this chore may be mostly done for you .
This requiresa lotof hand - nailing using a nail readiness . But these nail are n’t dinky trimming nails in midland trim . Serious encroachment energy is necessitate to move them . And hold a nail set as you would a pencil while you dash it is not easy . get under one’s skin a big nail specify with a bigger target is the key here , likethis one from Shark Corpor theKakuri Nail Punch.(I’ve had the Kakuri for class , and it is my favored nail set ) .
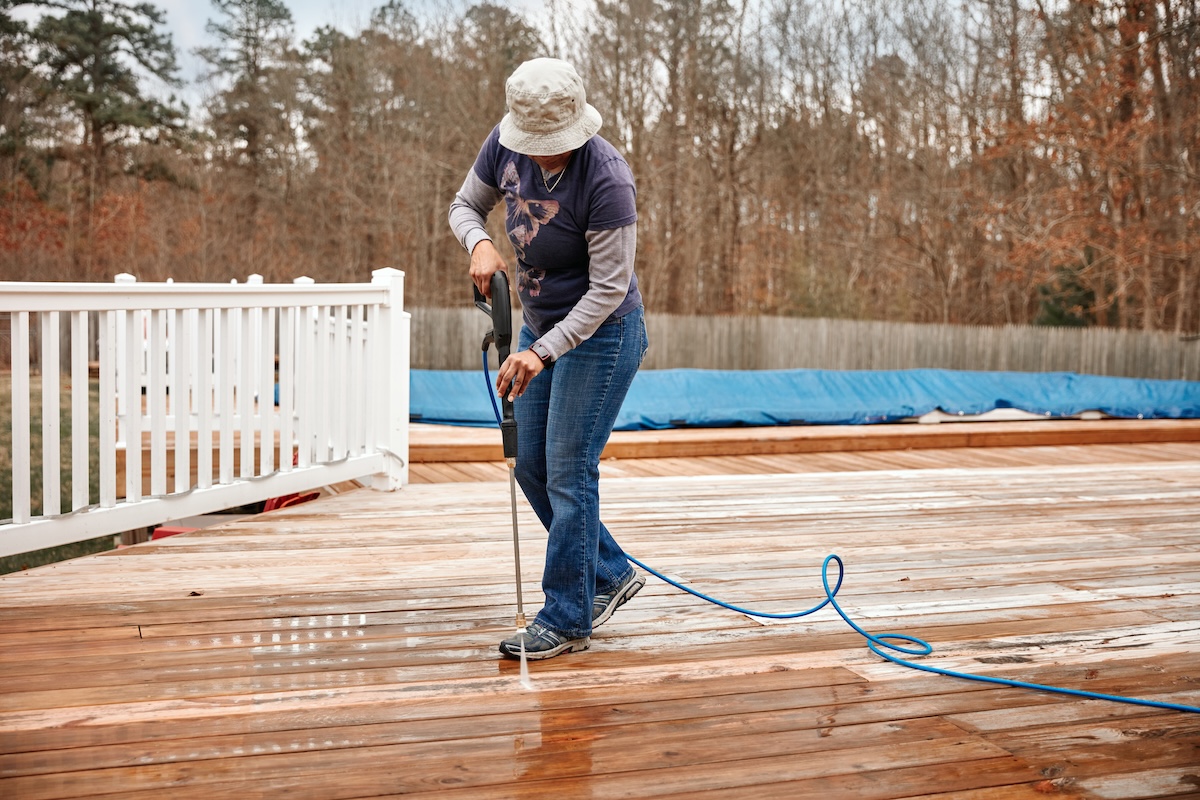
Photo: Getty Images
Screws . If your pack of cards was build in the age of cordless drill / driver and screw , this countersinking problem may seem like it solves itself . Just speed the screws in a niggling further with an wallop machine driver or practice session , and you ’re ready to go . However , as I ’ve take apart decks for deck resurfacing , I ’ve retrieve that screws have typically bear witness debatable to manage .
First , the heads fulfil with soil and debris so getting a driver tip in there ( almost always Phillips where I work out ) is near impossible . And even if you may get the tip in the cruciform recess , the screw may be too quick-frozen in the wood vulcanized fiber to back out or repulse in . Or , it might just gyrate because — and this is common — the screwing shank has rusted and rotted between the bottom of the deck board and the top of the joist . If this happens to you , you may need to consider resurface the deck with new decking or hire a professional to sand the decking .
Step 3: Rent a floor sander.
To truly open up new wood fibre , the required tools need to take a serious amount of livestock . And for this , a professional floor sander is pretty much required . There are twotypes of sandersfor a deck : A drum smoother and a 4 - phonograph record random range sander .
For a deck , I ’d choose the 4 - magnetic disk random orbit sander because you could get closer to edge , it covers a slenderly wider surface area , and it command less technique to operate aright . You ’ll also require to buy a lot of sanding discs , starting from the roughest and exploit down to 80- or 100 - grit .
Tip : If you have n’t successfully arrange all those fastener from Step 2 , and you begin sanding through them , you ’ll see them as “ shiner ” as you make notch . You go the jeopardy of damage the rental tool , which you do not own . Ask your rental provider about coverages for shaft damage .
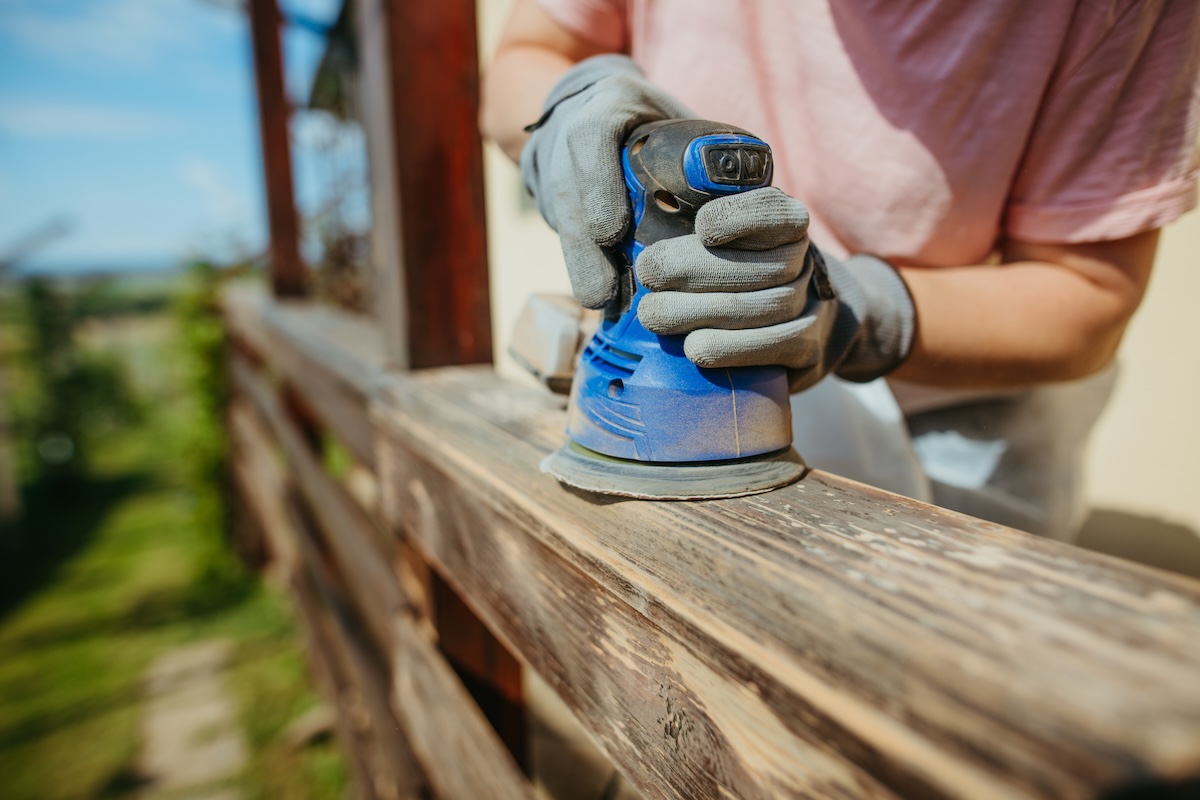
Photo: Getty Images
Step 4: Pass over the decking with the sander.
assume you rent a 4 - record random orbit machine , it ’s a issue of smooth , even reportage , going through the grits from the most coarse to the finest . pack of cards sanding ask methodically passing over the deck surface , back and onward , make a motion in the instruction of the deck boards .
Depending on the condition of the wood , it might be voguish to make two passes with the most coarse discs . Do n’t expect to see night and day changes on the first pass , either . This is mostly fund removal for smoothing . The finersandpaper gritsshould expose the new Sir Henry Joseph Wood fibre .
Because deck boards need so much stock removal , I overlap my passes 50 percentage , kind of like mow the lawn . Two disc rack up on raw wood , and then two phonograph record work out on slightly smooth fabric , at least for the first round .

There ’s no way to explain how to make up one’s mind when to change sand discs , but when you do n’t see much of a change in the deck surface any longer , they ’re clog . Keep your mask on when you check the dust bag every so often to see how full it is . Change it as needed .
Tip : Use a blower between passes to houseclean the pack of cards off . There ’s no sense in sandpaper sawdust .
Step 5: Sand the railing caps.
The same prerequisite hold to railing as they do to decking . Fasteners must be set , and dirt must be cleaned away before sand . It ’s much easy to notice a change after sand railing caps — almost always a 2×6 . While you could sandpaper a rail cap with a typical5 - inch random cranial orbit drum sander , that tool really is n’t designed for the challenges of exterior neckcloth removal . A6 - inch , veracious - angle random compass sanderis my pick for this job . ( By the way , after you use it , you ’ll wonder why you ever choose that light - obligation 5 - incher . )
Tip : On the rail cap , however , there might be an ace in the cakehole , at least for the first passport : An angle grinder with a flapper rack . Before I say anything else , an angle grinder spin at 35,000 revolutions per minute . It ’s no jape . But , it removes breed in seconds where other tools will take many bit to achieve the same solvent . I use this frame-up in new pack of cards builds where I involve to remove some bark , ebb , or forklift damage from pieces .
The downside of the angle grinder is that it ’s hard to get the workpiece savourless because the flapper rack only has about 1 inch of lusterlessness to it . Subsequent passing play should be with a electric sander that has a flat plenum ( the part of the prick that the sandpaper sticks to ) .
Final Thoughts
Sanding a deck can revive the face of a Ellen Price Wood deck andprep it for paint , sealer , orstain . While it can be painstaking to walk back and forth holding on to a drum sander for a few hours , it will keep up the enjoyment of your current deck . And , while you ’re wondering if your wood deck of cards is in good enough contour to benefit from sandpaper , also be thinking about the costs of simply resurfacing the deck of cards with new decking . If you add the value of your clip into the overall budget , it may cost about the same and be much less piece of work .
Everything You Need for a Lush and Healthy Lawn
Keeping your grass unripened and your plants thriving does n’t just take a gullible thumb — it begin with the right dick and supply .
