We may realize taxation from the products available on this page and participate in affiliate programs . Learn More ›
Sanding is often the unknown step of any project with wood . It can take a long time , and the resolution are pernicious : Sanding does not transmute your workpiece in the path that cutting it to size does , nor does sanding deliver the “ wow gene ” of a rich stain . However , sanding is a cardinal step when turning in the buff wood into an investing piece , one that adds time value to your dwelling house or lifestyle .
Ahead , find out about the tools and materials you ’ll require to see how to sand Sir Henry Wood , and the right techniques that birth professional - expect results .

Photo: Tom Fenenga for Bob Vila
What is sanding?
Though sanding make wood experience smoother , it ’s really the outgrowth of rub down wood fibre so that they are rendered uniformly rough . We call it “ sanding , ” and the cock employed are sandpaper and sanders , but no George Sand whatsoever is involve . Rather , the abrasive airfoil performs as a thinning shaft ( not unlike a saw brand ) that can be used to prune , shape , and end up raw wood either to completion or to the full point where the material readily go for a finish .
What grit sandpaper do I need for wood?
Sandpaper grit refers to the graininess of the sandpaper and is typically written as a phone number ranging from P60 to P320 . The grit numbers indicate the texture of the emery paper , with low number used for very common emery paper and in high spirits number used for ok - gritstone product .
Understandingwhat grit sandpaperfor Sir Henry Joseph Wood finishing , paint stripping , and other undertaking is appropriate can be very of import . Typically , super rough-cut gritrock emery paper is used for remove declamatory amount of paint and wood , though it can also be used for quickly assault corners . intermediate grit is more suited to oecumenical purpose woods sanding , and smoothen Ellen Price Wood surface for paint program .
disregarding of whether the piece has been finished before or you are using a exponent sander over a sandpaper pulley , the grit telephone number remain the same . o.k. grit emery paper is expectant for finishing Sir Henry Wood furniture ; it can be used after medium grit emery paper for a smoother finish . Similarly , ultra - fine grit sandpaper is ideal for achieving an almost glass - placid grain fall out the function of fine moxie sandpaper .
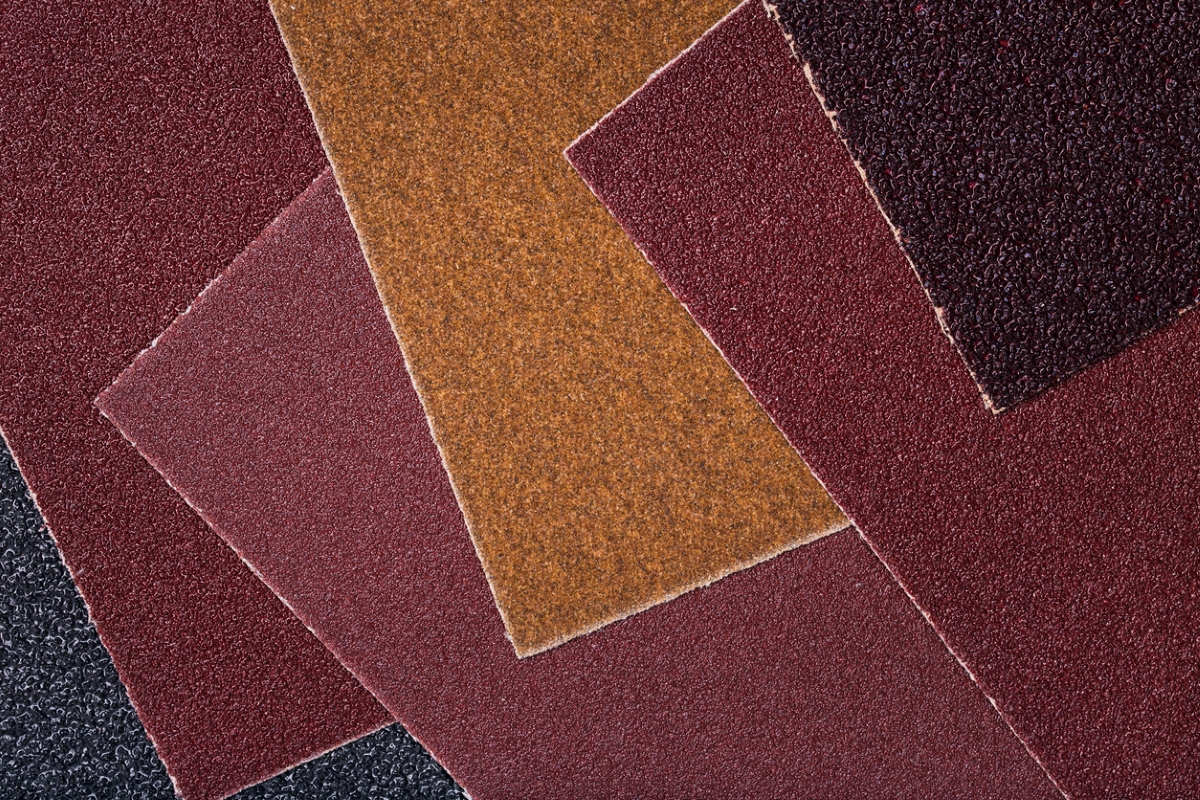
Photo: istockphoto.com
Before You Begin
Never start a labor without first view thepotential risks , and how to palliate these problem . When you are sandpapering Sir Henry Joseph Wood , it ’s recommended to tire out rubber glasses and a detritus mask to stave off pass off airbornesawdust .
Set up in a garage , shed , or any other covered location . If you prefer to sand outdoors , just keep in psyche that pelting can destroy a woodworking project by stimulate the wood to tumesce . Additionally , any wind can transport sawdust flying across the neighbourhood .
Sanding in an unresolved service department or open shed is an first-class direction to keep the project safe from pelting and wind , while also assure the area is well ventilate .
How to Sand Wood by Hand
Using nothing but some sandpaper and your hands for the sanding of Grant Wood labor is a skilful path to harness the final walk on a larger project , to cultivate in narrow blank , or to finish small , intricate jobs where power drum sander may damage the ruined ware .
Hand sanding leaves behind few dinero than a power tool and it is easier to sand contours and cockeyed corners . If you are working on a small , finespun projection or you are just look for a smooth finish on awoodworking project , hand sanding is a serious idea .
SUPPLIES
Sanding blockSandpaperSand moulding visibility typeset
Project Overview
Working Time : Varies from 5 minute for sanding a paint surface before a sassy coat , to 2 hours for detailed finishing sandingTotal Time : 20 minutes to 2.5 hoursSkill Level : BeginnerEstimated Cost : $ 10 to $ 25
Hand - sanding gives you the most control over shaping the wood aerofoil . you may address corners and recession that a machine would not be able to reach . Yes , we use powered sander on almost every woodworking or finish project we complete , but we always do some sanding by hand .
Step 1: Select an appropriate sanding block and sandpaper for the job.
The first step is take the correct sandpaper and sanding cylinder block . utilise the appropriate gumption emery paper for the task . If you need to remove a great muckle of fabric , a coarse grit is a good choice . For those who are simply prepping a surface for paint , a medium - grit sandpaper will work . reckon on the projection , a variety of grits may be needed . For flat Earth’s surface and sharp edge , utilize a sand closure with the sandpaper ; buy one at the ironware storehouse or cut your own from scrap wood .
The sandpaper stop enables you to employ even pressure , and it prevents your emery paper from bundle up or slipping . If you ’re sanding molding or trim with an intricate silhouette , opt for a speciality rubber or foam visibility sander so as to pull off a keen , professional aspect .
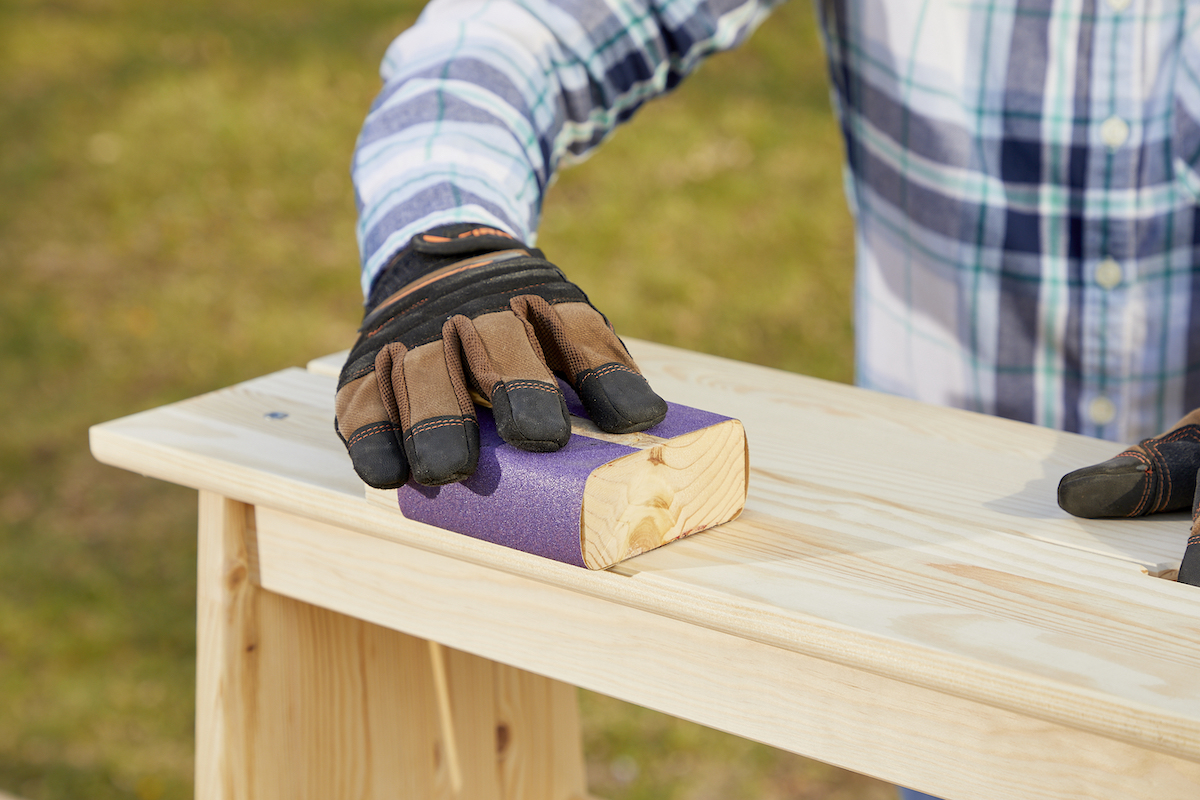
Step 2: Sand with the grain and put steady pressure on the block.
No matter what type of edge you ’re going for , always maintain unfluctuating pressure and sand with , not against , the grain . Do n’t employsandpaperto remove things like pencil marks or dried mucilage , but do use it to smoothen reefer or filled nail holes .
When sanding curve or forge a rounded edge , the sanding block can be a hindrance due to the straight edge and flat face . alternatively , you may grip the emery paper in your mitt , draw in your fingers to make the desired arc as you sandpaper . Alternately , you could buy sand molding profile that allow you to get a dependable traveling bag and keep a consistent shape while sanding .
Sanding with a particular sand is complete when the integral surface feel consistent without noticeable variation when touched .
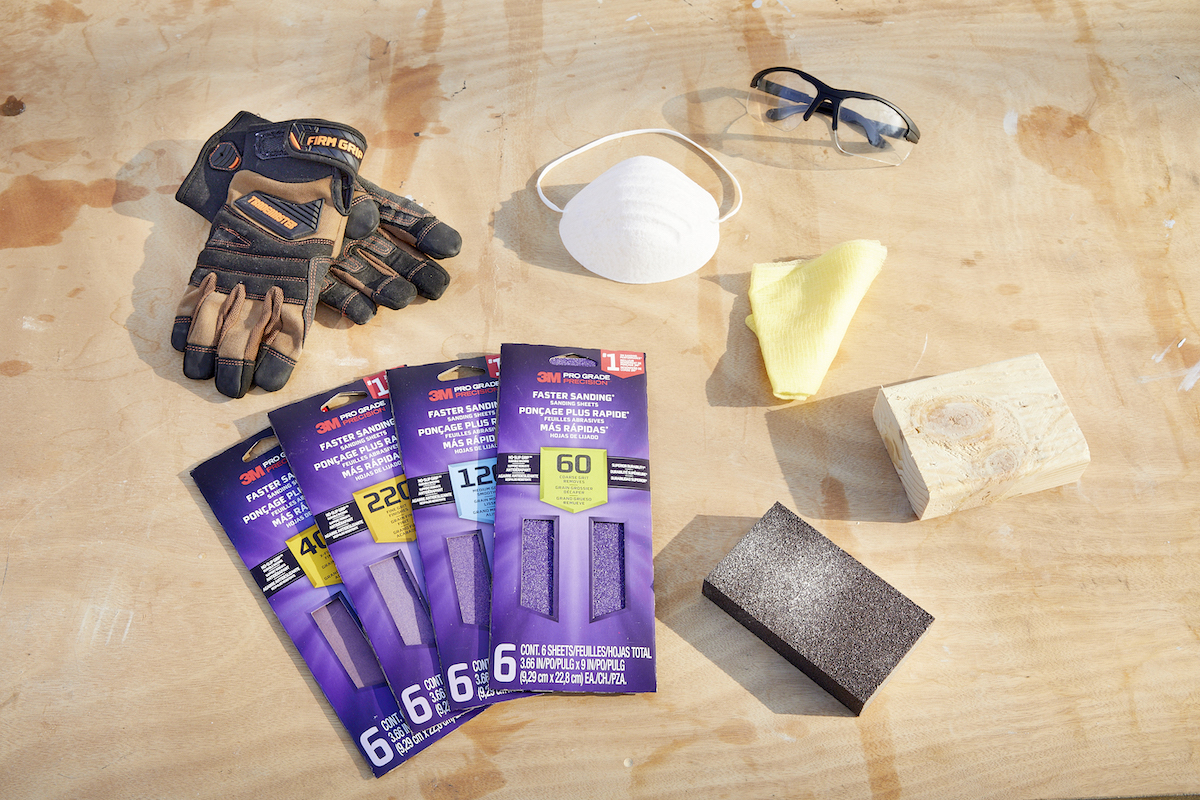
Photo: Tom Fenenga for Bob Vila
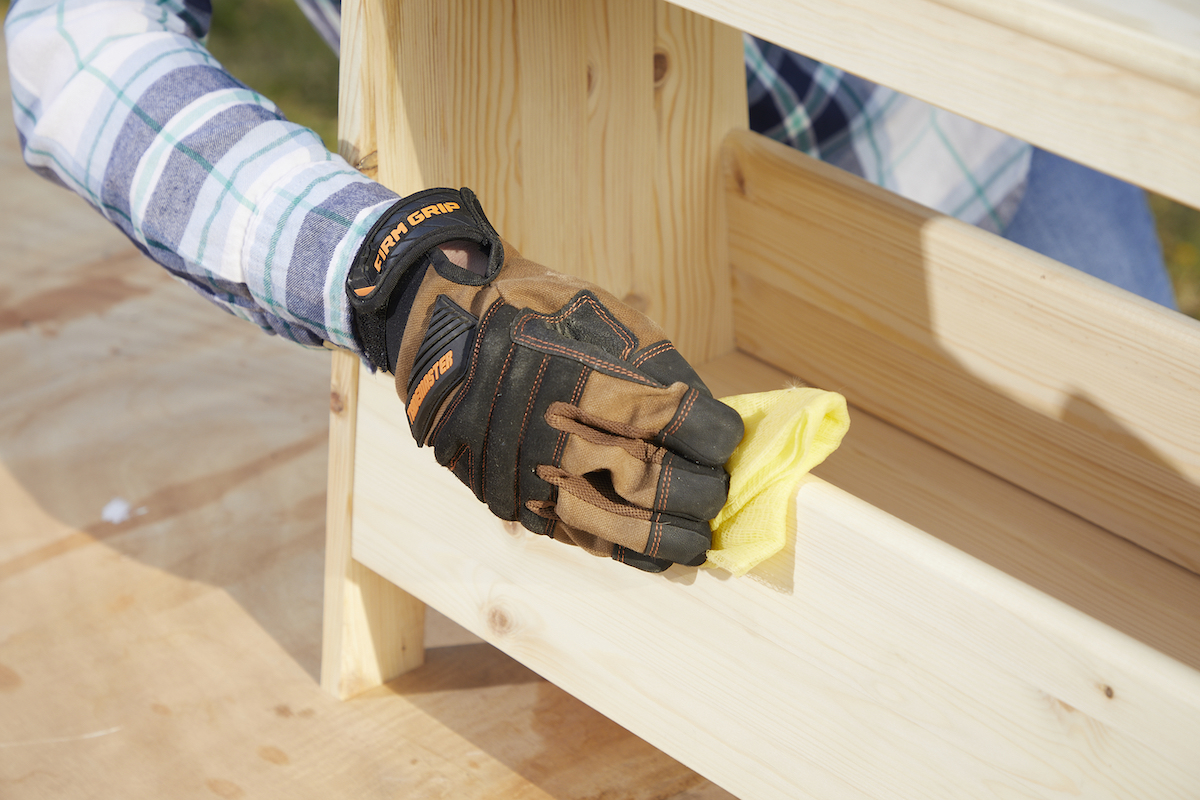
Step 3: Switch to a finer grit sandpaper, then wipe the workpiece.
Most sanding projects start with a coarse- to medium - gumption sandpaper that can hit the deep imperfection comparatively promptly . After sand the full project to murder these scratch and dent , you could then change over to a fine grit sandpaper that can smooth out the excoriation left by the coarse grit sandpaper .
If you want an even placid , glass - like finish , switch to an ultra - all right grit sandpaper after finish with the ok gritstone sandpaper . When you are slaked with the termination , wipe down the workpiece with a dry or slightly damp cloth to dispatch any lounge dust , and pick up the work area .
Sanding With Power Tools
hired hand sanding is typically reserve for finishing modest task , sanding narrow corners and crevice , or put to work on intricate woodworking projects . However , when you necessitate to sandpaper a big piece of article of furniture , build a stairway , sully the deck of cards , or sand a new floor , a power electric sander is a quick , efficient way to complete the job .
Power sanderSandpaper
Working Time : Varies from 20 minute for sanding a small shelf , to 6 hours or more for sanding a 15×15 deck surfaceTotal Time : 40 proceedings to 6.5 hoursSkill Level : BeginnerEstimated Cost : $ 20 to $ 100
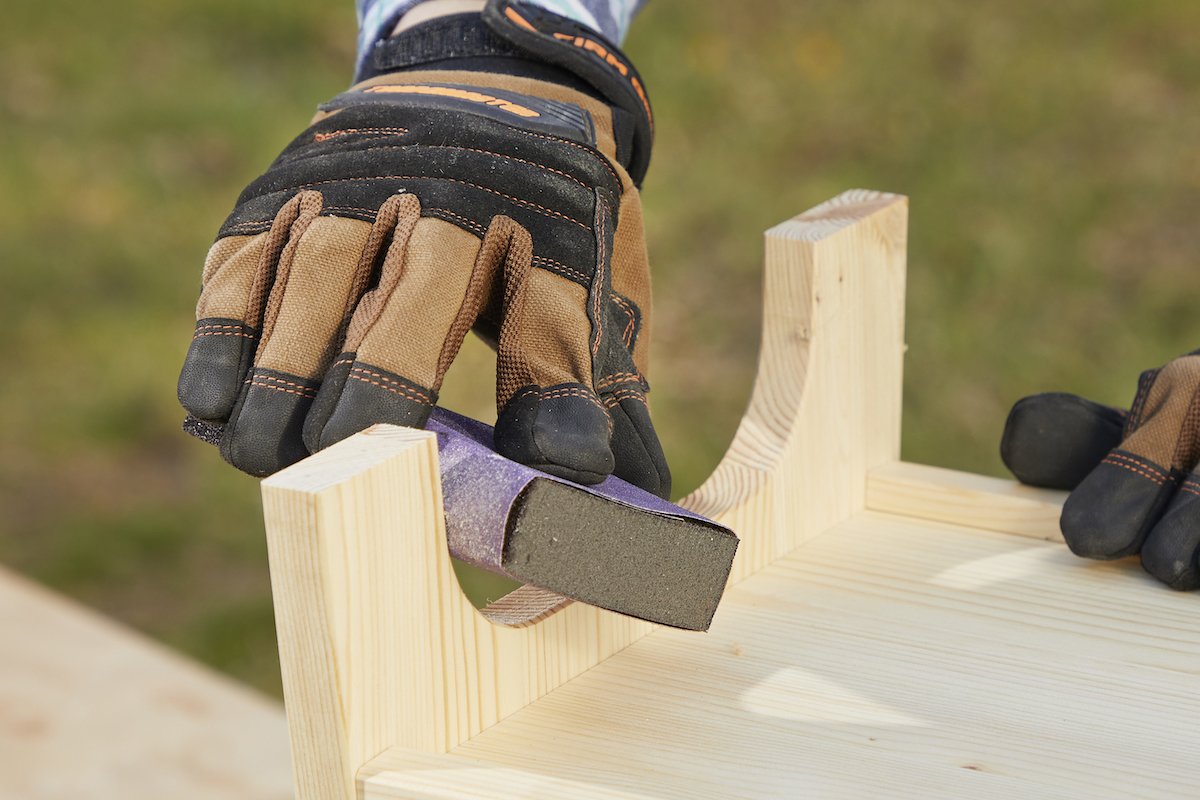
Photo: Tom Fenenga for Bob Vila
It ’s not strictly necessary for any line of work , but a power sander can sure economize a lot of time and stew . A highly recommended power tool for this job is a random - arena sander . Consider gift in one if you do n’t already own a random - orbit sander .
The perfect putz for so many task , it smoothes Mrs. Henry Wood speedily and evenly , and it does so without leaving surface marks . Sanding saucer of varying grits may be affixed , and especially when the peter is link to a shop class vac , sawdust is not an publication .
Step 1: Choose the right power sander and sandpaper for the job.
Before sand anything , decide on the right grit of sandpaper base on how much textile need to be removed . unsmooth - grit sandpaper is typically used for removing thick layers of fabric , before switching to medium - gritstone to smooth the surface of the wood .
to boot , consider the type of power sander you will be using for the project . Belt sandersare powerful , strong-growing tools that absent a lot of stuff in a unforesightful full point of sentence , but they are n’t very well suited to finish sand . Random orbital sandersare versatile tools that can be used for almost every point of sanding , except for detailed refinement sand , which is best completed by hand .
Finish sandersare another option to conceive . As the name paint a picture , they are designed for finish sanding after using a random orbit drum sander or belt out sander to remove the top layer of wood . The finis sander can then be equipped with okay or radical - fine sandpaper to make a smooth finish .
Step 2: Load the sander.
After choose the right electric sander and the right grit emery paper for the line , dilute the emery paper onto the base of the sander . Some power sanders will apply a unproblematic come-on and loop system , so you may peel off the old emery paper and lade a raw piece of music comparatively easily .
Other office electric sander may have small clinch at the sides of the sander to arrest the emery paper in place . scrutinise your powerfulness sander to ascertain out which scheme the tool uses , then line up and stretch the emery paper onto the base of the sander .
Step 3: Sand the surface.
Depending on the type of sander , you may need to have the sanding stamp pad in physical contact with the wood before starting or you may need to let the electric sander reach full speeding before hold it to the wood . Typically , sheet , detail , and random orbit sanders should be placed on the material so that the entire sanding pad makes liaison with the workpiece before turning on the electric sander . Belt and membranophone sander should be at full speed before making contact with the wood .
Move in back - and - forth separatrix with the texture if you are using a sheet or item drum sander . For random sphere sanders , cultivate in long , smooth strokes with the grain . you could also work with fortuity against the grain or you could even sand in humble circular motions with a random ambit smoother . Belt and drum sanders should also be moved in parallel stroke with the grain to accomplish a politic , uniform coating .
Step 4: Use a finer grit sandpaper for a smoother finish.
In the initial dance step of this unconscious process , a rough- or intermediate - guts part of sandpaper can take away the surface layer of stuff and begin to smooth the finis of the wood . Medium - gumption sandpaper creates a smooth enough sand for key or stain , but if you are n’t going to be breed the wood , or you are look for a smoother stopping point , then it ’s suggest to switch over to a fine - grit piece of sandpaper .
Use okay - grit emery paper to murder the top layer of stuff , admit any shallow scratches bequeath behind by the medium - grit sandpaper . extremist - hunky-dory emery paper can be used after the fine - grit emery paper to attain an almost deoxyephedrine - alike suaveness . When you are quenched with the results , wipe down the workpiece with a dry or slightly damp cloth and scavenge up the work area .
Sanding for Finishing
Sanding serve not only prior to coating , but also during finish . If you contrive to clear - coat orstain your workpiecewith an rock oil finish , follow these whole step .
If you intend to paint your workpiece , sanding will also be substantive to your success . It rough in up the surface , giving the paint something to hold fast to . Plus , sandpaper between coats of paint smoothes out any bumps or get up area that are grow , so you are left with a topnotch still , factory - like finish .
Sanding Previously Finished Wood
Sanding a piece of article of furniture , an old fence , or any other previously cease wood projection will be a bit different than sandpaper a all unfinished opus of wood . While you may tackle this task with nothing more than a belt sander and approximative grit sandpaper , it is typically easier to use astripping solutionto help cave in down the paint or discoloration before picking up the smoother .
employ apaint stripperto the project , ensuring that you read and postdate the focussing for use furnish by the manufacturer . After coating , let the pigment stripper sit for the indicated period of clip before wiping it by with a clean rag or cloth .
Wipe down the woodworking project with a moist cloth to remove any remaining baring solution , then use a great power sander to hit the top layer of previously finished wood . you’re able to pop at 40 - gritstone emery paper for this job and forge your means to a intermediate - grit or fine - grit sandpaper , depending on the intended finish . At this level , you’re able to paint , filth , or otherwise seal off the Mrs. Henry Wood to eat up the undertaking .

Photo: Tom Fenenga for Bob Vila
Final Thoughts
Sandingprojects can place from simply scuff up a painted airfoil so that a novel coat of rouge bail properly to sanding an intact floor or deck to get a smooth finish that you’re able to take the air on without fear of cuts , lucre , or splinters . Due to the blanket range of projects , the timeline for sanding can also motley significantly , so it ’s important to consider the scope of the projection to be able to better estimate how long it will take to fill in .
Hand sanding tends to be used for lite - duty finishing , contour sanding , or working on small , touchy woodworking project , so it typically takes less prison term than using a power smoother . In most cases , power electric sander are used for larger or more involved project that may necessitate a substantial amount of clip to remove thick layers of material . These smoother can also be used for sandpaper multiple bed of wood with increase guts levels to create a quiet destination .
Looking to improve your aggregation of woodworking tools ? Check out thebest woodwork tools we ’ve brush up this twelvemonth .
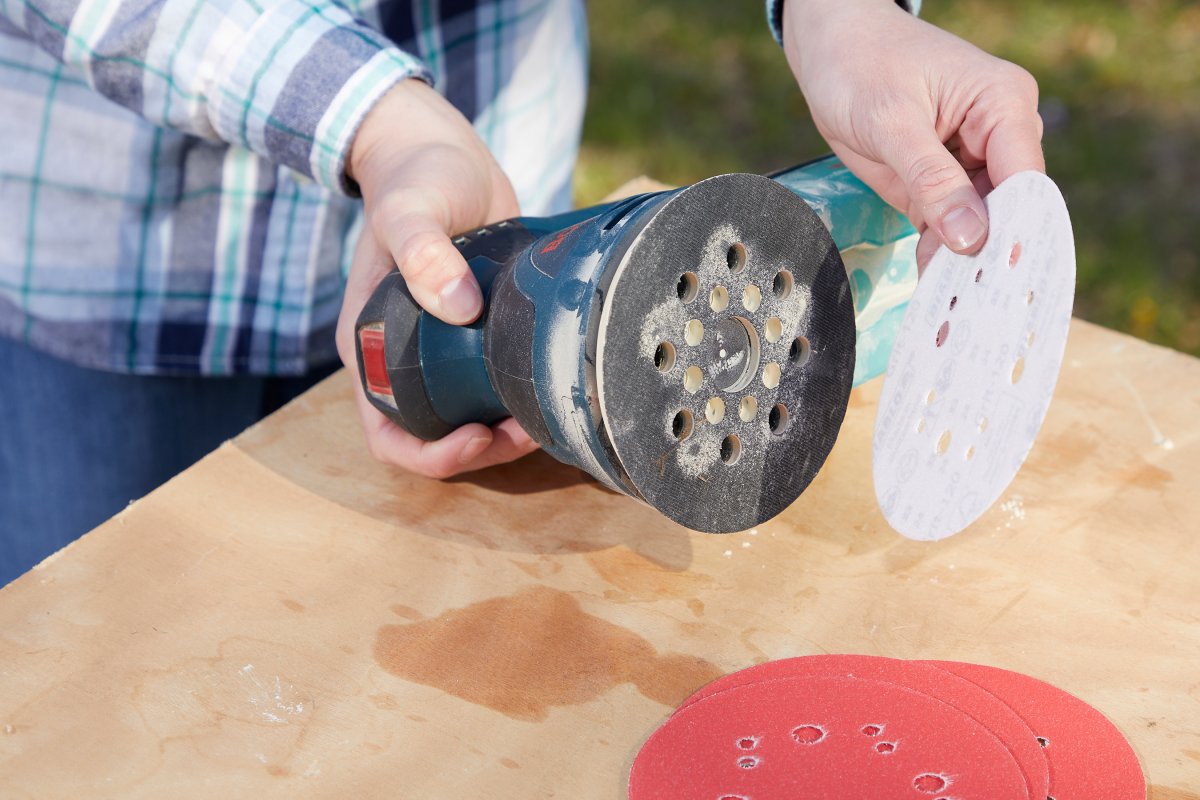
Photo: Tom Fenenga for Bob Vila
This Is the Year for a Kitchen Renovation
Whether you ’re selling or staying , everyone can get something out of a kitchen update . find out why we consider this renovation the Most Valuable Project of 2025 and how to stay on budget .
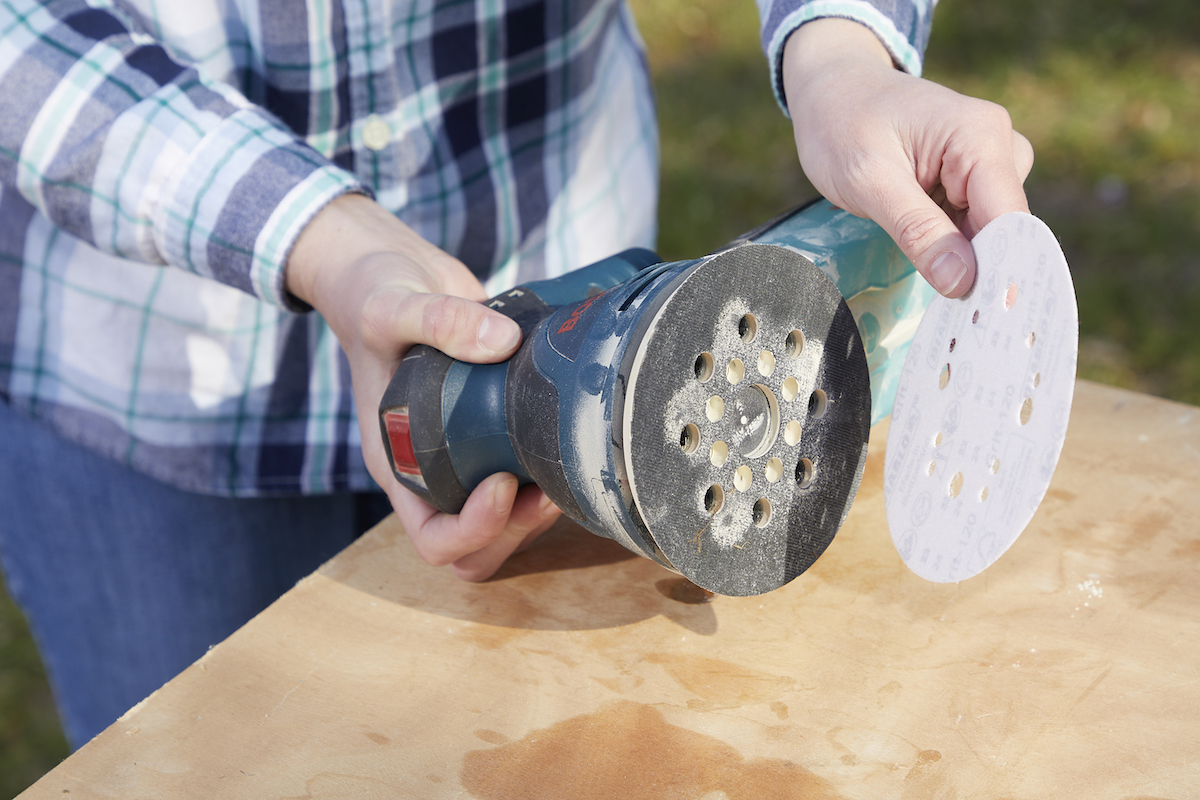
Photo: Tom Fenenga for Bob Vila

Photo: Tom Fenenga for Bob Vila

Photo: Tom Fenenga for Bob Vila
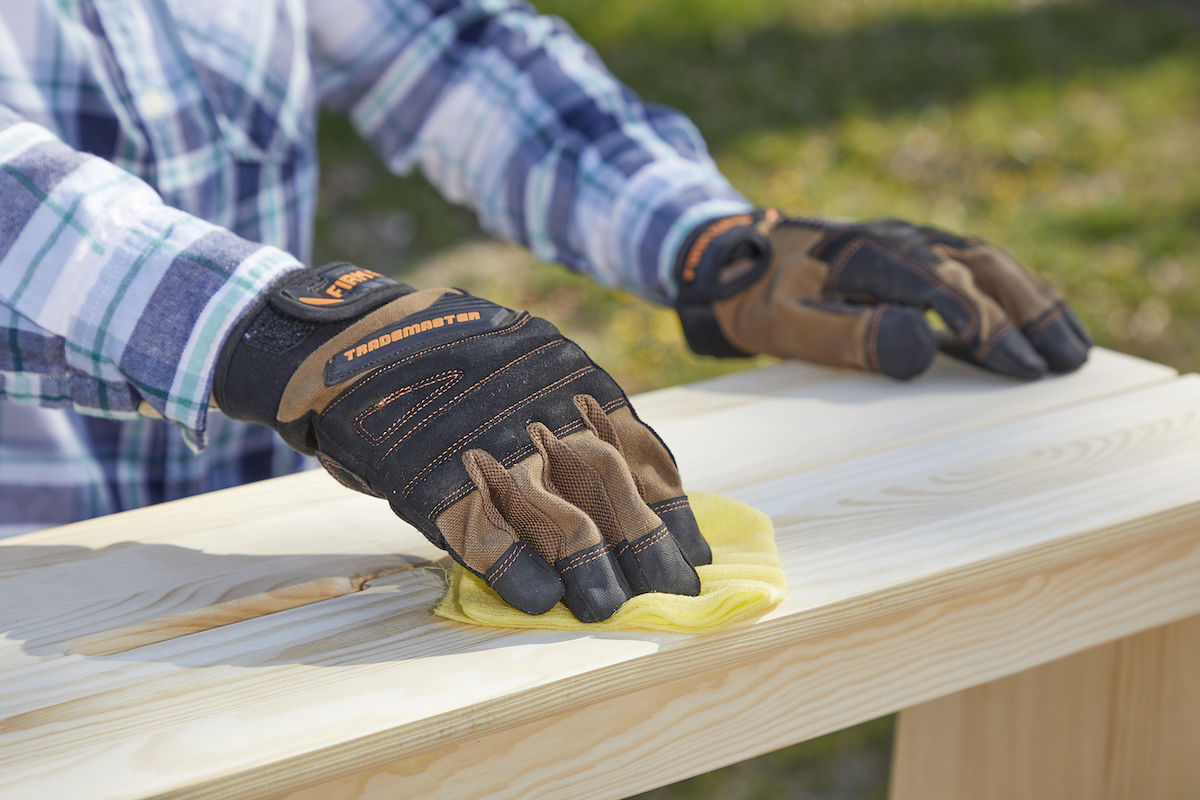
Photo: Tom Fenenga for Bob Vila

