We may earn gross from the products usable on this varlet and participate in affiliate programs . Learn More ›
In This Article
Even if you keep your can tiles clean , dirty grout lines can really detract from the look of your tiled floors and walls . Because cement - based grout , whether sandpaper or not , is poriferous by nature , substances like oil , grease , and water be given to seep indoors and cause ugly discolouration .
The best room to prevent this is to seal off your new grout and reprise as needed . You ’ll wan to give the sealant a refresh every yr or so on a tile floor that does n’t get pie-eyed , and more often for grout in the exhibitor or on the bathroom backsplash . With these instructions , you ’ll learn how to seal grout and make a reliable barrier against unsightly stains and a dingy coming into court . You may never have to cancel those grout lines again !
Tools & Materials
Bobvila.com may earn a commission from purchase made through these connexion .
Project Overview
Working Time:1 hourTotal Time:2 to 3 hoursSkill Level : BeginnerEstimated Cost:$25 to $ 50 , depending on the price of sealer
Before You Begin
Knowing how to seal grout start out with the sympathy that not all grout sealer are the same . Some sealer is designed to play only with sealed types of grout and tiles . With that in judgement , make certain you assess your tile and grout before steer to the household advance memory to purchase a sealer .
While the step below provide elaborate education for put on most grout sealer , some product may demand other steps . ensure to understand the manufacturer ’s directions for how to practice the grout sealant before you get started .
Step 1: Clean and repair the grout.
Before applying a sealant , be sure to clean your grout exhaustively — you’re able to either use a commercialgrout cleaneror makehomemade grout cleaner . Next , restore grout , mend any crack or crumbles in the grout lines . Otherwise , you ’ll seal in stain and damaged seams . Scrub out as much of the grime as potential using a toothbrush dim in oleaginous weewee . ( Switch to a 50 - 50 acetum and warm weewee resolution if you ’re trying to annihilate stains . ) Tackle one grout line at a time . When you ’re finished cleaning the grout , allow the field to dry for 45 minutes before sealing .
Step 2: Choose the type of grout sealer that’s right for your project.
Next , get one ofthe best grout sealersthat ’s appropriate for the type of tile you have and its location . No one sealer is best suited for all situation . As you ’ll see when shopping for grout sealer , the diversity of products useable allows for a sealed point of customization . recording label specify which sealers work well with marble , pit , and ceramic tiles , as well as how much wet the sealer can tolerate , be it high moisture in the shower bath or low moisture along a kitchen backsplash . The two main type of grout sealant are penetrating sealers and tissue layer - fizz sealers . The one that ’s skillful for your project depends on the type of roofing tile you have and where it is located .
Step 3: Determine the type of sealer applicator that’s best for your project.
choose the proper applier is primal to achieving good results for a grout sealing business . Applicator selection depend on several factors , including the thickness of the grout logical argument and whether you ’re exploit with sealed or unsealed roofing tile .
Step 4: Apply the sealer slowly and wipe off the excess.
habituate a foam parazoan or brush to employ the sealant to the grout lines . verify the grout is continue equally and completely to ensure the sealant make a watertight roadblock . Let the sealant determine for about 10 minutes , then use a dry material to wipe off the excess sealant from the surround tile . Do n’t skip this pace or you ’ll end up with a foggy film on the roofing tile that ’s almost impossible to remove .
Step 5: Apply a second coat of sealer.
Once you ’re done applying the first coat of sealer , let it dry out for an hour before lend oneself a second coat . It will typically take one to three coats of sealant to achieve adequate trade protection .
Step 6: Test the sealer.
After the 2d pelage of sealer dry , test the surface by apply a few drop of body of water to the grout . The liquid should bead up into droplet . If it does n’t , employ a third pelage to ensure quality outcome .
Step 7: Allow time for the sealer to cure completely before walking on it or using the shower.
Some sealer need only 24 hours to bring around , while others can take up to 48 hours ; ascertain the manufacturer ’s counsel on the grout sealant you ’re using for particular . While it may be inconvenient to keep a room off - limits for a daylight or two , remind yourself how convenient it will be the next time you clean your grout . A good sealant mean less time scrubbing . This is one task that will make your routine bathroom and kitchen cleaning a breeze .
Using Aerosol Grout Sealers
Although aerosol spray - on sealer are promiscuous to use than those that require a parazoan or brushwood for software , there are a few thing to keep in thinker before buy one of these ware .
Spray grout sealergoes on speedily , but it also allow excess sealant on the roofing tile brass . This intend you ’ll spend some prison term after program wiping off overspray for foreclose hazing on the roofing tile . Because sprays are n’t as precise as sealers that are applied by other method , it ’s easy to neutralise a lot of product .
Another thing to know about aerosol grout sealers is that they create thinner barriers , which means you ’ll require to spray more coats to get the same protective covering that you would from a brushing - on or leech - on sealant .
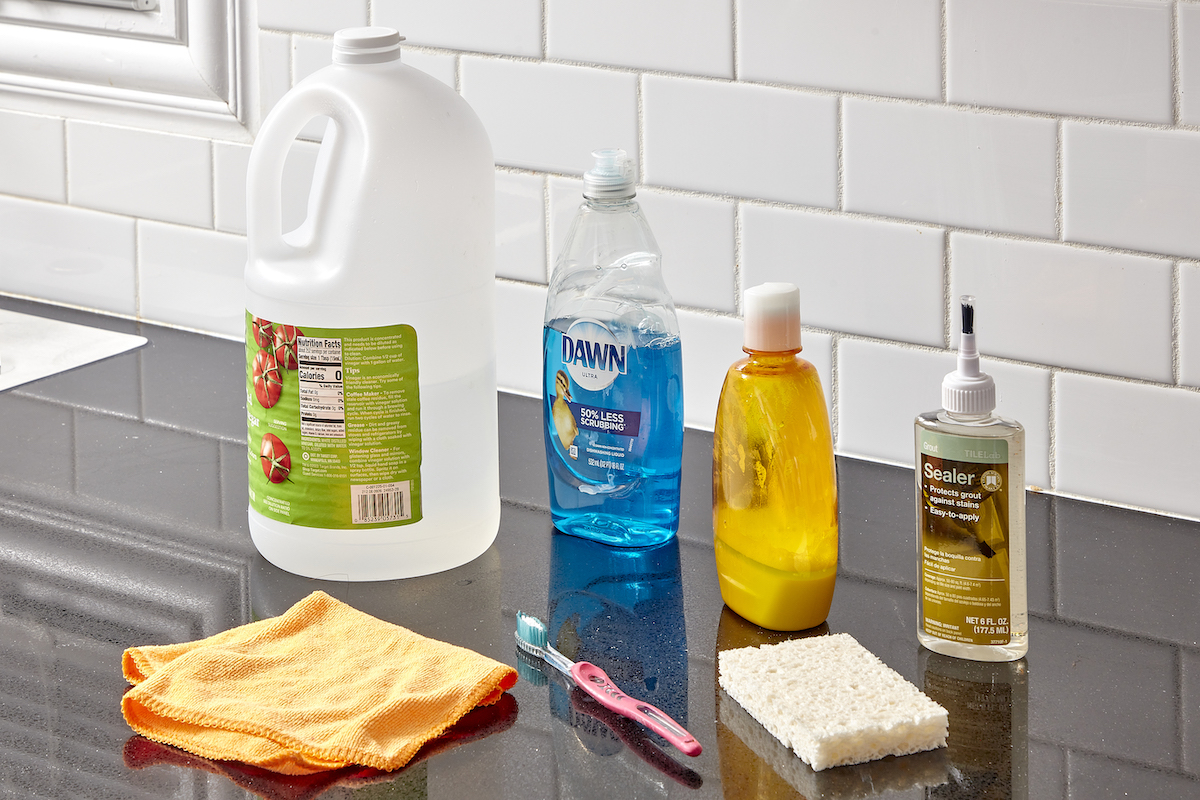
Photo: Tom Fenenga for Bob VIla
Final Thoughts
By following the above tried - and - true method acting for sealing grout , you’re able to maintain the dish of the roofing tile in your kitchen or bathroom by preventing stains , bacterium , and mould from leaching into the grout . When applied right , a good grout sealant will provide protective covering for a yr or more . Grout waterproofing is also a relatively simple project that does n’t require any special tool , and is a doable project for even the novice DIYer .
FAQs
Wait at least 48 hour after set up fresh grout before seal it . This will give the grout slew of time to dry out so it can properly absorb the sealer .
You canrestore the original color of your groutby applying a key called grout colorant . However , if you ’ve already seal the grout , you wo n’t be able to paint over it . You ’ll need to wait at least a yr for the sealer to wear out off . you’re able to also utilize tinted sealant to exchange the color of the grout .
For higher dealings areas , such as a bathroom , you ’ll want to reseal grout about once a year . For low traffic sphere , such as a guest bathroom , you ’ll need to reseal the grout about once every 2 years .

Photo: Tom Fenenga for Bob Vila
Most grout is holey and will therefore suck water unless it is seal . The only grout that is completely waterproof and therefore does n’t need to be sealed is epoxy grout .
This Is the twelvemonth for a Kitchen Renovation
Whether you ’re deal or staying , everyone can get something out of a kitchen update . Learn why we conceive this renovation the Most Valuable Project of 2025 and how to stay on budget .
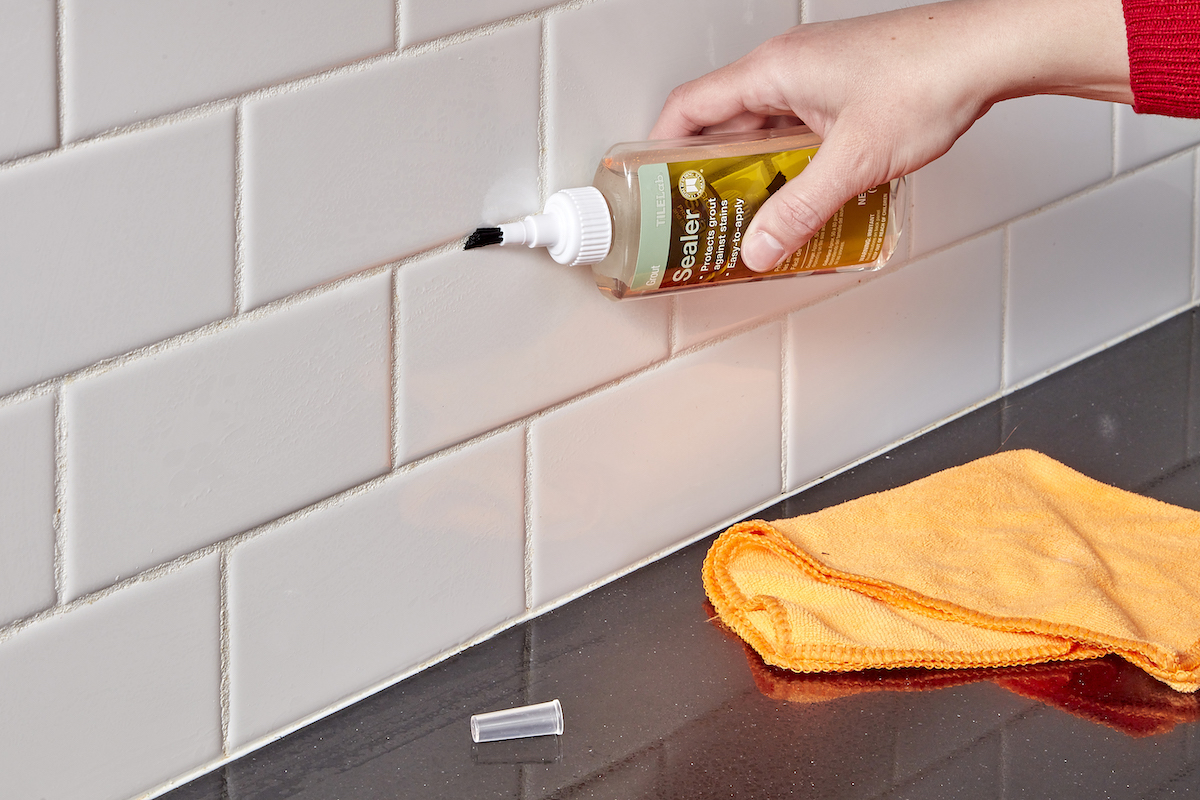
Photo: Tom Fenenga for Bob Vila
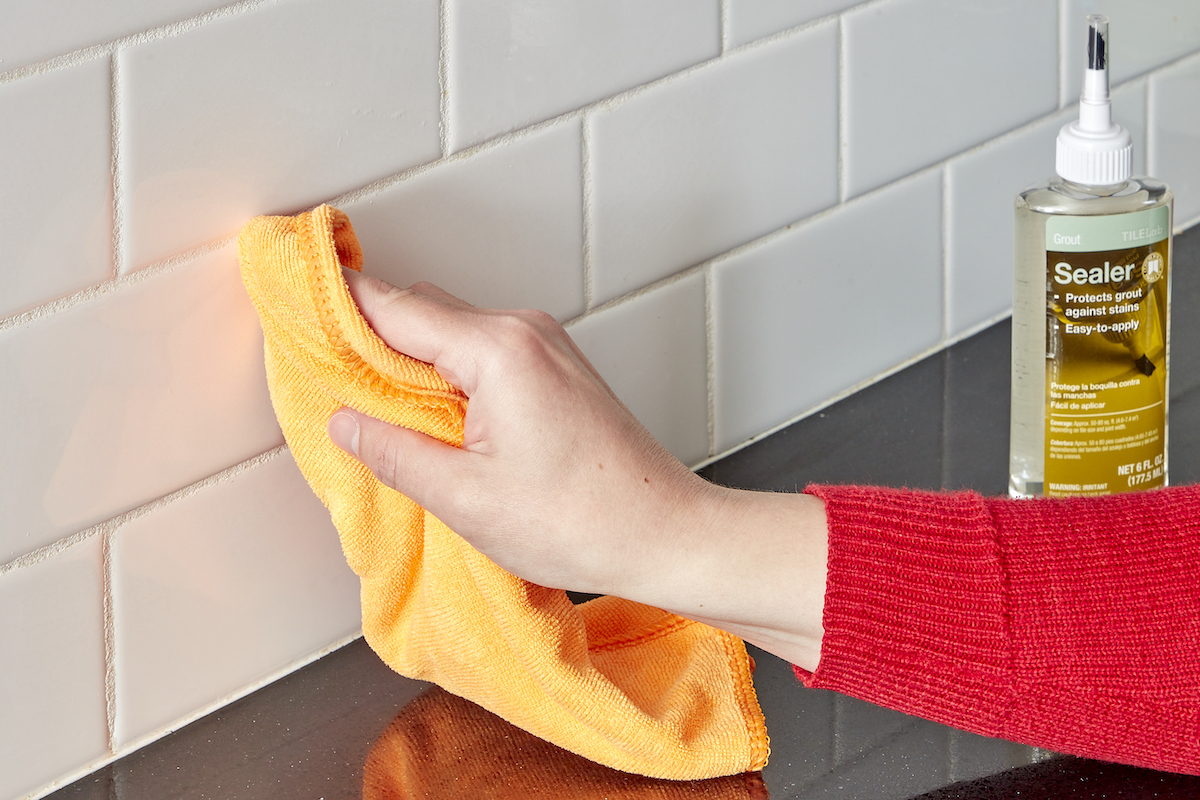
Photo: Tom Fenenga for Bob Vila

