We may pull in revenue from the merchandise available on this Sir Frederick Handley Page and enter in affiliate program . determine More ›
mayhap there was a mishap while moving a major widget . Or perhaps someone hung some pictures the old - fashioned way by ( gasp ! ) hammer nail rather than relying on equipment casualty - devoid wall mounting strip . Whatever the suit , you ’re now look small dings , slit , and gouges to your poultice or gypsum board wall .
The immobile agency torepair drywallis to use spackle chemical compound , a eccentric of putty not to be confused with drywall or joint compound , which are apply likewise but generally used to amend big , properly reinforced holes . What ’s peachy about spackle chemical compound is it dry quickly and shrink minimally , allowing you to piece venial damage without waiting 24 hour before repainting . apprehend down precisely how to spackle , and you ’ll make curt piece of work of all next wall repair .
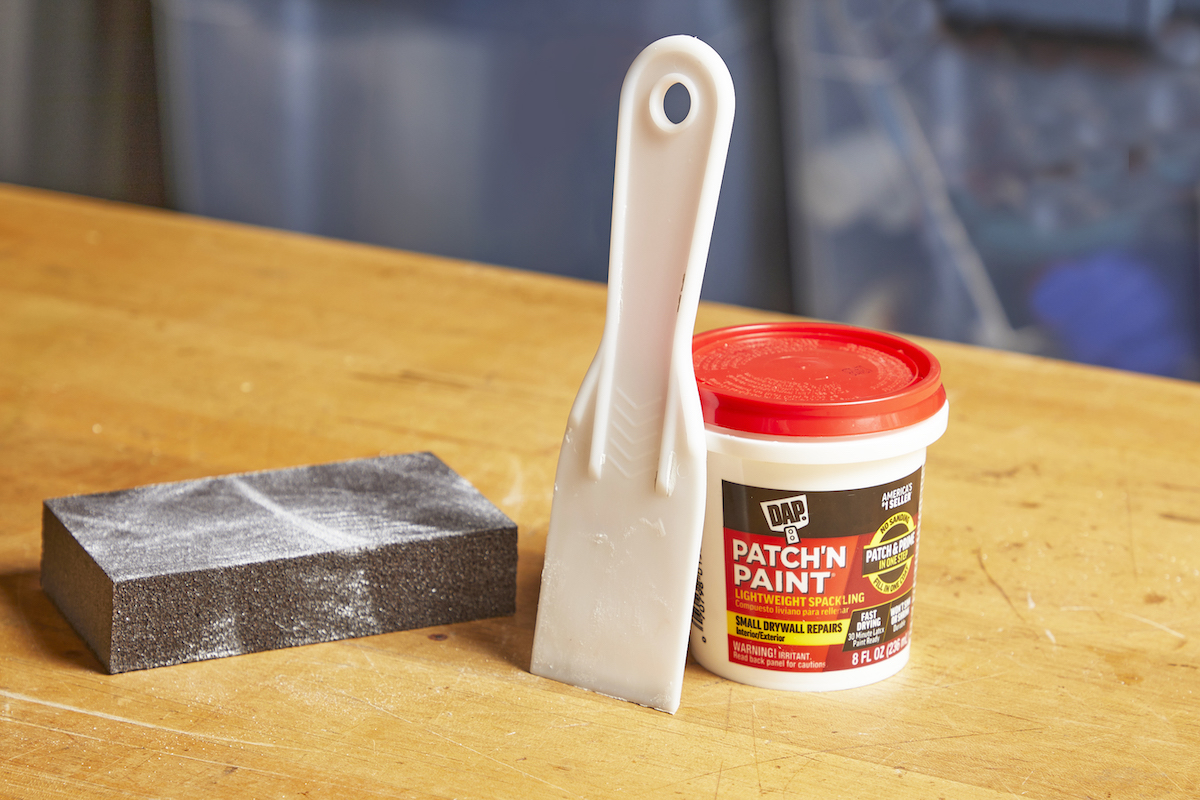
Photo: Tom Fenenga for Bob Vila
Tools & Materials
Bobvila.com may earn a commission from purchases made through these links .
Step 1: Choose the right compound for the hole.
First , pick your compound . Spackle chemical compound comes two ways : in a commodious pre - motley paste or in powdered form that you ’ll mix with water supply for right consistency . Pre - mixed compound is sold in “ lightweight ” and “ all purpose ” variety . The former , which includes a vinyl hold broker , is best for pocket-sized holes in areas that are n’t vulnerable to succeeding damage ; the latter include acrylic and is suited for voids as wide as 3/4 in . Both vinyl and acrylic add elasticity to minimize shrinkage .
Step 2: Clean in and around the hole.
Prepare the area you plan to spackle to enhance the putty ’s sticking power . Use the putty knife or o.k. - grit emery paper to make clean all debris from in and around the hole and make the surface as politic as possible .
Step 3: Apply the spackle to the hole.
Time to mix and use to the hollow in the wall ! The case of putty you picked up will ascertain how to prep the spackle . If you purchased fine-grained spackle compound , unify it with small measure of water until it reach a fatheaded yet easy - to - spread consistence . train a belittled great deal — you’re able to always meld more if you necessitate it . Pre - motley compound is mostly good to go , but stir it well if you ’re using a previously opened container . ( Always shut the chapeau after take what you need so the paste does n’t dry out out . )
Dip the bound of theputty knifeinto the spackling chemical compound and outflank out a act more than what you ’ll need to satisfy the hole . contain the putty - loaded knife slightly above the damage site at a slight slant and apply with a downward motion to patch .
Step 4: Scrape away excess putty.
When the hole is fill , hold the knife at a 90 - degree slant to scrape aside excess , take care not to pull the putty from the yap . Do n’t strive for perfection here as you spackle the wall ; you ’ll sand it smooth once dry . Use a dampish textile or sponger to wipe residual compound from the rampart next to the fix web site .
Step 5: Assess the dried spackle.
survey your work after about 2 hour , when the compound should be dry . If the patch seems to be recess , the library paste shrank a bit as it dried . Holes deeper than ¼ inch often want more than one program of spackling compound . In this case , reiterate the late steps , this clip leaving a fragile mound that you ’ll sand off after . Wait another 2 hours .
Step 6: Sand the spackled hole.
Once your spackle chemical compound is wry , gently sand the repaired sphere with fine - guts emery paper until it ’s flush with the circumvent paries . Use the fabric to wipe aside any rubble .
Now that you ’ve mastered how to spackle this gouge and virtually any other dings to come , just premier and paint the patched area until it to the full blends in with the surrounding wall . A seamless tone , in a breeze !
Everything You want for a Lush and Healthy Lawn
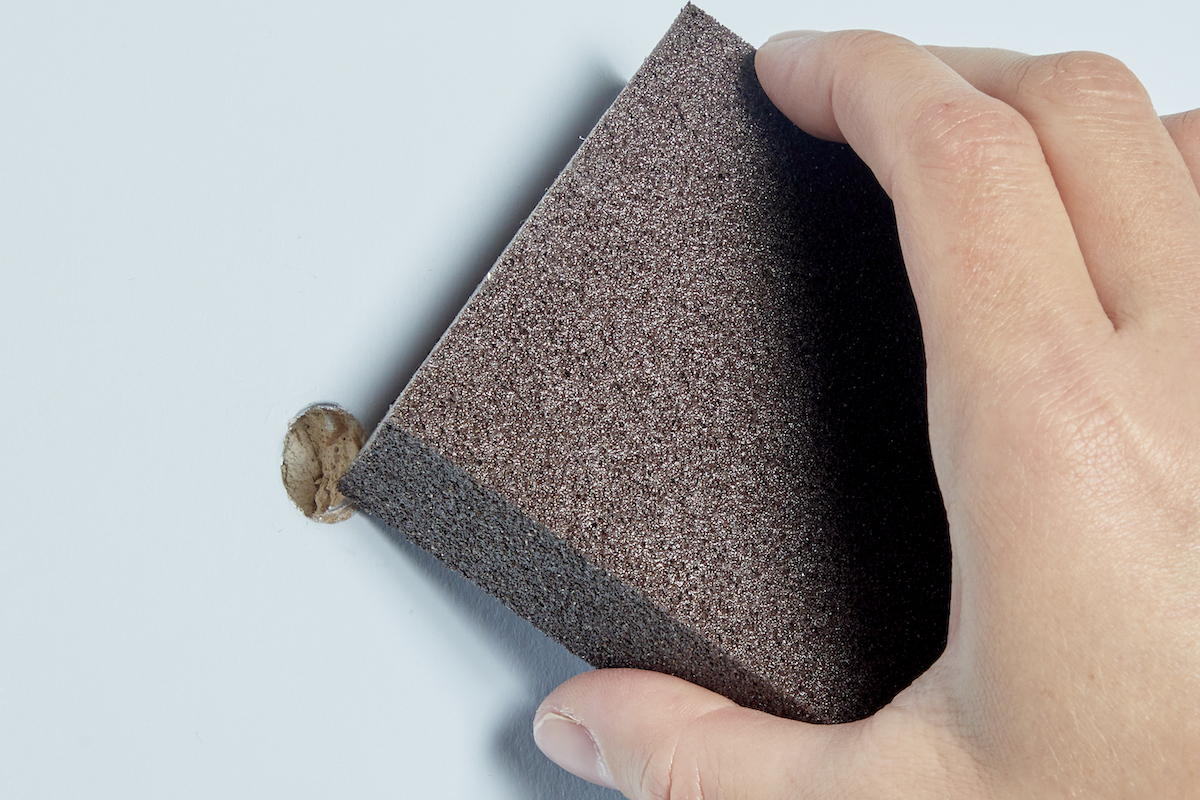
Photo: Tom Fenenga for Bob Vila
Keeping your Gunter Grass dark-green and your plant thriving does n’t just take a immature thumb — it starts with the right tools and supplying .

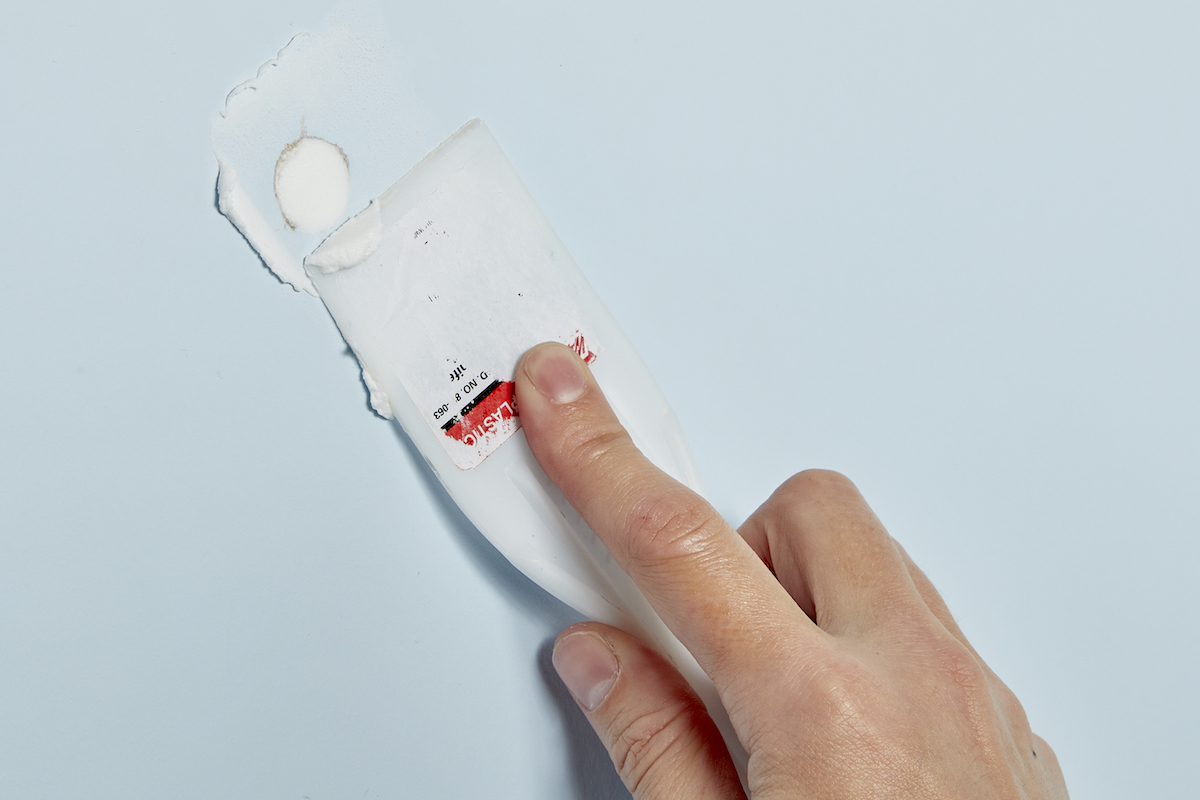
Photo: Tom Fenenga for Bob Vila


