We may earn revenue from the products available on this page and enter in affiliate programs . Learn More ›
Anyone serious about woodworking or DIY finally wants a tabular array saw in their office tool arsenal . Named for the table that supports the cloth being cut , the mesa saw is an splendid cock for stimulate quick , precise employment of repetitious cutting task . If you ’re in the market for one of these beauties or just bought one for yourhome woodworking workshop , contemplate up here on how to habituate a mesa see to make cuts aright and safely .
Table Saw Basics
The best table saws , which run between $ 300 for a received model to $ 700 for a contractor - quality version , are sold by the size of it of thetable adage bladesthey accommodate . The 10 - in size is most coarse and idealistic for most carpentry and carpentry chore , yet you ’ll find 8 - column inch tablesawsthat are handy for small work and 12 - inch versions well suit to creating deeper cuts on thicker textile . The parts of a table power saw include :
SafetyTips for Using a Table Saw
Too many weekend warrior — and pro — have suffered serious injury for not knowing how to use a table proverb . If not in good order manage , the material being turn out can get in a bind and kicked back , either throwing the material at a high velocity toward them or jerking it violently and perpetrate their fingers toward the blade . Here ’s what to do to reduce the risk of kickback :
In add-on to the specific base hit observances to prevent kickback , take the time read the manufacturing business ’s safety provision and be sure to always wear goggles and ear shelter while using the board saw . Also call up to unplug the power saw before you adjust or align the steel , and do n’t remove the safety guards that come with the saw .
Tried-and-True Advice
“ One common mistake people make when using a tabular array saw is set the blade too in high spirits . The steel height only needs to be 1/8 inch greater than the thickness of the fund you ’re cutting , yet many people cerebrate the brand necessitate to extend an inch or more . The vane ’s gullet are designed to discharge Mrs. Henry Wood , so there ’s no ground to have several inches of exposed blade spinning perilously above the wood airfoil .
While I was never stung by this vulgar fault , my dada was . While work in a shop in his XX he almost completely severed his left band finger when he ran his hand over the sword . It had to be reattached , and it ’s been curve for as long as I can remember . ”
— Tony Carrick , Contributing author
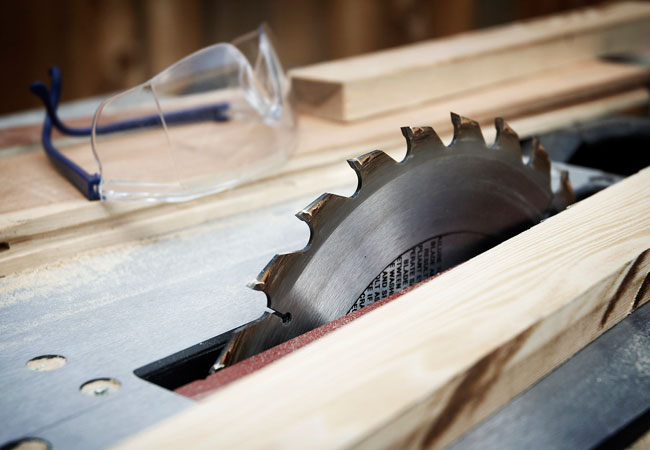
Photo: iStock
Making the Cuts
Withtable pick up accessoriessuch as clamps , halt , and jig , you could make such long suit cuts as wainscot cuts , compound angles , and rabbet joint — yet woodworkers rely on the mesa saw most for two basic undercut . rip , the most vulgar utilization of a table byword , imply cutting material to a specific width . Crosscuttingapplies to cutting material to a specific duration . Below , you ’ll rule step - by - stone’s throw focal point for using a table saw to make each of these common cut .
How to Rip
rip is the simple cut to make , thanks to the board saw ’s rip fence that set to the width of the desired cut and also serves as a guidebook to control the material while cut .
Unplug the table saw and check a rip sword ( suitable for the material you ’re cutting ) into the brand arbor on the top of the table . Adjust the vane height so the top of the sword rise no more than ¼ ” above the heaviness of the material you ’re issue . For example , if you ’re ripping foresightful pieces of woodwind from ½”plywood , set the blade no higher than ¾ ” above the tabletop .
To do this , apply the mandrel nut twist that came with your tabular array encounter to tease the arbor nut ( the nut that holds the steel in berth ) and position the rip blade with the teeth facing the front of the table saw . A table see brand spins towards you , from the top downward , so the sharp steel must look the front of the board see and not the back . Tighten the bower nut snugly .
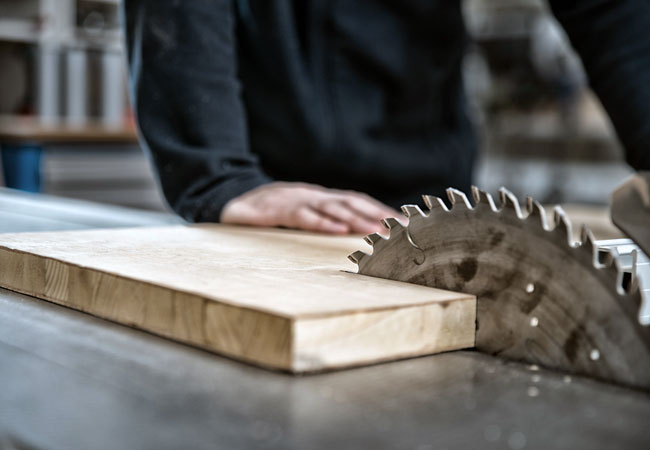
Photo: iStock
place the rip fence by release the lock in lever on the front of the fence , which locks the fence into shoes , and then sliding it so its intimate bound jibe the trust width of the cut . Your table saw has a swayer on the front to help set the fencing , but do n’t depend only on the swayer for assess your slash . Use a precisiontapemeasure and measure out the aloofness from the fence to the cheeseparing edge of a saw blade tooth . Saw blade teeth alternative , one toward the left and then one toward the right . By measuring to the tightlipped edge , you ’ll account for the amount of wood the sword will cut away ( called the kerf ) during the cut .
Plug in the table discover and place the material to be cut on the board , aligned with the snag fencing , but do not appropriate the material to partake the blade until you ’ve turn on the sawing machine and the blade gain full speed . If the material have tangency with the blade before the blade strain veer swiftness , it a trusted recipe for kickback .
Guide the material slowly but securely along the rip fencing with one or both hands , whichever is necessary to ascertain the material , keeping it flat along the table top and snugly aligned with the fence . When ripping large , thick boards , you ’ll often want to habituate both hired man to guide the material at the start , and then flip to one hand as the gash nears completion . If the cloth is farsighted and broaden beyond the back of thetable , either use a table lengthiness to put up it or have a helper support it as you issue to keep the textile flat at all times . Do n’t let go of the material and take the air around to the back of the table saw , which may cause the material to hook off the table , increase the peril of kickback .

utilize a push stick when necessary to keep your fingers away from the impress blade . A push stick is designed to guide the material when you ’re making narrow rips that would put your fingers within a few column inch of the blade . Do n’t chance it — always use a push stick .
How to Crosscut
When making shortcut on a table sawing machine , it ’s vital to retrieve not to practice the rip fence a scout . The rip fence stabilise retentive lengths , but most crosscuts are made on jolly narrow-minded cloth — cut it in half or look at off the closing of a board , for good example . Not enough of the fabric is uncommitted to fit along the rip fencing during crosscuts so assay to habituate the fence increases the risk of unsafe kickbacks . alternatively , utilise amiter gauge .
A miter gauge boast a guide fence to stabilize the material and a bar that fits into one of the rich grooves on the board ’s airfoil . When the bar is correspond into a vallecula , the whole mitre joint standard of measurement slides from the front to the back of the table saw so you could moderate the cold shoulder . It also features a protractor - like guide that ’s adjustable by relax a knob and then selecting the correct slant before retightening the thickening . Sometimes , the mitre calibre that comes with a table find out is a little on the lightweight side . If you plan to do a lot of crosscutting , consider investing in an after - market miter caliber that ’s more material . Alternately , you may apply a mitre sled ( see “ Note ” below ) .
1 . Unplug the tabular array see and insert a crosscut blade into the table come across bower as described above in whole tone 1 of “ How to Rip . ”
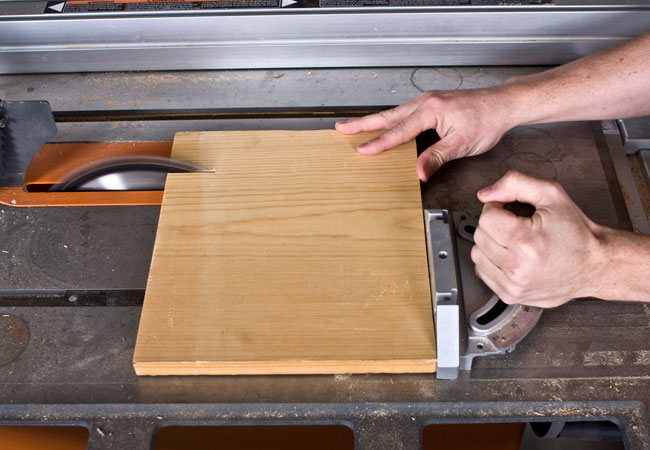
Photo: iStock
2 . align the protractor templet on miter joint gauge to make either straight or mitered ( angle ) crosscuts .
3 . Position and ordinate the material along the front edge of the miter gauge , using clamp if necessary to procure it in position .
4 . Plug in the board view and turn it on but do not let the Ellen Price Wood touch the blade until the blade is spinning at full speed .
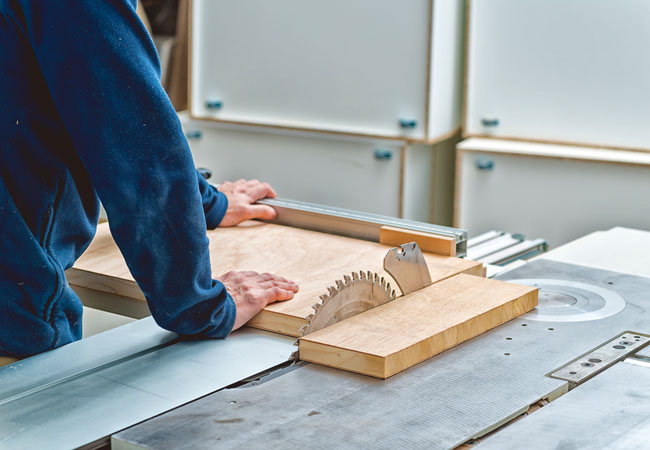
Photo: iStock
5 . Carefully slide the entire mitre gauge and the material you ’re cut forward slowly and carefully through the go blade .
6 . flex the table pick up off before recollect thin out off parts of textile near the brand .
notice : You may care to use an after - market mitre joint sleigh to sustain your cloth during shortcut . A miter sleigh resembles a shallow orthogonal box seat with pre - cut slot in the bottom , which allow you to position the material in the sled and then slide the intact sled over the table while cutting . You do n’t inevitably have to buy one , though . Many woodworkers make their own mitre joint sleds , and you may find spare detailed plan online . Making a miter joint sled might be a great first labor for your new table saw !

This Is the yr for a Kitchen Renovation
Whether you ’re selling or staying , everyone can get something out of a kitchen update . Learn why we consider this renovation the Most Valuable Project of 2025 and how to stay on budget .
