We may earn revenue from the products available on this Thomas Nelson Page and participate in affiliate programs . Learn More ›
puma ’s tape is used to create crisp lines , protect ceilings and trimming , and make a picture job look like it was done by a professional . Using painter ’s tape recording , however , can be trickier than it looks .
While experienced painter sometimes turn out in without magnetic tape , tyro ordinarily usepainter ’s tapeto disguise off arena that they do n’t want to paint and then skin the key off to reveal absolutely painted lines .

Photo: Thanos Alatsidis / Getty Images
This guide will teach you about the different eccentric of cougar ’s tapeline , and how to use this sort of mag tape around doors , windows , and other areas you desire to protect from paint splash .
5 Types of Painter’s Tape DIYers Should Know
These are the most common eccentric of painter ’s tape you ’re likely to see at your local home betterment store . Thebest painter ’s tapefor you depends on the chore at helping hand .
1. Multipurpose Painter’s Tape
Multipurpose painter ’s tape is suitable for most common house projects . It has a medium level of adhesion and sticks to most painted walls without causing any harm . It can also be used on floor , clean-cut , skirting board , tile , and looking glass . Some tape brand employ colors to specialise their Felis concolor ’s magnetic tape varieties , and most blue tape is considered multipurpose tape .
Our Recommendation : ScotchBlue Original Multi - Surface Painter ’s tapeline at Amazon ( 0.7 inches / 60 yards ) for $ 6.05ScotchBlue ’s Original Multi - Surface Painter ’s Tape is an splendid all - around pick with medium adhesion that works well for a broad variety of airfoil types .
2. Textured Surface Painter’s Tape
When mask textured surfaces for paint , it ’s important to use a style of tape with a gamy level of adhesion that ’s ideal for rough materials like brick , concrete , and wood . Many marque make their gamey - adherence tape green .
Our good word : Scotch Rough Surface Extra Strength Painter ’s Tape at Amazon ( 0.94 inches / 60 yards ) for $ 5.99This taping from Scotch adheres well to rough and textured surfaces and protest UV rays .
3. Delicate Surface Painter’s Tape
One of the risks of using painter ’s magnetic tape is potentially damage the surface . With ticklish surface painter ’s tape , however , that ’s not a fear . Some brands use the color purpleness to designate their touchy control surface mountain lion ’s tape .
Our passport : FROGTAPE Delicate Surface Painter ’s tape measure ( 24 mm x 55 m ) at Acme Tools for $ 7.49This down in the mouth - adhesion tapeline is easy to tear and gives you very acute blusher argument while protect the delicate surface underneath .
4. Exterior Painter’s Tape
When knead alfresco , the highest level of adhesion is necessary — especially if your project takes a few days . Exterior painter ’s tape is designed to hold out the component and wo n’t peel off if it rain down .
Our Recommendation : Scotch Exterior Surface Painter ’s Tape ( 1.88 in . / 45 yards ) at Amazon for $ 19.99This tape adheres well to common outdoor surfaces like metallic element , vinyl radical , paint woodwind instrument , and meth , and it ’s idealistic for when you need a high - adhesion option .
5. Decorative Shape Tape
Those attempting wily DIY projects may appreciate thinner rolls of painter ’s tape , which permit them to create thin lines for a intent . Some ornamental tapes come in unique approach pattern like chevrons , which can be used to make a graphic effect on wall and other surfaces .
Our Recommendation : Chinco Painter ’s Automotive Masking Tape ( 6 rolls ) at Amazon for $ 12.99This set of six tape paradiddle fare in a variety of breadth so that users can use them for countless esthetic house painting projects .
How to Protect Trim and Ceilings Using Painter’s Tape
When paint paries , painter ’s tape recording can be used to protect cap , baseboards , and shave . The following pace will help see that your key lines are crisp and that no paint splatters onto undesirable surfaces .
Step 1: Prep and clean walls, ceiling, and trim.
Before bulge out any painting project , it ’s important to guarantee that all of thesurfaces are sporty and free of dust . This is particularly crucial when using painter ’s tape since it wo n’t stick by properly to unsporting surfaces .
After pick , ensure everything has dried completely before actuate on to the next stride .
Step 2: Apply the tape to the trim and ceiling.
The next step is identify the areas you demand to protect . In most rooms , this means the ceiling , the passementerie around windows and doors , and baseboards .
rend off 1 - pes - farsighted pieces of tape , which are prosperous to address . Apply them to the mean sphere in a straight line . Start in the middle of each firearm , smoothing it down with a finger or putty tongue as you go . If any piece bubble or lay unevenly , it ’s best to pull them up and try again .
Step 3: Remove the tape as soon as you’re done painting.
While painter ’s tape can commonly remain in place for hours — or even 24-hour interval — without cause any hurt to the surface underneath , it ’s best toremove itas soon as potential to ensure the best result .
lento flake off the mag tape off the trim at a 45 - degree slant . If any sections do n’t do off easy , a putty knife usually help .
How to Use Painter’s Tape When Painting Trim
When it ’s time to paint your trim , you ’ll need to protect your bulwark , floors , and ceiling from becoming cover in paint .
Step 1: Apply tape to the floor, whether it’s carpeting or a hard surface.
When paint trimming , mountain lion ’s tape measure can be used to protect hard flooring like wood and tile as well as carpet . It ’s especially important to protect wall - to - wall carpeting from paint because it ’s really hard to get key out of rug .
Ensure that the level is clean , and then apply a broad piece of painter ’s tape along the border where the baseboards fulfil the reason , working one substructure at a time . For carpeting , use a putty knife to tack the tape recording down so that no carpeting is exposed to paint while you work .
Step 2: Use tape to protect your walls from paint.
The next step is applying painter ’s tape to the walls where they get together the trim . Ensure that rampart are clear and free of dust before applying the tape recording along all of the trimming .
If you painted your walls first , it ’s important to waitress 24 hours — or until the paint has dry completely — before using painter ’s taping to ensure the paint does n’t peel off when it ’s removed .
Tried-and-True Advice
“ pick out the correct painters tapeline for the Earth’s surface makes a self-aggrandizing remainder for me . It ensures the tape adheres and functions as it should . I find it wanton to record retentive surfaces with a better half . Together , we pull out the correct duration of tape and run along it up before coiffe over the surface . While not required , it does make for even lines with less pother .
At the terminal of the day , taping is tedious and take time to get everything utter . Do n’t rush and compensate attention to the details . It will make for a dry cleaner and easily look paint line of work when everything is finished . ”
— Zach Lazzari , Contributing Writer
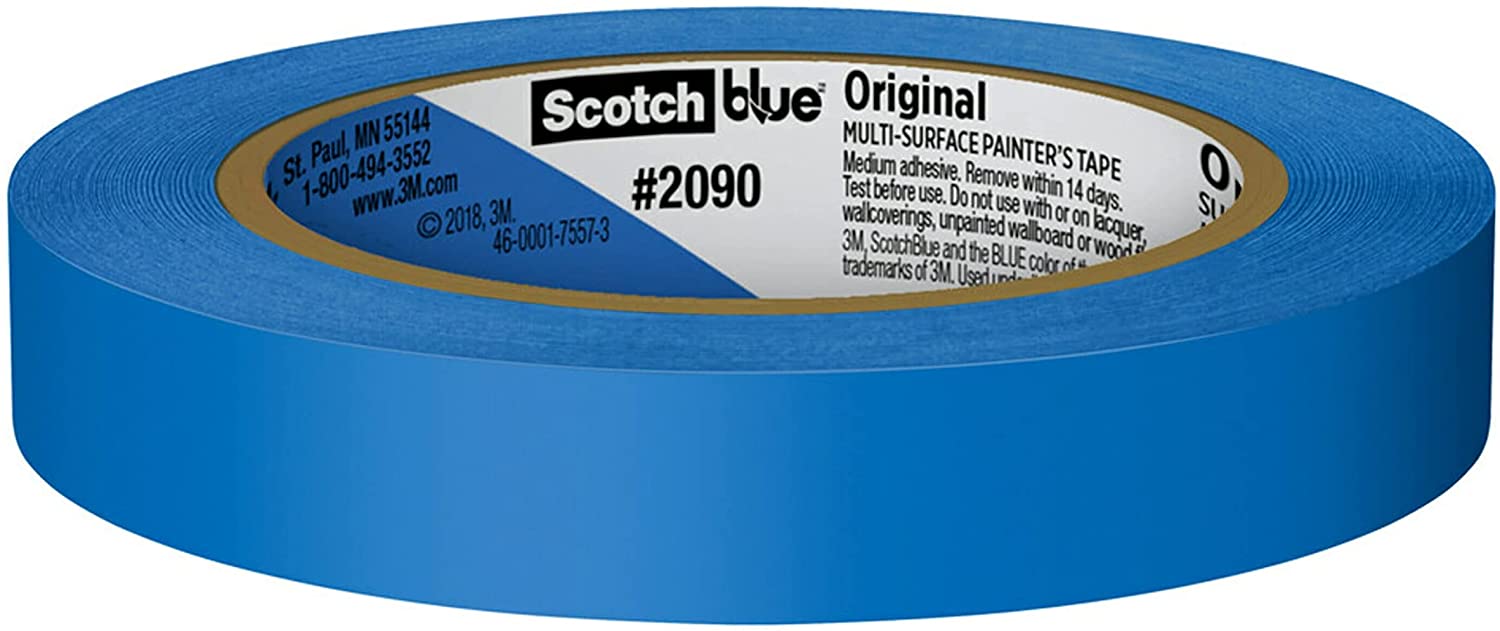
Photo: Amazon Photo: Amazon.com
Step 3: Apply painter’s tape to the ceiling.
If your trim includes crest moulding or any other style of shape that abuts the ceiling , the roof will need to be protect . It would be easy to assume that white trim paint wo n’t be noticeable on a ceiling , but trims are typically painted with semi - gloss paint , whereas it ’s generally recommended that ceilings are paint with compressed key .
Apply paint along the upper edge of the trim , smoothing it down as you work out .
How to Use Painter’s Tape When Painting a Ceiling
When paint a ceiling , protect your walls — especially if they ’re freshly painted . Similarly , if the space has crown molding , tapeline can be used to exert its laconic , white people of colour .
Step 1: Apply tape along the edges of the ceiling.
If the way in dubiousness does n’t have an upper molding , enforce painter ’s tape straightaway onto the wall where they meet the ceiling . If the wall have recently been paint , check that they have dried completely .
insure the tapeline lie perfectly wealthy with the bound of the ceiling and does n’t have any bubble or ripples . Take your time — it ’s significant to ensure the tape is unbent .
Step 2: Apply painter’s tape to the crown molding.
If the room has a moulding that meets the ceiling , expend the same proficiency detailed above , apply the tape to the moulding or else .
Press down the edges of the tape using your fingers or a putty tongue , ensuring it adheres to the border . When working with a particularly detailed moulding , this may ask a bit more time .
Once you ’ve finished painting the ceiling , remove the tape recording from the wall or molding as shortly as possible . If the paint has already dry , you may ask to use the straight bound of a putty tongue to nock the tape in guild to cleanly peel it aside without causing the roof paint to chip .

Photo: Amazon
The prices listed here are exact as of February 11 , 2025 .
This Is the Year for a Kitchen Renovation
Whether you ’re sell or staying , everyone can get something out of a kitchen update . Learn why we consider this redevelopment the Most Valuable Project of 2025 and how to stay on budget .
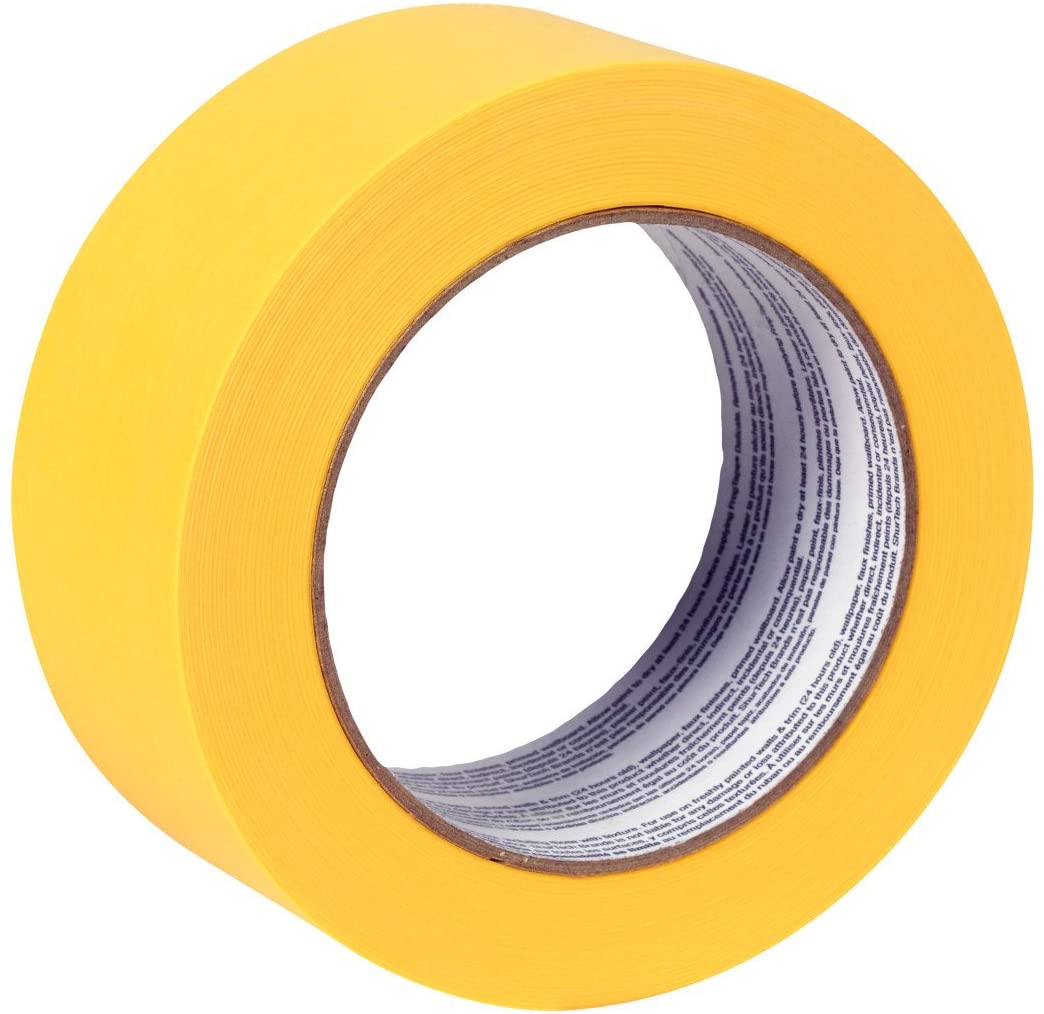
Photo: Amazon
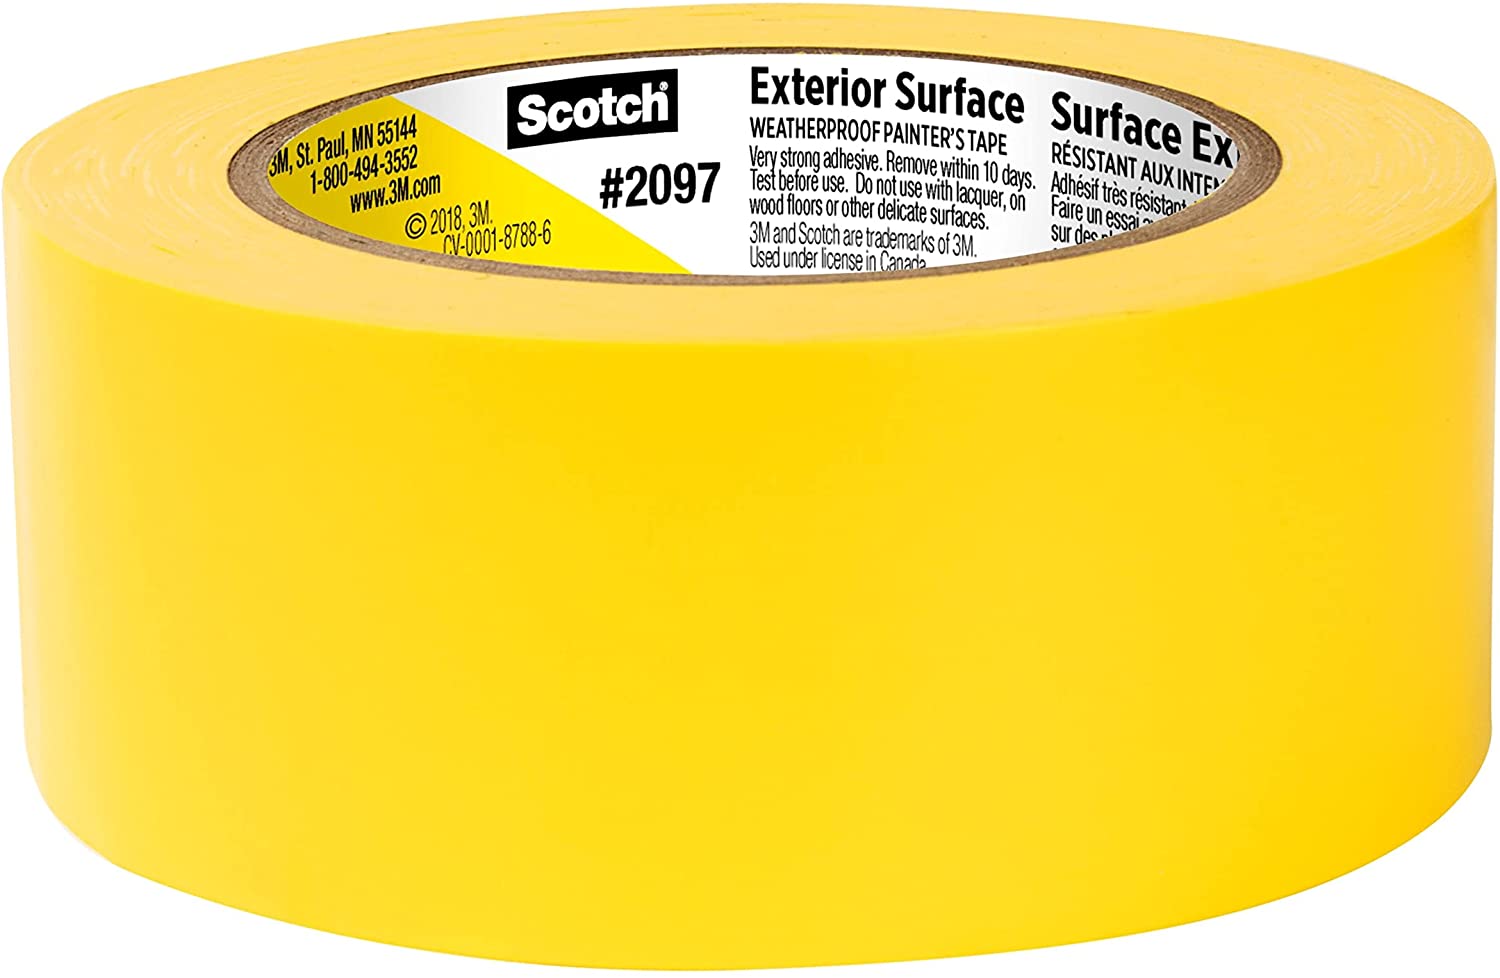
Photo: Amazon
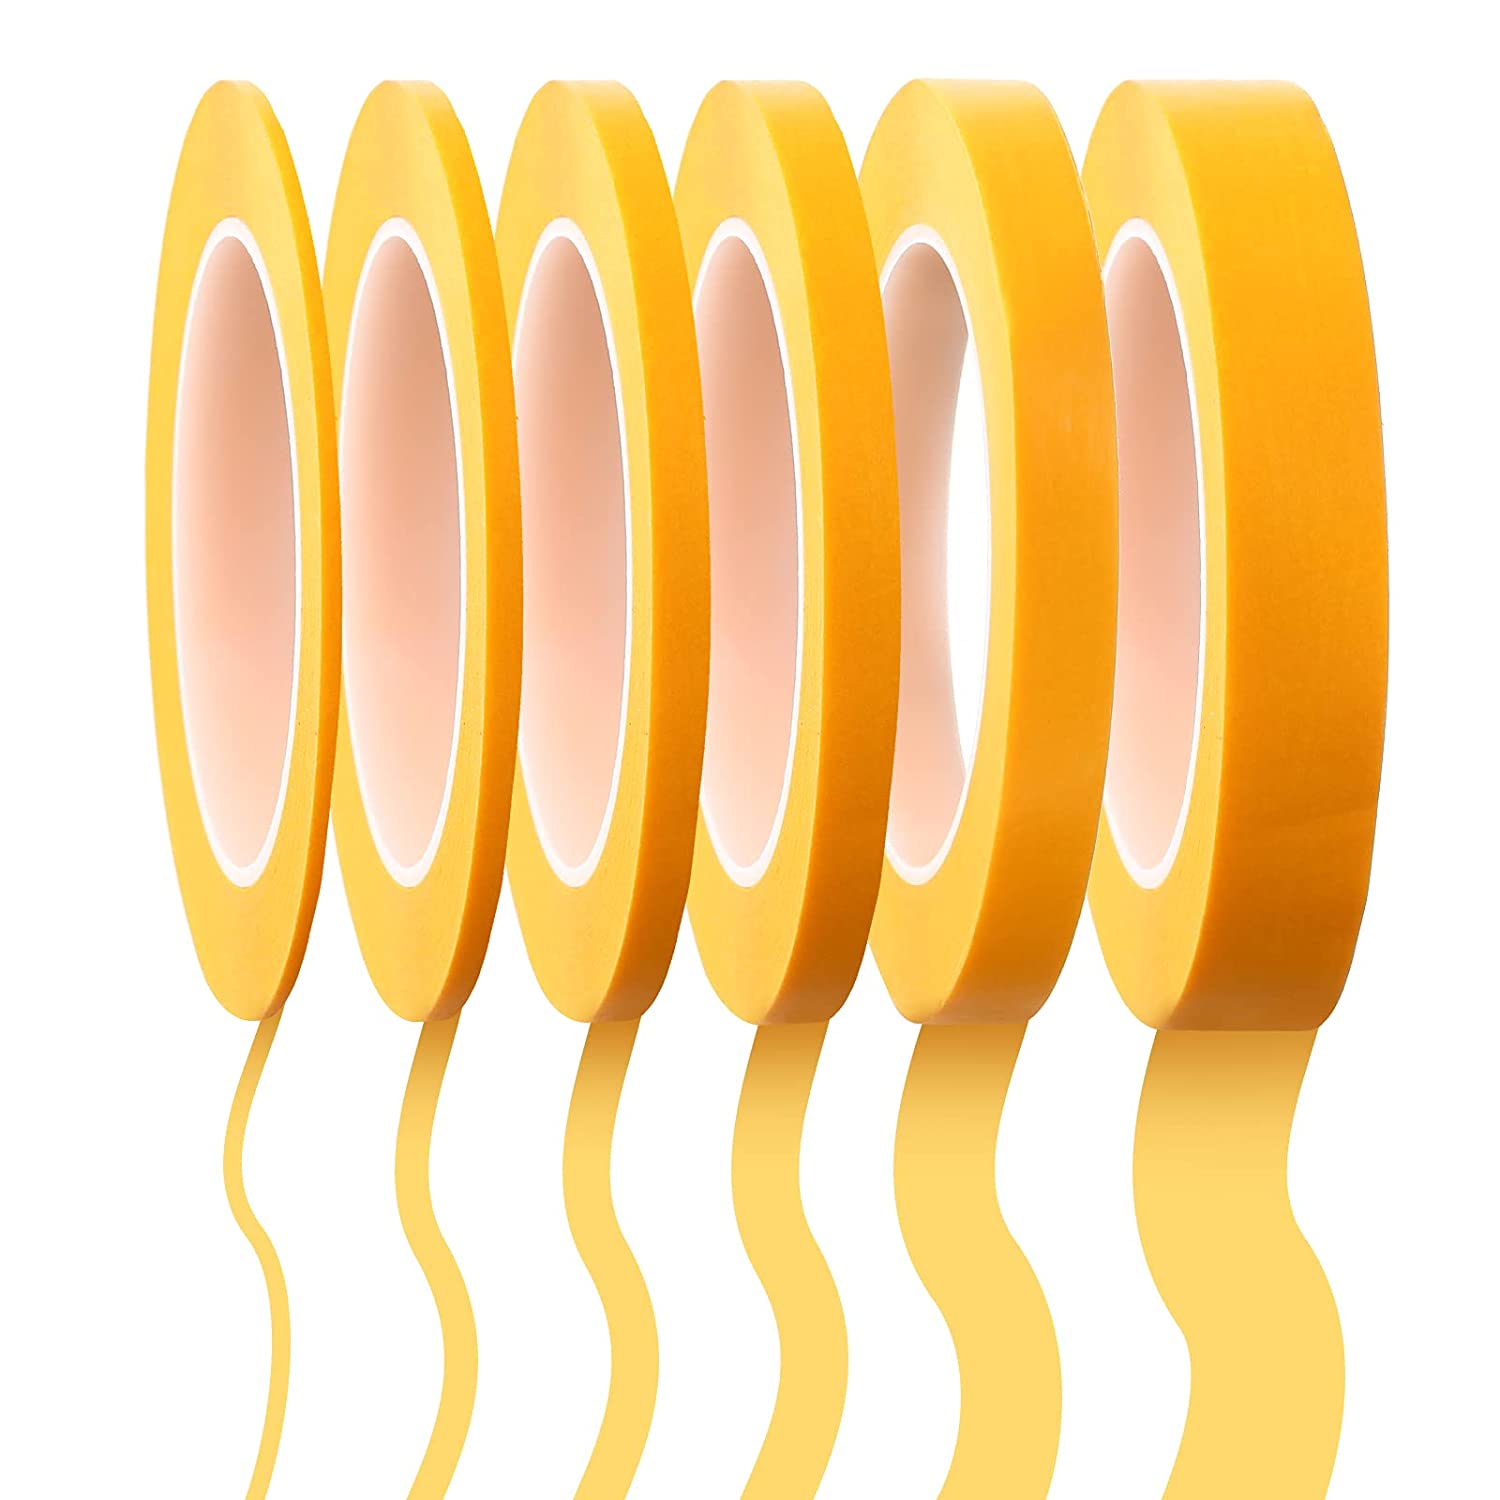
Photo: Amazon
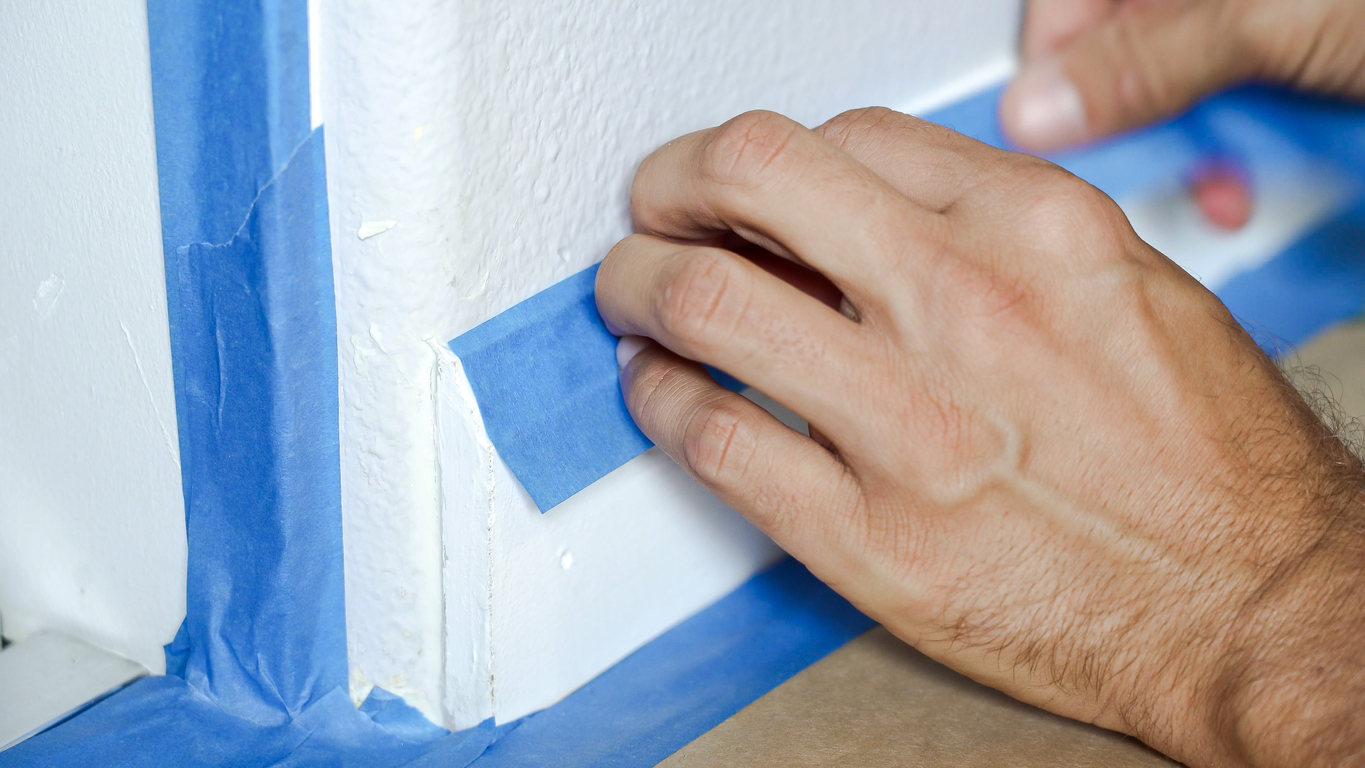
Photo: iStock

Photo: iStock

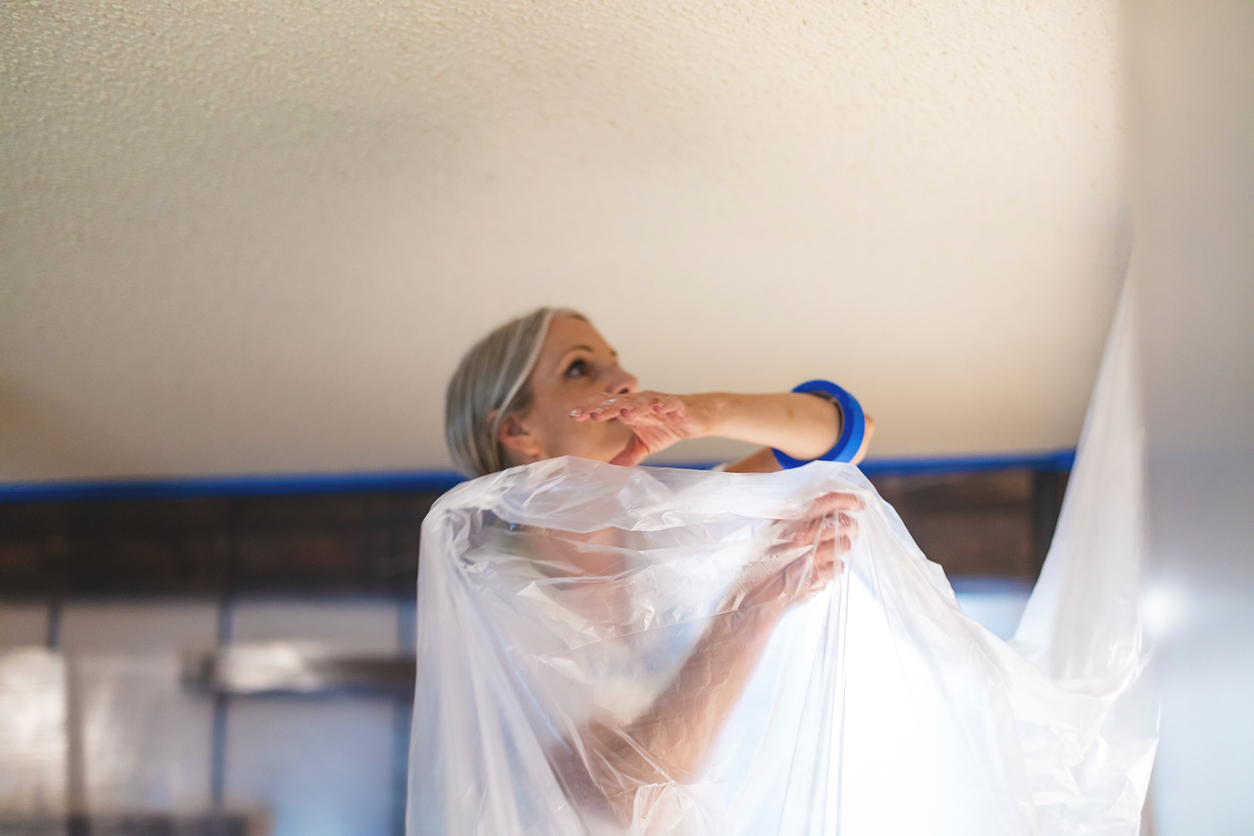
Photo: iStock

