We may gain tax revenue from the product available on this page and take part in affiliate programs . Learn More ›
Door drafts can be a cause of material discomfort . Besides the immediate unpleasantness of a chilly gust invading the warmth of your family in winter , there ’s also the impact that drafts can have on your vim bills . That ’s whereweatherstrippingcomes in . According to Energy Star , the induction of weatherstripping can hold open you up to 20 percent on warming and cooling cost . Best of all , almost anyone can install weatherstripping ; this is definitely not a sophisticated DIY . But to inveigle the greatest value from its insulate attribute , weatherstrip must be installed correctly . Continue say to learn the right way to go about the project .
How to Install Weatherstripping for Doors
Learning how to weatherstrip a door is middling simple , and you ’ll almost certainly rule weather strip to be a fairly quick and well-situated summons . fix the area , take thrifty measurements , issue the weatherstripping and then adhere it in property .
Tools & Materials
Bobvila.com may earn a commission from purchase made through these link .
Step 1: Prepare the area and take measurements.
First , clean the doorway and the jamb , polish off as much dirt and rubble as potential . If any grease continue after cancel with oily weewee , consider using fine - sand sandpaper to get rid of residuary buildup .
Once you ’ve have the doorway cleaned , proceed to do some measure . Because you ’ll require doorway seal strip along both side of the door , as well as across the top and bottom , be sure to cautiously measure out all those areas .
Step 2: Tighten the door’s hinges.
Before you go cut the weatherstrip , verify the doorway hinge are tight . Using the doorhandle , lift the door upward . If there ’s some play , and the doorway run upward , tighten the screws on the top hinge . And then make trusted the turnkey in the bottom hinge are secure , as well . This ensures the door is tightly meet and straightforwardly hung , which will allow the newly installed weatherstripping to fit the gaps evenly and do its Book of Job in good order .
Step 3: Measure the jamb.
You demand to answer two head . First , how wide-cut is the crack between the threshold and jamb ? ( Be trusted to measure twice , once along the side , and again along the top . These measurement might take issue . ) secondly , how wide is the jamb ? While the answer to the first question tells you how thick theweatherstrippingyou purchase can be , the second resolution reveals how wide . program to buy enough weatherstrip to run across the breadth and height of the doorway , plus about 10 pct extra .
Step 4: Choose the correct weatherstripping.
weather strip come in a variety of materials . Each has pro and hustle . Felt weatherstrippingoffers the benefits of being cheap and very easy to cut and set up , but because it ’s not very perdurable , it ’s rarely used on doors .
Marginally more expensive is well-situated - installfoam weatherstrip . Though foam wears better than matte , neither boast the durability ofrubber weatherstripping , the most expensive option . pencil eraser insulates well , but it can be somewhat challenging to install . Unlike the other options , it often must be nailed into blank space .
Step 5: Cut the weatherstripping into segments, and check the cuts.
With your choose weatherstripping at the ready , proceed to cut three pieces : One piece for the top of the door , and two for the sides .
Step 6: If required, adjust the cut.
Before you begin to permanently enforce the newfangled weather strip , hold each of your while up to the doorframe to affirm you ’ve cut the length properly . If they ’re a fleck too long , that ’s ok ; you’re able to trim the excess after the stripping is in place .
If any of your strips are too short , however , you ’ll want to tick your measure and cut a unexampled piece .
Step 7: Tack, snap, or adhere the weatherstripping to the door.
If the product features an adhesive back , peel it away and push it into place around the perimeter of the threshold jamb , not the door itself . Even if your weatherstrip has adhesive , you may wish to reinforce the initiation with heavy - duty staple or small tacking nails . Either will help keep the weather stripping in home over time .
Step 8: Install a door sweep.
To complete the occupation , install a sweep along the bottom of the door . The most vulgar type of door chimneysweep consist of a metal isthmus from which a flight strip of natural rubber juts down ( view model on Amazon ) . When the room access opens , the gum elastic flexes so as not to be an obstructor , and when the door close , the synthetic rubber provides a warm air seal .
Door sweeps come in received size , but if you could not retrieve one whose width check that of your door , you could apply a hacksaw to ignore the sweep down to size . sequester the right - size sweep to the room access using the screws provided . Because these screws tend to be small and not self - tapping , it ’s best to predrill pickle for them by mean value of an electric drill / driver . put the sweep so that it seals tightly against the threshold .
From start to finish , the threshold weather stripping process should take no longer than an minute . That ’s a small time commitment to control that you remain well-to-do through the winter , without drop a fortune on to keep the business firm fond . Though it ’s a simple project , weather stripping really is one of the most effective agency tostop draftsand the discomfort they do .
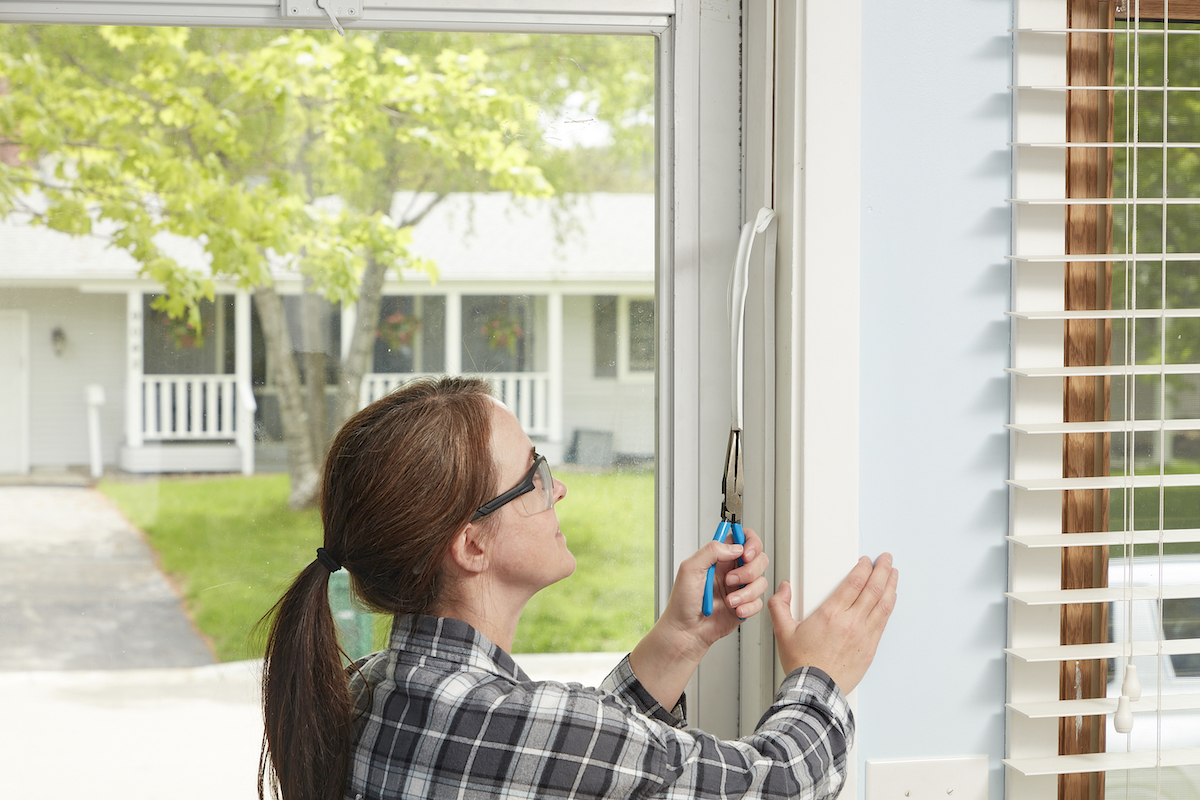
Photo: Tom Fenenga for Bob Vila
The Benefits of Door Weatherstripping
FAQs
At any home improvement center , you ’ll bump a number of type of weather stripping , including tapes , quintet - strips or v - seals , gaskets , and sweeps . For door , most pros and DIYers feel that gaskets and sweeps work best .
right applied weatherstripping can aid prevent rain from coming under your room access . Incidentally , weather stripping is also used on home door assoundproofing .
This Is the Year for a Kitchen Renovation
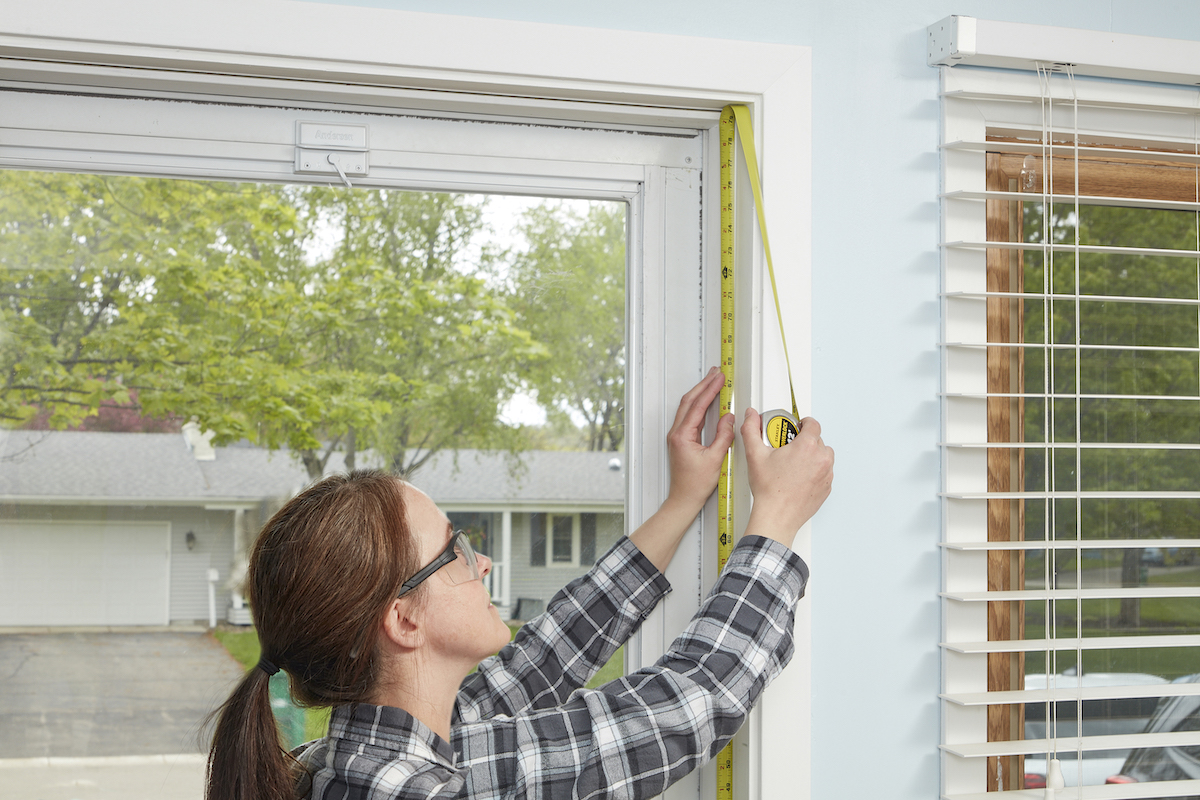
Photo: Tom Fenenga for Bob Vila
Whether you ’re sell or staying , everyone can get something out of a kitchen update . Learn why we consider this renovation the Most Valuable Project of 2025 and how to stay on on budget .
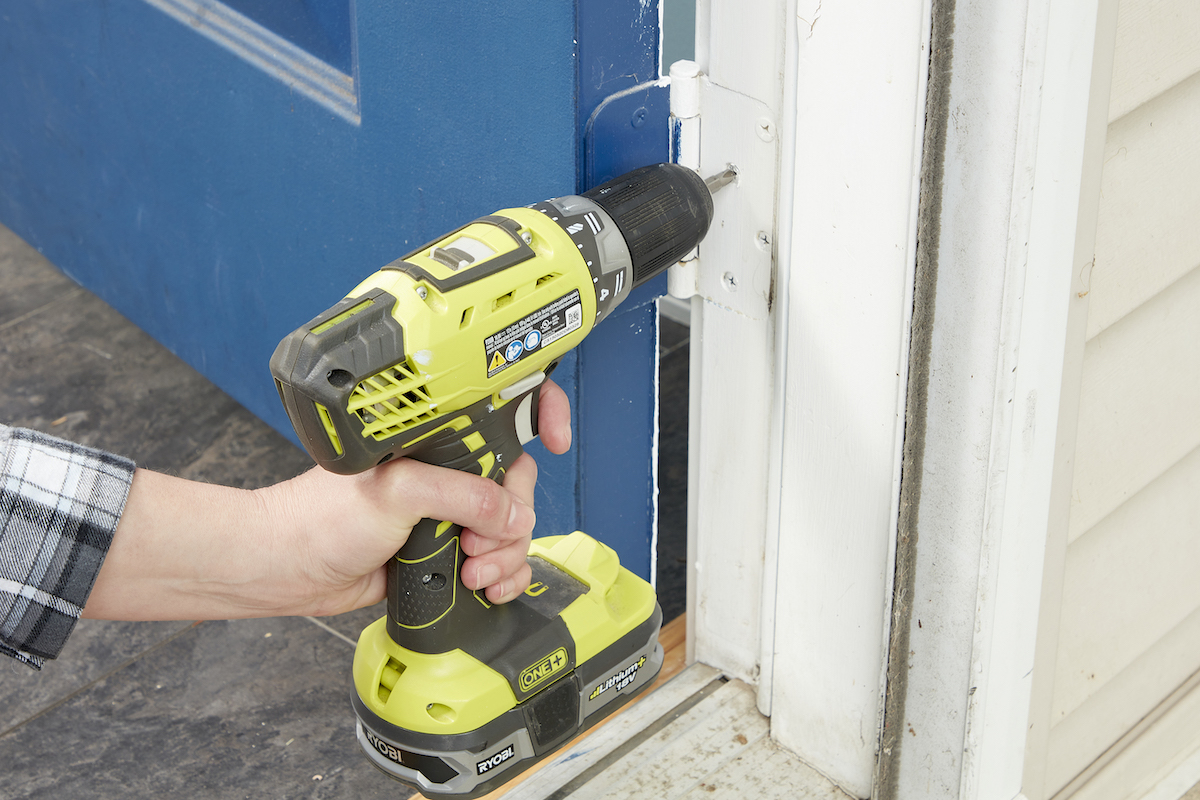
Photo: Tom Fenenga for Bob Vila
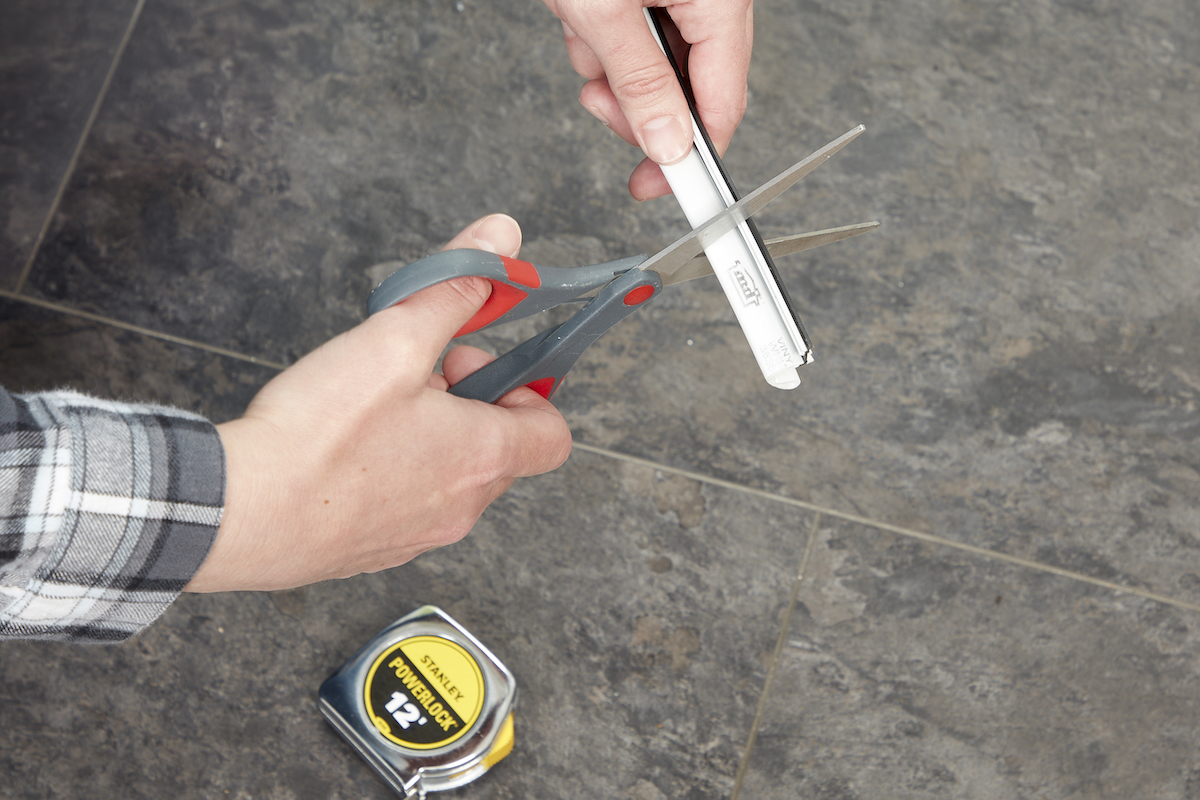
Photo: Tom Fenenga for Bob Vila

Photo: Tom Fenenga for Bob Vila
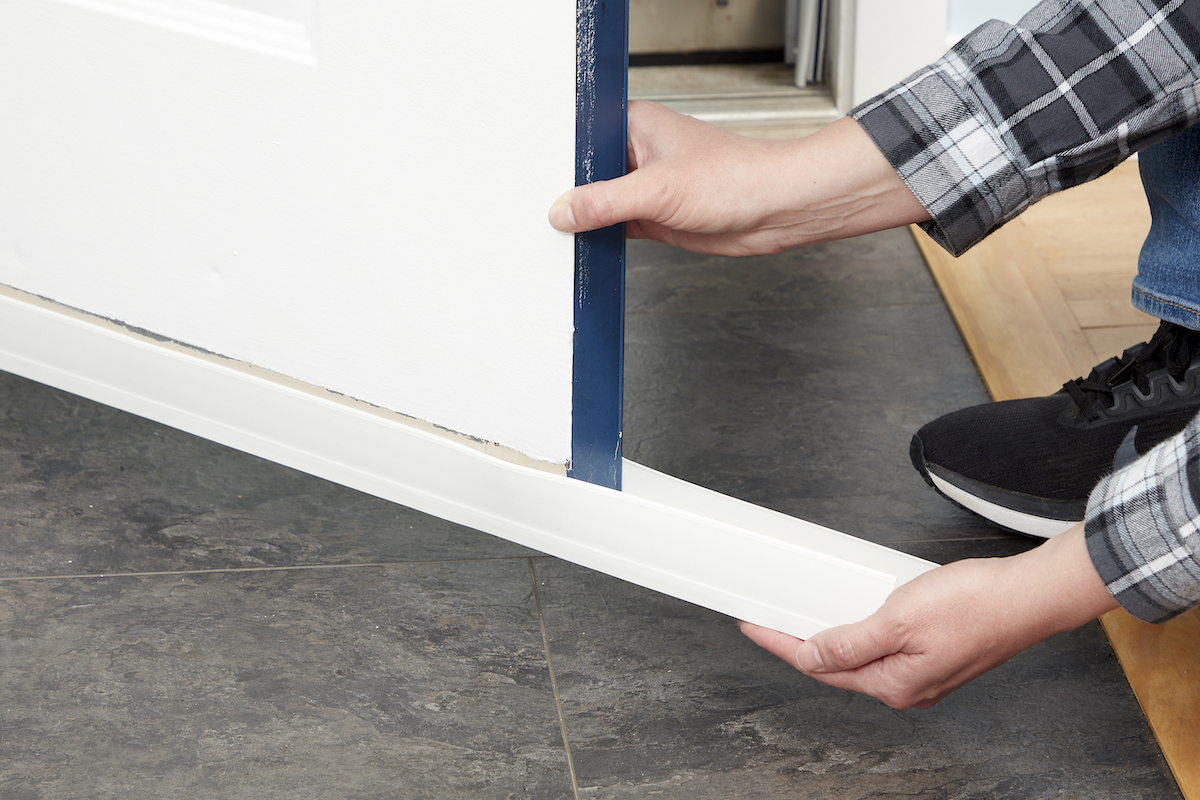
Photo: Tom Fenenga for Bob Vila

