light upon the ancient art of using olla to effortlessly keep your garden hydrous . This time - essay , eco - friendly method acting expect no hoses and significantly reduce water waste .
adopt these seven all important tips to create your own olla system and assure your plant stay succulent and vibrant .
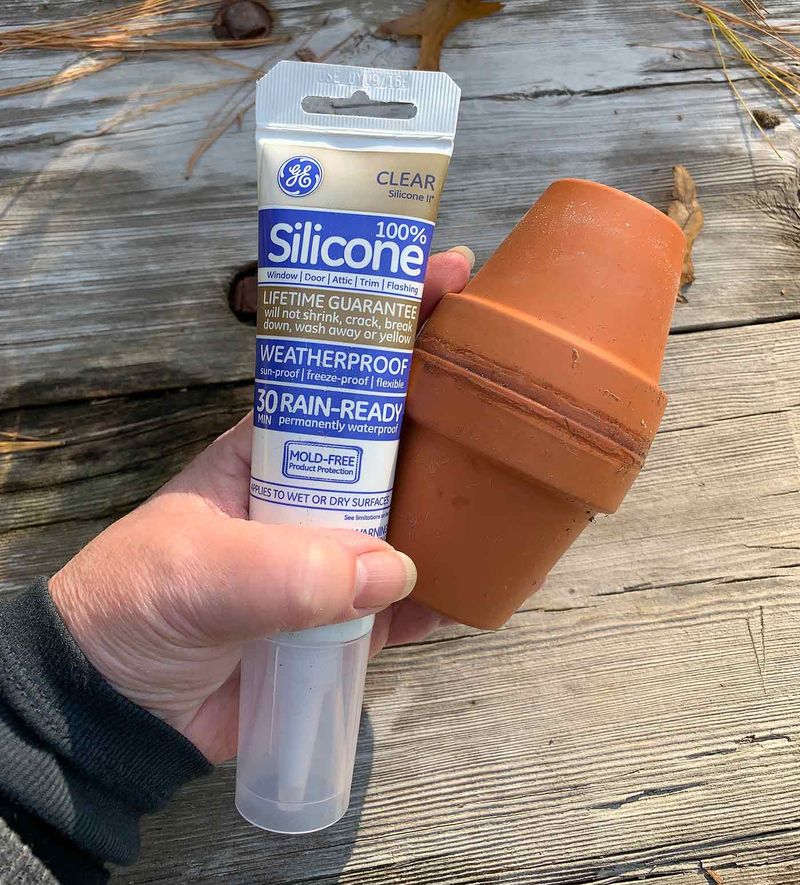
1. Gather Your Materials
Begin your olla dangerous undertaking by gather the necessary materials . You ’ll demand two unglazed terracotta pots of the same size , each with a drainage hole . Do n’t forget rainproof silicone polymer or a full-bodied outdoor - safe adhesive material . A small terracotta saucer or roofing tile acts as a perfect lid . Keep water and a tabloid ready to hand for cleaning . Ensuring these materials are within reaching will set you up for seamless gardening success .
2. Seal the Bottom Drainage Hole
Sealing the drainage hole is a pivotal step . Use silicone or adhesive to completely end the drain golf hole of one pot . This make a watertight stand crucial for the olla ’s function . Allow the Navy SEAL to heal fully , typically over a 24 - hr stop . This footprint insure water retention and effective irrigation , paving the way for thriving plant .
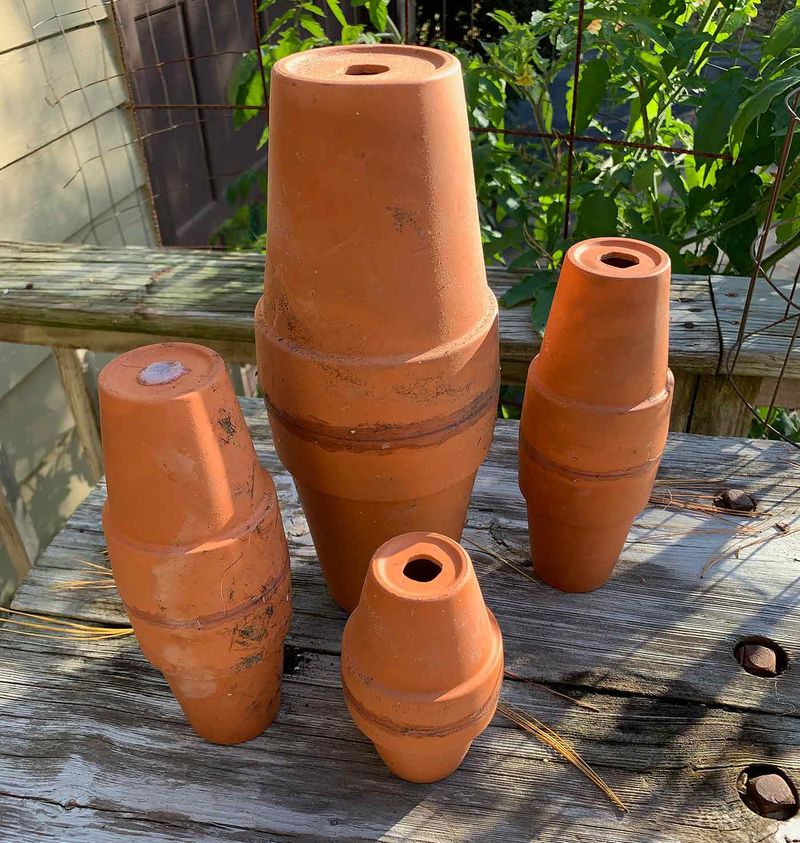
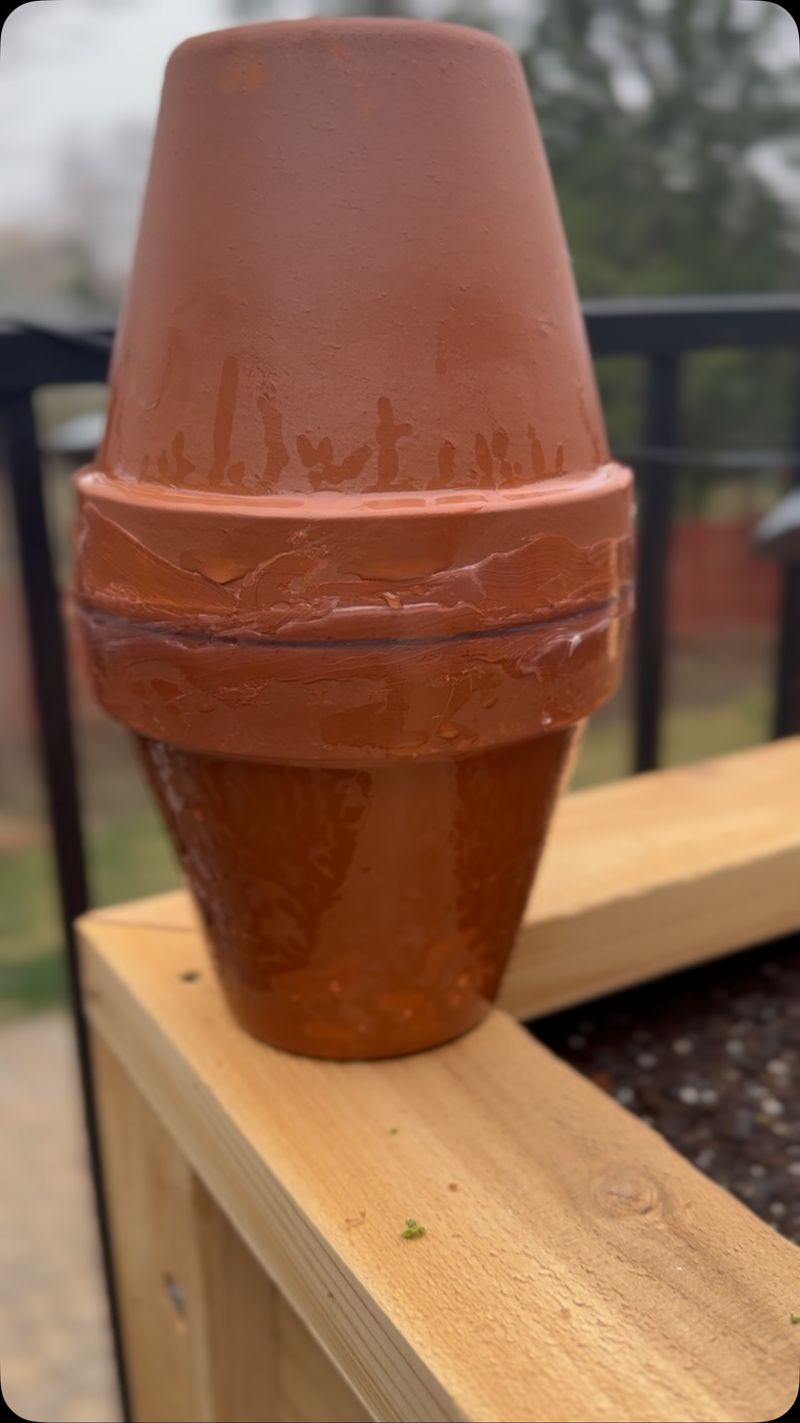
3. Join the Pots Together
organise your olla by link the heap . Apply silicone polymer generously around the lip of the sealed sens . Carefully press the 2d pot , keeping its fix undefended , atop the first passel to create a plastered bedroom . guarantee a loaded paroxysm and allow the adhesive material to dry out whole . This clever union forms the philia of your DIY irrigation system , predict consistent hydration for your garden .
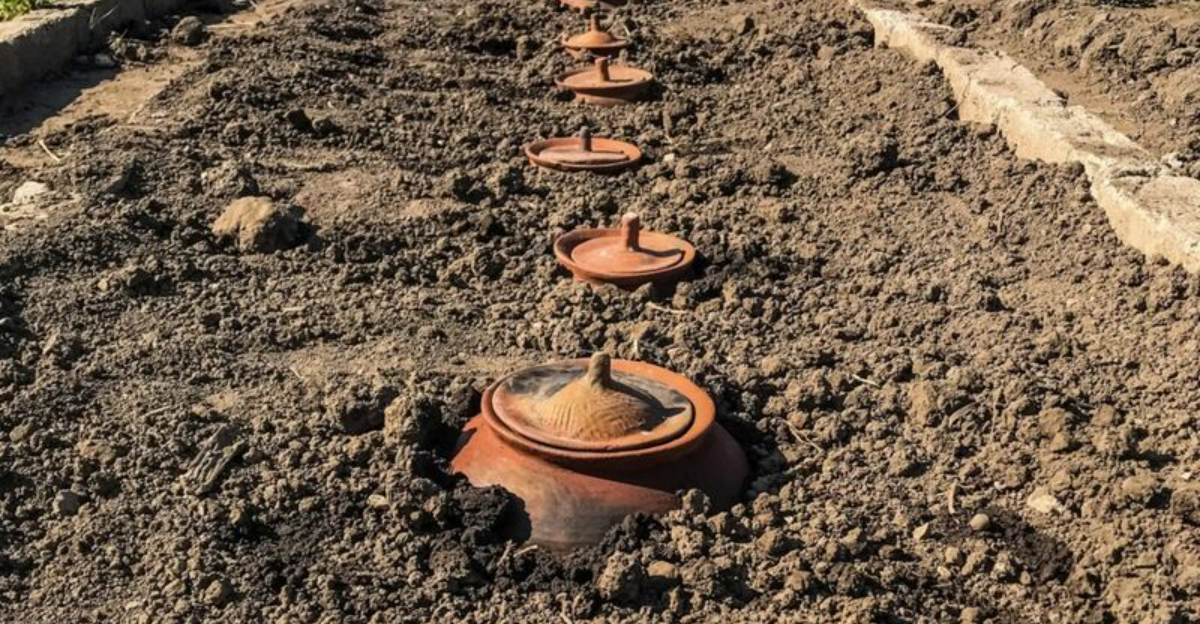
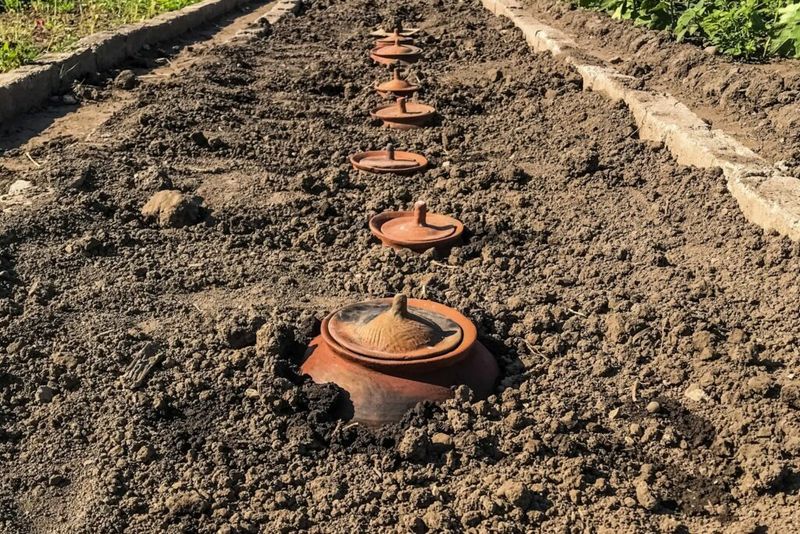
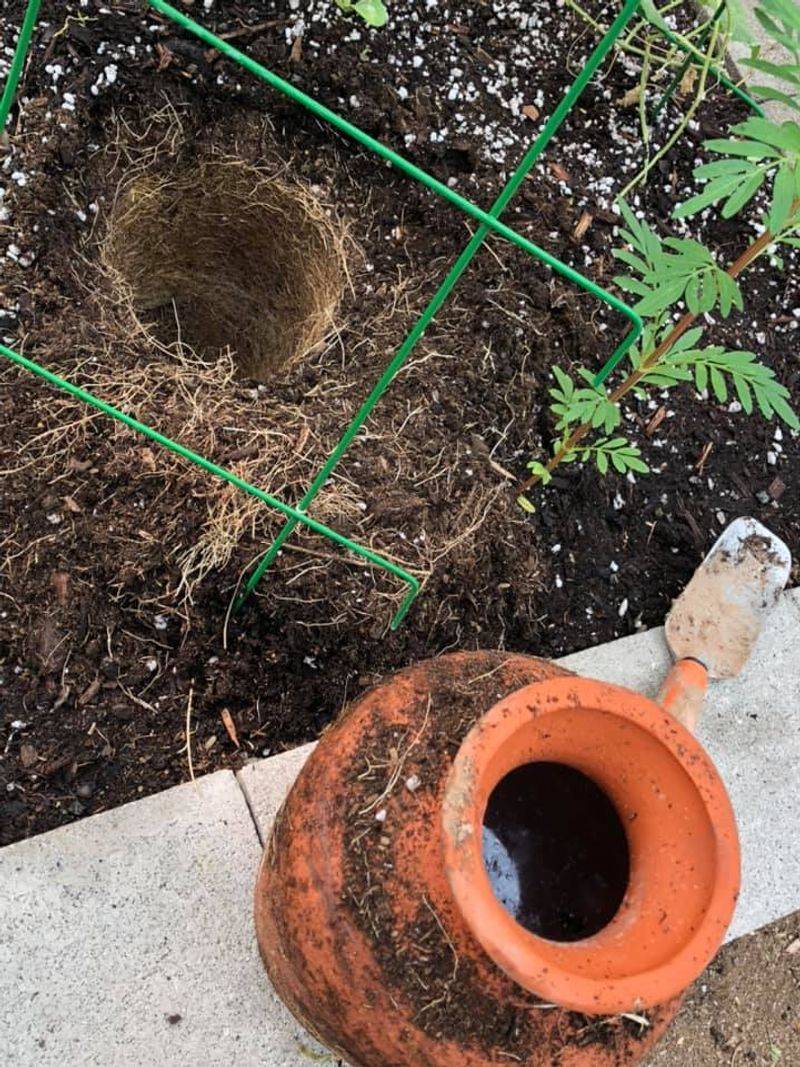
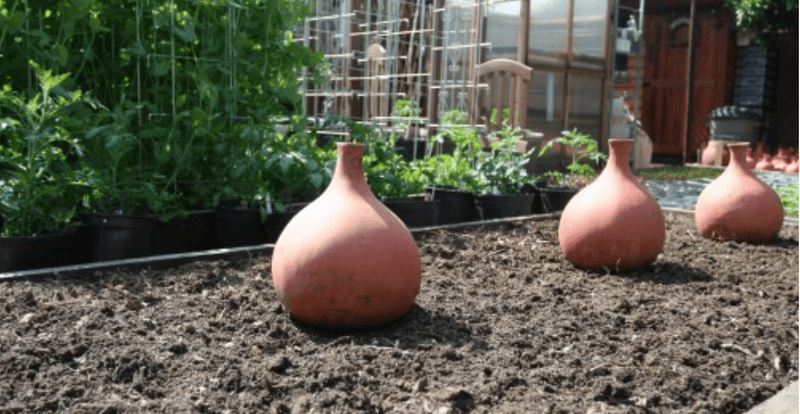
4. Bury Your Olla
transubstantiate your garden by inhume the olla . Dig a hole deep enough so only the top peek above the ground . Place the olla snugly in position and backfill the soil around it . This strategical placement allows body of water to easy seep into the grease , reach plant roots directly . Your garden will fly high , reaping the benefits of this ancient proficiency .
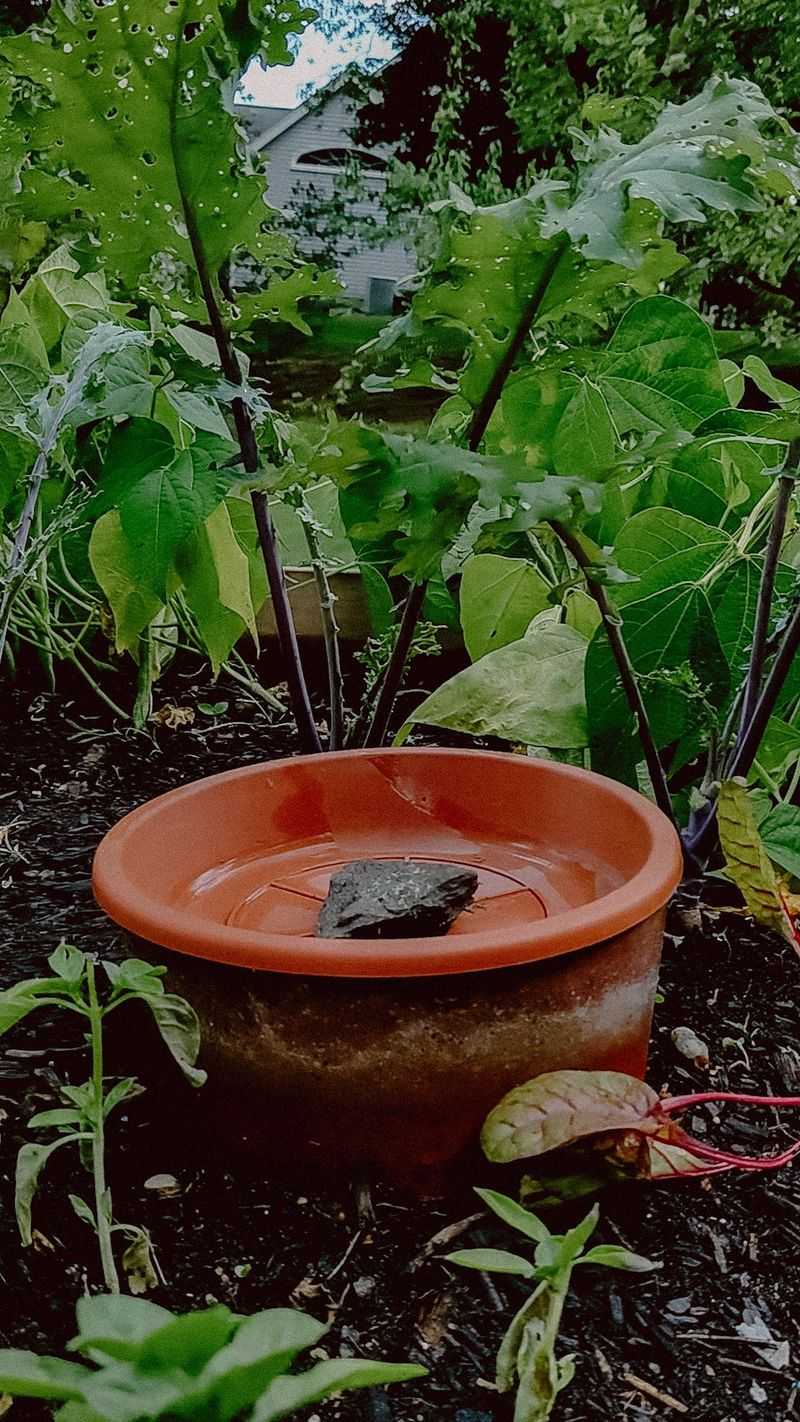
5. Fill and Cover
Maximize efficiency by fill the olla with water through its open top jam . Cover it with a terracotta saucer , tile , or a rock candy to minimise vapour and parry debris . This bare act see your plants receive a unfaltering trickle of moisture . By wield a well - extend olla , you raise its effectiveness , watering your garden for days without effort .
6. Plant Around It
Achieve thriving greenery by strategically plant pee - loving metal money like tomatoes , cucumbers , or herbs around your olla . This method ensures consistent wet directly to the roots , fostering rich plant maturation . The olla ’s slow water outlet nourish a vivacious , sustainable garden . implement this technique aligns with an eco - conscious horticulture ethos , advance lush landscapes without excessive water use .
7. Refill as Needed
keep up optimal garden health by regularly agree and refill the ola every 3–5 solar day . weather condition condition and plant need can influence the oftenness . This practice ensures a continual weewee supply , adapting to changing environmental demands . The graphics of refill aligns with nature ’s speech rhythm , emphasizing a responsive glide path to your garden ’s hydration .
© Sprouted Garden
© Sprouted Garden
© _mothergardener
© Plantura Magazin
© the cottage peach
© One Wintry Night Ollas
© Native-Seeds-Search
