We may take in receipts from the product available on this Thomas Nelson Page and enter in affiliate programs . Learn More ›
Sturdy , folding , and feature sacrificial pinnacle and convenient shelf , this set of sawhorses is custom tailored for DIY projects around the house and G . The legs are constructed with half - lap articulation , which bolster up stability and keep a modest profile when the sawhorses are folded for storage . This joinery method is also useful for many other woodwork project , such as cabinetry and outdoor furniture .
Because the set is made almost solely out of standard 2x4s , which are reasonably cheap and pronto available , it ’s promiscuous to interchange voice as needed . The tops , in especial , are designed to take a beating . Think of them as part of scrap wood that you may cut down or drill into as take . When it ’s time to switch in newfangled boards , all you need is a screwdriver .
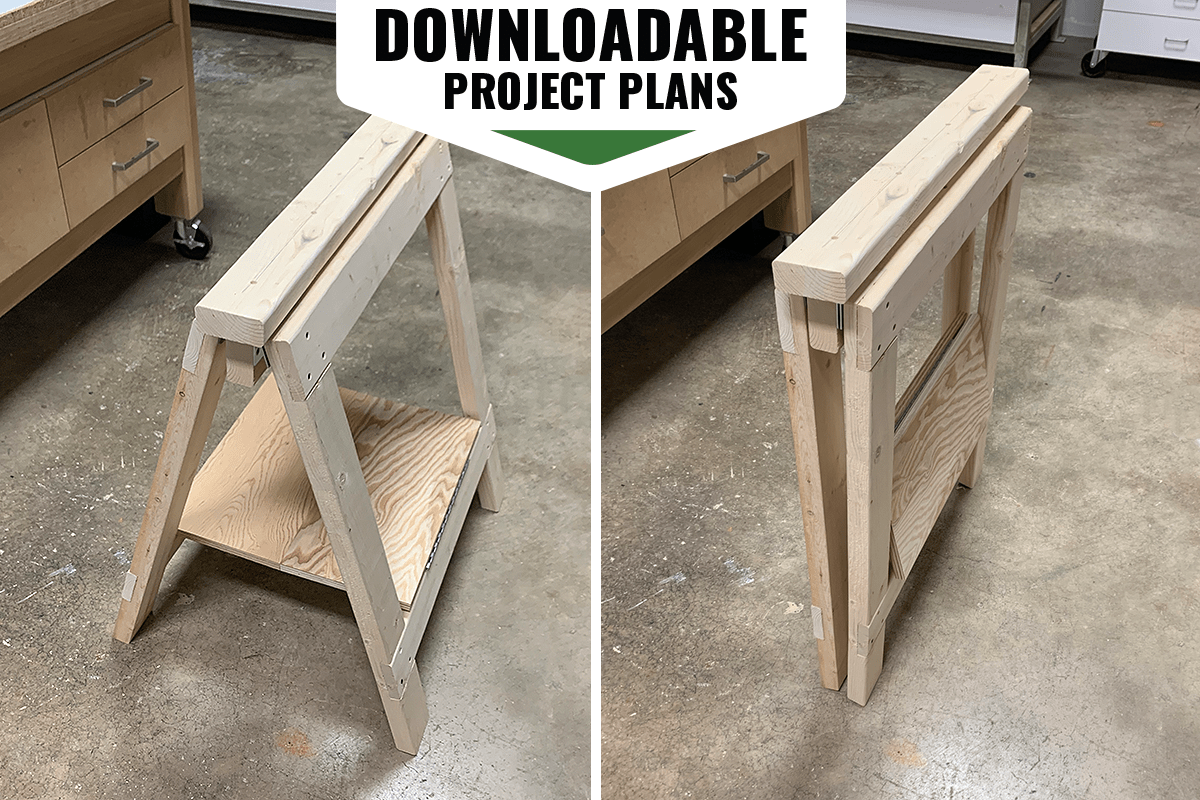
Photo: Matt Boley for Bob Vila
As a bonus , theseDIY sawhorsesfeature plywood shelves for resting power tools and various material while you make for . They are seize with continuous hinges that ply strong point as well as flexibility .
quick to learn how to build sawhorses?Download the undertaking plansto see the full deletion inclination , illustrations , and step - by - step exposure .
Tools & Materials
Bobvila.com may garner a mission from purchase made through these links .
Project Overview
Estimated Time : 3 hoursSkill spirit level : BeginnerEstimated Cost : $ 80 for two sawhorse
Before You Begin
These project plans will walk you through how to ramp up one sawbuck . To build a set , duplicate all of the parts and repeat all of the stair below . you’re able to make the sawhorses taller or short by set the length of the legs .
As always , take proper forethought while using business leader tool , tire out safety glass and a dust masquerade , and clamp part when necessary .
STEP 1: Cut all of the parts.
tailor the parts to distance with amiter sawor circular byword . Then make out a 15 - stage angle into the bottom of each ramification . This will allow the horse to stand mat along the level when it ’s unfolded .
STEP 2: Cut grooves in the rail.
In order for the door flexible joint to move freely , channel need to be make out into both sides of the top edge of the rail . Using afull - kerf bladeon yourtable byword , set the blade meridian to ⅜ inch and localize the board to the right side of the blade and the fencing to the correct side of the board . run along up the railing slice so that the edge clear just the breadth of the blade . Secure the fence and push the board over the blade . Flip the dining table and repeat the process to abridge a groove along the other side of the rails ’s top border .
STEP 3: Cut the half-lap joints.
Mark all the half - lap spliff on the stringer and legs . There are a few unlike path to cut these stick . If you are using a table saw , set up the blade height to ¾ in and clamp a scrap man of 1x material to the fence , in front of the blade . This is my recommend frame-up for cutting half - lap joints in the stringers and tops of the legs . Pass the board over the vane several times to make kerfs ; then use a rubber hammer to weaken apart and slay the waste . Clean up the groove with a Sir Henry Joseph Wood chisel .
To cut the humbled half - lap joints in the pegleg , use the same method acting but thumb the legs so the bottom is against the fencing and correct the fence accordingly .
As an alternative , you coulduse a circular sawwith the blade profundity set to ¾ column inch .

Photo: Matt Boley for Bob Vila
STEP 4: Build the leg assemblies.
Using Natalie Wood glue and 1¼-inch wood screws , fasten the stringer and leg together at the half lap joints . Check that the assembly is straightforward by measuring the aloofness between opposite quoin both manner ; it should be adequate .
STEP 5: Attach the legs to the rail.
Set the rail and one pegleg assembly on a flat surface so that the channel on the rails is facing the top of the leg assembly . Attach the two share together with door hinges so that the hinge pin is turn up in the groove . apply a self - centering fleck to predrill the holes . reduplicate this step to attach the other pegleg assembly .
STEP 6: Connect the sacrificial top to the sawhorse.
Fold the sawhorse , put down it on its side on a flat open , and center the top using a piece of ¾-inch combat wood as a spacer between the sawhorse and the work surface . Secure the top to the runway with 2½-inch wood screws . Sink the screw deep into the sacrificial top to keep off perchance tally them when using the sawhorse .
STEP 7: Create the shelf.
Lay the shelf parts on a prostrate Earth’s surface so that the farseeing edges are abutted . Center one uninterrupted flexible joint along the seam , predrill kettle of fish using a ego - centering bit , and tie the flexible joint using the included screws . revolve around the other two continuous hinges on opposite sides of the assembly and secure them to the shelf assemblage .
STEP 8: Attach the shelf to the sawhorse.
Stand the sawbuck on aworkbenchand brace the legs in position using scrap wood and clamps . Attach one of the side uninterrupted hinge to the top edge of a stringer ; flip the ledge assembly and secure the remaining uninterrupted flexible joint to the top edge of the other stringer . You may postulate to adjust the clamped board on your bench to fold the ledge slightly to make drilling easier .
Final Thoughts
While a single sawhorse can be handy for a variety of DIY project , I extremely recommend building a second one . A matching pair can be exceed with a tabloid of plyboard or an old vacuous - core room access for an instant workbench anywhere . And because this invention close down to a narrow size of it , it ’s light to store out of the way .
High - timbre sawhorsesdon’t have to be expensive , either . With the elaborated instructions , cut list , and exemplification include inthese downloadable project plan , you’re able to build your own set for less than $ 100 .
Looking for more woodworking projects ? Check out ourmobile workbenchandAdirondack death chair plans .
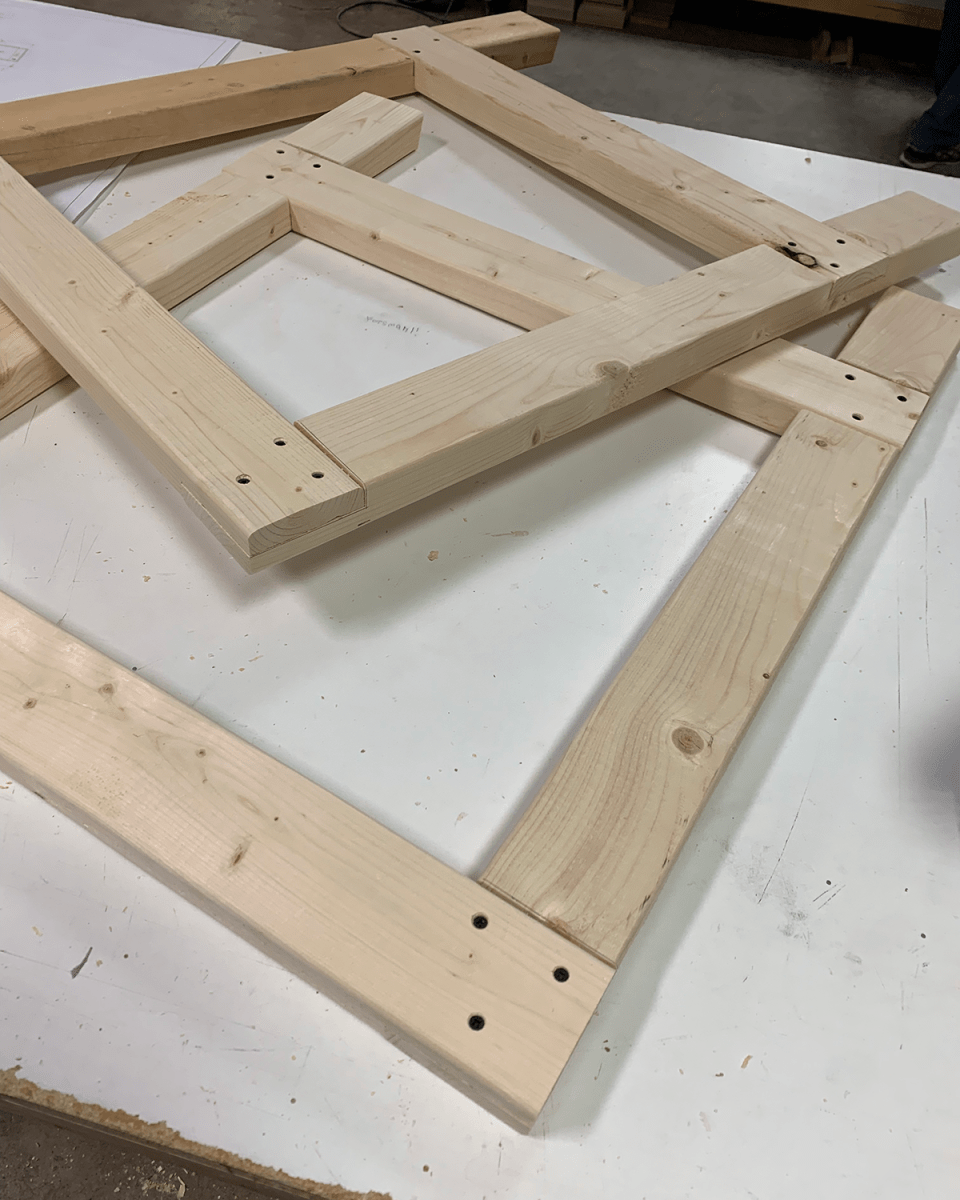
Photo: Matt Boley for Bob Vila
This Is the Year for a Kitchen Renovation
Whether you ’re selling or staying , everyone can get something out of a kitchen update . Learn why we conceive this redevelopment the Most Valuable Project of 2025 and how to delay on budget .

Photo: Matt Boley for Bob VIla

Photo: Matt Boley for Bob Vila

