We may earn revenue from the products available on this Sir Frederick Handley Page and participate in affiliate programs . Learn More ›
ascertain how to wash clothes and do the laundry is a fundamental life accomplishment that everyone should master . From freshen up your linen to maintaining the quality and longevity of your family ’s habiliment , knowing the right proficiency is of the essence . Not only does it save money on potential washables mishaps and dry cleaning , but it also empowers people to wish for their belongings by themselves .
In this how - to guide to lavation wash , we ’ll cover everything from sorting to drying and include helpful laundry hacker so you could tackle laundry mean solar day with self-confidence .

Photo: istockphoto.com
Tools & Materials
Bobvila.com may earn a commission from leverage made through these links .
Project Overview
Working Time : 1 - 2 hoursTotal Time : 3 - 4 hoursSkill tier : BeginnerEstimated Cost : $ 20 – $ 50 , depending on the leverage of optional tools and supplies .
Before You Begin
Before starting your washing , always check garment recording label for specific lavation instructions . Some fabrics require patrician Hz , cold body of water , orhand - washingto prevent wrong . Understanding these requirements is crucial to sustain the quality of your wearable and avoidingcommon washables mistakes .
STEP 1: Separate your clothes by fabric and color.
begin the cognitive process by disunite your clothes into different muckle based on material type and color . make distinct groups for ovalbumin , dark , lights , and delicates . Elizabeth Shields , operations coach ofSuper Cleaning Servicein Louisville , Kentucky , hint “ alternatively of cast out everything into one full-grown wash basket or muckle , set separate basket or hampers in your bedroom or laundry area for dissimilar categories like whites , darks , and delicates . This separation preclude colour transfer that can occur when colouration bleed , peculiarly from new or blue textiles .
Sorting by cloth type is evenly important since different materials have different tutelage requirements . Daniel Feliciano is the cobalt - founding father and CEO ofClotheslyne , an on - requirement laundry help based in select U.S. state . He says , “ recollect , ticklish fabric like silk and wool expect gentler wheel than cotton plant and synthetic substance . ”
STEP 2: Pretreat any stains.
Before loading your washing machine , inspect each garment for stains . Shields says , “ If you spot goody first , you address the stain right by so there ’s no prison term for it to put in . ”
“ implement a spot remover or a small amount of laundry detergent immediately to the soil , ” Feliciano says . “ Scrub the solvent with an old toothbrush to see the stain remover is set . ” in conclusion , he adds , “ Allow the smear remover to sit for at least 15 arcminute . ” For tougher stains likeoilor vino , letting the pretreatment pose overnight can be helpful .
STEP 3: Load the washer and add detergent, fabric softener, and/or whitener.
Once your clothes are sorted and any stains are do by , load the washer . Make trusted to avoid overcharge it — clothes should have enough room to move freely throughout the cycle . Add the appropriate amount of high - efficiency wash detergent into the designated compartment . According to Feliciano , you should “ habituate the recommended amount of laundry detergent for your load size and H2O hardness , ” adding that “ more laundry detergent does not mean cleaner wearing apparel . ”
If you ’re using textile softener or whitener ( like bleach ) , add together these to their respective dispenser now . It ’s crucial to evaluate these additive accord to the producer ’s recommendation to debar leaving residue on wearing apparel or damaging the fabric .
shield cautions against using commercially - made material softener , say , “ you’re able to use fabric softener beads or liquid softener , but there ’s a catch . While the buildup might not be a problem right out , it could cause issues with your washing machine later on on . ” She evoke hold out the DIY path , saying “ All you have to do is pour abouthalf a cupful of white vinegarinto the material softener expansion slot during the rinse cycle . ”
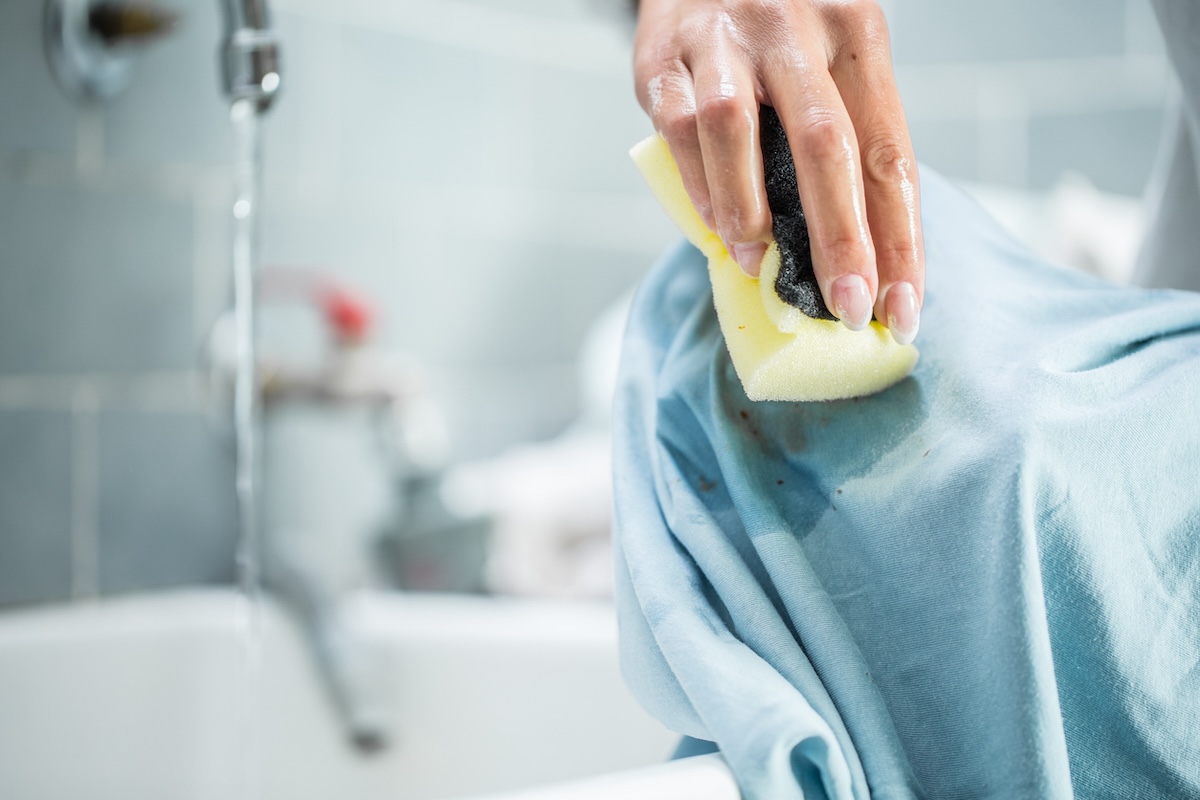
Photo: istockphoto.com
STEP 4: Choose the right washing machine settings.
It ’s important to choose the rightwashing machine settingsto get the good issue . lead off by confer your washing simple machine ’s proprietor ’s manual , which will detail your model ’s specific preferences . When choosing the Hz , think the fabric case and soiling floor of your washing .
Temperature and bicycle type have a major shock on vigour consumption , so using them judiciously can also lead tosavings on public utility company bills .
Here ’s a crack-up of the most common scope :

Photo: istockphoto.com
STEP 5: Move the clothes from the washer to the dryer.
After the washout cycle dispatch , transfer your clothes from the automatic washer to the dryer . “ I recognize laundry can be a morsel of a task , but it ’s of import to transfer your clothes from the automatic washer to the dryer quickly to fend off wrinkles and ensure that your dress dry out properly , ” Shields says .
Give larger items a expert shake to remove any wrinkles and verify they ’re separated for uniform dry . Before loading the drier , ascertain the labels on your wear again to corroborate which items are drier - safe . Any garments that requirehang - dryingshould be remove at this pointedness .
forefend overloading the drier and insure there is enough space for air to circulate around the garments . “ When you ’re stretch up your dryer , start with larger items like sheets and towel first , so that they produce a cushion for the smaller items , ” Shields advises . “ This will serve advertize better airflow and make trusted everything dry out evenly . ”
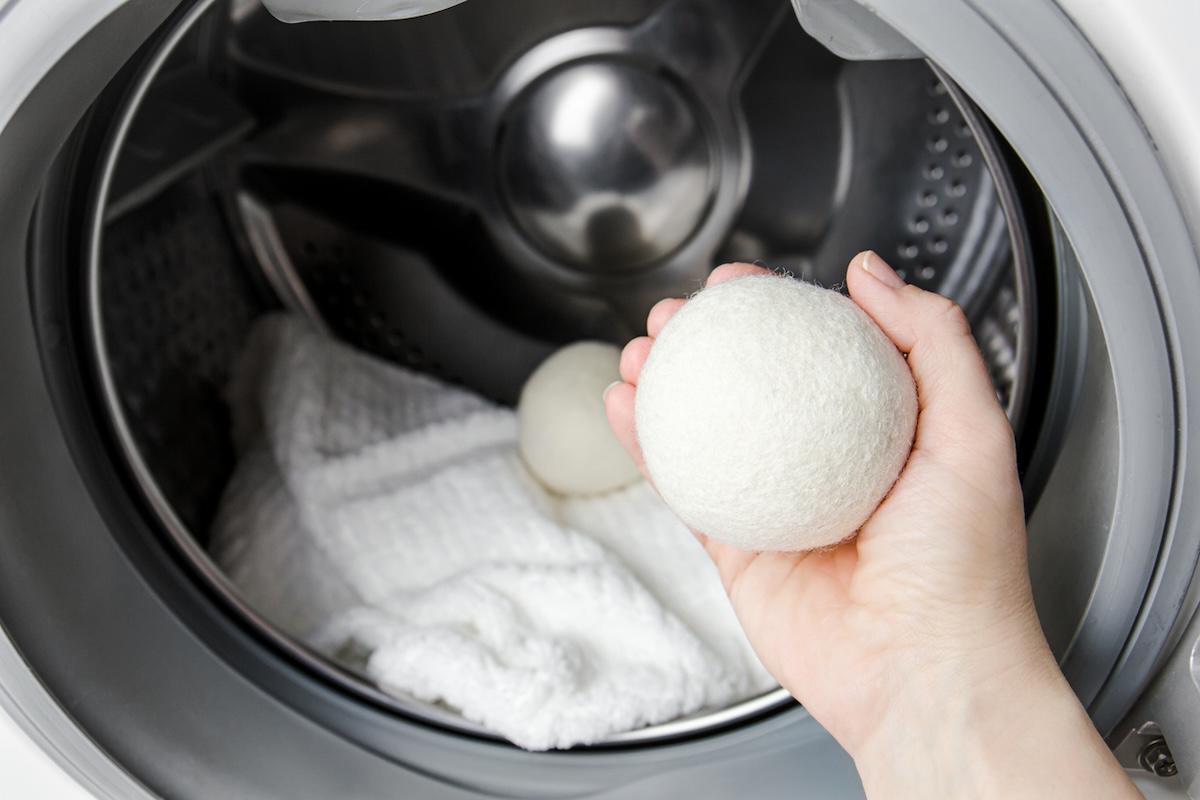
Photo: istockphoto.com
She also recommendsusing drier ballsor sportsmanlike tennis balls to fluff and separate your dress during the drying cycle .
STEP 6: Select the best dryer settings and start the machine.
Choosing the correct drier setting is of the essence for ensure your clothes come out dry , undamaged , and minimally wrinkle . Start by consulting your dryer ’s manual of arms to realise the specific feature and configurations of your model . Choose a dry out cycle based on the cloth type .
Adjusting the warmth stage setting is also important ; gamey heat can apace dry out clothes but may make shrinking and textile damage , whereas low heat is good for frail particular but accept longer . Some dryers come with sensor drying , which automatically adjusts the time and temperature base on the moisture level of the clothes , assure vigor efficiency and cloth care .
Here ’s a breakdown of common drier preferences and the material they are best befit for :

Photo: istockphoto.com
Always remember toclean the lint filterbefore starting a new cycle to foreclose attack risks and ensure the dryer is exploit at peak operation .
STEP 7: Remove the dry clothes immediately and separate them into piles.
“ If you require to keep your clothes looking neat and respectable , removing them from the dryer as soon as potential after the cycle is done is a must , ” says Shields . stir out each item to loosen any plication shape during the drying process .
screen out the apparel into pile base on their entrepot needs — like point that call for to be hung and items that take folding .
STEP 8: Fold the clothes on a flat surface.
Folding dress on a flat , clean surface is all important for achieve neat , compendious folds that preserve the shape and appearance of your garment . Begin by smooth out out each particular to get rid of any crinkle .
expend systematic fold up techniques so that everything is unvarying : for shirts , shut the arms back and then fold the shirt in half vertically ; for knickers , fold them lengthwise and then in half or third gear reckon on their length . Shields adds , “ if you need to get really fancy , you could even invest in some folding panel or template to make the appendage even easier . ”
STEP 9: Hang up and put away the clothes.
Once your clothes are neatly folded or designate for hanging , it ’s time to put them away . “ apply hangers for thing like shirt , dresses , sports coat , and pants so they do n’t get crinkle or lose their figure , ” Shields recommends . “ Then , put affair like t - shirts , sweater , and jeans in drawers or on shelves , so they ’re soft to find when you need them . ”
Final Thoughts
master the process of doing wash effectively is an substantive skill that ensures your vesture stay on in good condition . This comprehensive vesture care guide provides step - by - step instructions to tackle laundry from start to finish . recall to always check maintenance recording label before wash clothes and choose the appropriate preferences for both yourwasher and dryerto protect your clothes . By following these elaborated steps , you ’re fit out to cover washables efficiently , preserve your closet while save time and energy .
This Is the Year for a Kitchen Renovation
Whether you ’re selling or staying , everyone can get something out of a kitchen update . Learn why we consider this renovation the Most Valuable Project of 2025 and how to remain on budget .

